![- 1 package (1 lb) refrigerated pizza dough - 4 tablespoons unsalted butter, melted - 4 cloves garlic, minced - 1 teaspoon Italian seasoning - 1 cup shredded mozzarella cheese - 1/2 cup grated Parmesan cheese - 1/4 teaspoon red pepper flakes (optional) - Salt to taste - Fresh parsley, chopped for garnish - Baking sheet - Parchment paper - Rolling pin - Pizza cutter or sharp knife When making cheesy garlic breadsticks, you need the right ingredients. The list above includes everything for this tasty treat. I always choose fresh garlic because it adds the best flavor. If you like a bit of heat, add those red pepper flakes. You can adjust the salt to fit your taste. For equipment, use a baking sheet lined with parchment paper. It makes cleanup easy. A rolling pin helps shape the dough. A pizza cutter or sharp knife will help cut the breadsticks into perfect strips. This recipe is simple and perfect for any meal. You can even make it for a party. For the full recipe, just check out the link above. - Preheat your oven to 400°F (200°C). Line a baking sheet with parchment paper. - Take the refrigerated pizza dough out of the package. Roll it out on a floured surface until it’s about 1/4 inch thick. - In a small bowl, mix the melted butter and minced garlic. - Add the Italian seasoning, red pepper flakes (if using), and a pinch of salt. Stir well to combine. - Brush the dough with the garlic butter mixture. Make sure to cover it evenly. - Sprinkle the shredded mozzarella and grated Parmesan on top of the dough. - Use a pizza cutter or knife to cut the dough into 1-inch wide strips. You can cut them straight or in a fun zigzag pattern. - Carefully transfer the sliced breadsticks onto the prepared baking sheet. - Bake them in the oven for 12-15 minutes until golden and the cheese bubbles. - Once baked, let them cool for a few minutes. Garnish with freshly chopped parsley before serving. Follow the [Full Recipe] for a detailed guide to these cheesy delights. To get the best garlic taste, use fresh garlic. Mince it finely for strong flavor. You can also roast garlic for a sweeter, milder taste. Adjust the amount based on your preference. If you want it stronger, add more garlic. If you prefer it lighter, use less. Don't forget to add a pinch of salt, as it enhances the garlic. For crispy edges, roll the dough thin. Aim for about 1/4 inch thick. If you like soft centers, keep the dough a bit thicker. Bake at 400°F for 12-15 minutes. Keep an eye on them. If the edges turn golden, they’re ready. Letting them bake longer makes them crunchier, while less time keeps them chewy. Dips make great companions for cheesy garlic breadsticks. Marinara sauce is a classic choice. You can also try ranch or a creamy garlic dip. For a fun twist, serve them in a basket lined with parchment paper. This makes it look nice and keeps them warm. Sprinkle some extra cheese or herbs on top before serving for a pop of color. {{image_2}} You can change the cheese for your breadsticks. Mozzarella is great, but you can try other cheeses too. Cheddar adds a sharp taste. Gouda gives a rich, creamy flavor. For a twist, use pepper jack for some heat. Mix and match cheeses to find your favorite blend. Each choice adds a new spin to the classic recipe. Adding herbs or spices makes your breadsticks special. Try fresh basil for a sweet taste. Oregano adds an earthy flavor that pairs well with garlic. You can also mix in some Italian seasoning for a bold kick. For a spicy touch, add crushed red pepper flakes. Experiment with flavors to match your mood or meal. If you need gluten-free options, use gluten-free pizza dough. Many brands offer this now. For a vegan version, swap the butter for olive oil. Use plant-based cheese instead of mozzarella and Parmesan. These swaps keep the taste delicious while fitting your diet. Enjoy your cheesy garlic breadsticks guilt-free! To keep your cheesy garlic breadsticks fresh, place them in an airtight container. Make sure they are cool before storing. They will stay good in the fridge for about 3 to 4 days. If you want to keep them longer, consider freezing them. Always check for any signs of spoilage before eating. To reheat your cheesy garlic breadsticks, you want to keep them crispy. Preheat your oven to 350°F (175°C). Place the breadsticks on a baking sheet. Heat them for about 5 to 10 minutes. This will help revive their crisp texture. You can also use a toaster oven for this step. Avoid the microwave, as it can make them soggy. If you want to freeze your cheesy garlic breadsticks, here’s what to do. First, let them cool completely. Then, wrap each breadstick in plastic wrap or aluminum foil. Place them in a freezer bag or airtight container. They can last in the freezer for about 2 to 3 months. To defrost, simply take them out and let them sit in the fridge overnight. Reheat them as mentioned earlier to enjoy them again. For the full recipe, check out the entire article! Cheesy garlic breadsticks last about three to four days in the fridge. To store them properly, place them in an airtight container. Make sure they cool down first to keep them fresh. You can also wrap them in plastic wrap before putting them in the container. This helps keep moisture in and prevents them from drying out. Yes, you can make cheesy garlic breadsticks ahead of time. You can prepare the dough and let it rest in the fridge for up to 24 hours. This makes it easy to bake them fresh later. For added flavor, let the garlic butter mixture sit for a bit before using it. This allows the garlic and herbs to blend well. Many local restaurants serve tasty cheesy garlic breadsticks. Pizzerias often have their own twist on this dish, using fresh herbs or unique toppings. Some Italian restaurants serve them as part of their appetizer menu. Places like these typically use high-quality cheese and fresh ingredients, making their breadsticks a favorite among customers. You can try them and find your own favorite version! You now have a complete guide to making cheesy garlic breadsticks. We covered the key ingredients and equipment you need, as well as step-by-step instructions to make them mouthwatering. I shared tips for achieving great flavor and texture. You can even try different cheeses or herbs for fun variations. Whether you serve them with dips or enjoy them plain, these breadsticks will impress. Store or freeze leftovers using the best methods to keep them fresh. Enjoy baking these treats and sharing them with friends and family!](https://recipesinsight.com/wp-content/uploads/2025/04/02fa692c-3a93-4780-916b-bd8b330a67be-768x768.webp)
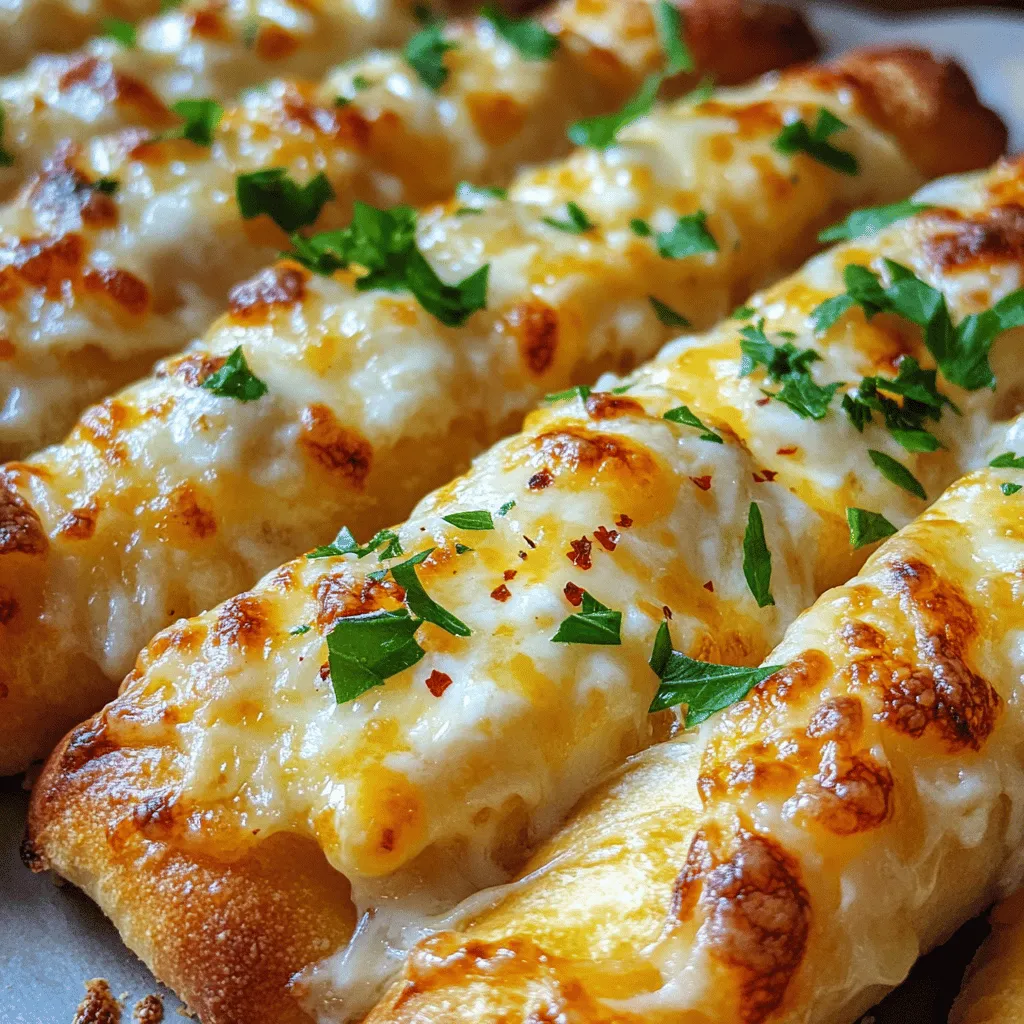
Craving a quick and easy snack? Cheesy garlic breadsticks are your answer! With just a few simple ingredients and minimal prep time, you can create a delicious treat that pairs perfectly with any meal. Read on to discover my easy and delicious recipe, packed with tips to make your breadsticks golden, cheesy, and full of flavor! Perfect for sharing or enjoying on your own, these will become a favorite!
Ingredients
List of Ingredients
– 1 package (1 lb) refrigerated pizza dough
– 4 tablespoons unsalted butter, melted
– 4 cloves garlic, minced
– 1 teaspoon Italian seasoning
– 1 cup shredded mozzarella cheese
– 1/2 cup grated Parmesan cheese
– 1/4 teaspoon red pepper flakes (optional)
– Salt to taste
– Fresh parsley, chopped for garnish
Equipment Needed
– Baking sheet
– Parchment paper
– Rolling pin
– Pizza cutter or sharp knife
When making cheesy garlic breadsticks, you need the right ingredients. The list above includes everything for this tasty treat. I always choose fresh garlic because it adds the best flavor. If you like a bit of heat, add those red pepper flakes. You can adjust the salt to fit your taste.
For equipment, use a baking sheet lined with parchment paper. It makes cleanup easy. A rolling pin helps shape the dough. A pizza cutter or sharp knife will help cut the breadsticks into perfect strips.
This recipe is simple and perfect for any meal. You can even make it for a party. For the full recipe, just check out the link above.
Step-by-Step Instructions
Preparing the Dough
– Preheat your oven to 400°F (200°C). Line a baking sheet with parchment paper.
– Take the refrigerated pizza dough out of the package. Roll it out on a floured surface until it’s about 1/4 inch thick.
Making the Garlic Butter Mixture
– In a small bowl, mix the melted butter and minced garlic.
– Add the Italian seasoning, red pepper flakes (if using), and a pinch of salt. Stir well to combine.
Assembling the Breadsticks
– Brush the dough with the garlic butter mixture. Make sure to cover it evenly.
– Sprinkle the shredded mozzarella and grated Parmesan on top of the dough.
– Use a pizza cutter or knife to cut the dough into 1-inch wide strips. You can cut them straight or in a fun zigzag pattern.
Baking and Garnishing
– Carefully transfer the sliced breadsticks onto the prepared baking sheet.
– Bake them in the oven for 12-15 minutes until golden and the cheese bubbles.
– Once baked, let them cool for a few minutes. Garnish with freshly chopped parsley before serving.
Follow the [Full Recipe] for a detailed guide to these cheesy delights.
Tips & Tricks
Perfecting the Garlic Flavor
To get the best garlic taste, use fresh garlic. Mince it finely for strong flavor. You can also roast garlic for a sweeter, milder taste. Adjust the amount based on your preference. If you want it stronger, add more garlic. If you prefer it lighter, use less. Don’t forget to add a pinch of salt, as it enhances the garlic.
Achieving the Perfect Texture
For crispy edges, roll the dough thin. Aim for about 1/4 inch thick. If you like soft centers, keep the dough a bit thicker. Bake at 400°F for 12-15 minutes. Keep an eye on them. If the edges turn golden, they’re ready. Letting them bake longer makes them crunchier, while less time keeps them chewy.
Serving Suggestions
Dips make great companions for cheesy garlic breadsticks. Marinara sauce is a classic choice. You can also try ranch or a creamy garlic dip. For a fun twist, serve them in a basket lined with parchment paper. This makes it look nice and keeps them warm. Sprinkle some extra cheese or herbs on top before serving for a pop of color.
Variations
Different Cheeses
You can change the cheese for your breadsticks. Mozzarella is great, but you can try other cheeses too. Cheddar adds a sharp taste. Gouda gives a rich, creamy flavor. For a twist, use pepper jack for some heat. Mix and match cheeses to find your favorite blend. Each choice adds a new spin to the classic recipe.
Infused Flavors
Adding herbs or spices makes your breadsticks special. Try fresh basil for a sweet taste. Oregano adds an earthy flavor that pairs well with garlic. You can also mix in some Italian seasoning for a bold kick. For a spicy touch, add crushed red pepper flakes. Experiment with flavors to match your mood or meal.
Dietary Modifications
If you need gluten-free options, use gluten-free pizza dough. Many brands offer this now. For a vegan version, swap the butter for olive oil. Use plant-based cheese instead of mozzarella and Parmesan. These swaps keep the taste delicious while fitting your diet. Enjoy your cheesy garlic breadsticks guilt-free!
Storage Info
Storing Leftovers
To keep your cheesy garlic breadsticks fresh, place them in an airtight container. Make sure they are cool before storing. They will stay good in the fridge for about 3 to 4 days. If you want to keep them longer, consider freezing them. Always check for any signs of spoilage before eating.
Reheating Instructions
To reheat your cheesy garlic breadsticks, you want to keep them crispy. Preheat your oven to 350°F (175°C). Place the breadsticks on a baking sheet. Heat them for about 5 to 10 minutes. This will help revive their crisp texture. You can also use a toaster oven for this step. Avoid the microwave, as it can make them soggy.
Freezing for Later Use
If you want to freeze your cheesy garlic breadsticks, here’s what to do. First, let them cool completely. Then, wrap each breadstick in plastic wrap or aluminum foil. Place them in a freezer bag or airtight container. They can last in the freezer for about 2 to 3 months. To defrost, simply take them out and let them sit in the fridge overnight. Reheat them as mentioned earlier to enjoy them again.
For the full recipe, check out the entire article!
FAQs
How long do cheesy garlic breadsticks last in the fridge?
Cheesy garlic breadsticks last about three to four days in the fridge. To store them properly, place them in an airtight container. Make sure they cool down first to keep them fresh. You can also wrap them in plastic wrap before putting them in the container. This helps keep moisture in and prevents them from drying out.
Can I make cheesy garlic breadsticks ahead of time?
Yes, you can make cheesy garlic breadsticks ahead of time. You can prepare the dough and let it rest in the fridge for up to 24 hours. This makes it easy to bake them fresh later. For added flavor, let the garlic butter mixture sit for a bit before using it. This allows the garlic and herbs to blend well.
What are some popular restaurant versions of cheesy garlic breadsticks?
Many local restaurants serve tasty cheesy garlic breadsticks. Pizzerias often have their own twist on this dish, using fresh herbs or unique toppings. Some Italian restaurants serve them as part of their appetizer menu. Places like these typically use high-quality cheese and fresh ingredients, making their breadsticks a favorite among customers. You can try them and find your own favorite version!
You now have a complete guide to making cheesy garlic breadsticks. We covered the key ingredients and equipment you need, as well as step-by-step instructions to make them mouthwatering. I shared tips for achieving great flavor and texture. You can even try different cheeses or herbs for fun variations. Whether you serve them with dips or enjoy them plain, these breadsticks will impress. Store or freeze leftovers using the best methods to keep them fresh. Enjoy baking these treats and sharing them with friends and family!
![- 1 package (1 lb) refrigerated pizza dough - 4 tablespoons unsalted butter, melted - 4 cloves garlic, minced - 1 teaspoon Italian seasoning - 1 cup shredded mozzarella cheese - 1/2 cup grated Parmesan cheese - 1/4 teaspoon red pepper flakes (optional) - Salt to taste - Fresh parsley, chopped for garnish - Baking sheet - Parchment paper - Rolling pin - Pizza cutter or sharp knife When making cheesy garlic breadsticks, you need the right ingredients. The list above includes everything for this tasty treat. I always choose fresh garlic because it adds the best flavor. If you like a bit of heat, add those red pepper flakes. You can adjust the salt to fit your taste. For equipment, use a baking sheet lined with parchment paper. It makes cleanup easy. A rolling pin helps shape the dough. A pizza cutter or sharp knife will help cut the breadsticks into perfect strips. This recipe is simple and perfect for any meal. You can even make it for a party. For the full recipe, just check out the link above. - Preheat your oven to 400°F (200°C). Line a baking sheet with parchment paper. - Take the refrigerated pizza dough out of the package. Roll it out on a floured surface until it’s about 1/4 inch thick. - In a small bowl, mix the melted butter and minced garlic. - Add the Italian seasoning, red pepper flakes (if using), and a pinch of salt. Stir well to combine. - Brush the dough with the garlic butter mixture. Make sure to cover it evenly. - Sprinkle the shredded mozzarella and grated Parmesan on top of the dough. - Use a pizza cutter or knife to cut the dough into 1-inch wide strips. You can cut them straight or in a fun zigzag pattern. - Carefully transfer the sliced breadsticks onto the prepared baking sheet. - Bake them in the oven for 12-15 minutes until golden and the cheese bubbles. - Once baked, let them cool for a few minutes. Garnish with freshly chopped parsley before serving. Follow the [Full Recipe] for a detailed guide to these cheesy delights. To get the best garlic taste, use fresh garlic. Mince it finely for strong flavor. You can also roast garlic for a sweeter, milder taste. Adjust the amount based on your preference. If you want it stronger, add more garlic. If you prefer it lighter, use less. Don't forget to add a pinch of salt, as it enhances the garlic. For crispy edges, roll the dough thin. Aim for about 1/4 inch thick. If you like soft centers, keep the dough a bit thicker. Bake at 400°F for 12-15 minutes. Keep an eye on them. If the edges turn golden, they’re ready. Letting them bake longer makes them crunchier, while less time keeps them chewy. Dips make great companions for cheesy garlic breadsticks. Marinara sauce is a classic choice. You can also try ranch or a creamy garlic dip. For a fun twist, serve them in a basket lined with parchment paper. This makes it look nice and keeps them warm. Sprinkle some extra cheese or herbs on top before serving for a pop of color. {{image_2}} You can change the cheese for your breadsticks. Mozzarella is great, but you can try other cheeses too. Cheddar adds a sharp taste. Gouda gives a rich, creamy flavor. For a twist, use pepper jack for some heat. Mix and match cheeses to find your favorite blend. Each choice adds a new spin to the classic recipe. Adding herbs or spices makes your breadsticks special. Try fresh basil for a sweet taste. Oregano adds an earthy flavor that pairs well with garlic. You can also mix in some Italian seasoning for a bold kick. For a spicy touch, add crushed red pepper flakes. Experiment with flavors to match your mood or meal. If you need gluten-free options, use gluten-free pizza dough. Many brands offer this now. For a vegan version, swap the butter for olive oil. Use plant-based cheese instead of mozzarella and Parmesan. These swaps keep the taste delicious while fitting your diet. Enjoy your cheesy garlic breadsticks guilt-free! To keep your cheesy garlic breadsticks fresh, place them in an airtight container. Make sure they are cool before storing. They will stay good in the fridge for about 3 to 4 days. If you want to keep them longer, consider freezing them. Always check for any signs of spoilage before eating. To reheat your cheesy garlic breadsticks, you want to keep them crispy. Preheat your oven to 350°F (175°C). Place the breadsticks on a baking sheet. Heat them for about 5 to 10 minutes. This will help revive their crisp texture. You can also use a toaster oven for this step. Avoid the microwave, as it can make them soggy. If you want to freeze your cheesy garlic breadsticks, here’s what to do. First, let them cool completely. Then, wrap each breadstick in plastic wrap or aluminum foil. Place them in a freezer bag or airtight container. They can last in the freezer for about 2 to 3 months. To defrost, simply take them out and let them sit in the fridge overnight. Reheat them as mentioned earlier to enjoy them again. For the full recipe, check out the entire article! Cheesy garlic breadsticks last about three to four days in the fridge. To store them properly, place them in an airtight container. Make sure they cool down first to keep them fresh. You can also wrap them in plastic wrap before putting them in the container. This helps keep moisture in and prevents them from drying out. Yes, you can make cheesy garlic breadsticks ahead of time. You can prepare the dough and let it rest in the fridge for up to 24 hours. This makes it easy to bake them fresh later. For added flavor, let the garlic butter mixture sit for a bit before using it. This allows the garlic and herbs to blend well. Many local restaurants serve tasty cheesy garlic breadsticks. Pizzerias often have their own twist on this dish, using fresh herbs or unique toppings. Some Italian restaurants serve them as part of their appetizer menu. Places like these typically use high-quality cheese and fresh ingredients, making their breadsticks a favorite among customers. You can try them and find your own favorite version! You now have a complete guide to making cheesy garlic breadsticks. We covered the key ingredients and equipment you need, as well as step-by-step instructions to make them mouthwatering. I shared tips for achieving great flavor and texture. You can even try different cheeses or herbs for fun variations. Whether you serve them with dips or enjoy them plain, these breadsticks will impress. Store or freeze leftovers using the best methods to keep them fresh. Enjoy baking these treats and sharing them with friends and family!](https://recipesinsight.com/wp-content/uploads/2025/04/02fa692c-3a93-4780-916b-bd8b330a67be-250x250.webp)