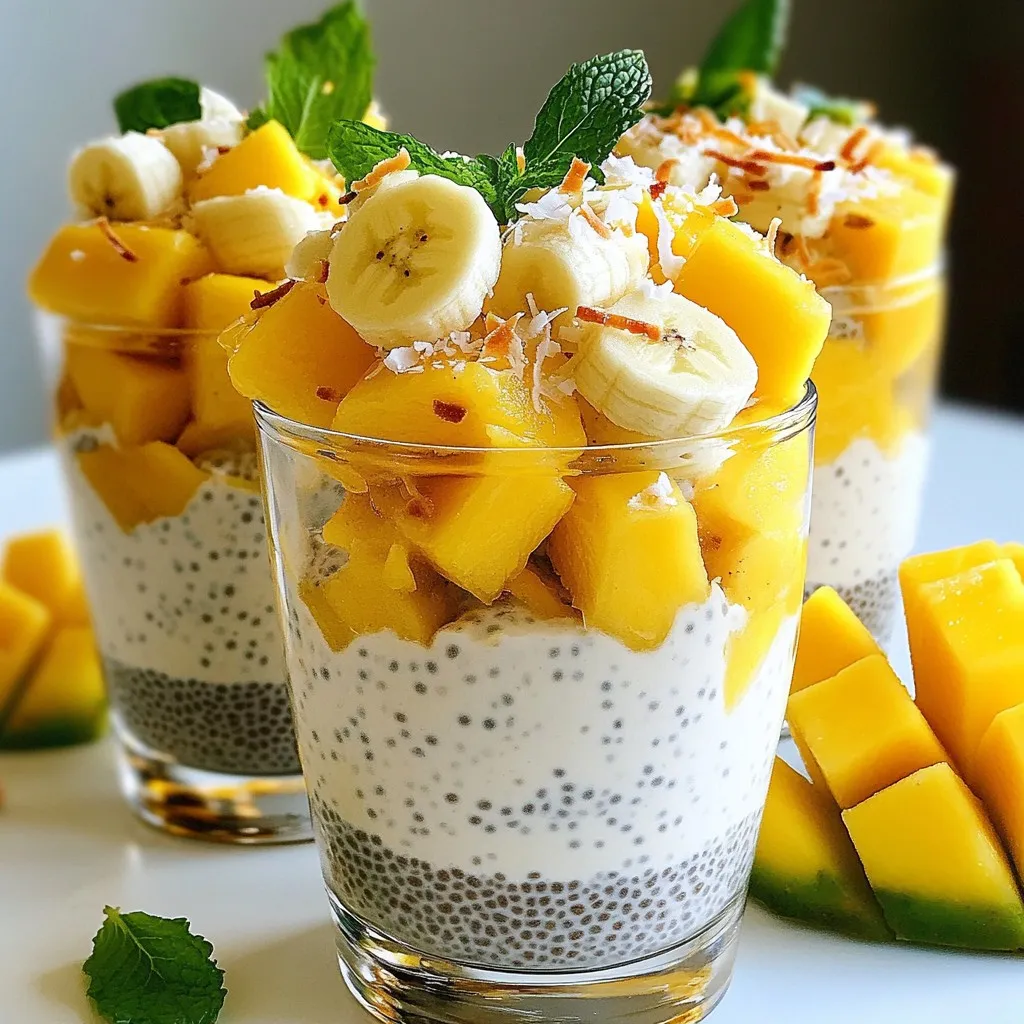
Tropical Coconut Chia Parfait Delicious and Nutritious
Are you ready to indulge in a healthy treat? This Tropical Coconut Chia Parfait is both delicious and nutritious! Packed

Are you ready to indulge in a healthy treat? This Tropical Coconut Chia Parfait is both delicious and nutritious! Packed
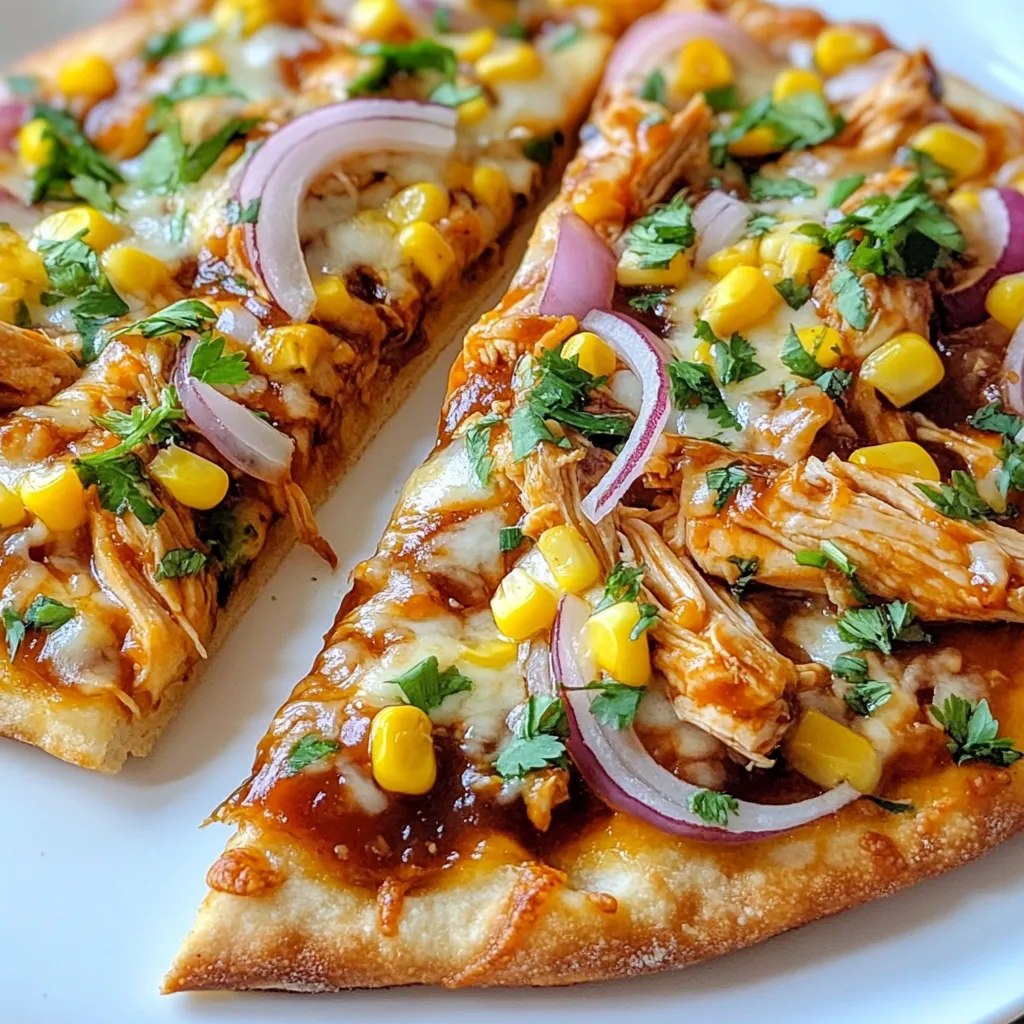
Craving something delicious and easy to make? This BBQ Chicken Flatbread Pizza recipe is your answer! With simple ingredients, you
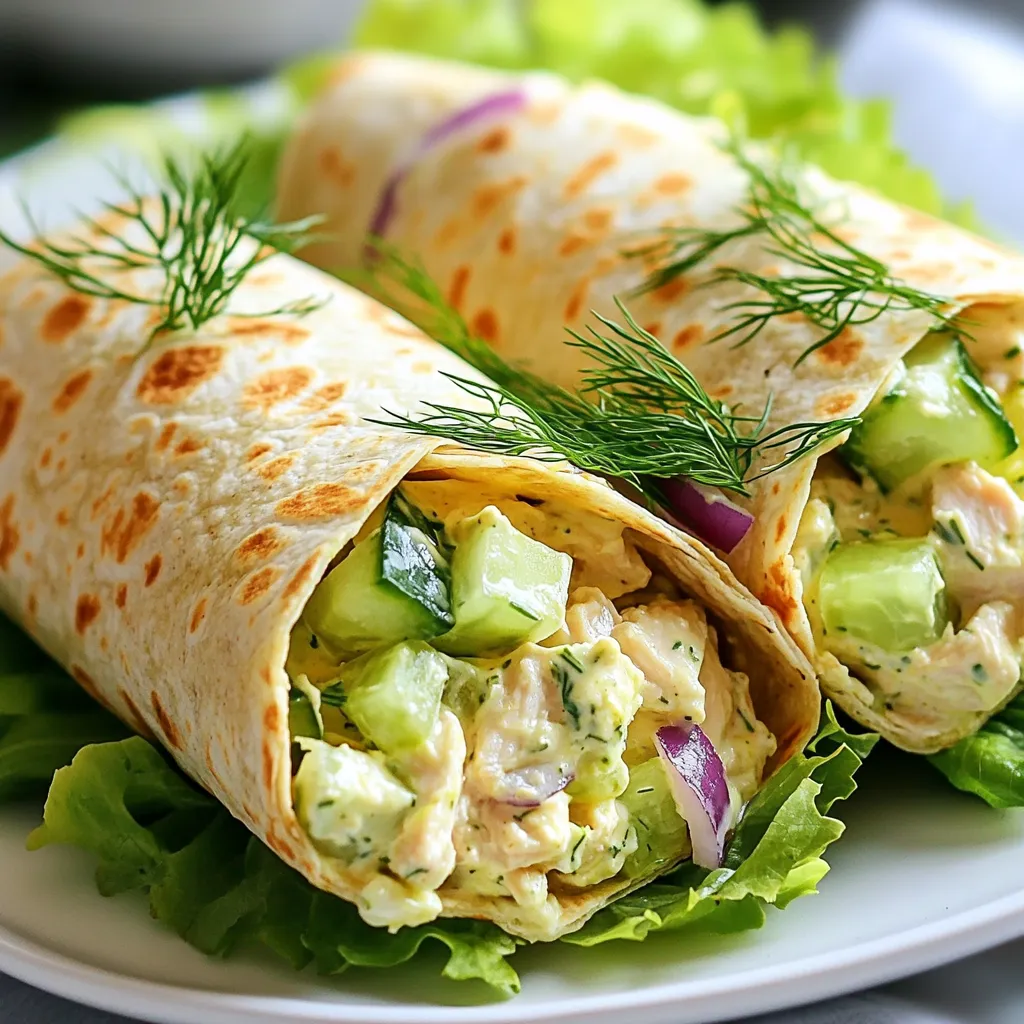
Looking for a tasty and healthy meal option? Try my Greek Yogurt Chicken Salad Wraps! Made with lean chicken and
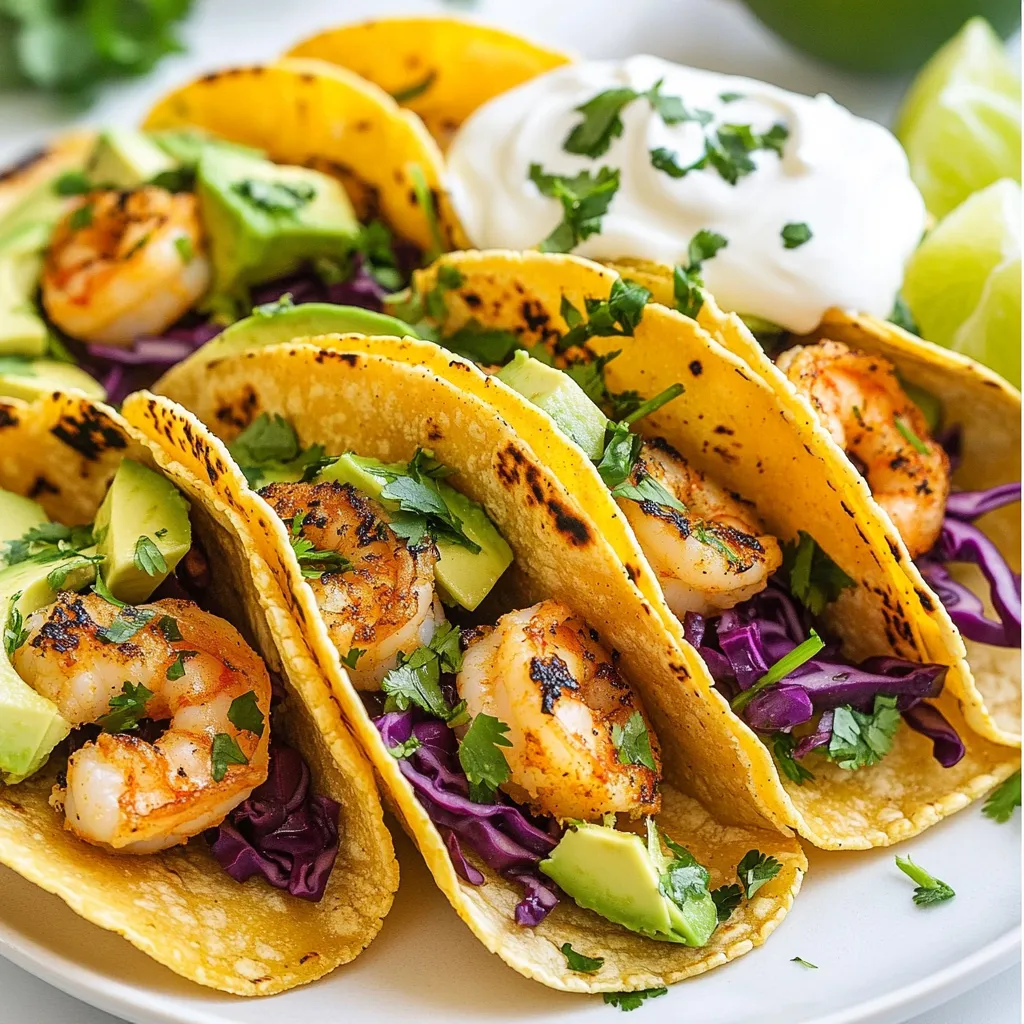
If you’re craving a delicious meal that’s quick to make, look no further! These Cilantro Lime Shrimp Tacos are packed
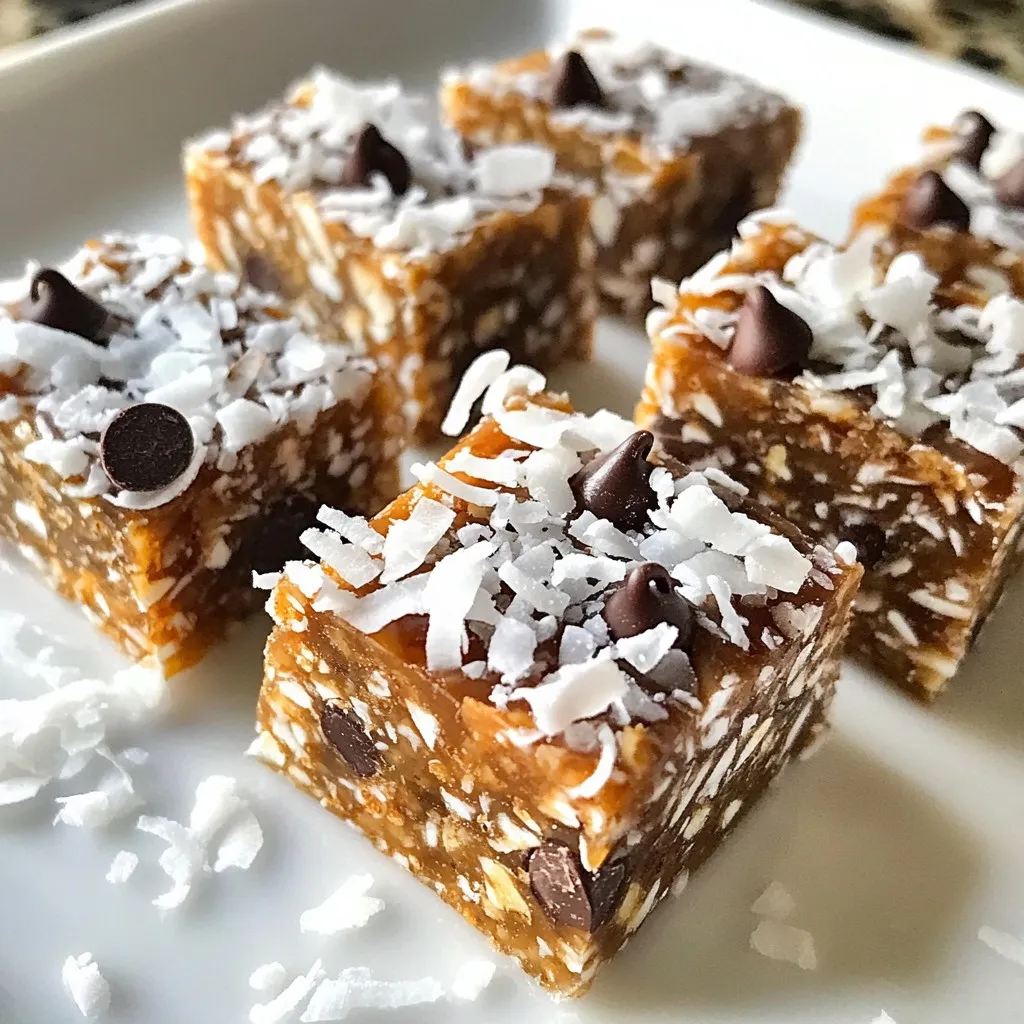
Looking for a tasty and healthy snack? Coconut Chocolate Chip Larabars are perfect! They combine sweet coconut with rich chocolate
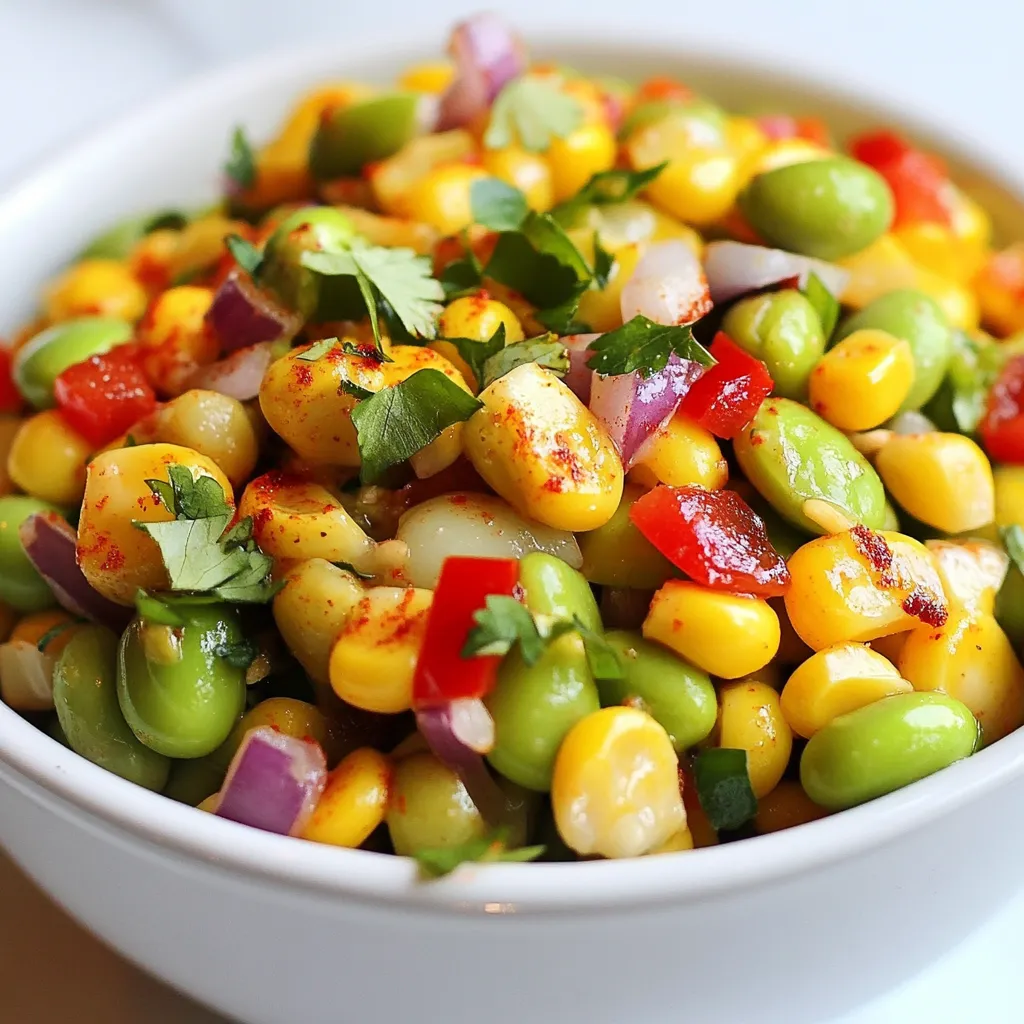
Looking for a fresh, vibrant dish that bursts with flavor? Edamame Corn Succotash is your answer! In this simple recipe,

Are you ready to add a fresh twist to your dinner table? Our Lemon Dill Salmon Cakes are quick, tasty,
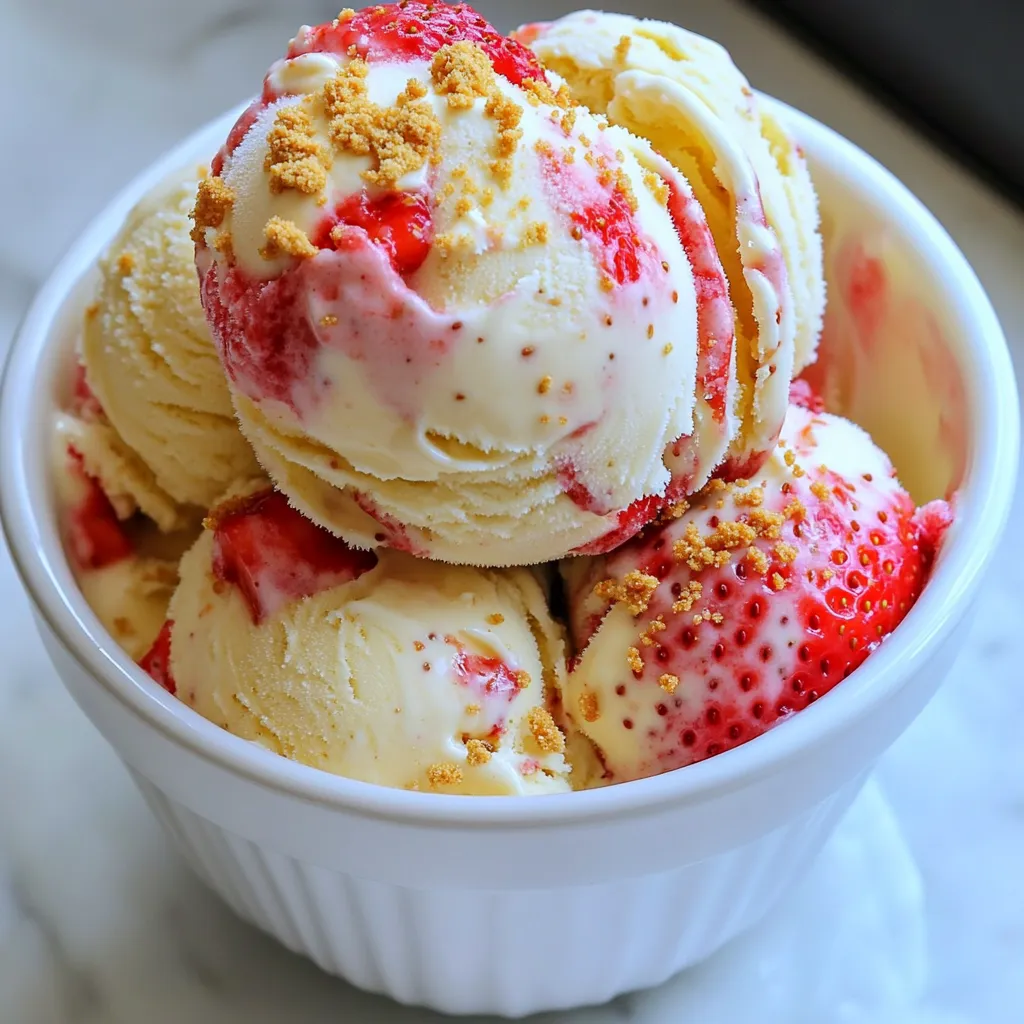
Get ready to delight your taste buds with my Strawberry Cheesecake Ice Cream recipe! This creamy treat combines fresh strawberries
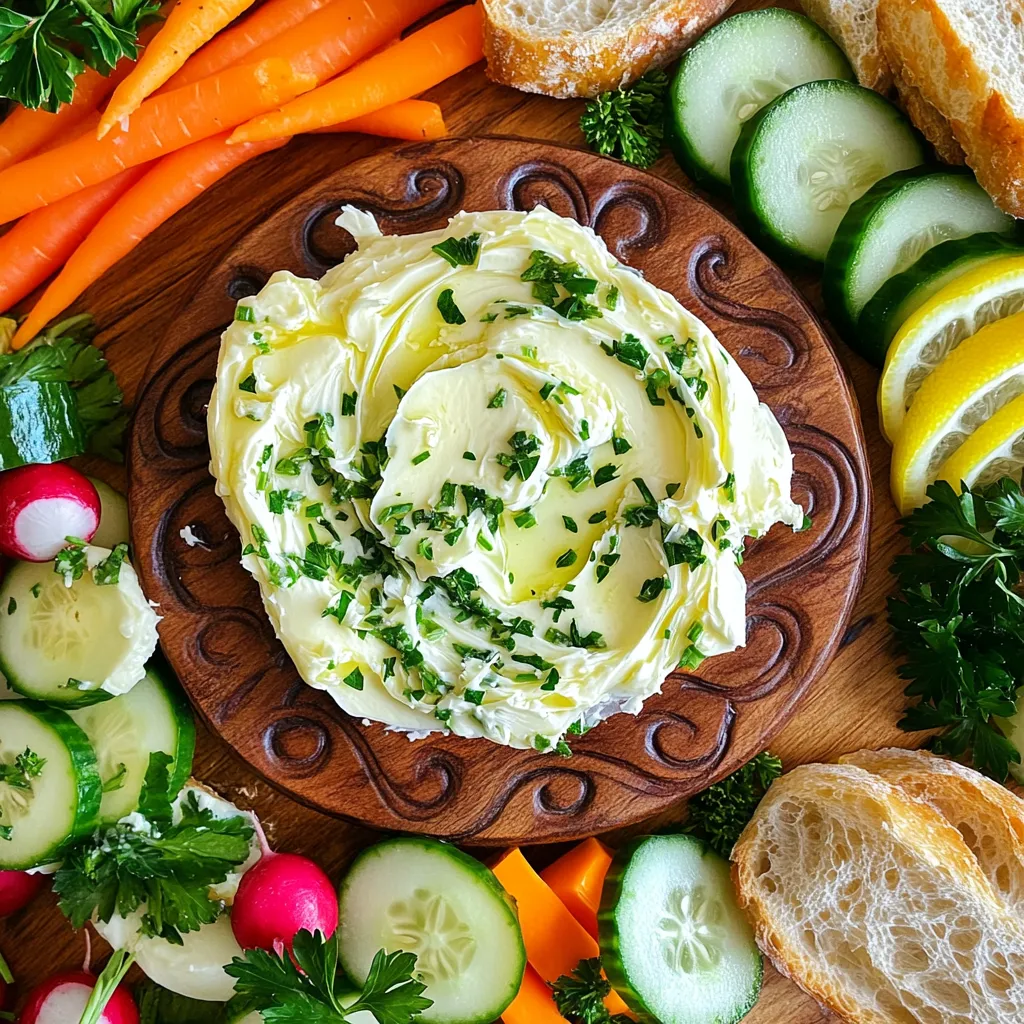
Are you ready to elevate your appetizer game? A Garlic Herb Butter Board is not just a spread; it’s a
Are you ready to elevate your meal game with a dish that’s both vibrant and tasty? In this article, I’ll