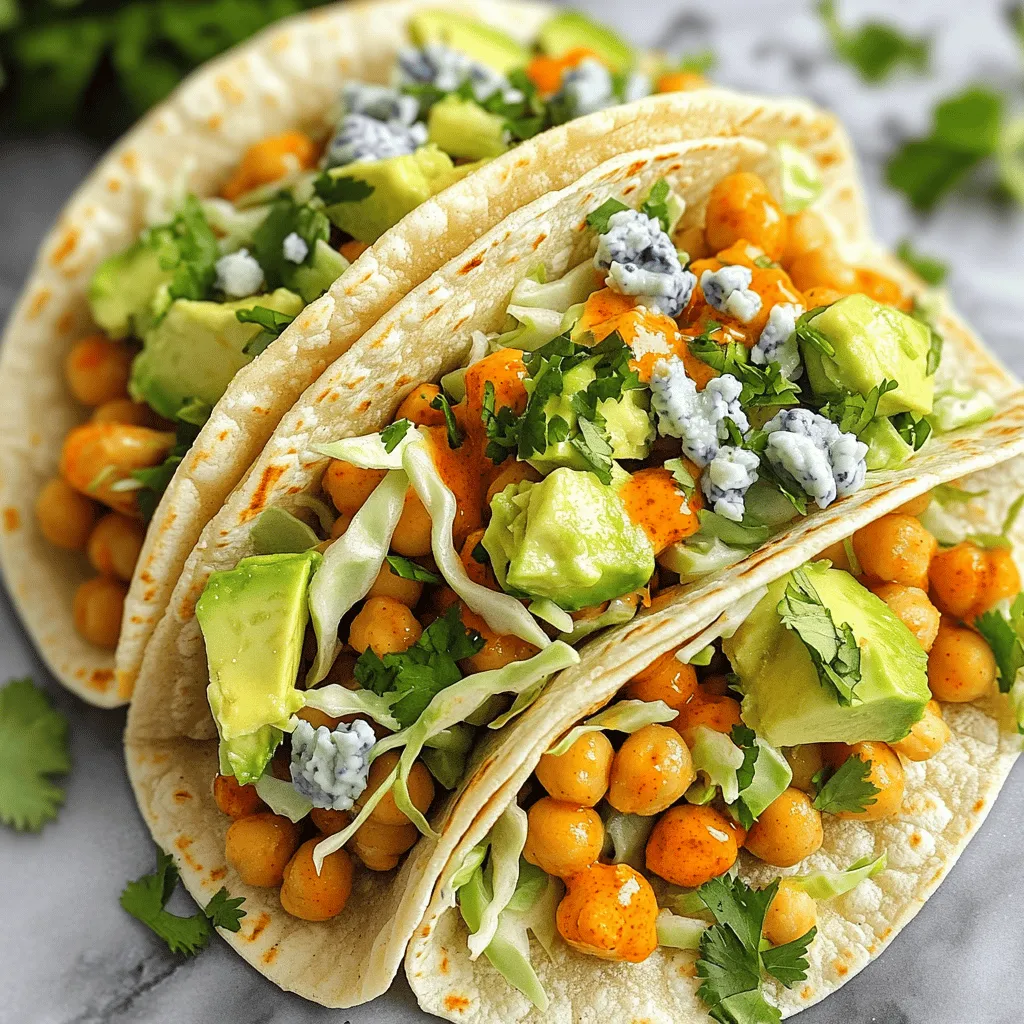
Air Fryer Buffalo Chickpea Tacos Flavorful and Easy
Get ready to spice up your taco night with my Air Fryer Buffalo Chickpea Tacos! These tasty tacos are quick,

Get ready to spice up your taco night with my Air Fryer Buffalo Chickpea Tacos! These tasty tacos are quick,
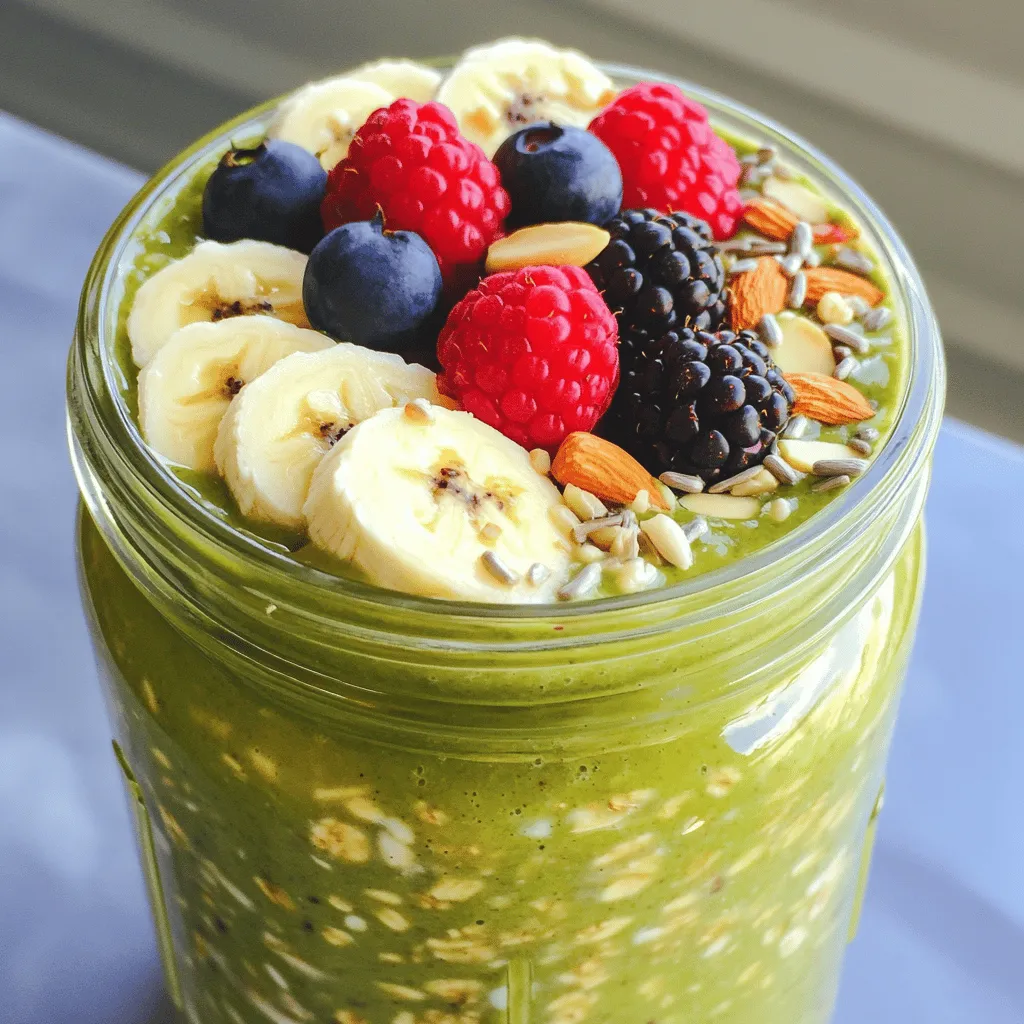
Start your day right with High-Protein Matcha Overnight Oats! This easy, nutritious breakfast is packed with energy and flavor. You’ll
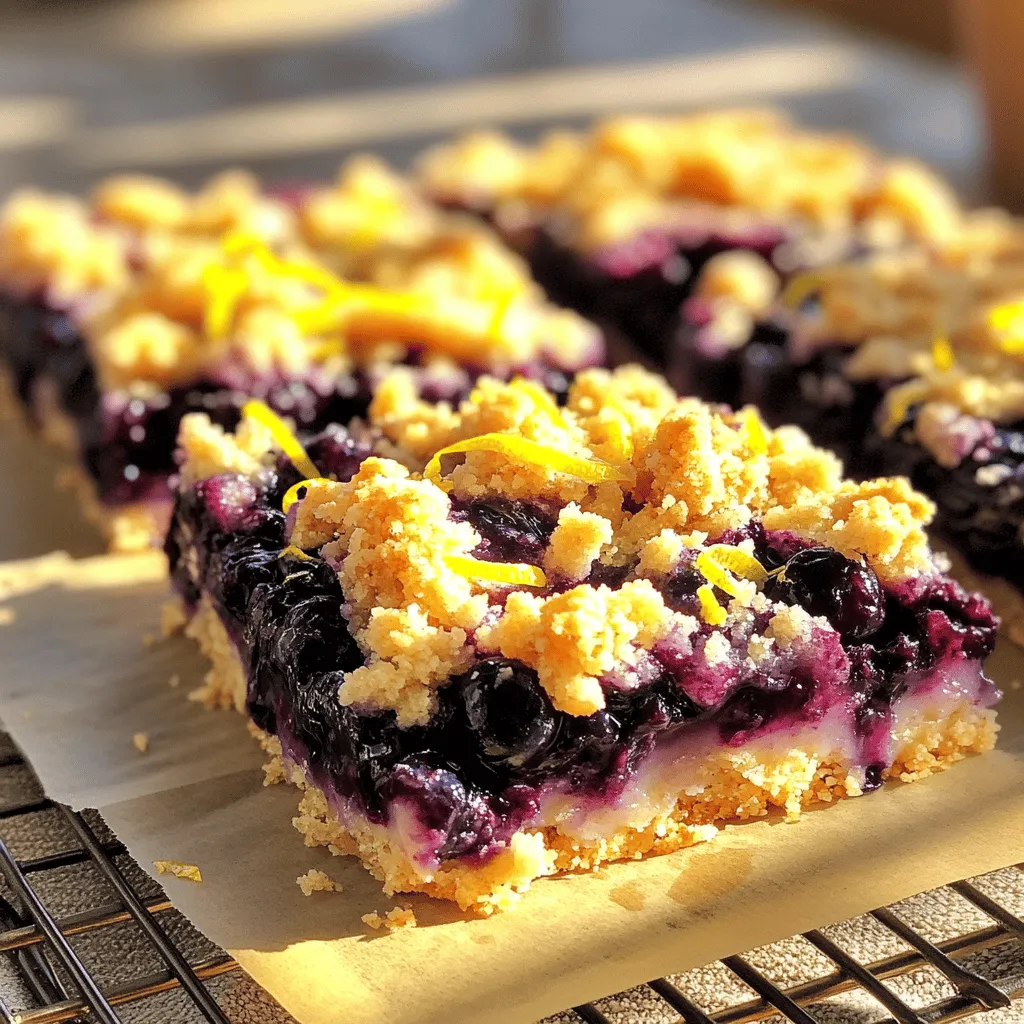
If you crave a treat that’s both tart and sweet, look no further! Blueberry Lemon Crumble Bars are a perfect

Looking for a hearty dish that bursts with flavor? You’ll love this Slow Cooker Lemon Herb Chicken Stew! Packed with

Looking for a quick, tasty snack that packs a punch? Chocolate Peanut Butter Energy Fudge is your answer! This simple

Are you ready to transform simple zucchinis into a tasty meal? My Pesto Chicken Stuffed Zucchini Boats bring fresh flavors

Looking for a vibrant twist on taco night? These Chili Lime Roasted Cauliflower Tacos pack a punch of flavor! With

If you want a fun and tasty dessert, try my Cinnamon Sugar Baked Apple Roses. This easy recipe combines sweet

Craving a warm, zesty hug in a bowl? This Instant Pot Lemon Chicken Orzo Soup is your answer! In just

Dive into the vibrant world of flavors with my Sesame Ginger Soba Noodle Salad. This dish brings fresh ingredients like