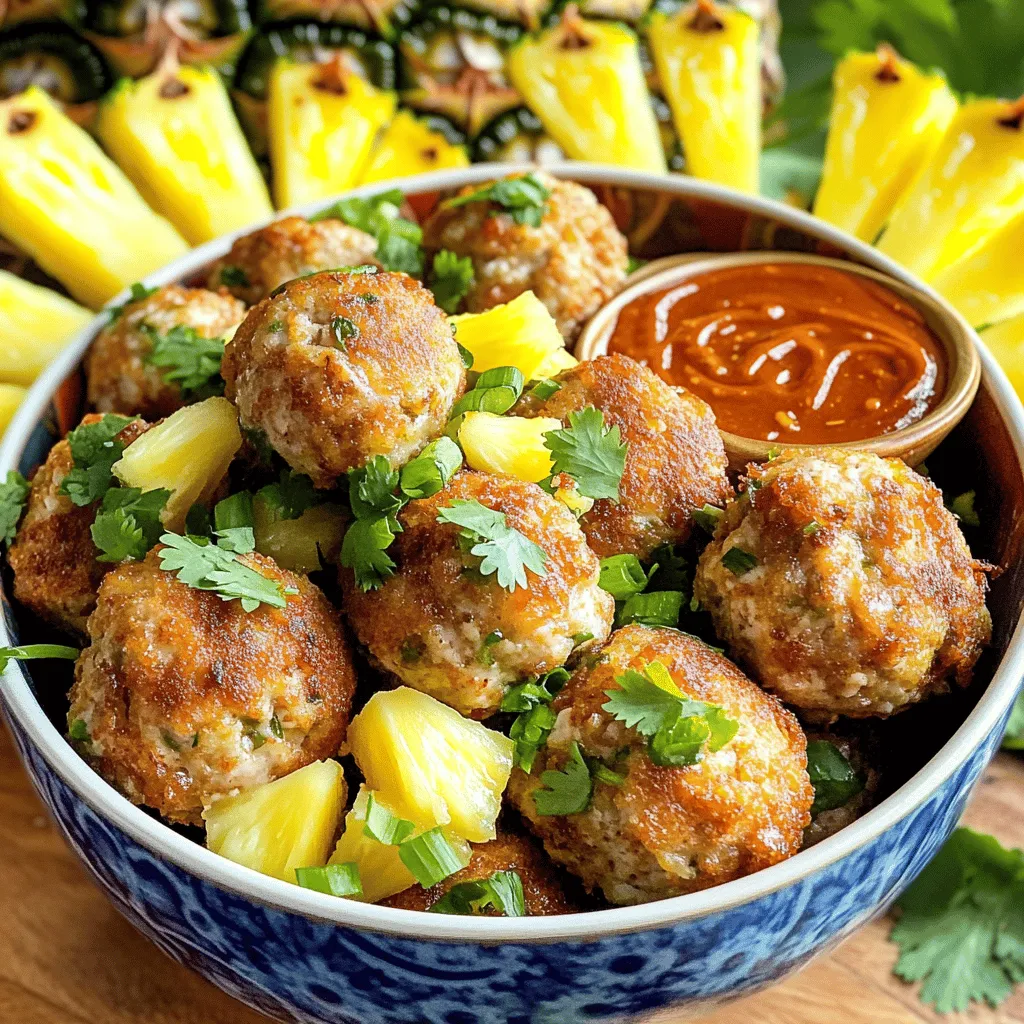
Sweet Chili Pineapple Meatballs Flavorful and Easy Dish
Are you ready to tantalize your taste buds? My Sweet Chili Pineapple Meatballs are the perfect blend of sweet and

Are you ready to tantalize your taste buds? My Sweet Chili Pineapple Meatballs are the perfect blend of sweet and

Are you ready to take your banana bread to a whole new level? This Nutella Swirl Banana Bread recipe is
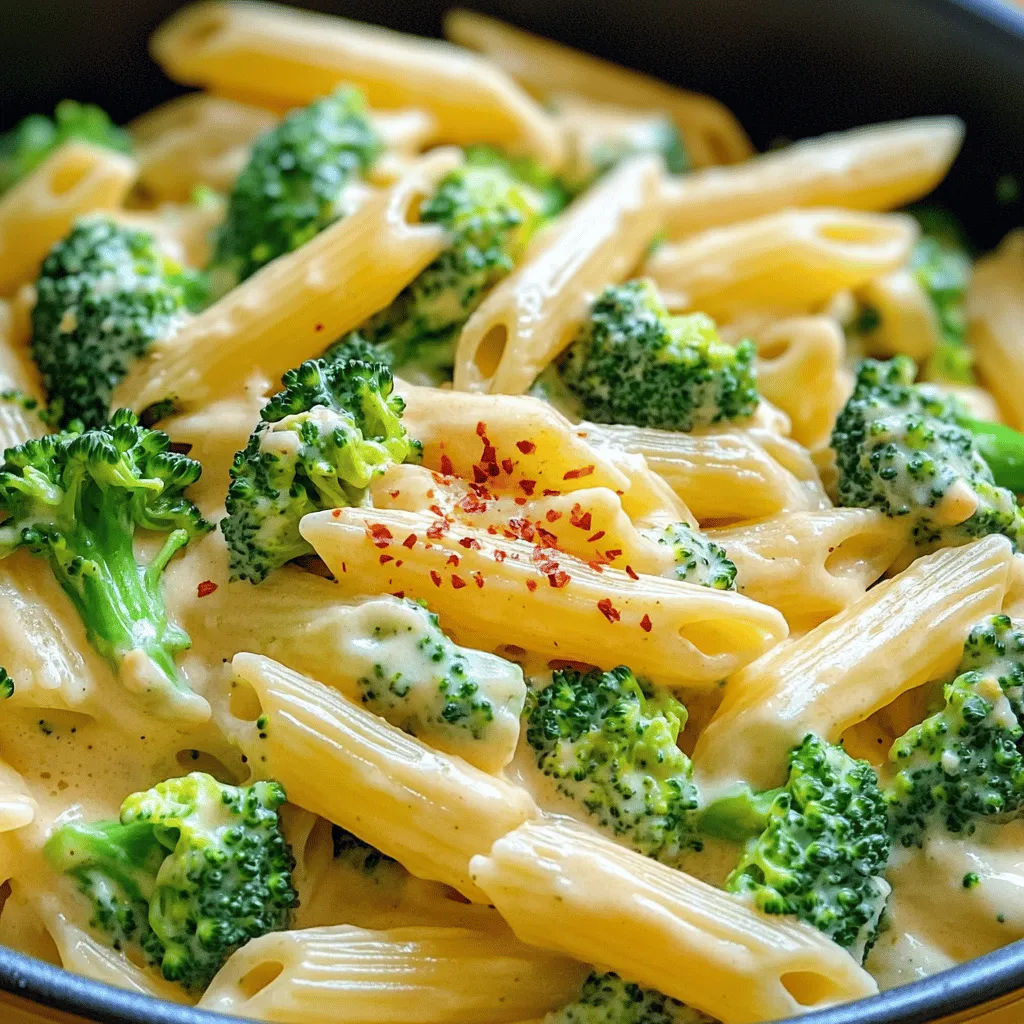
Welcome to a creamy pasta delight you’ll want to savor! This One Pot Creamy Broccoli Cheddar Pasta is perfect for
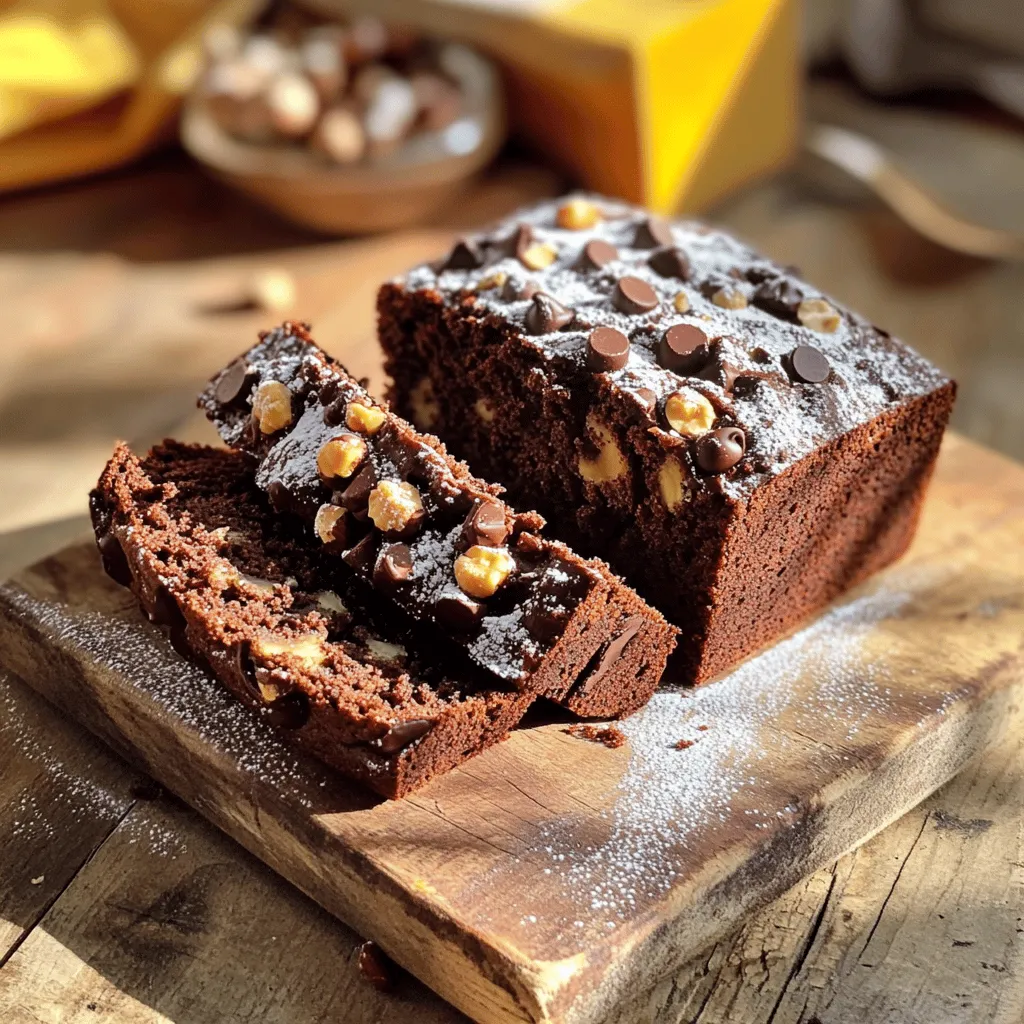
Indulging in Chocolate Hazelnut Banana Bread is like enjoying a slice of pure joy. This recipe combines the sweetness of
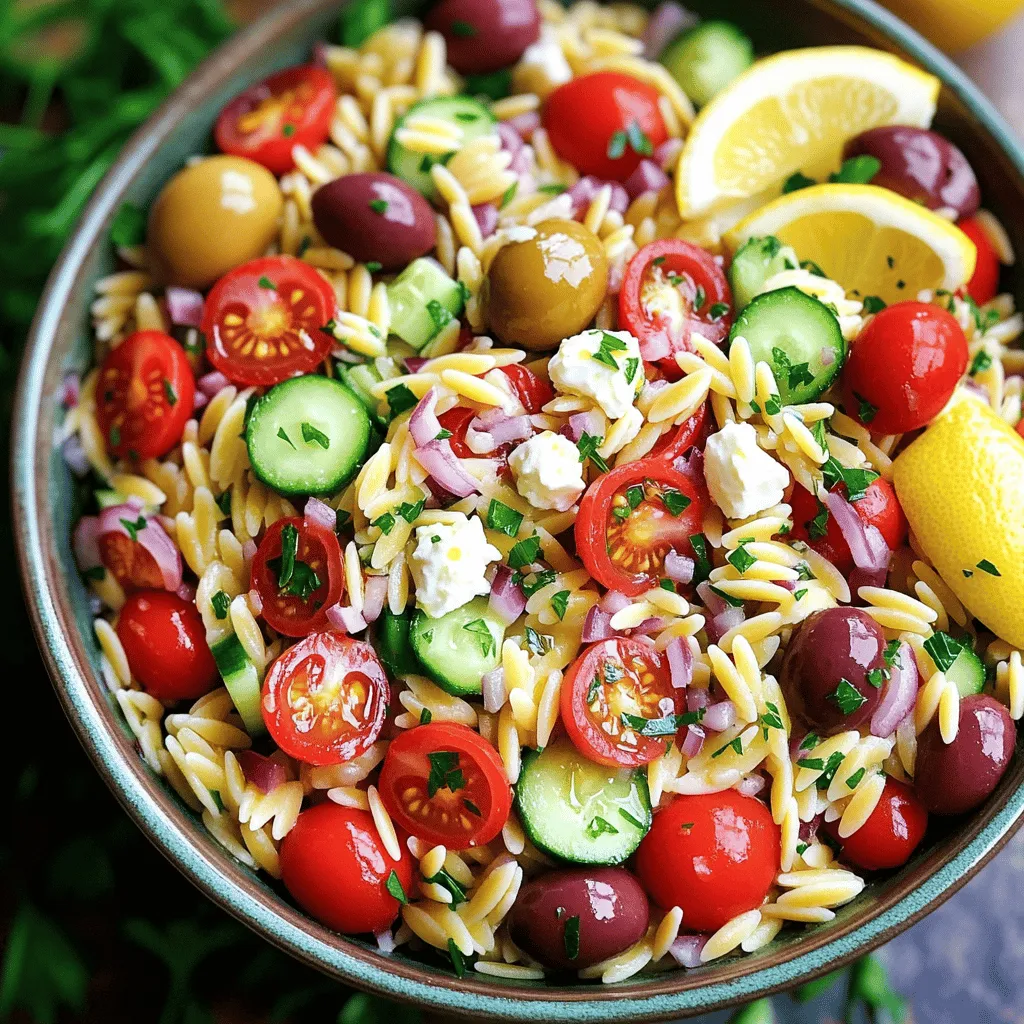
Looking for a refreshing dish that bursts with flavor? Greek Orzo Pasta Salad is your answer! This simple, tasty recipe
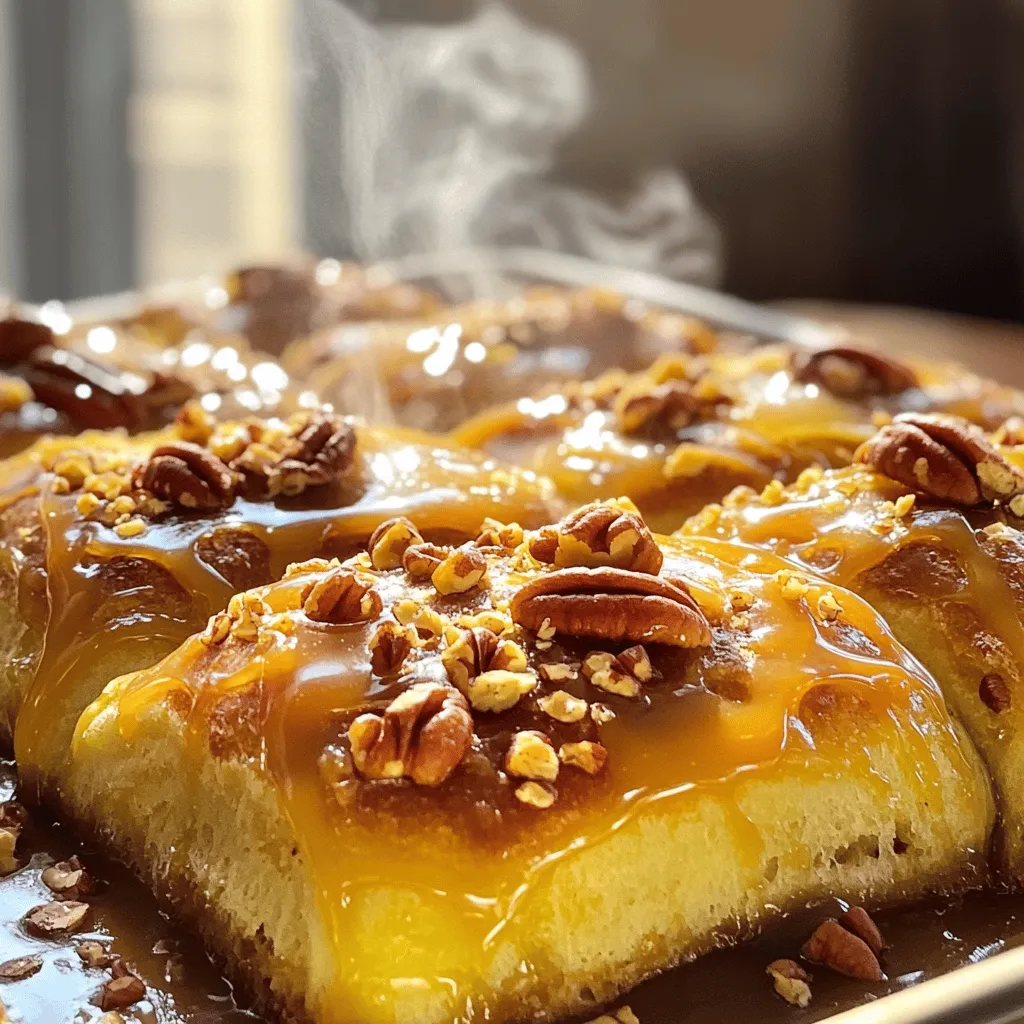
Start your day on a sweet note with my Caramel Pecan Sticky Buns! These soft, gooey treats combine rich caramel
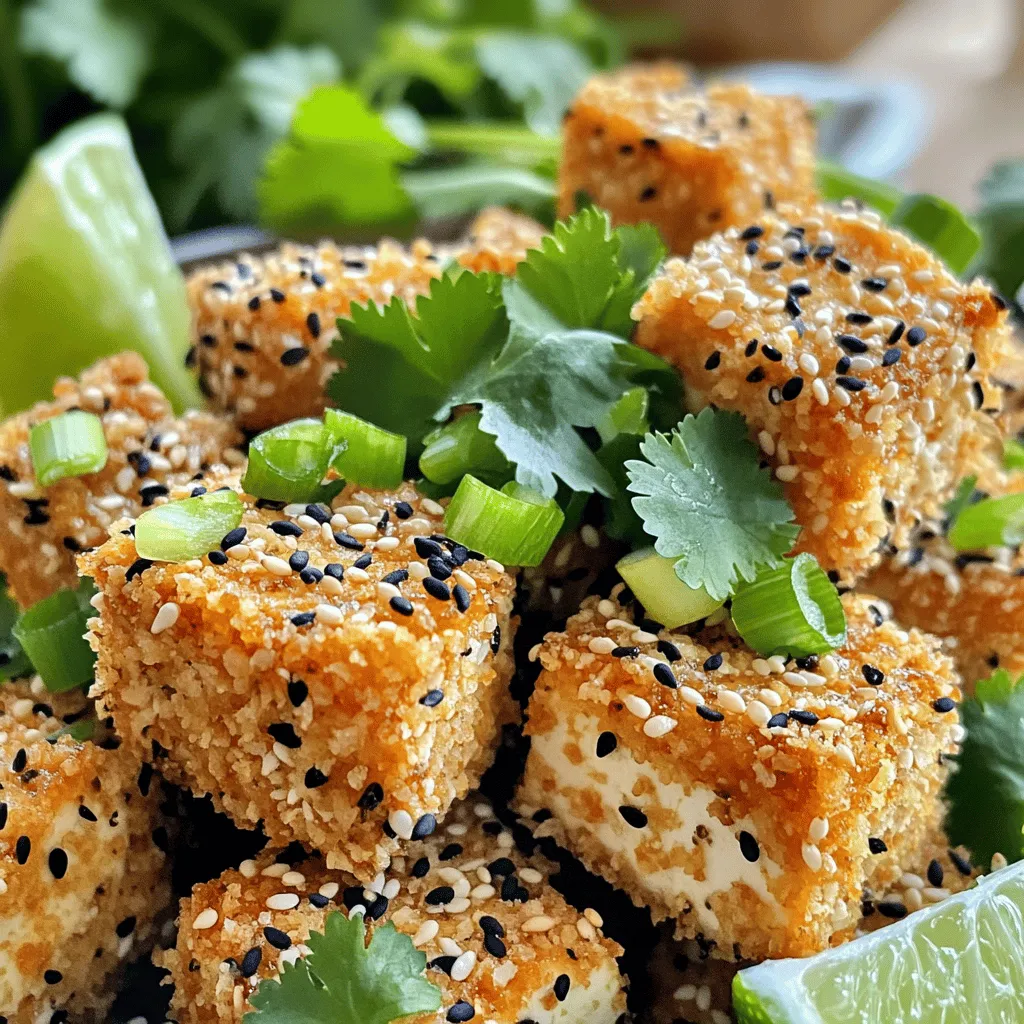
Ready to dive into a dish that packs a punch? My Spicy Sesame Crusted Tofu is crunchy, flavorful, and perfect
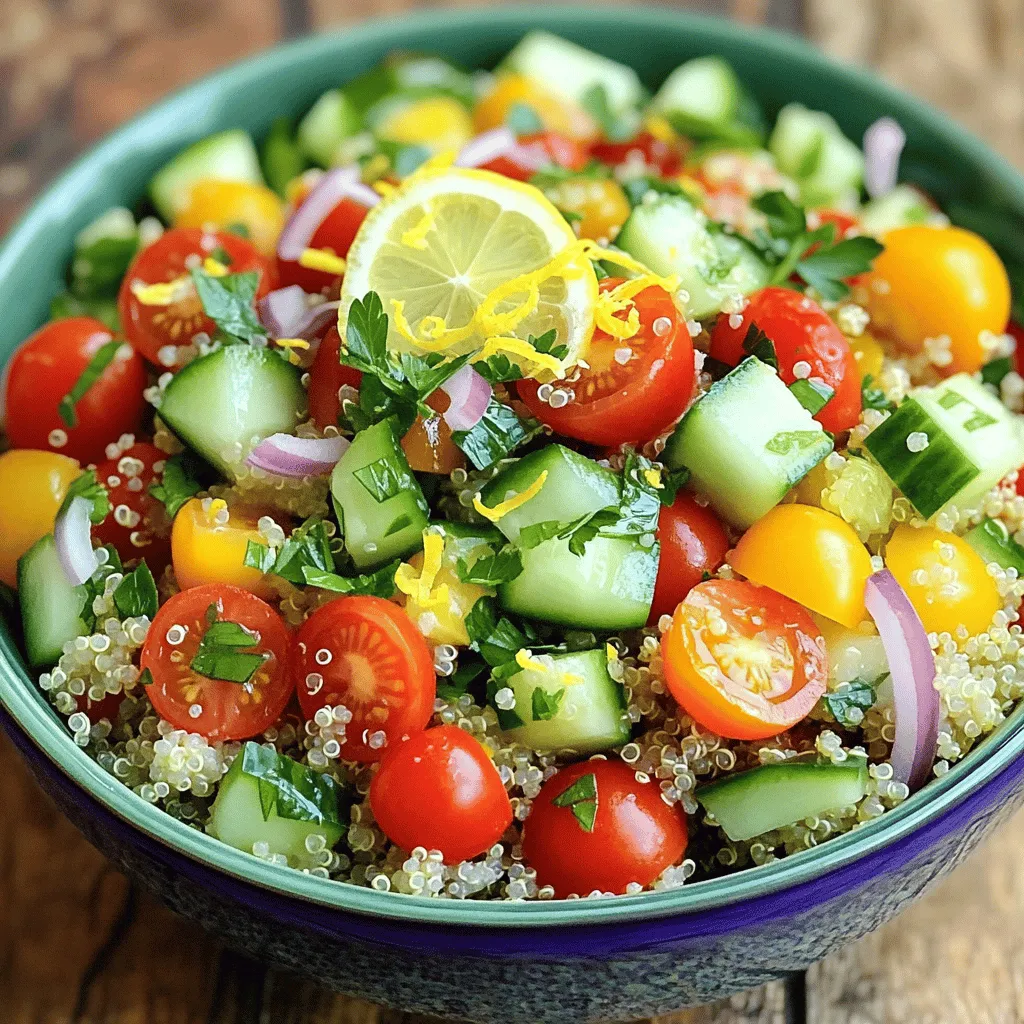
Looking for a fresh and tasty dish that’s both healthy and simple? You’ve found it! My Lemon Herb Quinoa Salad
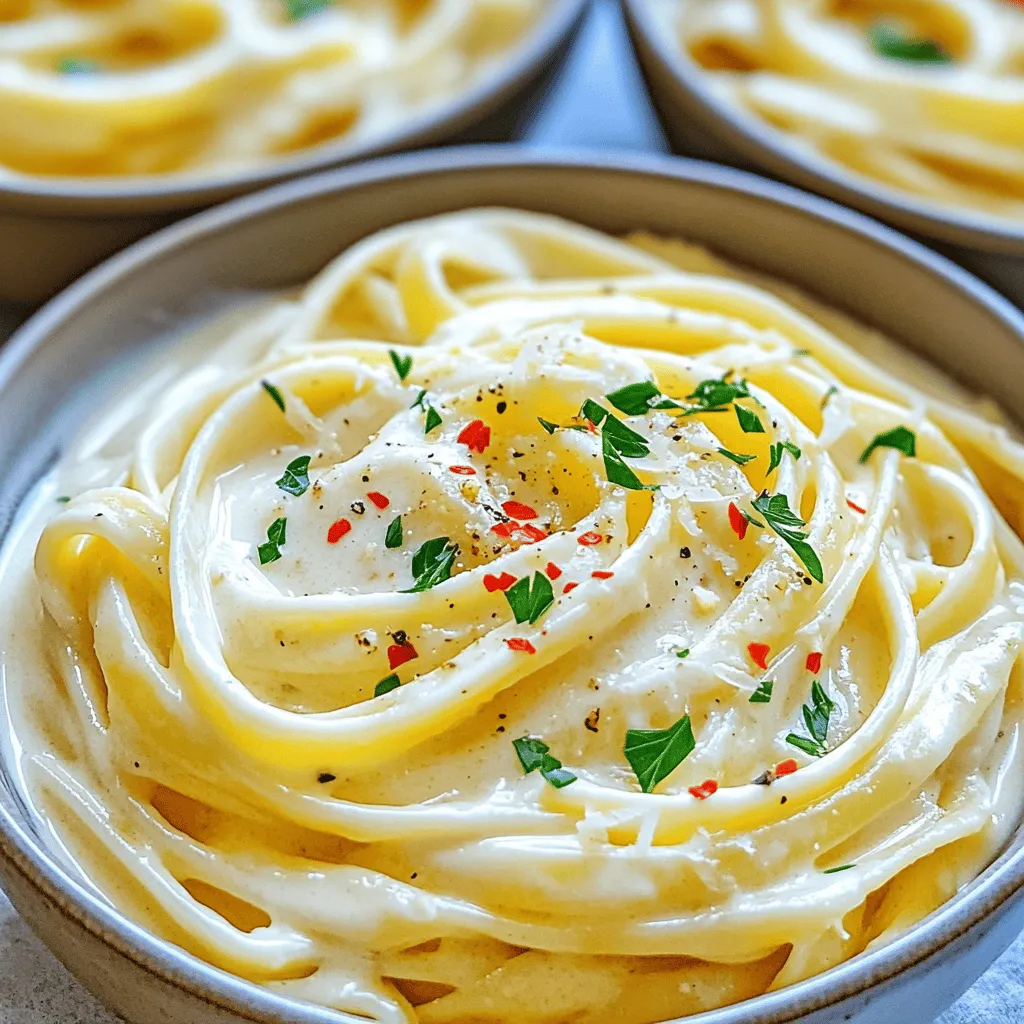
Get ready to indulge in a bowl of creamy goodness with my simple and tasty Creamy Garlic Mascarpone Pasta recipe!
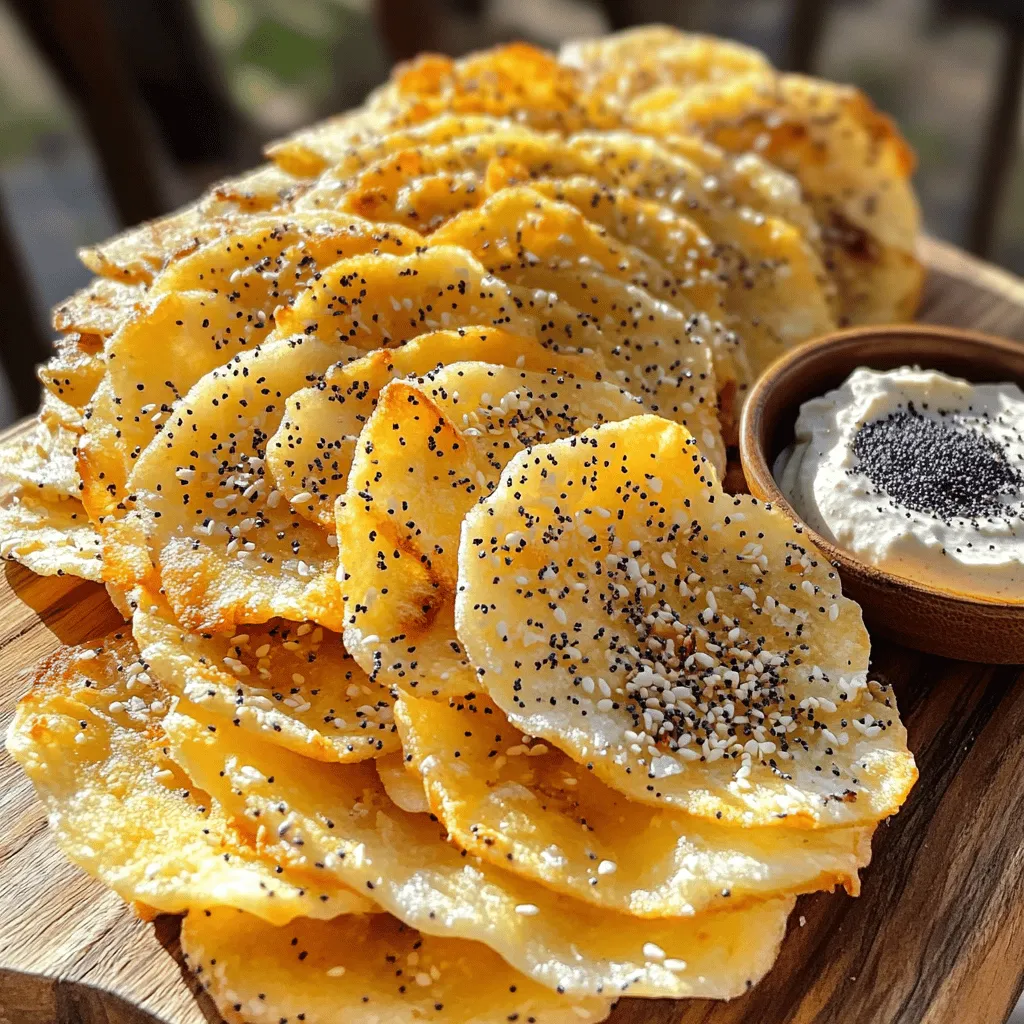
If you’re craving a crunchy snack that’s easy to make, I’ve got the perfect solution: Air Fryer Everything Bagel Chips.