
Cheesy Taco Pasta Skillet Easy Family Meal Recipe
Are you ready for a quick, tasty family meal? This Cheesy Taco Pasta Skillet packs fun flavors and easy prep

Are you ready for a quick, tasty family meal? This Cheesy Taco Pasta Skillet packs fun flavors and easy prep

Are you ready to impress your taste buds with a simple yet delicious dish? Maple glazed salmon brings together rich
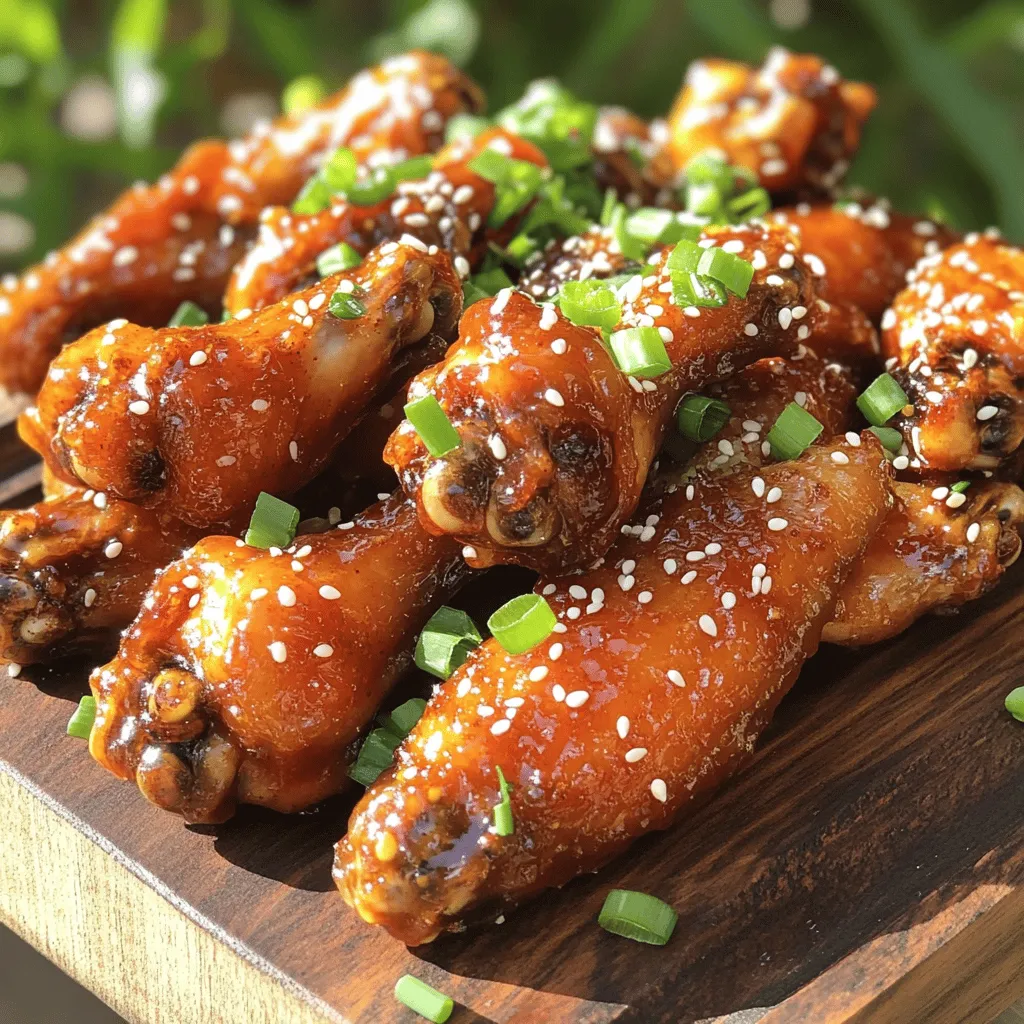
Are you ready to take your game-day snacks to the next level? Spicy Honey Garlic Wings offer a perfect mix
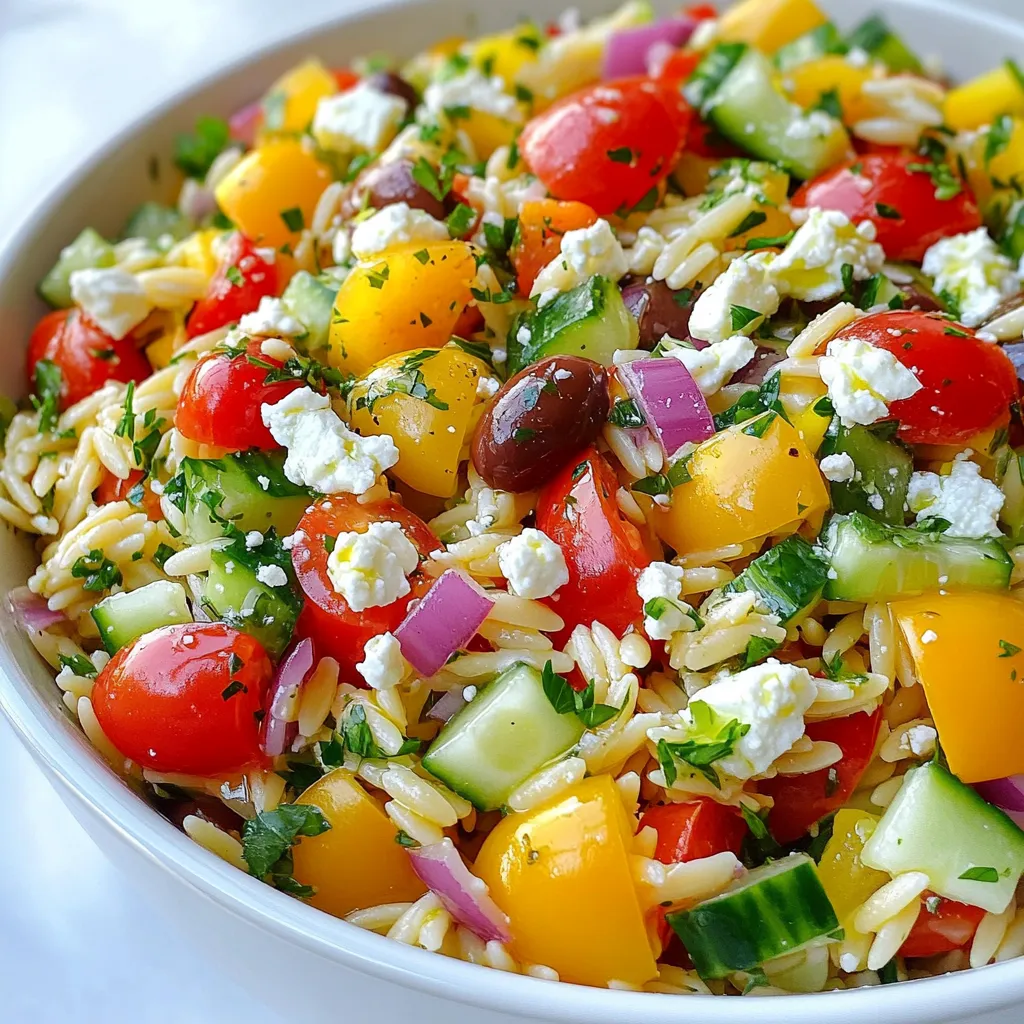
Are you looking for a light and tasty dish that bursts with fresh flavors? This Greek Veggie Orzo Salad is
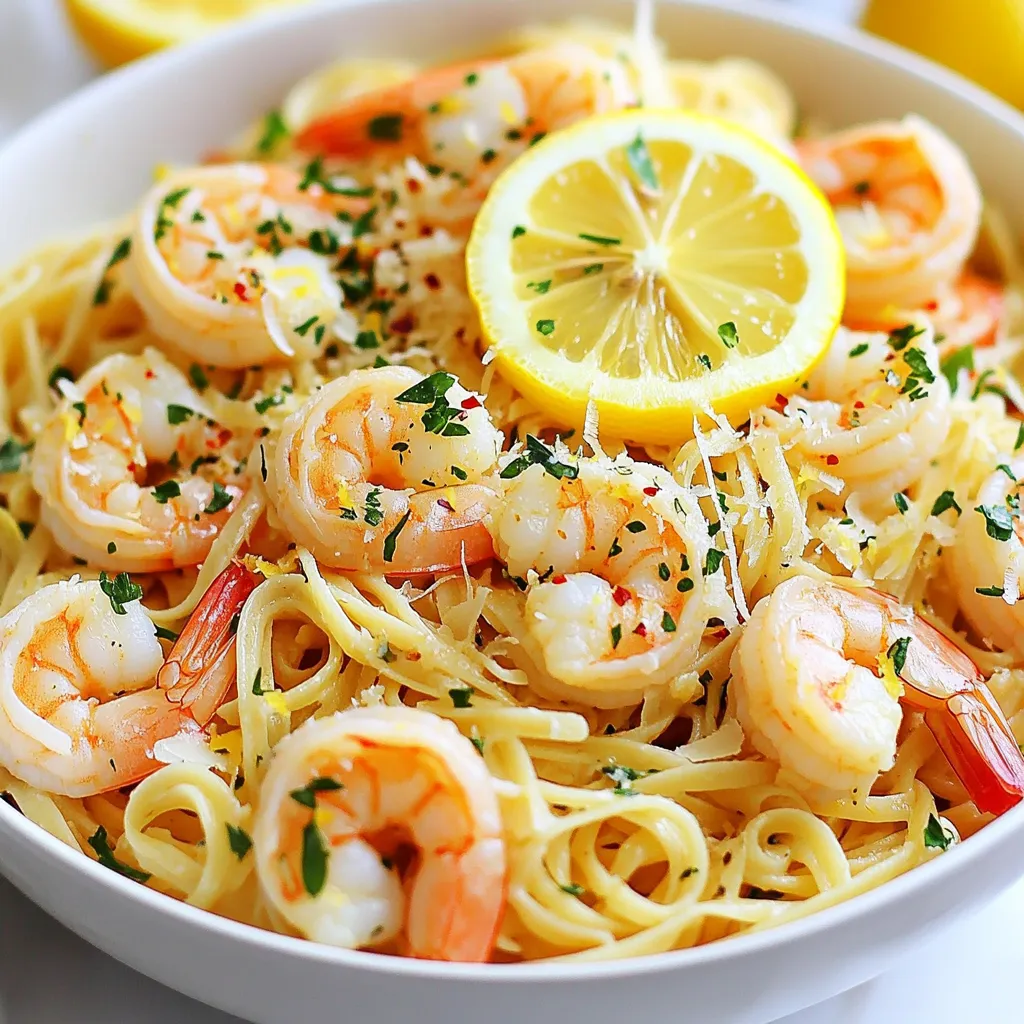
Are you ready to elevate your dinner game? Lemon Garlic Shrimp Pasta is a dish bursting with fresh flavors and
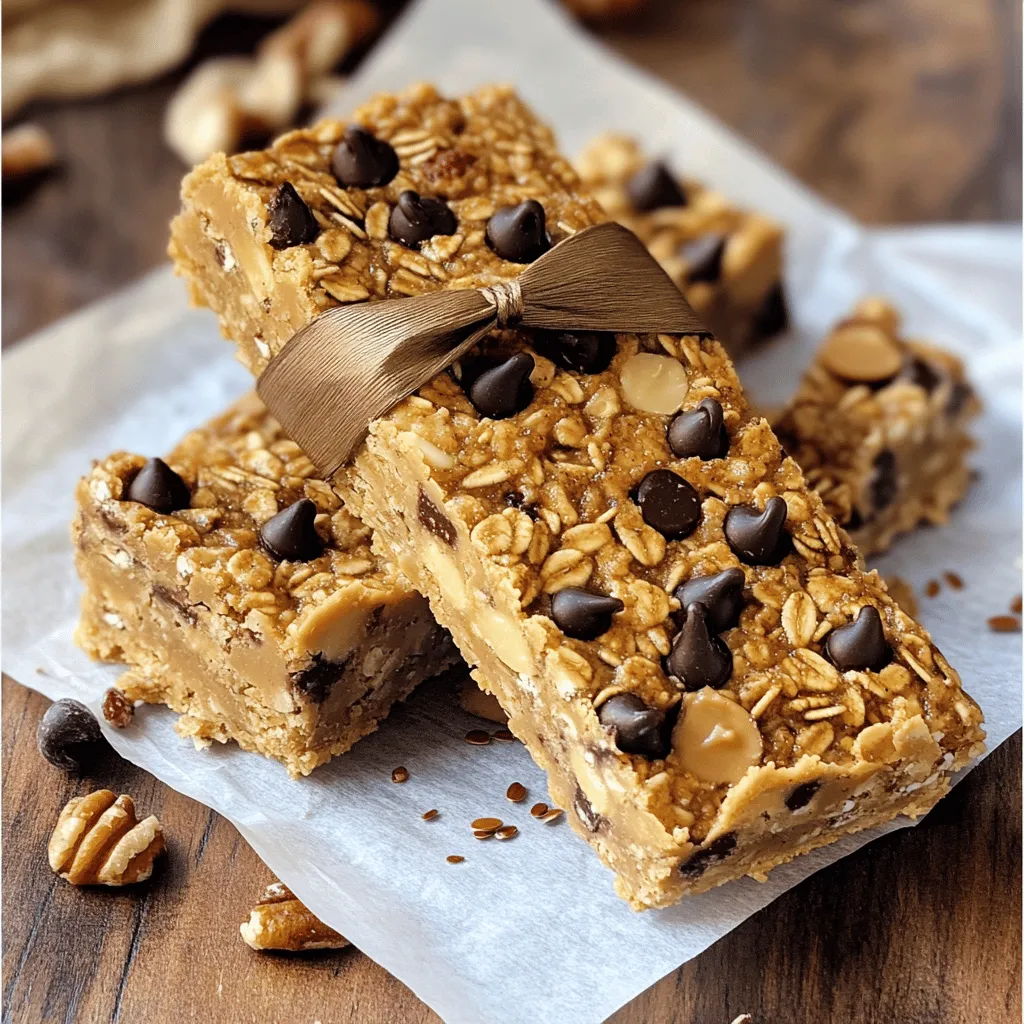
Looking for a tasty snack that’s easy to make? Try my Peanut Butter Chocolate Chip Granola Bars! With just a
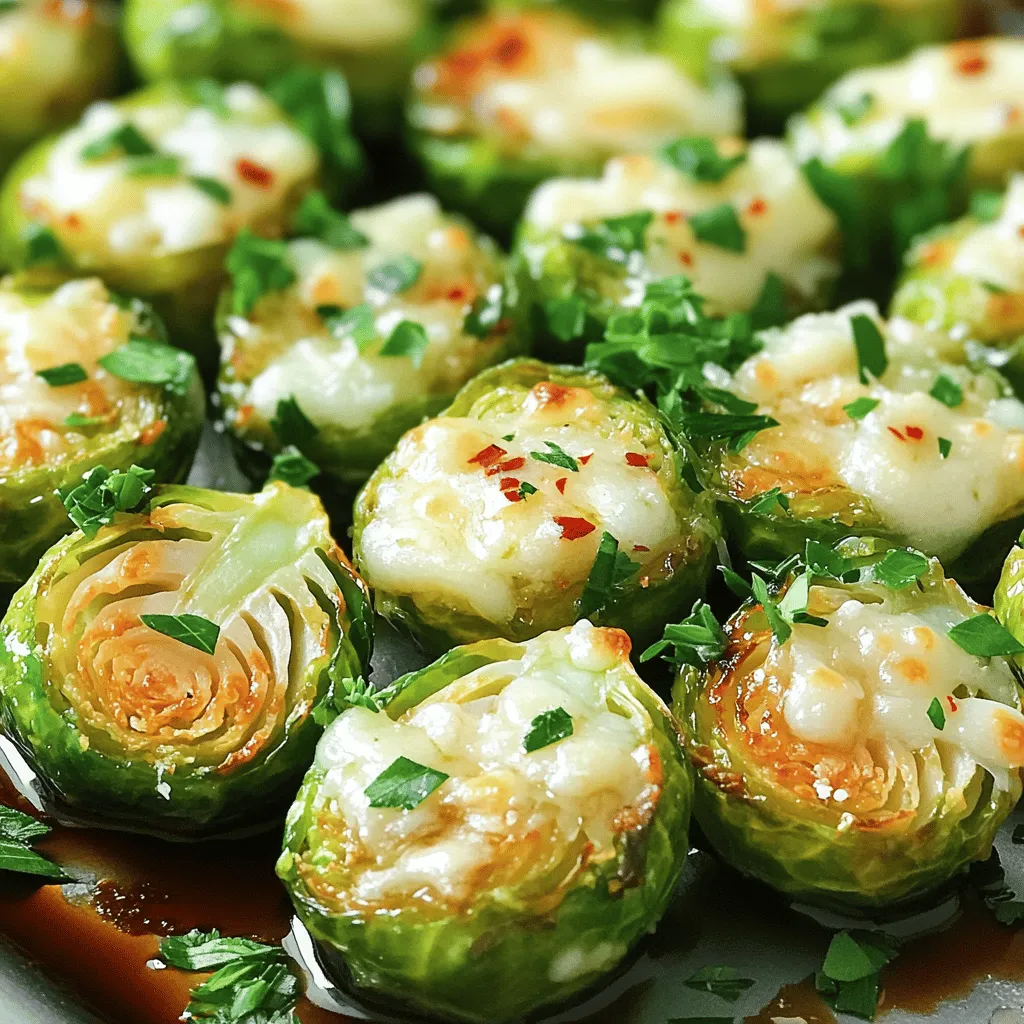
Get ready to elevate your side dish game with Roasted Garlic Parmesan Brussels Sprouts Delight. These tender, flavorful Brussels sprouts
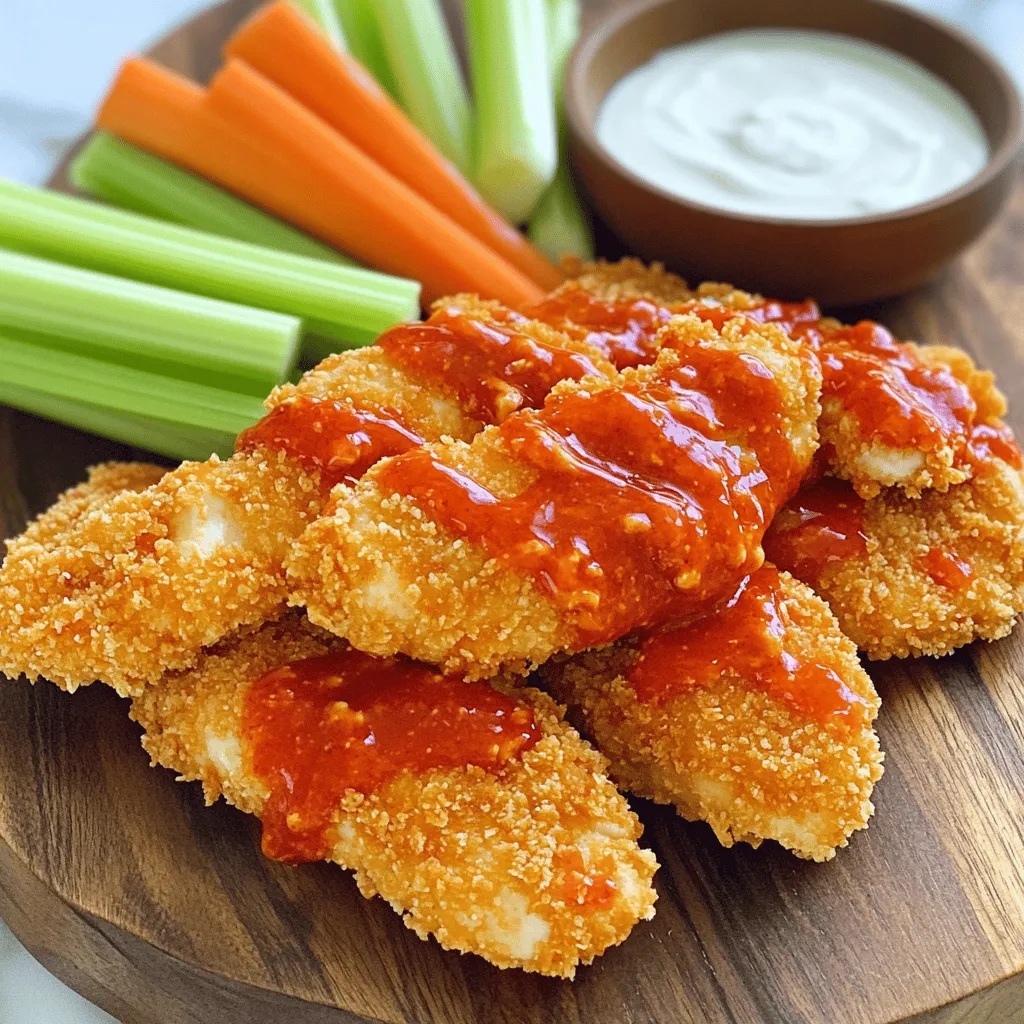
Are you ready to elevate your game day snacks? My Air Fryer Buffalo Chicken Tenders are crispy, flavorful, and easy

Are you craving a treat that’s both tasty and healthy? Coconut Mango Chia Pudding is the answer! This delightful dessert

Looking for a tasty snack that’s both crunchy and healthy? You’ve come to the right place! I’m excited to share