
Vanilla Almond Granola Crunchy and Nutritious Snack
Looking for a crunchy, nutritious snack that satisfies your cravings? My Vanilla Almond Granola is just what you need! Packed

Looking for a crunchy, nutritious snack that satisfies your cravings? My Vanilla Almond Granola is just what you need! Packed
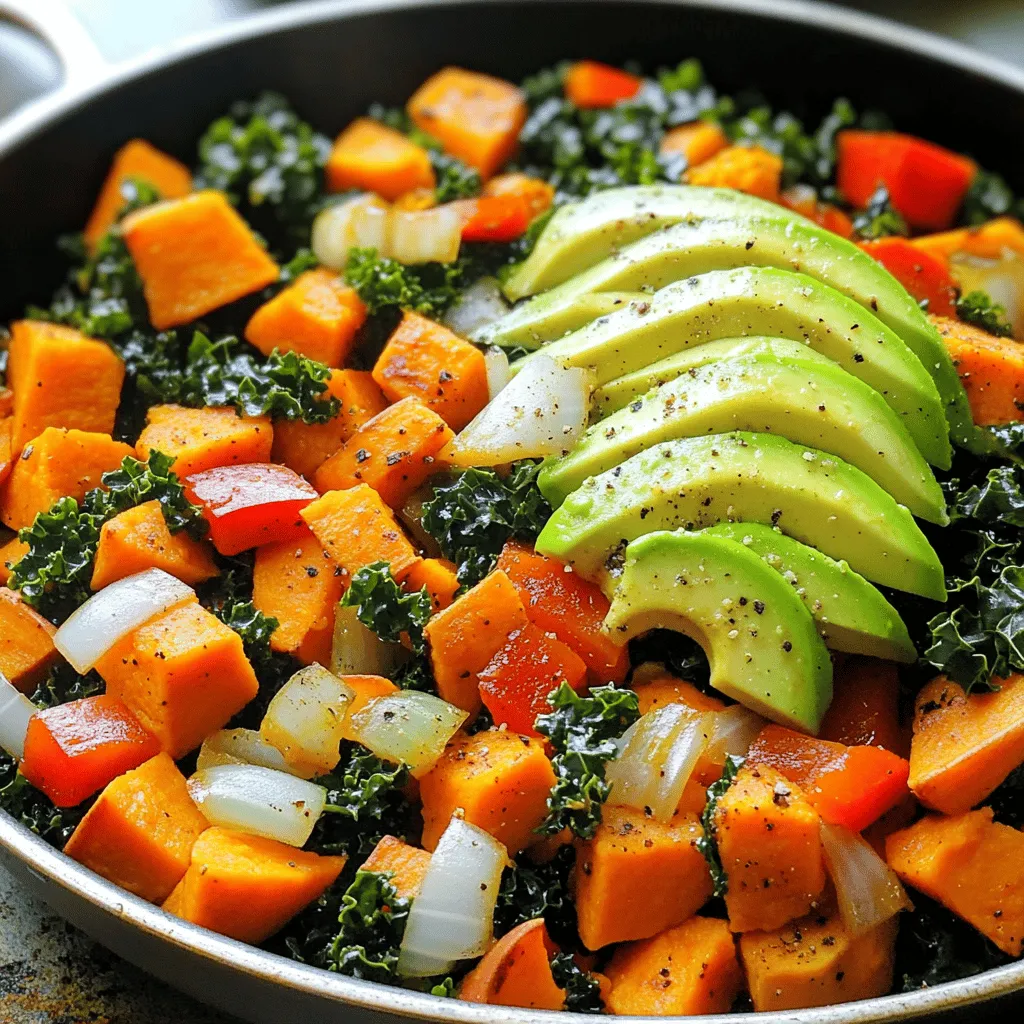
Looking for a quick, tasty, and healthy dinner? You’ll love this Sweet Potato Kale Skillet! Packed with colorful veggies and
![- 1 pound boneless, skinless chicken breast, diced - 1 tablespoon olive oil - 1 medium onion, chopped - 3 garlic cloves, minced - 2 carrots, diced - 2 celery stalks, diced - 1 teaspoon dried thyme - 1 teaspoon Italian seasoning - 4 cups chicken broth - 1 pound potato gnocchi - 1 cup heavy cream - 2 cups fresh spinach - Salt and pepper to taste - Grated Parmesan cheese, for serving - Fresh parsley, for garnish To get started, you need to measure your ingredients. For the chicken, cut it into small, even pieces. This way, it cooks faster and evenly. Chop the onion, carrots, and celery into small bits. Mince the garlic finely. Using a sharp knife makes this easier. Make sure all your ingredients are ready before cooking. This will help you move smoothly through the steps. You can swap some ingredients if you wish. For the chicken, try turkey or even tofu for a veggie option. Use vegetable broth instead of chicken broth for a lighter taste. If you lack heavy cream, coconut milk works well. You can also mix in any greens you like instead of spinach. Kale or Swiss chard can add a nice twist. For the gnocchi, you can use pasta if that’s what you have. Just adjust the cooking time based on what you choose. This recipe is flexible, so feel free to make it your own! Check the Full Recipe for more details. Gather all your ingredients before you start. This makes the process smooth. You will need: - 1 pound boneless, skinless chicken breast, diced - 1 tablespoon olive oil - 1 medium onion, chopped - 3 garlic cloves, minced - 2 carrots, diced - 2 celery stalks, diced - 1 teaspoon dried thyme - 1 teaspoon Italian seasoning - 4 cups chicken broth - 1 pound potato gnocchi - 1 cup heavy cream - 2 cups fresh spinach - Salt and pepper to taste - Grated Parmesan cheese, for serving - Fresh parsley, for garnish Start by washing and chopping the vegetables. Dice the chicken into small pieces. This helps it cook evenly. 1. Heat the olive oil in a large pot over medium heat. Once hot, add the diced chicken. Season it with salt and pepper. Cook until it turns white, around 5-7 minutes. Remove the chicken and set it aside. 2. In the same pot, add the chopped onion, carrots, and celery. Cook for 5-6 minutes. Stir often until the veggies soften. 3. Next, add the minced garlic, dried thyme, and Italian seasoning. Cook for one more minute. The kitchen will smell amazing! 4. Now, pour in the chicken broth. Bring it to a boil. Add the potato gnocchi. Cook them until they float to the top, usually 3-5 minutes. 5. Lower the heat. Stir in the heavy cream and fresh spinach. Return the chicken to the pot. Let it simmer for 5 minutes. This warms everything through. 6. Taste the soup. Add salt and pepper if needed. 7. Serve hot. Top each bowl with grated Parmesan cheese and fresh parsley. - Use a sharp knife for cutting vegetables. This makes prep easier. - Don’t rush the cooking of the chicken. Make sure it’s fully cooked for safety. - Stir the soup gently when you add the gnocchi. This helps them stay intact. - Taste as you go. Adjust seasoning to fit your taste. - Make it your own! You can add more veggies or herbs if you like. Follow these steps for a creamy chicken gnocchi soup that warms your heart. For the full recipe, refer back to the ingredients list. Enjoy every bite! To make your creamy chicken gnocchi soup shine, follow these tips: - Cook chicken thoroughly: Ensure the chicken is cooked until no longer pink. This keeps it safe to eat. - Sauté vegetables well: Sautéing the onions, carrots, and celery adds depth to the flavor. Aim for tenderness and a bit of caramelization. - Use fresh spinach: Fresh spinach wilts nicely and adds vibrant color. Stir it in just before serving. - Monitor the broth: Keep an eye on the chicken broth. Adding it gradually helps control the soup's thickness. Even the best cooks can make mistakes. Here are some common ones: - Overcooking gnocchi: Gnocchi cooks quickly. When they float, they are done. Cooking them longer can make them mushy. - Neglecting seasoning: Don’t forget to taste and adjust salt and pepper. Each ingredient needs balance. - Adding cream too soon: Stir in the cream at low heat. Adding it too early can cause curdling. Want to take your soup to the next level? Consider these ideas: - Add herbs: Fresh herbs like basil or thyme can brighten the dish. Sprinkle them just before serving. - Spice it up: If you like a kick, add a pinch of red pepper flakes. It adds warmth without overwhelming the soup. - Finish with cheese: Grated Parmesan adds richness. It melts nicely into the soup, enhancing every spoonful. For the complete creamy chicken gnocchi soup experience, check out the Full Recipe. {{image_2}} You can easily make a creamy gnocchi soup without meat. Swap the chicken for mushrooms. Use 1 pound of diced mushrooms for a rich, earthy flavor. You can also add tofu for extra protein. It absorbs the flavors well and adds a nice texture. Use vegetable broth instead of chicken broth for a full vegetarian experience. If you want different proteins, try shrimp or sausage. Shrimp cooks quickly and brings a sweet taste. Use about 1 pound of peeled shrimp. For sausage, choose Italian sausage for a spicy kick. Cook it first, then add it to the soup. You can also use shredded rotisserie chicken. It saves time and adds great flavor. Mix in seasonal veggies for variety. In spring, add peas or asparagus. In summer, zucchini and corn brighten the soup. In fall, use squash or pumpkin for a cozy feel. In winter, root vegetables like parsnips or turnips add heartiness. Each season brings unique flavors, making the soup exciting year-round. Don't forget to check the Full Recipe for further details. To store leftover creamy chicken gnocchi soup, let it cool first. Pour the soup into an airtight container. It will stay fresh in the fridge for up to three days. If you want to keep it longer, consider freezing it. Reheat your creamy chicken gnocchi soup on the stove. Pour the soup into a pot and heat over medium heat. Stir it often to warm it evenly. You can also use a microwave. Place the soup in a microwave-safe bowl and heat it in one-minute intervals, stirring between each interval. Make sure it is hot all the way through. If you want to freeze the soup, follow these steps. First, let the soup cool completely. Pour it into freezer-safe bags or containers. Leave some space at the top for expansion. Label the bags with the date. You can freeze the soup for up to three months. When ready to enjoy, thaw it overnight in the fridge before reheating. Creamy chicken gnocchi soup lasts about three to four days in the fridge. Store it in an airtight container to keep it fresh. If you want to keep it longer, consider freezing it. Just remember, the texture may change slightly after freezing. Yes, you can use store-bought gnocchi! It’s a great time-saver. Fresh or frozen gnocchi works well in this soup. Just follow the package directions for cooking time. This helps ensure you get that perfect, soft texture. You can serve many tasty sides with chicken gnocchi soup. Here are a few ideas: - Garlic bread: It’s a classic choice and great for dipping. - Caesar salad: The crunch complements the soup perfectly. - Roasted veggies: These add color and nutrition to your meal. - Simple green salad: A light salad balances the creaminess of the soup. For the full recipe, check out the [Full Recipe]. In this article, we covered how to make creamy chicken gnocchi soup. We detailed the key ingredients and their prep. I provided cooking steps and shared tips to avoid common mistakes. You can also try variations and learn storage tips. Remember, customizing your soup makes it special. Enjoy this warm, filling meal anytime. Good food brings joy, and this soup is sure to please!](https://recipesinsight.com/wp-content/uploads/2025/07/614a901d-a806-465c-9bd2-26d2e58b1797.webp)
Warm your soul with my creamy chicken gnocchi soup! This dish blends tender chicken, fluffy gnocchi, and fresh veggies, creating
![- Shredded Coconut: This is the star of the show! You need sweetened shredded coconut for that chewy texture and rich flavor. - Sweetened Condensed Milk: This makes the macaroons sweet and sticky. It binds everything together and adds creaminess. - Extracts and Flavorings: Vanilla and almond extracts give a nice depth of flavor. They make each bite taste special. - Egg Whites and Salt: Egg whites add lightness. They help the macaroons rise, while a pinch of salt enhances the sweetness. - Chocolate Chips for Drizzling: If you love chocolate, melt some semi-sweet chocolate chips on top. It adds a nice contrast to the coconut. - Edible Garnishes: Get creative! You can use edible flowers or extra shredded coconut for decoration. They make your macaroons look fancy. With these ingredients, you can make the best Coconut Macaroons. Check out the Full Recipe for all the details on how to combine these ingredients into a delightful treat! First, you need to preheat your oven to 325°F (160°C). This step is very important. It helps the macaroons bake evenly. While the oven heats, line a baking sheet with parchment paper. The parchment keeps the macaroons from sticking. It also makes cleanup easier. In a large bowl, combine the sweetened shredded coconut, sweetened condensed milk, vanilla extract, and almond extract. Mix these dry and wet ingredients well. Make sure every bit of coconut gets coated with the sweet milk. This mixture gives the macaroons their rich taste. In a separate bowl, take your two large egg whites and sprinkle in the salt. Use an electric mixer to whip the egg whites until soft peaks form. This will take about 2-3 minutes. Soft peaks mean the egg whites should look fluffy but not too stiff. This step adds air to the batter, making the macaroons light. Gently fold the whipped egg whites into the coconut mixture. Be careful not to deflate the air bubbles. Use a tablespoon or cookie scoop to portion the mixture onto the prepared baking sheet. Space them about 1 inch apart. Bake these in the preheated oven for 15-20 minutes. Watch for the tops to turn golden brown. After baking, let them cool on the sheet for about 10 minutes. Then, transfer them to a wire rack to cool completely. If you want, drizzle melted chocolate over the cooled macaroons for extra flavor. [Full Recipe] Avoiding Overmixing the Batter When you mix the egg whites with the coconut, do it gently. Overmixing can make the macaroons tough. Aim for a light touch. Fold the egg whites into the coconut mixture until just combined. This keeps your macaroons fluffy and light. Baking Time and Temperature Set your oven to 325°F (160°C). This is the sweet spot for baking. Bake the macaroons for 15 to 20 minutes. Watch them closely. You want golden brown tops, not burnt edges. If you bake them too long, they will dry out. Best Practices for Storing Macaroons Let the macaroons cool completely before storing. Keep them in an airtight container. They stay fresh for up to a week. Place parchment paper between layers to avoid sticking. This keeps them nice and soft. Freezing Instructions You can freeze macaroons for up to three months. Place them in a single layer on a baking sheet first. Once frozen, transfer them to a freezer-safe bag. This way, they won’t clump together. Thaw them at room temperature before enjoying. Creative Ways to Present Coconut Macaroons Arrange the macaroons on a colorful plate. Sprinkle some extra shredded coconut on top for flair. You can also add edible flowers for a pop of color. Drizzle melted chocolate over them for a fancy touch. This makes your treats look as good as they taste. {{image_2}} Want to make your macaroons extra special? Try chocolate-dipped coconut macaroons. They add a rich layer of flavor. To make them chocolatey, melt semi-sweet chocolate chips in a microwave. Use 30-second intervals, stirring until smooth. After the macaroons cool, dip the bottoms in chocolate. Place them on parchment paper to set. This simple step gives your treats a gourmet touch. If you need gluten-free macaroons, you're in luck! The main ingredients are naturally gluten-free. Just ensure your shredded coconut and chocolate chips say “gluten-free” on the label. You can also make them without the almond extract. Use extra vanilla instead. This keeps the flavor bright and tasty. Now, everyone can enjoy these treats! Want to mix it up? Add different flavors to your macaroons. Citrus zest, like lemon or orange, brightens the taste. Just add a teaspoon of zest to the coconut mixture. For a nutty twist, add chopped nuts like almonds or pecans. This gives your macaroons a fun crunch. Play around with flavors to make them uniquely yours. Each variation will surprise your taste buds! Coconut macaroons are simple yet delicious treats. They mainly consist of: - 3 cups sweetened shredded coconut: This gives the macaroons their chewy texture. - 1 cup sweetened condensed milk: This adds sweetness and binds the mixture together. - 1 teaspoon vanilla extract: It enhances the flavor. - ¼ teaspoon almond extract: This gives a nice nutty taste. - 2 large egg whites: These help create a light texture. - ¼ teaspoon salt: It balances the sweetness. - ½ cup semi-sweet chocolate chips (optional): For drizzling or dipping. Each ingredient plays a key role in making these treats both tasty and enjoyable. If you want to make coconut macaroons without egg, you have some great options. Here are a few vegan alternatives: - Aquafaba: Use 3 tablespoons of aquafaba (the liquid from canned chickpeas) instead of egg whites. Whip it until it forms soft peaks. - Flaxseed Meal: Mix 1 tablespoon of flaxseed meal with 2.5 tablespoons of water. Let it sit for 5-10 minutes, then use it as your binder. - Chia Seeds: Similar to flaxseeds, mix 1 tablespoon of chia seeds with 2.5 tablespoons of water. Allow it to thicken. These substitutes work well and keep the texture light and fluffy. Coconut macaroons can last quite a while if stored correctly. Here are some tips: - At room temperature: They can last about 3-5 days in an airtight container. - In the fridge: They will stay fresh for up to 1 week. - Freezing: If you want to keep them longer, freeze them for up to 3 months. Make sure to wrap them well. By following these storage tips, you can enjoy your macaroons for a long time! Coconut macaroons are fun and easy to make. They bring joy to any gathering. Here’s how to create these delightful treats. Ingredients: - 3 cups sweetened shredded coconut - 1 cup sweetened condensed milk - 1 teaspoon vanilla extract - ¼ teaspoon almond extract - 2 large egg whites - ¼ teaspoon salt - ½ cup semi-sweet chocolate chips (optional, for drizzling) Instructions: 1. Preheat your oven to 325°F (160°C) and line a baking sheet with parchment paper. 2. In a large bowl, mix the shredded coconut, sweetened condensed milk, vanilla extract, and almond extract until well combined. 3. In a separate bowl, whisk the egg whites and salt until soft peaks form. This will take about 2-3 minutes with an electric mixer. 4. Gently fold the egg whites into the coconut mixture until just combined, being careful not to deflate the egg whites. 5. Use a tablespoon or cookie scoop to portion out the mixture onto the prepared baking sheet, spacing them about 1 inch apart. 6. Bake in the preheated oven for 15-20 minutes, or until the tops are golden brown. Keep an eye on them to avoid overbaking. 7. Remove from the oven and allow the macaroons to cool on the baking sheet for about 10 minutes. Then, transfer them to a wire rack to cool completely. 8. If you want a drizzle, melt the chocolate chips in a bowl in 30-second intervals, stirring in between until smooth. Once cooled, drizzle the melted chocolate over the macaroons. - Prep Time: 15 minutes - Total Time: 40 minutes - Servings: 20 macaroons Presentation is key. Arrange the macaroons on a decorative plate. Sprinkle with extra shredded coconut for added texture. You can also add a few edible flowers for an elegant touch. Enjoy your Coconut Bliss Macaroons! Coconut macaroons are simple yet delicious treats. We covered essential ingredients, including shredded coconut and sweetened condensed milk. I shared step-by-step instructions and tips for perfect results every time. Remember, presentation can make your macaroons shine even more. Explore fun variations to wow your guests. Whether you’re baking for a special occasion or just for fun, these tips will help you succeed. Enjoy your coconut macaroons, and let your creativity flow!](https://recipesinsight.com/wp-content/uploads/2025/07/3ab06778-886a-4b99-82bf-78c10c043886.webp)
Coconut macaroons are a sweet treat that everyone can enjoy. With just a few simple ingredients like shredded coconut and
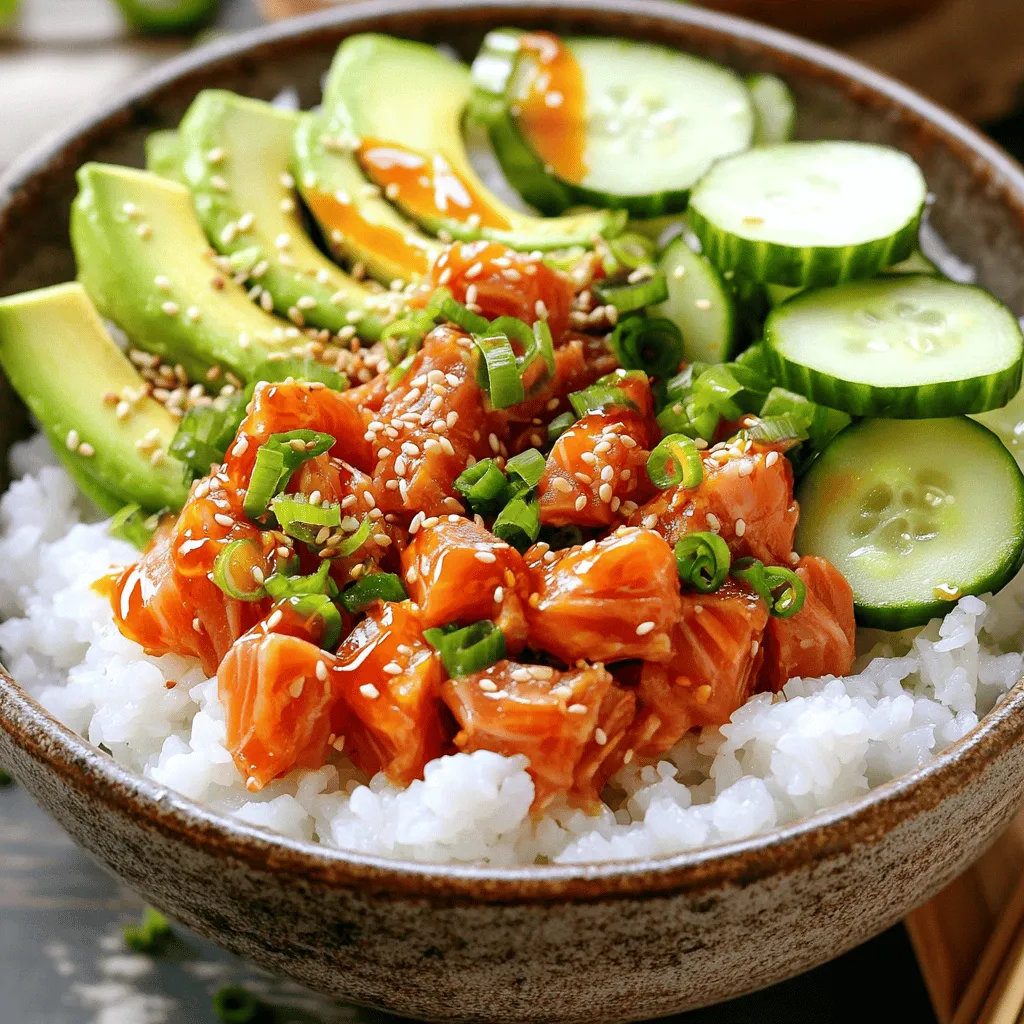
Are you craving a meal that’s both healthy and bursting with flavor? Let me introduce you to Spicy Tuna Sushi

Are you ready for a meal that’s crispy, cheesy, and full of flavor? Parmesan Crusted Chicken Tenders are just that!
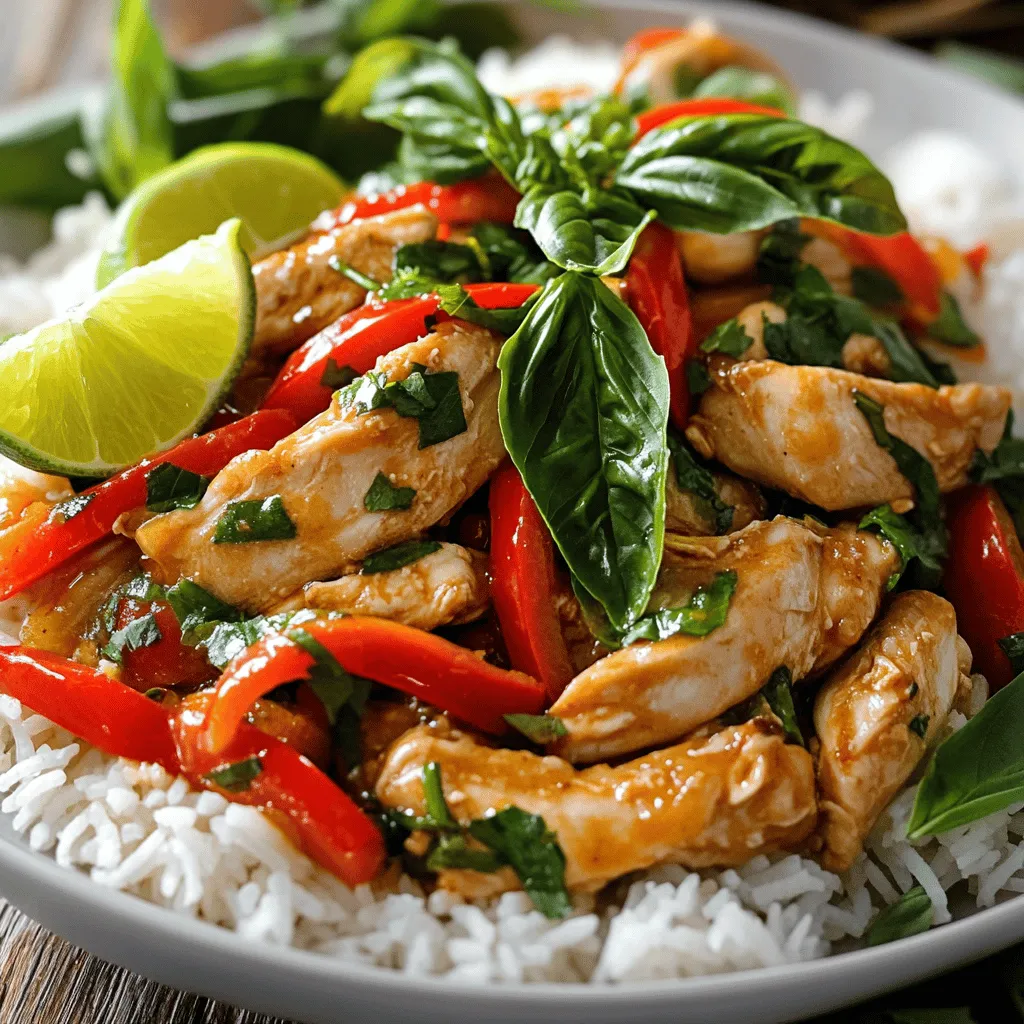
Ready to spice up your dinner routine? My Thai Basil Chicken stir-fry recipe brings bold flavors right to your table.

If you crave a drink that’s both refreshing and healthy, my Tropical Pineapple Smoothie is just what you need! Bursting
![- 1 cup orzo pasta - 4 cups vegetable broth - 1 tablespoon olive oil - 3 cloves garlic, minced - 1 cup heavy cream - 1 cup grated Parmesan cheese - 1/2 cup frozen peas - 1 teaspoon fresh thyme (or 1/2 teaspoon dried thyme) - Salt and pepper to taste - Fresh parsley, chopped (for garnish) - Alternatives for orzo pasta: You can use rice or quinoa. Both work well and add unique flavor. - Dairy-free options: Substitute heavy cream with coconut cream or nut milk. Use nutritional yeast for a cheesy flavor. - Fresh herbs vs. dried herbs: Fresh herbs add bright taste. Dried herbs are more concentrated, so use less. Cooking is all about flexibility. Tailor this dish to fit your needs! For the full recipe, check the section above. 1. Start by heating the vegetable broth. Pour it into a large saucepan. Set the heat to medium. Wait until it simmers. This takes about 5 minutes. 2. Once the broth is hot, add the orzo. Stir it gently. Cook for 8 to 10 minutes. Make sure to stir often. The orzo should be al dente, or firm to the bite. 1. In a separate skillet, heat the olive oil over medium heat. After a minute, add the minced garlic. Sauté it for 1 to 2 minutes. You want it fragrant, not brown. 2. When the orzo is ready, check for excess broth. If there is any, drain it. Transfer the orzo into the skillet with the garlic. Mix them together well. 3. Next, pour in the heavy cream. Stir until it blends smoothly. Let the mixture simmer for 2 to 3 minutes. This will thicken it slightly. 4. Gradually add the grated Parmesan cheese. Stir continuously. This helps it melt into the dish. 1. Add the frozen peas and thyme. Cook for another 2 to 3 minutes. You want the peas heated through. 2. Season with salt and pepper to taste. Mix everything well. 3. Once done, remove from heat. Let it rest for a couple of minutes. This helps the dish thicken even more. For the full recipe, check out the details above. Enjoy your creamy, flavorful orzo! To make the best creamy garlic Parmesan orzo, focus on two key areas: consistency and cooking time. - Achieving the right consistency: The sauce should be rich and creamy, not runny. Start by adding the heavy cream slowly. Stir as you add the cheese until it melts completely. Let it simmer a bit to thicken. You want a nice, smooth texture that coats the orzo well. - Avoiding overcooking the orzo: Orzo cooks quickly, so keep a close eye on it. Aim for al dente, which means it should still have a little bite. This helps it hold up in the creamy sauce. If you overcook it, the orzo can become mushy and lose its shape. How you serve your dish can make it even more appealing. Here are some easy tips: - Simple garnishing techniques: A sprinkle of fresh parsley adds color and freshness. You can also add more grated Parmesan on top for a cheesy finish. If you like a bit of crunch, drizzle a little olive oil for shine. - Serving suggestions for added flavor: Serve the orzo in a large bowl for family-style dining or on individual plates for a fancy touch. Pair it with grilled chicken or roasted veggies for a complete meal. You can even add a side salad for extra freshness. For the complete recipe, check the Full Recipe section above. Enjoy your cooking! {{image_2}} You can upgrade Creamy Garlic Parmesan Orzo with different proteins. Chicken, shrimp, or tofu work great. Simply cook your choice separately and mix it in at the end. This adds flavor and makes the dish heartier. You can also add vegetables for extra nutrition. Spinach, broccoli, or bell peppers are excellent options. Just sauté them with the garlic for a few minutes. They add color and health benefits to your meal. If you want to make a vegan version, swap the heavy cream and Parmesan cheese. Use coconut cream and nutritional yeast instead. These changes keep the dish creamy and tasty. For a gluten-free option, choose gluten-free orzo. Many brands now offer this type of pasta. Just follow the same cooking steps. Your dish will still be rich and flavorful. For the full recipe, check the [Full Recipe]. To keep your creamy garlic Parmesan orzo fresh, use an airtight container. Glass or BPA-free plastic containers work best. Store it in the fridge if you plan to eat it within three days. If you want to save it for longer, freezing is a great option. Just make sure to let it cool before you freeze it. When reheating, the safest methods are using the microwave or the stove. To keep it creamy, add a splash of broth or cream while reheating. Stir well to combine and avoid any lumps. Heat it slowly on low heat, stirring often. This will help maintain its rich texture. Enjoy your delicious dish again without losing its charm! Can I make this recipe ahead of time? Yes, you can prepare Creamy Garlic Parmesan Orzo ahead of time. Cook it fully and store it in the fridge. This dish tastes great even after a day. Just reheat it gently on the stove or in the microwave. What can I serve with Creamy Garlic Parmesan Orzo? You can pair this dish with many options. Grilled chicken or shrimp adds protein. A fresh salad or steamed veggies adds color and nutrition. Garlic bread is also a great choice! How long does Creamy Garlic Parmesan Orzo last in the fridge? Creamy Garlic Parmesan Orzo lasts about three to four days in the fridge. Store it in an airtight container to keep it fresh. Always check for any signs of spoilage before eating. Is orzo pasta healthy? Orzo pasta can be a healthy choice. It is made from durum wheat, which provides carbs for energy. Pair it with veggies and lean proteins to create a balanced meal. Be mindful of portion sizes to keep it healthy. Can I use other types of pasta? Yes, you can use other types of pasta. Small shapes like elbows or shells work well. Just adjust the cooking time based on the pasta you choose. How do I make it less creamy? To make it less creamy, reduce the amount of heavy cream. You can replace it with more broth or use a lighter milk. Adding extra veggies can also help balance the creaminess while enhancing flavor. Creamy Garlic Parmesan Orzo is a simple, tasty dish. You learned about the key ingredients and how to replace them. I shared clear steps for cooking and tips for perfecting the texture. You can make it your own with different flavors and dietary options. Store leftovers well and reheat properly to keep it creamy. Enjoy making this dish and impress your friends and family with your skills!](https://recipesinsight.com/wp-content/uploads/2025/07/f1dcd557-3166-4d30-8b38-073c961e53c1.webp)
If you’re looking for a dish that’s both simple and bursting with flavor, then Creamy Garlic Parmesan Orzo is your
![To make this hummus, you need some simple, fresh ingredients. Here’s what to gather: - 1 can (15 oz) chickpeas, drained and rinsed - 1 large roasted red pepper, peeled and seeded - 2 tablespoons tahini - 2 tablespoons lemon juice - 2 cloves garlic, minced - 2 tablespoons olive oil (plus more for drizzling) - ½ teaspoon ground cumin - Salt and pepper to taste These ingredients work together to create a creamy and flavorful dip. The roasted red pepper adds a sweet, smoky taste that pairs well with chickpeas. Tahini gives it a rich texture, while lemon juice brightens the flavor. To make your hummus look even more inviting, consider these tasty garnishes: - Paprika, for a pop of color - Fresh parsley, chopped, for a fresh touch - A drizzle of olive oil, for added richness These extras can elevate your dish and make it more appealing to the eye. Roasted red pepper hummus is versatile and pairs well with many foods. Here are some great serving ideas: - Warm pita bread - Fresh cut veggies like carrots, cucumbers, and bell peppers - As a spread on sandwiches or wraps These options not only enhance the flavors but also make for a healthy snack or meal. For the full recipe and step-by-step guide, check out the [Full Recipe]. To start, you need to roast the red pepper. If you use fresh peppers, place them under a broiler or on a grill. Roast them until they are charred on all sides. This should take about 10 minutes. After roasting, put the peppers in a bowl and cover it with plastic wrap. This steams them and makes peeling easier. After 10 minutes, peel off the skin and remove the seeds. Set the roasted red pepper aside for later. Next, you will blend the ingredients. In a food processor, add the drained chickpeas, the roasted red pepper, tahini, lemon juice, minced garlic, olive oil, and ground cumin. Make sure you have everything ready before you start. This blend gives your hummus its rich flavor. Now, it’s time to process the mix. Pulse the ingredients until they become smooth and creamy. If your hummus looks too thick, add a bit of water or more olive oil. Do this one tablespoon at a time. Keep blending until you reach the perfect consistency. Finally, taste the hummus and add salt and pepper to your liking. Blend briefly to mix it in. For the full recipe, check the Full Recipe section. Enjoy your homemade flavor! You can change the taste of your hummus easily. Add spices like smoked paprika for a smoky kick. Try fresh herbs like basil or cilantro for a green twist. For heat, add a pinch of cayenne or red pepper flakes. You can also mix in roasted garlic for a rich flavor. Blend in sun-dried tomatoes for a tangy bite. Experimenting lets you find your perfect blend. To keep your hummus fresh, store it in an airtight container. Place a thin layer of olive oil on top. This helps prevent it from drying out. Keep it in the fridge for up to a week. If you want to store it longer, freeze it! Portion it into small containers to use later. Just thaw in the fridge overnight before serving. Roasted red pepper hummus is great for any event. Serve it as a dip with pita chips or fresh veggies. It’s perfect for game day or a picnic. Spread it on sandwiches or wraps for a tasty lunch. For dinner parties, serve it in a bowl with a drizzle of olive oil. Add fresh herbs and paprika on top for a nice touch. You can find the full recipe in the article for more ideas. {{image_2}} To add heat to your hummus, mix in some spices. Try adding 1 to 2 teaspoons of cayenne pepper or a dash of hot sauce. Blend it in with the other ingredients. This will give your hummus a nice kick. You can adjust the heat to suit your taste. This spicy twist pairs well with pita chips or crunchy veggies. You can also infuse your hummus with fresh herbs. Basil, cilantro, or dill make great choices. Chop about ¼ cup of your chosen herb and blend it into the hummus. This adds a fresh flavor and makes the dish even more vibrant. It’s a fun way to change up the taste without much effort. While chickpeas are classic, you can try other beans. Black beans or white beans work well, too. Swap out the chickpeas for 1 can of your chosen beans. This gives a new flavor and texture. Each bean type will change the taste, so feel free to experiment. You might find a new favorite variation! For the full recipe, you can check the main article. Store your roasted red pepper hummus in an airtight container. Make sure the lid is tight. This keeps the hummus fresh and tasty. You can put a thin layer of olive oil on top. This helps seal in moisture and flavor. You can freeze hummus for later use. Use a freezer-safe container or bag. Leave some space for the hummus to expand as it freezes. When you’re ready to eat, thaw it in the fridge overnight. Stir it well before serving again. Refrigerated hummus lasts about 4 to 7 days. Check for changes in color or smell. If it looks dry or has mold, it’s time to toss it. Fresh hummus should smell light and nutty. For the best taste, eat it within a week. For the Full Recipe, refer back to the main article. To make roasted red pepper hummus from scratch, gather your ingredients. Use chickpeas, roasted red pepper, tahini, lemon juice, garlic, olive oil, and cumin. Blend the chickpeas and roasted red pepper in a food processor. Add tahini, lemon juice, garlic, and olive oil. Pulse until smooth. If it's too thick, add water or more olive oil. Season with salt and pepper to taste. This process takes about 20 minutes. For a detailed guide, check the Full Recipe. Yes, you can use jarred roasted red peppers. They save time and add great flavor. Just make sure to drain them well before adding to your hummus. This way, your hummus won't be too watery. It’ll still taste fresh and delicious. Hummus is a healthy choice packed with nutrients. It contains protein from chickpeas, which helps build muscle. Tahini adds healthy fats, while olive oil boosts heart health. Hummus also contains fiber, aiding digestion. Plus, it's low in calories, making it a great snack. Enjoy it with veggies or whole-grain pita for added nutrients. In this article, we explored how to make delicious roasted red pepper hummus. We covered the key ingredients, step-by-step preparation, and tips for perfecting the flavor. Customizing your hummus is easy, whether you prefer spicy or herb-infused options. We also discussed storage methods to keep your hummus fresh and tasty. Experimenting with different beans adds a fun twist. Enjoy creating this healthy dip for yourself or your guests. Make it a part of your meals, and relish the vibrant flavors it brings!](https://recipesinsight.com/wp-content/uploads/2025/07/552d879b-3ea1-4ddc-9e62-657218c3b37b.webp)
Are you ready to impress your taste buds with a vibrant Roasted Red Pepper Hummus? This simple recipe packs a