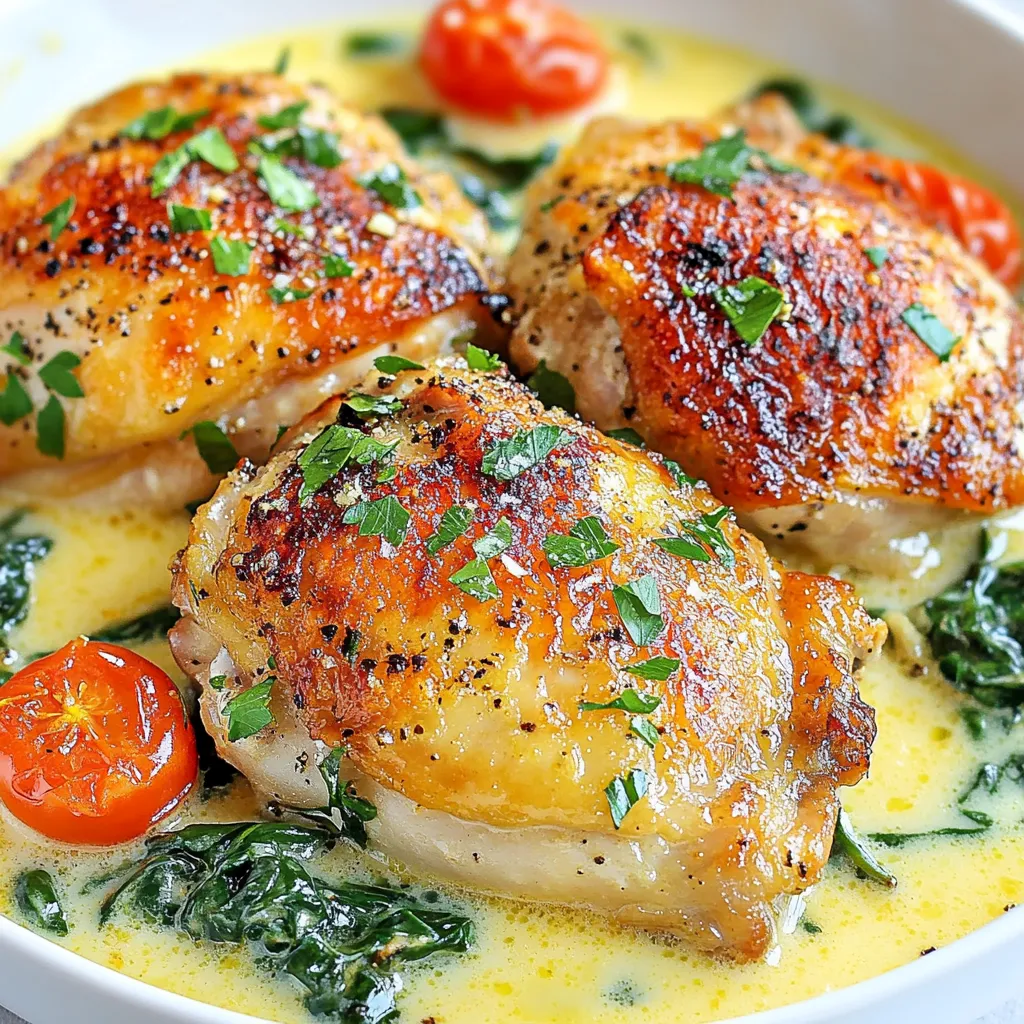
Garlic Parmesan Chicken Skillet Simple Dinner Delight
Looking for a quick and tasty dinner? You’re in the right place! This Garlic Parmesan Chicken Skillet brings together simple

Looking for a quick and tasty dinner? You’re in the right place! This Garlic Parmesan Chicken Skillet brings together simple
![- 1 cup polenta (cornmeal) - 4 cups vegetable broth - 1/2 cup grated Parmesan cheese - 2 tablespoons fresh parsley, finely chopped - 1 teaspoon dried oregano - 1 teaspoon garlic powder - Salt and pepper to taste - 2 tablespoons olive oil (for brushing) - Extra Parmesan cheese for garnish For Parmesan Herb Polenta Fries, you start with polenta. Polenta is simply cornmeal. It cooks up creamy and smooth. You also need vegetable broth to add flavor. The broth must boil before you add the polenta. Next, grated Parmesan cheese brings a salty and nutty taste. Fresh parsley adds a nice green touch and bright flavor. Dried oregano and garlic powder give your fries a savory kick. Salt and pepper help enhance all the flavors. Then, you'll brush the fries with olive oil. This helps them crisp up in the oven. Finally, sprinkle extra Parmesan cheese on top. It melts perfectly and adds more flavor. This combination makes the fries both crispy and delicious. If you want to see the full process, check out the Full Recipe. - Bring vegetable broth to a boil in a large saucepan. - Slowly whisk in the polenta, stirring until smooth. - Cook for about 20 minutes on low heat. Stir often to avoid lumps. - Remove the pot from heat and stir in Parmesan cheese and herbs. - Mix in garlic powder, salt, and pepper. - Spread the polenta into a greased baking dish. Smooth the top with a spatula. - Let it cool for 30 minutes until it sets. - Preheat your oven to 425°F (220°C). - Cut the set polenta into fries or sticks. - Arrange the fries on a lined baking sheet. - Lightly brush each fry with olive oil. - Bake for 25 to 30 minutes, flipping halfway, until crispy and golden. - Sprinkle with extra Parmesan cheese before serving. For the complete recipe, check the Full Recipe. To get that perfect crispiness, preheat your oven to 425°F (220°C). A hot oven helps the fries cook evenly. When the fries bake, flip them halfway through. This way, both sides brown nicely. For dipping, try marinara or aioli. These sauces add a nice touch to the fries. You can also pair these fries with grilled chicken or a fresh salad. They work well as a side dish or a snack. Avoid overcooking the polenta. Cook it just right so it stays creamy. Also, let the polenta sit and set before cutting. This makes it easier to slice into fries. If you skip this step, the fries may fall apart. For the full recipe, check the [Full Recipe]. Enjoy making these tasty treats! {{image_2}} You can change the taste of your polenta fries by adding different spices. For a kick, sprinkle in paprika or cayenne. Both spices add heat and flavor. If you want a milder taste, consider using smoked paprika for a smoky note. You can also swap out the cheese. While Parmesan is classic, cheddar or feta can be fun alternatives. Cheddar offers a creamy richness, while feta adds a salty tang. Try mixing different cheeses for a unique blend. If you want a different base, use chicken broth instead of vegetable broth. This change adds a savory depth to your fries. If you need a gluten-free option, polenta itself is naturally gluten-free. Just make sure your broth and any added spices are also gluten-free. You can make your polenta fries a loaded dish. Top them with melted cheese, jalapeños, or even chili. This makes a hearty snack or meal. For a fresh touch, serve your fries with herbs or microgreens. Chopped parsley or basil can brighten the dish. A sprinkle of fresh herbs not only adds flavor but also makes it look more appealing. For the full recipe, check out the detailed instructions provided above, and enjoy exploring these variations! To keep your leftover polenta fries tasty, store them in an airtight container. Place parchment paper between layers to avoid sticking. This method keeps them fresh. I recommend using glass or plastic containers. They work well and help you see what’s inside. You can freeze cooked polenta fries for later use. Allow them to cool completely before packing. Place them in a freezer-safe bag or container. Remove as much air as possible to prevent freezer burn. To thaw, just leave them in the fridge overnight. Reheat in the oven at 375°F (190°C) until hot and crispy again. In the fridge, these fries last about 3-4 days. Always check for signs of spoilage. If they smell off or look moldy, it's best to toss them. Enjoy your Parmesan herb polenta fries fresh for the best taste. For the full recipe, check the earlier sections! To check if your polenta fries are done, look at their color and texture. They should be golden brown and crispy on the outside. You can poke one fry with a fork. If it feels firm and has a nice crunch, they're ready to eat. The perfect fry has a soft inside and a crispy shell. Yes, you can prepare polenta fries ahead of time! First, cook the polenta as directed in the Full Recipe. After it cools and sets, cut it into fries. Then, store them in an airtight container in the fridge. When you’re ready, simply bake them. This makes it easy to enjoy a quick snack or side dish anytime. You can serve polenta fries with many tasty options. They pair well with marinara sauce or creamy aioli for dipping. You can also serve them alongside grilled meats or roasted veggies. For a fun twist, top them with fresh herbs or sprinkle some feta cheese on top. Enjoy exploring different flavors with your fries! In this blog post, we covered how to make tasty Parmesan Herb Polenta Fries. You learned about the main ingredients, seasonings, and step-by-step instructions. Tips for perfecting texture and storing leftovers were shared too. Remember to avoid common mistakes like overcooking the polenta. Experiment with flavors or serve them as a loaded dish for more fun. Enjoy your cooking, and make these fries a new favorite in your home!](https://recipesinsight.com/wp-content/uploads/2025/07/aabe7dee-46db-496b-9e6f-fec7f70e9a39.webp)
Looking for a tasty twist on classic fries? Try my Parmesan Herb Polenta Fries! These crispy and savory delights are
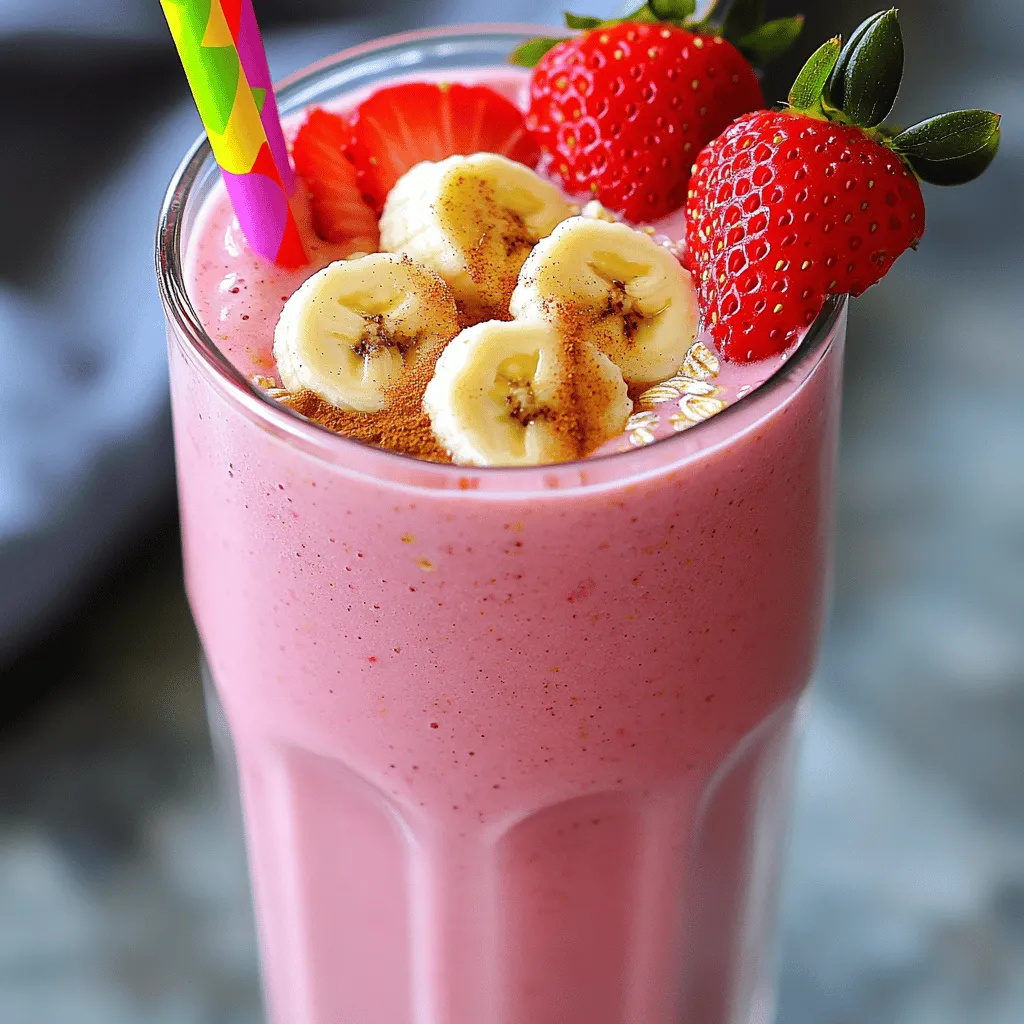
Looking for a delicious and healthy snack? Try my Strawberry Banana Oat Smoothie! It’s packed with fresh fruits, creamy oats,
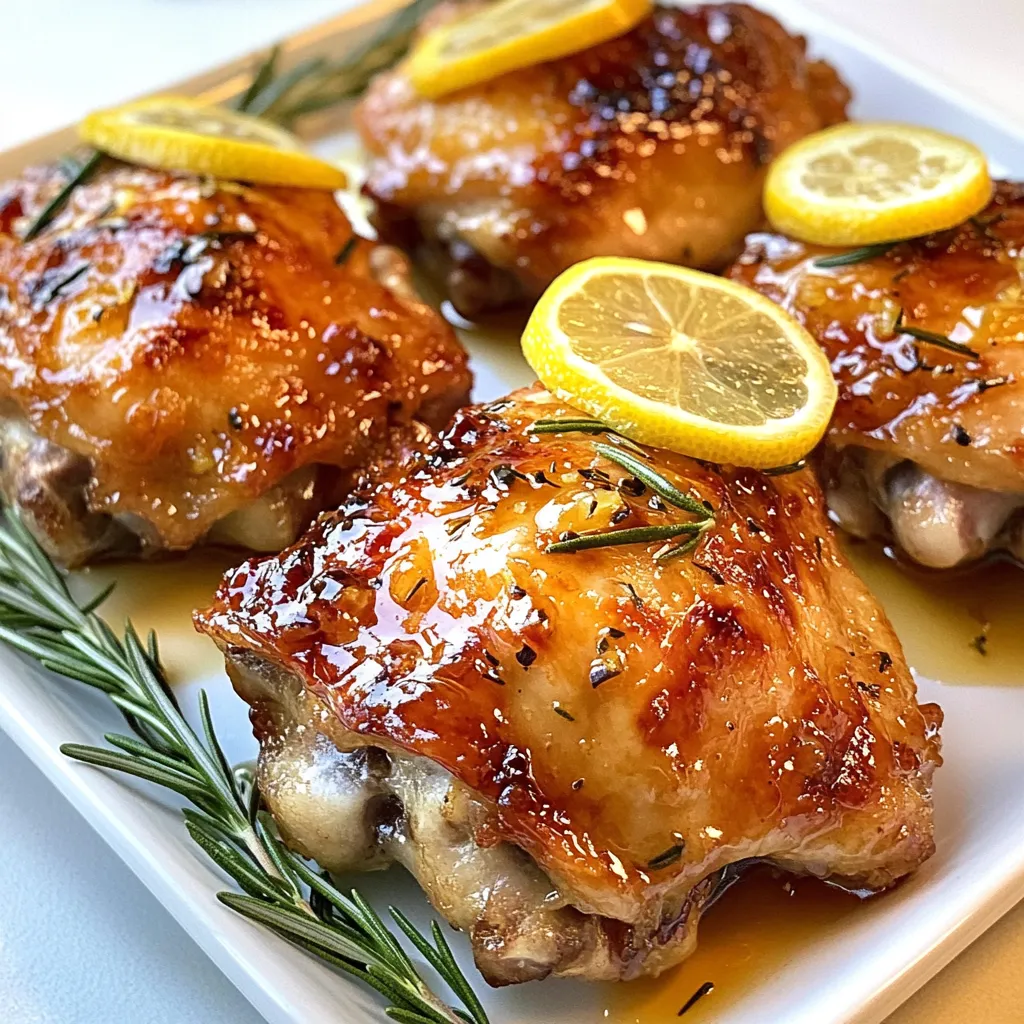
![- 4 skin-on, bone-in chicken thighs - 1/4 cup honey - 4 cloves garlic, minced - 2 tablespoons soy sauce (low sodium) - 2 tablespoons apple cider vinegar For this dish, chicken thighs are the star. Their juicy meat stays tender during cooking. Honey adds a sweet touch, while garlic gives a strong flavor. Soy sauce brings saltiness, and apple cider vinegar adds brightness. Each ingredient plays a role in making this dish amazing. - 1 tablespoon grated fresh ginger - 1 teaspoon sesame oil - Salt and pepper to taste Ginger adds warmth and depth. Sesame oil gives a nutty flavor that enhances the dish. Salt and pepper are simple but key to brightening the taste. These seasonings help balance the sweetness of the honey and the richness of the chicken. - 1 tablespoon chopped fresh cilantro or parsley - Sesame seeds Garnishes make the dish look pretty and fresh. Chopped cilantro or parsley adds color and flavor. Sesame seeds provide a nice crunch on top. These final touches make your honey garlic chicken thighs shine on the plate. For the complete details on how to combine these ingredients into a mouthwatering meal, check out the Full Recipe. To make the marinade, mix the honey, minced garlic, soy sauce, apple cider vinegar, grated ginger, and sesame oil in a bowl. This mix gives the chicken a sweet and tangy flavor. You should marinate the chicken thighs for at least 30 minutes. If you can, let them soak for up to 2 hours. This extra time helps the flavors soak in better. Preheating is key for even cooking. Set your oven to 400°F (200°C). A lined baking sheet is important too. It makes cleanup easy and prevents sticking. Use aluminum foil or parchment paper to line it. Place the marinated chicken thighs on the baking sheet, skin-side up. Pour any leftover marinade on top. Bake for 25 to 30 minutes. Always check the chicken's internal temperature. It should reach 165°F (75°C). This ensures it's safe to eat and the skin gets crispy. For a nice sticky glaze, switch your oven to broil for the last 3 to 5 minutes. Watch closely to prevent burning the garlic. This method gives the chicken a lovely caramelized finish. After baking, take the chicken out and let it rest for about 5 minutes. This helps the juices settle. When serving, garnish with chopped fresh cilantro or parsley and sprinkle sesame seeds on top. This adds color and extra flavor. For the complete recipe, check the Full Recipe section. To get the best taste, marinate your chicken thighs. The mix of honey, garlic, soy sauce, and ginger adds a lot of flavor. I recommend letting the chicken soak in the marinade for at least 30 minutes. If you have time, a few hours will really boost the taste. Always choose skin-on, bone-in chicken thighs. They stay juicier and have more flavor during cooking. Crispy skin is a must for this dish. To achieve this, bake the chicken at a high temperature. I suggest 400°F (200°C) for the best results. If you have a convection oven, use it! It helps circulate the heat and makes the skin crispy. Place the chicken on a lined baking sheet, skin-side up, and pour any leftover marinade on top. Honey garlic chicken thighs pair well with many sides. I love serving them with steamed rice or roasted vegetables. You can also add a side salad for freshness. Dipping sauces like sweet chili sauce or a tangy yogurt sauce can enhance the meal. For a fun touch, sprinkle some sesame seeds and fresh herbs on top before serving. Check out the Full Recipe for more ideas! {{image_2}} To add some heat, try spicy honey garlic chicken thighs. You can mix in chili flakes or sriracha to the marinade. Start with a teaspoon of chili flakes for a mild heat. If you love spice, use more! When marinating, let the chicken sit for at least one hour. This helps the spice blend with the honey and garlic. The longer you marinate, the more flavor you get. You can turn this dish into a quick stir-fry. Start by cutting the chicken thighs into bite-sized pieces. Stir-fry them in a hot pan with oil until they brown. Add your favorite vegetables to the mix. Bell peppers, broccoli, and snap peas work well. Toss in the honey garlic sauce during the last few minutes. This gives everything a sweet and sticky glaze. If you prefer grilling, adjust your method. Start by marinating the chicken as usual. Preheat your grill to medium heat. Cook the chicken thighs for about 6-8 minutes on each side. Use a meat thermometer to check for doneness. The internal temperature should reach 165°F. Grilling gives the chicken a nice char and adds depth to the flavor. For the full recipe, check the details above and enjoy your cooking! To store leftovers, place the chicken thighs in an airtight container. This keeps them fresh and moist. You can store them in the fridge for up to three days. If you want to enjoy them later, make sure to cool them first. This helps to keep the taste and texture just right. For freezing chicken thighs, wrap them tightly in plastic wrap or foil. Then, place them in a freezer-safe bag or container. This helps prevent freezer burn. You can freeze them for up to three months. When you are ready to eat, thaw them in the fridge overnight. This gradual thawing keeps the chicken juicy. The best way to reheat chicken thighs is in the oven. Preheat your oven to 350°F (175°C). Place the chicken on a baking sheet and cover it with foil. Heat it for about 15-20 minutes. This method keeps the skin crispy while warming the meat. If you want to reheat them quickly, use a microwave. Just be careful not to overcook them, as this can make the chicken dry. Marinate the chicken thighs for at least 30 minutes. For best flavor, aim for 1 to 2 hours. This helps the meat soak up the sweet and savory notes of the marinade. Longer marination gives you a deeper taste. Yes, you can use boneless chicken thighs. They cook faster than bone-in thighs. Expect to reduce the cooking time by about 5 to 10 minutes. Boneless thighs also offer a different texture and a more tender bite. Serve your chicken with rice, steamed veggies, or a fresh salad. Mashed potatoes or roasted sweet potatoes also pair well. These sides balance the sweet and savory flavors of the dish. The chicken is done when it reaches an internal temperature of 165°F (75°C). Use a meat thermometer inserted into the thickest part. The juices should run clear, not pink, to ensure it's fully cooked. Yes, you can prep the chicken thighs ahead of time. Marinate them the night before and store them in the fridge. This saves you time when you're ready to cook. Just remember to let them sit at room temperature for 15 minutes before baking. For the complete honey garlic chicken thighs recipe, check out the [Full Recipe]. You learned how to make delicious honey garlic chicken thighs. From marinating to baking, each step is clear. Use the right ingredients for the best taste. Remember to rest the chicken before serving for juicy meat. Feel free to explore variations like spicy or grilled options. Store leftovers correctly to enjoy later. This easy recipe fits any meal, and the flavors will impress. Try it today and enjoy every bite.](https://recipesinsight.com/wp-content/uploads/2025/07/2569af6b-c71a-4623-b3c0-94532a02ad06.webp)
Honey garlic chicken thighs are a delicious and simple dish you’ll love to make. With juicy meat, sweet honey, and
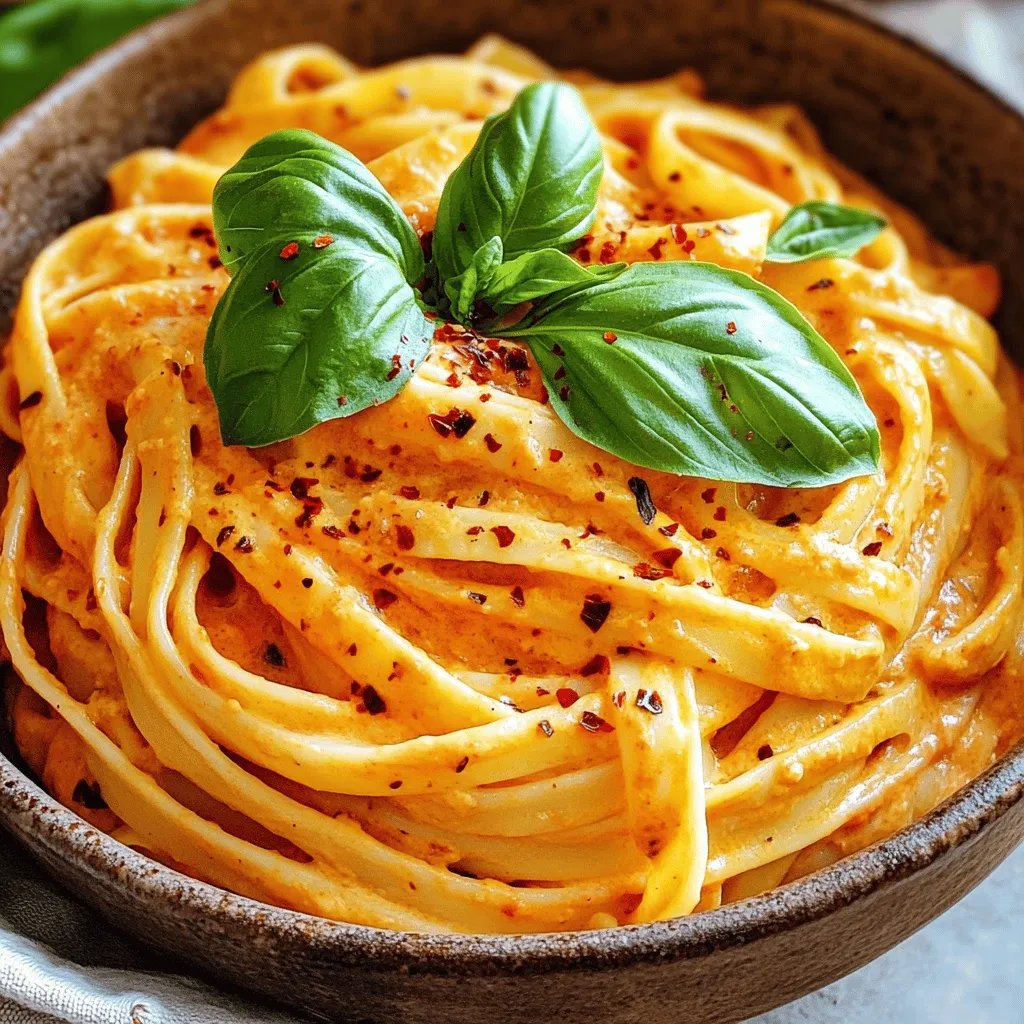
Looking for a quick and tasty meal? You’ve found it! My creamy roasted red pepper pasta is easy to make

Craving a sweet treat that’s simple to make? Let’s dive into the world of Chocolate Chip Cookie Dough Bites! With
![- 4 medium zucchinis - 2 cups cherry tomatoes, halved - 1 cup fresh mozzarella balls, halved - 1/4 cup fresh basil, chopped - 2 cloves garlic, minced - 1 tablespoon olive oil - Salt and pepper to taste - 1 teaspoon balsamic glaze (optional) When making Margherita zucchini boats, fresh ingredients shine. Zucchinis serve as the perfect base. They hold flavors well and have a nice texture. Cherry tomatoes add sweetness. They burst in your mouth with each bite. Fresh mozzarella brings creaminess and richness. Basil adds a fragrant herbal note. It ties all the flavors together. Garlic provides a sharp kick that enhances the dish. A drizzle of olive oil enriches the overall taste. Adding salt and pepper boosts all these flavors. You may choose to finish with balsamic glaze. It adds a tangy sweetness that balances the dish. The choice is yours, but I love the contrast it creates. - Baking dish - Mixing bowl - Spoon for scooping - Aluminum foil Having the right tools makes cooking easier. A baking dish is essential to hold your zucchini boats. A mixing bowl helps you combine the filling without mess. Use a spoon to scoop the zucchini centers. This creates space for the delicious filling. Finally, aluminum foil covers the dish while it bakes. This keeps moisture in and helps cook the zucchinis evenly. With these ingredients and tools ready, you're set to create this flavorful summer delight! For the full recipe, check back to see how to bring it all together. - Preheat the oven to 375°F (190°C). - Cut the zucchinis in half lengthwise. Scoop out the centers to form boats. Place them in a baking dish. - In a mixing bowl, combine the halved cherry tomatoes, mozzarella balls, minced garlic, and chopped basil. - Drizzle with olive oil. Season with salt and pepper. Toss this mixture well. - Fill each zucchini with the prepared mixture. Pack it tightly to fit. - Cover the baking dish with aluminum foil and bake for 20 minutes. - After 20 minutes, remove the foil. Bake for another 10-15 minutes until the zucchinis are tender and cheese is melted. - If desired, drizzle with balsamic glaze before serving. Garnish with more fresh basil for extra appeal. You can find the full recipe with all the details to create these tasty Margherita Zucchini Boats. To check if your zucchini is done, gently pierce it with a fork. If it slides in easily, it’s ready. If not, give it a few more minutes. Zucchini size matters too. Larger zucchinis need more time to cook. Adjust the baking time by adding 5-10 minutes on larger ones. This keeps them tender without getting mushy. Seasonings can make your Margherita zucchini boats shine. I love using fresh basil, oregano, and a pinch of red pepper flakes. They add depth and warmth. For oils, I recommend a good extra virgin olive oil. It brings out the flavors of the tomatoes and cheese. A drizzle of balsamic glaze adds a nice touch of sweetness, too. Pair these boats with a light salad or crusty bread. A fresh arugula salad with lemon vinaigrette complements the flavors well. For presentation, serve the boats on a colorful platter. Garnish with extra basil leaves. This makes the dish look fresh and inviting. For a bit of crunch, offer some toasted pine nuts on the side. For the full recipe, check out the [Full Recipe]. {{image_2}} You can change the cheese in your Margherita Zucchini Boats. For a twist, use feta or goat cheese. These cheeses add different flavors and textures, enhancing your dish. You can also go dairy-free with cashew cheese or nutritional yeast. If you want to try other vegetables, bell peppers or eggplant work great. They have a nice texture and soak up flavors well. You can even use mushrooms for a hearty filling. Just adjust the cooking time if needed. To make the recipe gluten-free, ensure your ingredients do not contain gluten. Most cheeses and vegetables are safe. Just check any pre-made items for hidden gluten. For vegan options, replace cheese with a vegan cheese alternative. You can also use mashed avocado for creaminess or add more veggies to the filling. This keeps it tasty and satisfying. Using seasonal ingredients makes your Margherita Zucchini Boats fresh and fun. In summer, add fresh corn or diced bell peppers. In fall, try adding roasted butternut squash for a sweet touch. Adjusting the recipe for holidays can also be fun. For a festive look, add cranberries or pine nuts for a pop of color and flavor. These little changes can make a big impact on your dish. For the full recipe, refer to the previous section. To keep your Margherita zucchini boats fresh, store them in an airtight container. This method helps keep moisture in and prevents them from drying out. You can refrigerate the leftovers for up to three days. After three days, the taste and texture may decline. If you want to save the zucchini boats for later, freezing is a great option. First, let the boats cool completely. Place them in a single layer on a baking sheet. Freeze them for a few hours until firm. After that, pack them in freezer bags. They can stay frozen for up to three months. To thaw, move them to the fridge overnight. Reheat in the oven at 350°F (175°C) until warm. To heat your zucchini boats without losing flavor, use the oven. Set it to 350°F (175°C). Place the boats on a baking sheet and cover with foil. This helps keep them moist during reheating. Bake for about 15-20 minutes. If you have leftover filling, use it in salads or as a topping for pasta. This way, you can enjoy the flavors in a new dish. Can I use larger zucchinis? Yes, you can use larger zucchinis. Just make sure they are firm and fresh. Larger zucchinis may need more cooking time. Check for tenderness with a fork. What can I substitute for mozzarella? You can use other cheeses like goat cheese or ricotta. Both offer great flavors. Vegan cheese also works if you want a dairy-free option. How do I know when the zucchinis are done cooking? The zucchinis are done when they are tender and the cheese is melted. Use a fork to poke them. If they feel soft, they are ready. Can I prepare these boats ahead of time? Yes, you can prepare the filling a day in advance. Just store it in the fridge. When ready, fill the zucchinis and bake them. What if I don’t have balsamic glaze? If you don’t have balsamic glaze, use balsamic vinegar instead. Drizzle it over the finished dish. It will add similar flavor. Calories and macronutrient breakdown One serving has about 200 calories. It includes 10g of fat, 15g of carbs, and 8g of protein. This dish is filling and nutritious. Health benefits of the ingredients used Zucchini is low in calories and high in vitamins. Tomatoes are rich in antioxidants. Fresh basil adds flavor and health benefits too. These ingredients make Margherita Zucchini Boats a healthy choice. This blog post walks you through making tasty Margherita zucchini boats. You learned about the key ingredients, kitchen tools, and easy steps to prepare this dish. We covered helpful tips for cooking and enhancing flavors. I shared variations for different diets and seasonal changes, along with storage advice. In the end, zucchini boats are not just fun to cook; they are also healthy and versatile. You can enjoy them anytime. Try this recipe and make it your own!](https://recipesinsight.com/wp-content/uploads/2025/07/818b044c-d38f-48c9-baae-d6cca0d13969.webp)
Looking for a delicious way to enjoy summer veggies? Try my Margherita Zucchini Boats! These easy-to-make treats are packed with
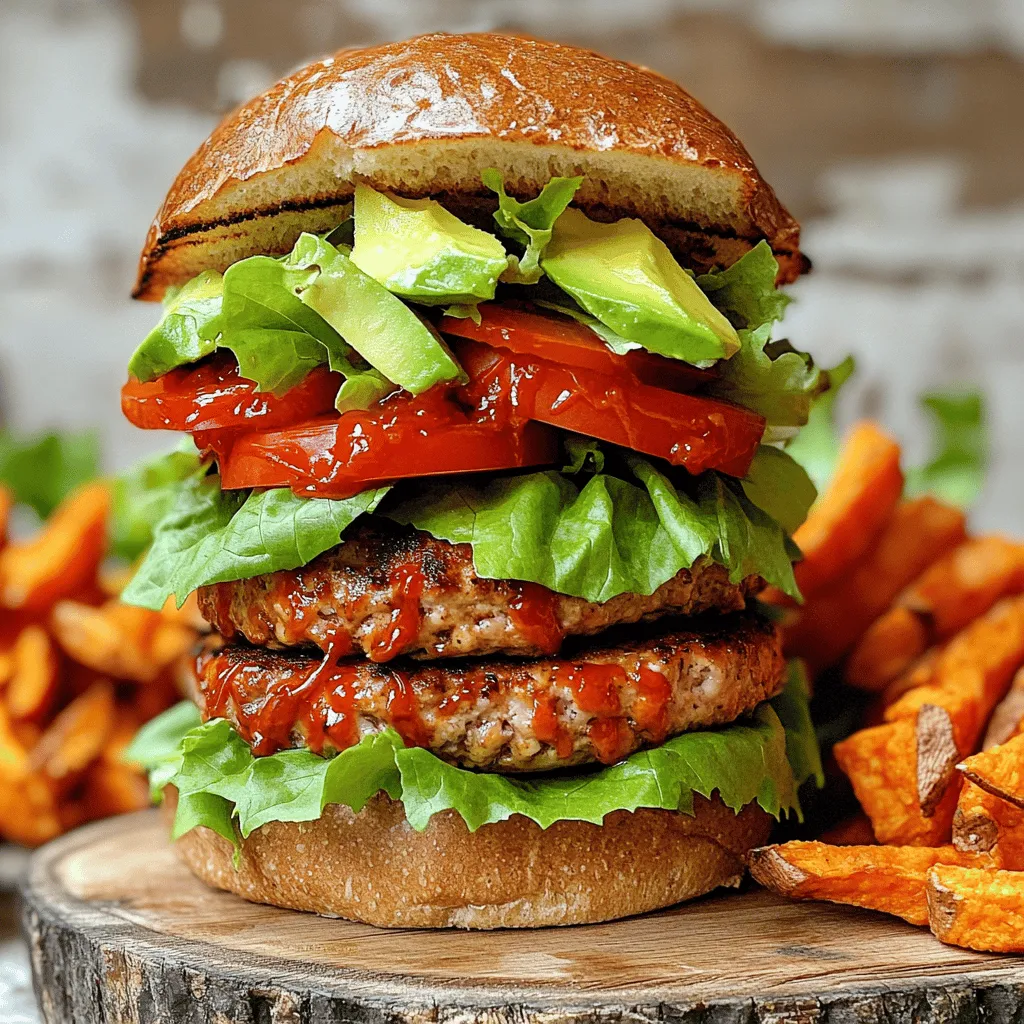
Are you ready to spice up your dinner? These Spicy Sriracha Turkey Burgers pack a punch of flavor. They are

Ready to taste the deliciousness of Greek chicken gyro wraps? This tasty and simple recipe is perfect for any meal.
Looking to impress at dinner? These Rosemary Lemon Chicken Thighs are your answer! Juicy, flavorful, and easy to make, this