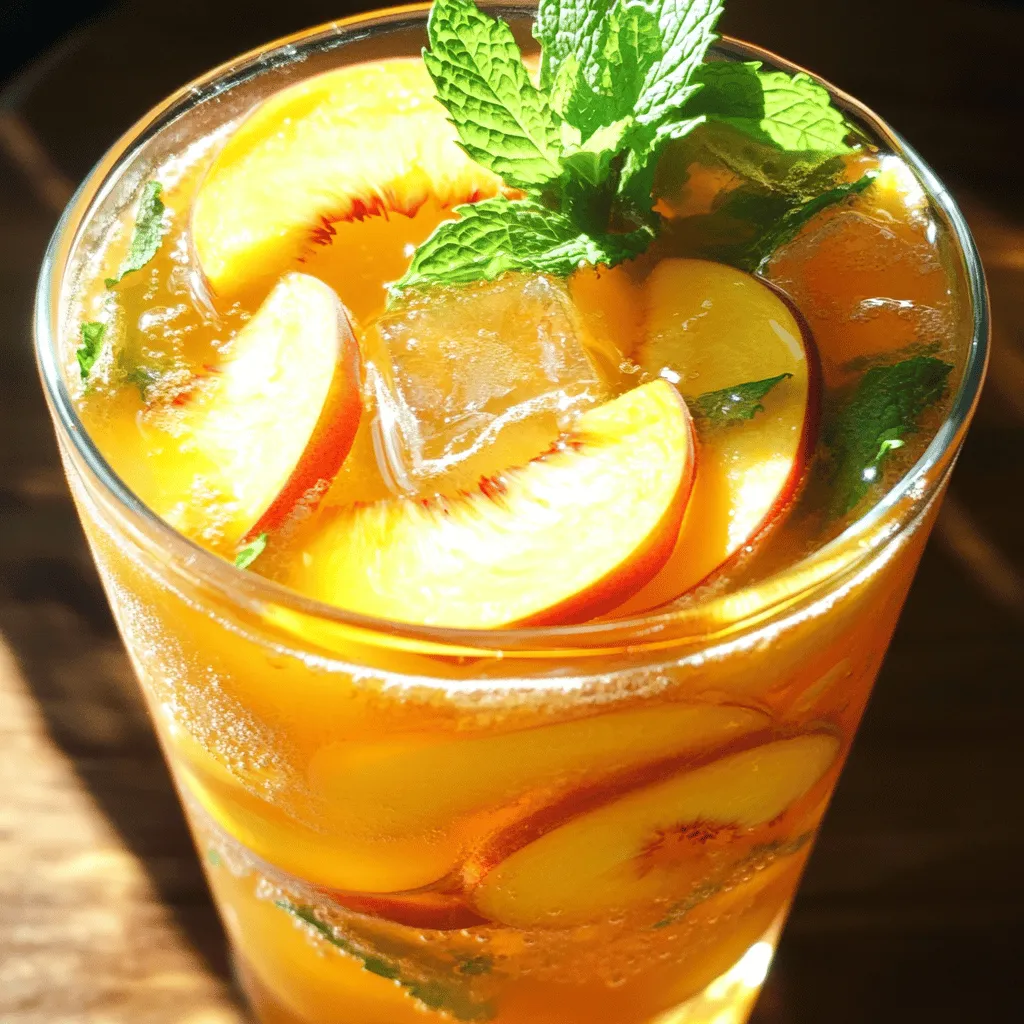
Ginger Peach Iced Tea Refreshing Summer Drink Recipe
Looking for a refreshing drink to chill out this summer? Try my Ginger Peach Iced Tea! This tasty blend combines

Looking for a refreshing drink to chill out this summer? Try my Ginger Peach Iced Tea! This tasty blend combines
![- 2 ripe bananas, frozen - 2 tablespoons creamy peanut butter - 1 tablespoon unsweetened cocoa powder - 1 cup almond milk (or milk of choice) - 1 tablespoon honey or maple syrup (optional) - 1/2 teaspoon vanilla extract - A pinch of salt - Ice cubes (optional) The first step is to gather your ingredients. You want to use ripe bananas. Frozen bananas give the shake a smooth texture. Next up is creamy peanut butter. This adds a rich flavor and creaminess to your shake. Unsweetened cocoa powder is another key ingredient. It gives the shake a deep chocolate taste without added sugar. You can choose almond milk or any milk you like. This helps to blend everything smoothly. If you want it sweeter, add honey or maple syrup. You can skip this if you prefer less sweetness. Vanilla extract adds a nice warm flavor. A pinch of salt will enhance all the tastes. Lastly, you can add ice cubes if you want a thicker shake. With these ingredients ready, you are set to enjoy a delicious Chocolate Peanut Butter Banana Shake. For the full recipe, check out the complete guide above. - Step 1: Peel and break frozen bananas into chunks. This makes blending easier. Use ripe bananas for the best flavor. - Step 2: Combine ingredients in the blender. Add the banana chunks, creamy peanut butter, cocoa powder, and almond milk. If you like it sweet, add honey or maple syrup. - Step 3: Blend until smooth and creamy. Start on low speed, then increase. You want everything mixed well. - Step 4: Adjust sweetness and blend again. Taste your shake. If it needs more sweetness, add a bit more honey or syrup. Blend again to mix. - Step 5: Serve and garnish as desired. Pour the shake into tall glasses. You can add a sprinkle of cocoa powder or drizzle extra peanut butter on top for fun. This shake is quick and easy, perfect for breakfast or a snack. Enjoy your Chocolate Peanut Butter Banana Shake! For the full recipe, check out the recipe section above. To get a smooth shake, use a high-speed blender. This tool helps blend all the ingredients well. If you want a thicker shake, start with less almond milk. You can always add more as you blend. You can adjust the sweetness based on your taste. If you like things sweeter, add more honey or maple syrup. You can also try non-dairy options. Almond milk works great, but soy or oat milk can be used too. Make your shake look extra special. You can garnish it with cocoa powder or a drizzle of peanut butter. Adding these touches makes it more fun to drink. Serve it in tall glasses to show off the creamy texture. For more details on making this shake, check out the Full Recipe. {{image_2}} You can easily make a vegan version of this shake. Just swap honey for maple syrup. Maple syrup gives a nice sweet taste without using animal products. This simple change fits perfectly with a vegan diet. It keeps the shake tasty while making it plant-based. If you want a protein boost, add protein powder or Greek yogurt. Protein powder mixes well and increases protein content. Greek yogurt adds creaminess and thickness. Both options keep the shake delicious and filling. You can enjoy it as a meal or a snack after workouts. Feel free to get creative and add more flavors. You can mix in spinach for a green boost. Spinach adds nutrients without changing the taste much. Berries are another great choice. They bring fresh flavors and natural sweetness. Just throw in a handful of your favorite berries to make a fruity twist. For the full recipe, visit the [Full Recipe] section. To keep your shake fresh, store it in the fridge. Use an airtight container. It will stay good for up to two days. When you want to enjoy it again, give it a good shake. You may need to blend it again to mix everything well. If you want to save the shake for later, freezing is a great option. Pour the shake into ice cube trays. Once frozen, pop the cubes into a freezer bag. This way, you can enjoy a quick treat anytime. When you want a shake, blend a few cubes with some almond milk. To reblend the shake, add a splash of milk. Blend until smooth and creamy again. Avoid heating it in the microwave. This can change the taste and texture. Enjoy your shake cold for the best flavor. To make a thicker shake, add more frozen bananas. You can also use ice cubes. Ice adds coldness and texture. Start with two bananas and adjust as needed. Blend slowly, adding almond milk one splash at a time. This method helps you control the thickness. Yes, you can use fresh bananas! However, using frozen bananas gives a creamier texture. Fresh bananas will make your shake thinner. If you use fresh ones, add ice cubes to get that thick, cold shake. Both options taste great, so pick what you have. This shake is packed with nutrients. Bananas provide potassium and fiber. Peanut butter adds protein and healthy fats. Cocoa powder offers antioxidants. Almond milk keeps it dairy-free and low-calorie. Together, they make a balanced snack or meal. This shake fuels your body and satisfies cravings. Yes, you can prep this shake ahead. Blend the ingredients and store in the fridge. It stays good for up to 24 hours. Just remember to shake or stir well before drinking. For longer storage, pour it into an ice cube tray. You can freeze it and blend later. Enjoy your shake fresh or frozen! In this blog post, we explored how to make a delicious chocolate peanut butter banana shake. We covered the ingredients, detailed instructions, helpful tips, and variations. You learned how to customize your shake for taste and nutrition. Remember, a high-speed blender helps create a smooth mix. Experiment with flavors and additives to match your preferences. This shake is easy and fun to make. Enjoy your tasty treat now or save some for later!](https://recipesinsight.com/wp-content/uploads/2025/07/cbbc344b-7460-41d0-8146-e6707bfb2869.webp)
Are you ready to indulge in a creamy, dreamy treat? This Chocolate Peanut Butter Banana Shake is the perfect blend
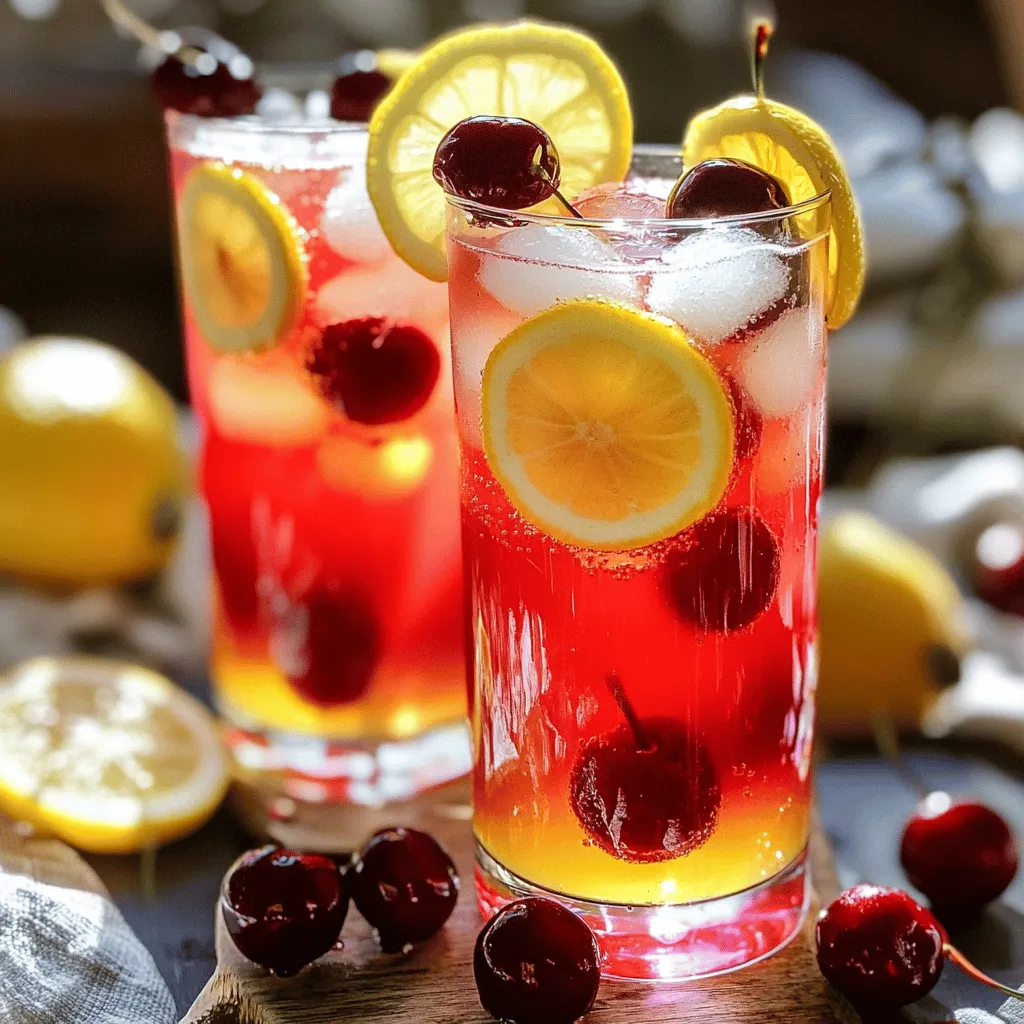
Summer is here, and it’s time to cool down with a Cherry Lemonade Cooler! This refreshing drink blends sweet cherries
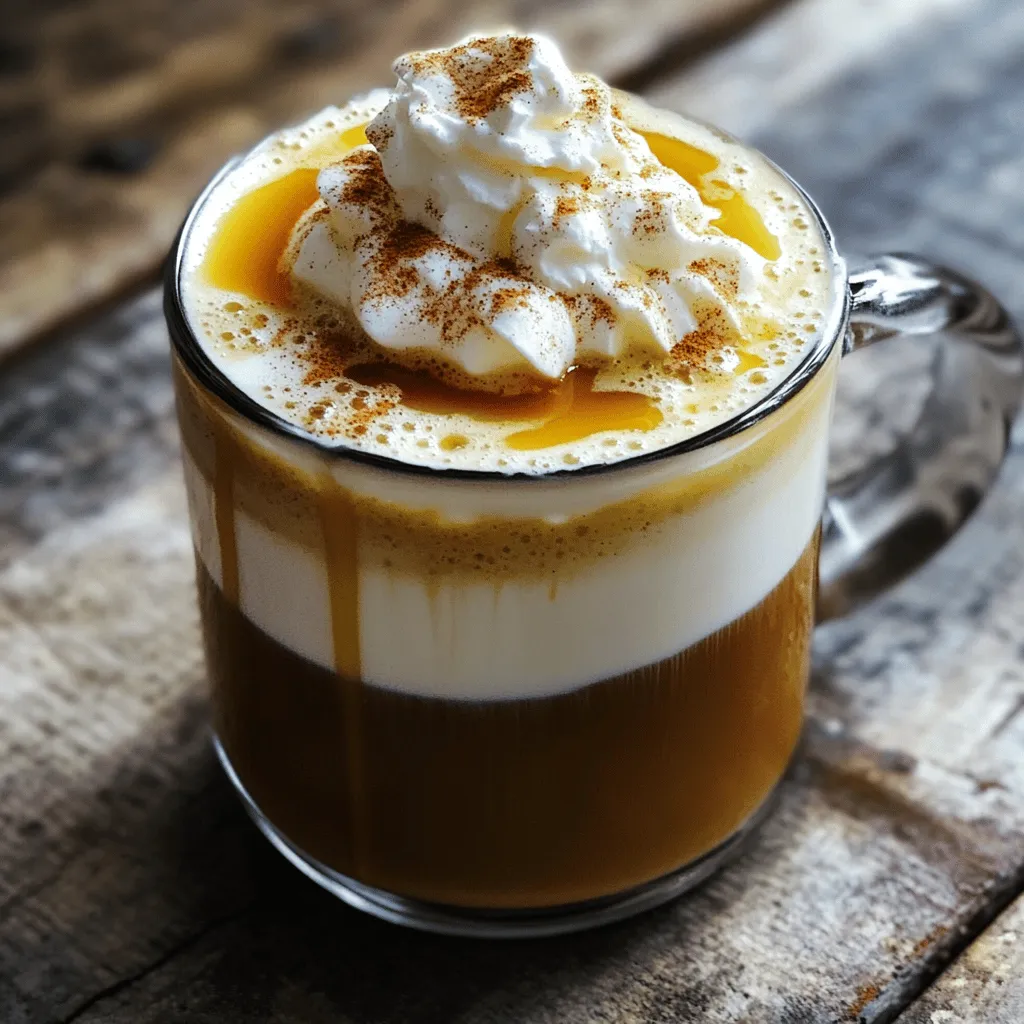
Get ready to delight your taste buds with the ultimate Spiced Maple Latte! This rich and flavorful recipe combines brewed
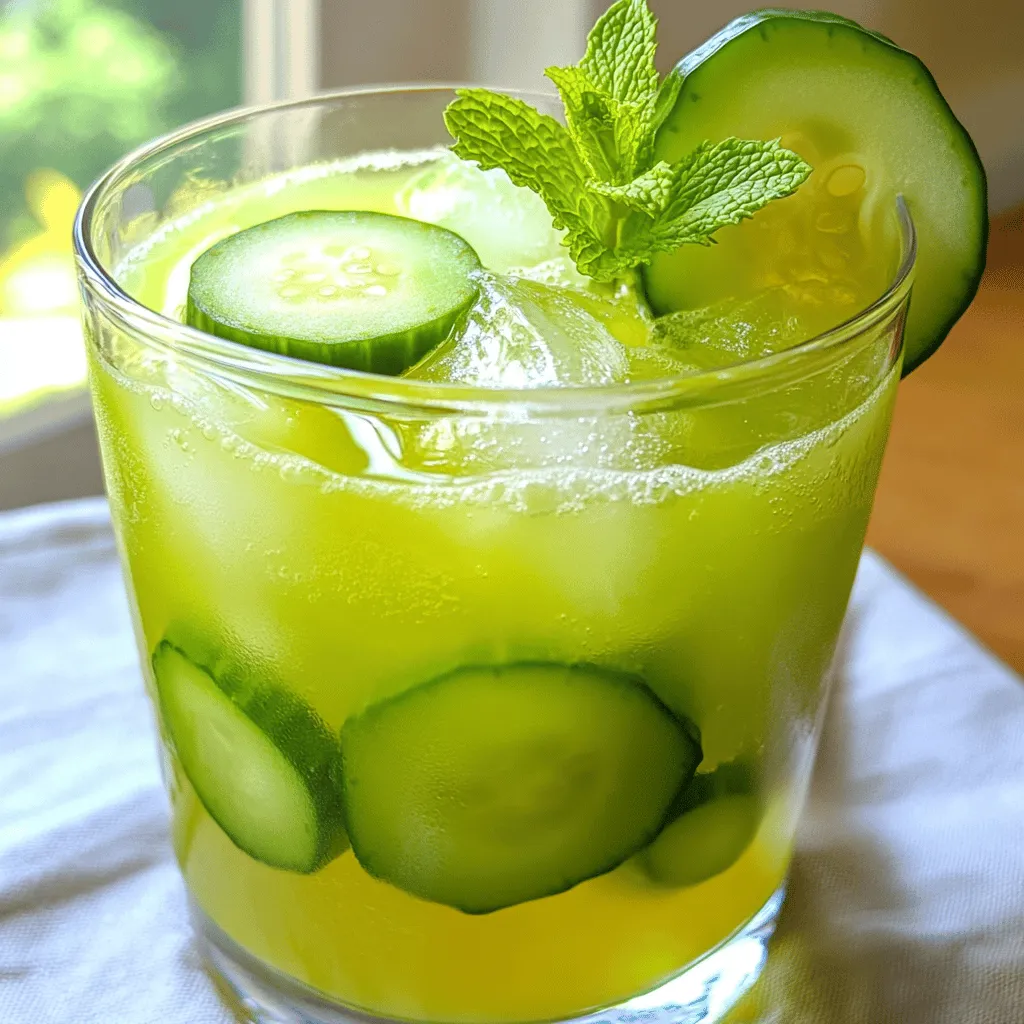
Looking for a cool drink to beat the summer heat? The Honeydew Cucumber Cooler is a fresh and tasty treat
![For a Coconut Blueberry Smoothie, gathering the right ingredients is key. Here's what you need: - 1 cup fresh or frozen blueberries - 1 cup coconut milk (or any non-dairy milk of your choice) - 1 banana, sliced - 1 tablespoon chia seeds - 1 tablespoon honey or maple syrup (optional for extra sweetness) - 1/2 cup Greek yogurt (or a non-dairy yogurt) - Ice cubes (optional, for a thicker consistency) - Fresh mint leaves for garnish Using fresh blueberries gives the best flavor. However, frozen ones work well too. Coconut milk adds a creamy texture. If you prefer non-dairy options, almond or oat milk can also be delicious. Bananas add natural sweetness and creaminess. They also help to thicken the smoothie. Chia seeds are great for extra nutrition. They are rich in omega-3 fatty acids and fiber. If you want a sweeter smoothie, honey or maple syrup can heighten the taste. Greek yogurt makes the drink creamy and adds protein. You can swap it for non-dairy yogurt if needed. Ice cubes can make your smoothie thicker and colder, which is perfect for hot days. To finish, fresh mint leaves add a nice touch. They give a pop of color and a refreshing taste. Now that you have the ingredients, you can move on to making this tasty treat. For the full recipe, check out the [Full Recipe]. To make the Coconut Blueberry Smoothie, follow these simple steps. - Step 1: Combine ingredients in a blender. Start by adding 1 cup of fresh or frozen blueberries, 1 cup of coconut milk, and 1 sliced banana. Also, add 1 tablespoon of chia seeds and 1/2 cup of Greek yogurt. If you want it sweeter, include 1 tablespoon of honey or maple syrup. - Step 2: Adjust thickness with ice cubes. If you like your smoothie thick, toss in some ice cubes. This will make it cold and refreshing. - Step 3: Blend until smooth and creamy. Blend the mixture on high speed for about 30 to 45 seconds. Keep blending until it's nice and smooth, with no chunks left. - Step 4: Taste and adjust sweetness as needed. After blending, take a quick taste. If you want it sweeter, feel free to add more honey or syrup. Blend again for a few seconds to mix it in. - Step 5: Serve and garnish. Pour the smoothie into glasses. Add fresh mint leaves on top for a lovely touch. This makes it look great and adds some flavor. Enjoy this Coconut Blueberry Smoothie as a tasty treat! For the complete recipe, check out the Full Recipe section. To make your smoothie smooth, use a high-speed blender. This helps blend all the ingredients well. Start with your liquids first. This allows the blades to move freely. Then, add the solid ingredients. Using ripe bananas is key. Ripe bananas make your smoothie sweet and creamy. They blend easily and give great flavor. If your bananas are not ripe, your smoothie may taste bland. To avoid splattering, secure the lid tightly. You can also cover the lid with a kitchen towel. This gives extra protection. Start blending on a low speed first. Gradually increase the speed to high. You may want to adjust the sweetness of your smoothie. Taste before serving. If it’s not sweet enough, add more sweetener. Natural sweeteners like honey or maple syrup work well. You can also use agave syrup. For a healthier option, try mashed dates. Each sweetener adds a different flavor. Choose what you love best. If you want a sugar-free option, use ripe bananas. They add natural sweetness without extra sugar. You can also skip the sweetener altogether if you prefer. For the full recipe, check out the details above. Enjoy your tasty and refreshing coconut blueberry smoothie! {{image_2}} You can boost your coconut blueberry smoothie with protein. Adding protein powder is a simple choice. It blends well and gives you extra energy. Use a scoop of your favorite flavor, like vanilla or chocolate. Another option is nut butter. Almond or peanut butter adds creaminess and flavor. Just a tablespoon makes your smoothie rich and satisfying. Plus, you'll get healthy fats and protein. This makes the drink more filling. Blueberries are great, but you can mix in other fruits too. Try strawberries, raspberries, or mango for a fresh twist. Each fruit adds its own flavor and nutrients. You can even blend in some spinach for a green boost. Seasonal fruits are perfect for variety. In the summer, use peaches or watermelon. In the fall, add apples or pears. This keeps your smoothie exciting and lets you enjoy what's fresh. For the full recipe, check out the section above. To keep your leftover coconut blueberry smoothie fresh, pour it into an airtight container. This helps prevent air from spoiling it. Place the container in the fridge. It will stay fresh for about one day. If you want to freeze the smoothie, pour it into ice cube trays. Once frozen, you can pop the cubes into a bag. This way, you can enjoy your smoothie later. You should drink stored smoothies within 24 hours for the best taste. If you freeze it, consume the cubes within one month. Signs that your smoothie has gone bad include a sour smell or change in color. If it looks or smells off, it’s best to throw it away. Enjoy your Coconut Blueberry Paradise Smoothie fresh for the best flavor! For the full recipe, check out the earlier section. To make this smoothie vegan, use non-dairy yogurt and coconut milk. Replace honey with maple syrup or agave. This keeps the drink plant-based while still tasting great. Yes, you can swap coconut milk for almond, soy, or oat milk. Choose your favorite non-dairy milk. Each option changes the flavor slightly, so pick what you like best. This smoothie is very healthy. It has antioxidants from blueberries, fiber from chia seeds, and healthy fats from coconut. Greek yogurt adds protein, which helps keep you full and energized. To lower the calorie count, skip the sweetener. Use low-fat or non-dairy yogurt. You can also reduce the amount of banana for fewer calories. These changes still keep it tasty and satisfying. For the full recipe, check the section above! This blog post covered a simple and tasty coconut blueberry smoothie. We explored the ingredients, step-by-step instructions, tips for blending, and variations. You now have the tools to make a delicious, creamy smoothie at home. Remember to adjust the sweetness to your taste and try different fruits or protein options. Enjoy experimenting with the recipe. Whether you drink it for breakfast or a snack, this smoothie is sure to please. Happy blending!](https://recipesinsight.com/wp-content/uploads/2025/07/276c62d0-f9d1-4972-8bfe-d4fcf65811fb.webp)
Are you ready to revitalize your day? This Coconut Blueberry Smoothie combines fresh blueberries, creamy coconut milk, and banana for
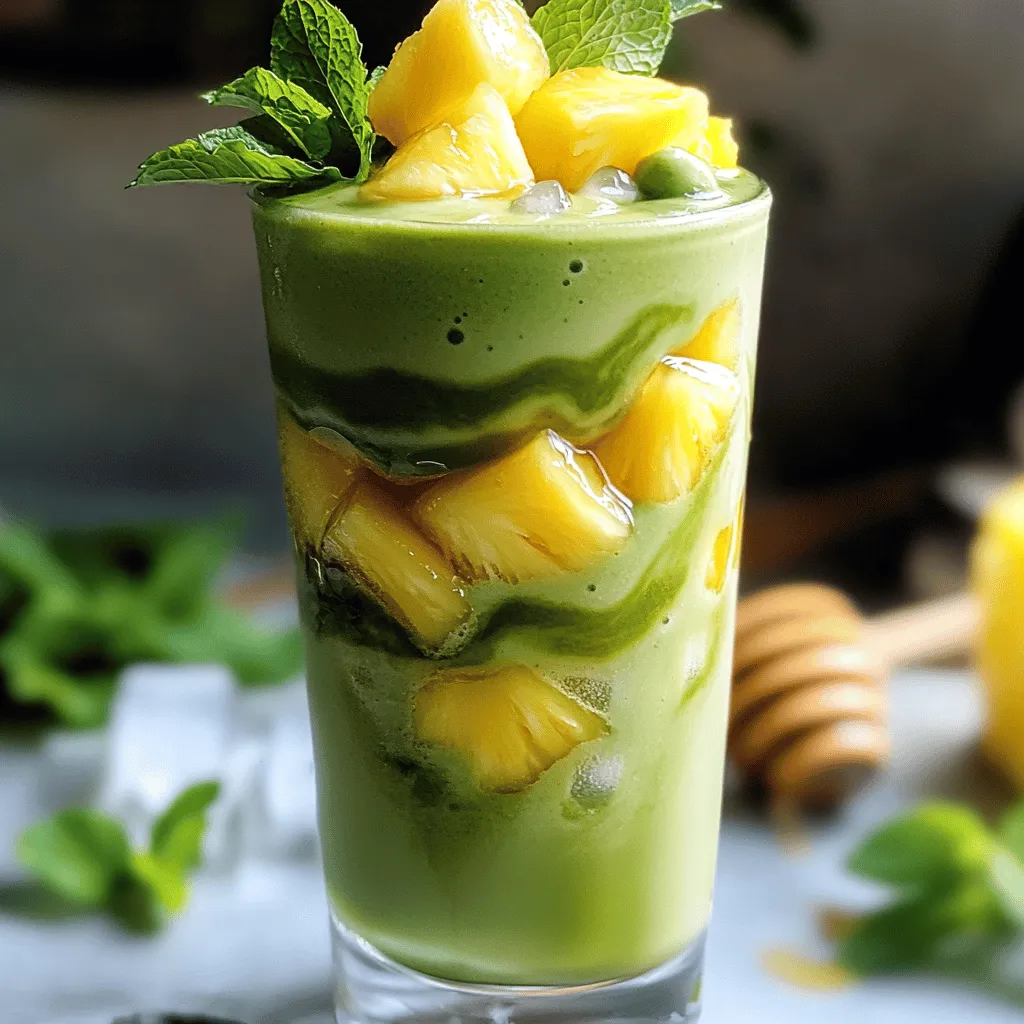
Looking for a drink that’s both refreshing and packed with flavor? You’re in the right place! The Pineapple Matcha Frappe
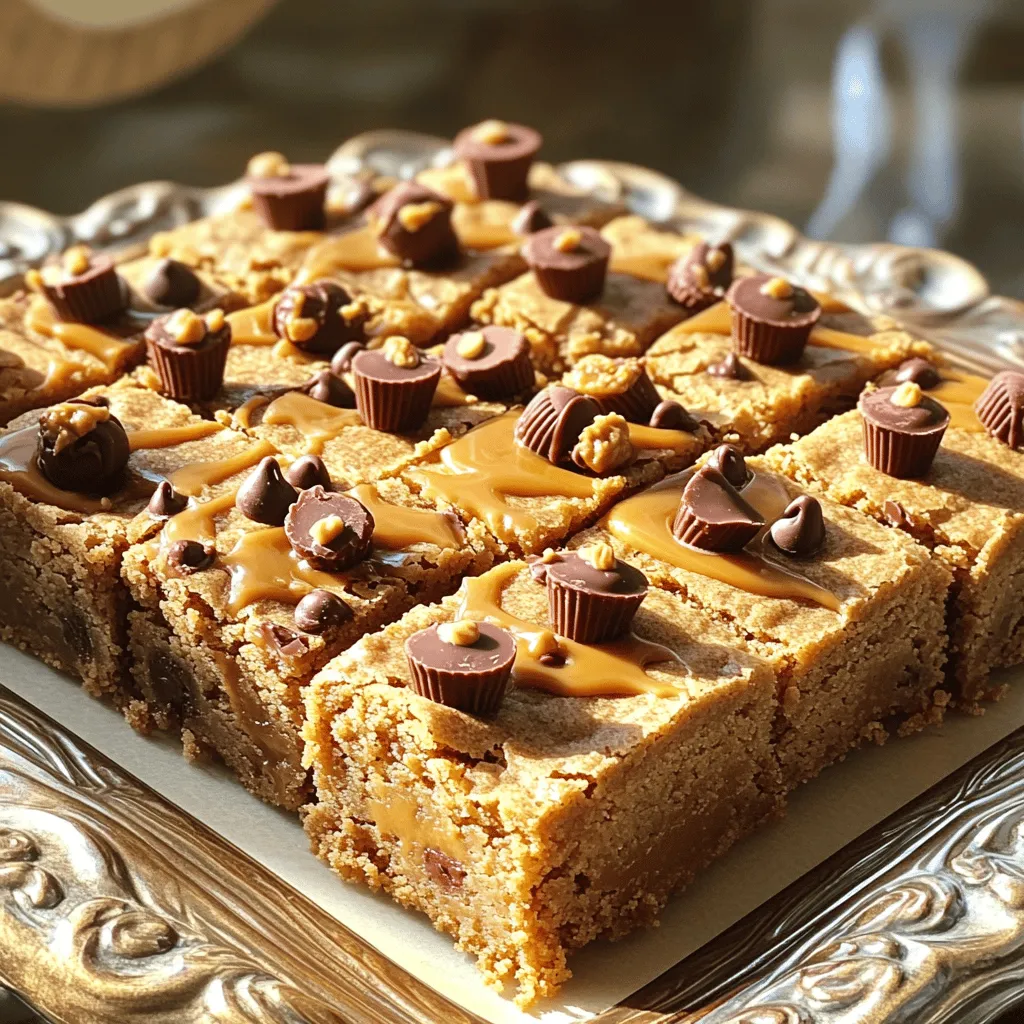
If you love sweet treats, you’ll adore Peanut Butter Cup Blondies! These soft, chewy bars pack a punch of peanut
![- 1 cup unsalted butter (2 sticks) - 2 cups granulated sugar - 4 large eggs - 1 teaspoon vanilla extract - 1 cup all-purpose flour - 1 cup unsweetened cocoa powder - 1 teaspoon baking powder - 1/2 teaspoon salt - 1 cup pretzel pieces - 1 cup chocolate chips (semi-sweet) - 1/2 cup caramel sauce (store-bought or homemade) - Sea salt flakes for topping To make Salted Caramel Pretzel Brownies, I focus on quality. Each ingredient adds something special. For example, unsalted butter gives a rich flavor. Granulated sugar provides the perfect sweetness. You can swap butter for margarine or coconut oil. This change works well and keeps the taste great. If you need a gluten-free option, use gluten-free flour. It will still make yummy brownies. Always use high-quality chocolate chips. They melt well and taste amazing. Fresh pretzels are key too. They add a nice crunch and salty flavor. Choosing fresh ingredients makes a big difference in the final taste. For more details, check out the Full Recipe. - Preheat your oven to 350°F (175°C) and prepare the baking pan. - Melt the butter and combine with sugar in a saucepan. Start by greasing a 9x13 inch baking pan or lining it with parchment paper. This step makes for easy removal later. Next, melt 1 cup of unsalted butter over low heat in a medium saucepan. Once melted, add 2 cups of granulated sugar. Stir until fully mixed. Remove from heat to let it cool slightly. - Beat in the eggs and vanilla extract thoroughly. - Combine dry ingredients separately and fold into wet mixture. Now, beat in 4 large eggs, one at a time. Mix well after each addition. Add 1 teaspoon of vanilla extract and stir to combine. In a separate bowl, whisk together 1 cup of all-purpose flour, 1 cup of unsweetened cocoa powder, 1 teaspoon of baking powder, and 1/2 teaspoon of salt. Slowly add this dry mix into the wet ingredients. Stir gently until the mixture is just combined. - Layering the brownie batter and drizzling the caramel sauce. - Final touch with sea salt before baking. Pour half of the brownie batter into the prepared pan. Spread it out evenly. Now, drizzle half of the 1/2 cup of caramel sauce over the batter. Carefully spoon the remaining batter on top, spreading it to cover the caramel. Drizzle the rest of the caramel sauce on top. Use a knife to gently swirl it into the batter. Finally, sprinkle sea salt flakes over the top for that perfect finish. For the complete recipe, refer to the Full Recipe section. - Avoid Overmixing the Batter: Mix the ingredients until just combined. Overmixing can add too much air. This makes brownies cake-like instead of fudgy. Stir gently, and don’t worry about small lumps. - Checking for Doneness: Use the toothpick method. Insert a toothpick into the center of the brownies. If it comes out with a few moist crumbs, they are done. If it’s wet with batter, they need more time. - Best Ways to Serve: Cut the brownies into squares and place them on a nice plate. Drizzle extra caramel sauce on top for added sweetness. Sprinkle more pretzel pieces for crunch. - Pairing Recommendations: Enjoy your brownies with a scoop of vanilla ice cream. They also pair well with a cup of coffee or a glass of cold milk. - Adding Nuts or Different Types of Chocolate: For extra crunch, try adding chopped nuts like walnuts or pecans. You can also swap in dark chocolate chips for a richer taste. - Suggestions for Additional Toppings: Top your brownies with whipped cream or a scoop of ice cream. A dusting of cocoa powder or powdered sugar adds a nice touch too. These tips will help you create amazing Salted Caramel Pretzel Brownies. For the full recipe, check the earlier section. Enjoy experimenting! {{image_2}} You can change the flavor of these brownies easily. Try different types of caramel, like dark or sea salt caramel. Each one gives a new twist. You can also switch up the chocolate. Use dark chocolate chips or even white chocolate for fun. The pretzels also add a lot. Use chocolate-covered pretzels for a sweeter bite. If you want more saltiness, try thicker pretzels. They will give a crunch that stands out. If you want a vegan version, swap eggs for flax eggs. Mix 1 tablespoon of flaxseed meal with 2.5 tablespoons of water. Let it sit until it thickens. Instead of butter, use coconut oil or vegan margarine. Make sure your chocolate chips are dairy-free too. For gluten-free brownies, use almond flour or a gluten-free flour mix. This keeps the flavor and texture great. You can also make these brownies fit the season. In fall, add pumpkin puree and spices like cinnamon and nutmeg. For winter holidays, include peppermint extract for a festive touch. You can even top with crushed candy canes for crunch. Each season brings a chance to change up flavors and fun. Enjoy experimenting with these ideas and make the recipe your own with your own twist! For the full recipe, check out the [Full Recipe]. To keep your Salted Caramel Pretzel Brownies fresh, place them in an airtight container. This helps prevent them from drying out. If you have leftovers, store them at room temperature for up to three days. For longer shelf life, refrigerate them. This can extend freshness for one week. Just make sure they are well-covered to avoid absorbing any odors. Want to enjoy these brownies later? Freezing is a great option. Start by cutting the brownies into squares. Wrap each piece in plastic wrap to keep them fresh. Then, place the wrapped brownies in a freezer-safe bag or container. For best results, freeze them for up to three months. When you're ready to eat, simply thaw them in the fridge overnight. You can also reheat them in the microwave for a warm treat. These brownies have a good shelf life. At room temperature, they stay fresh for about three days. If stored in the fridge, they last about a week. Frozen brownies can last up to three months. Watch for signs of spoilage like a change in color or a bad smell. If they look dry or crumbly, it’s best to toss them. Enjoy your treats while they are at their best! To check if your brownies are done, use the toothpick test. Stick a toothpick into the center of the brownies. If it comes out with a few moist crumbs, they are ready. If it comes out wet, they need more time. You can also look for visual cues. The edges should look set and slightly pull away from the sides of the pan. A soft, slightly puffed top is another good sign. Yes, you can use any caramel sauce you like. You can make homemade caramel or buy it at the store. Homemade caramel gives you more control over the flavor and texture. Store-bought options save time and are often very tasty. Just make sure it’s thick enough to hold its shape when drizzled. If your brownies turn out dry, there are a few tips to fix this. First, make sure not to overbake them. Check for doneness a few minutes early. Second, using high-quality butter adds moisture. Lastly, try adding a bit more caramel sauce to the batter. This can help keep them fudgy. When stored properly, these brownies last up to five days at room temperature. Keep them in an airtight container. For longer storage, place them in the fridge, where they can last for about a week. If you want to keep them even longer, you can freeze them for up to three months. Absolutely! You can make these brownies in advance. Once baked, let them cool completely. Then, wrap them tightly in plastic wrap or foil. Store them in the fridge or freezer until you are ready to serve. If you freeze them, make sure to let them thaw in the fridge for a few hours before enjoying. For the full recipe, check out the Salted Caramel Pretzel Brownies section. In this post, we explored the essential ingredients for Salted Caramel Pretzel Brownies, including butter, sugar, and chocolate. I shared step-by-step instructions to achieve the perfect blend of fudgy and crunchy. We discussed tips for choosing quality ingredients and offered ideas for flavor variations and dietary adaptations. Lastly, we covered storage methods to keep your brownies fresh. With this guide, you can confidently bake delicious brownies. Enjoy the balance of sweet caramel and salty pretzels!](https://recipesinsight.com/wp-content/uploads/2025/07/fc5d5de5-ba2a-4e93-8526-f7ddca734863.webp)
Indulge in the ultimate sweet-and-salty delight with my Salted Caramel Pretzel Brownies! These decadent treats combine rich chocolate with crunchy
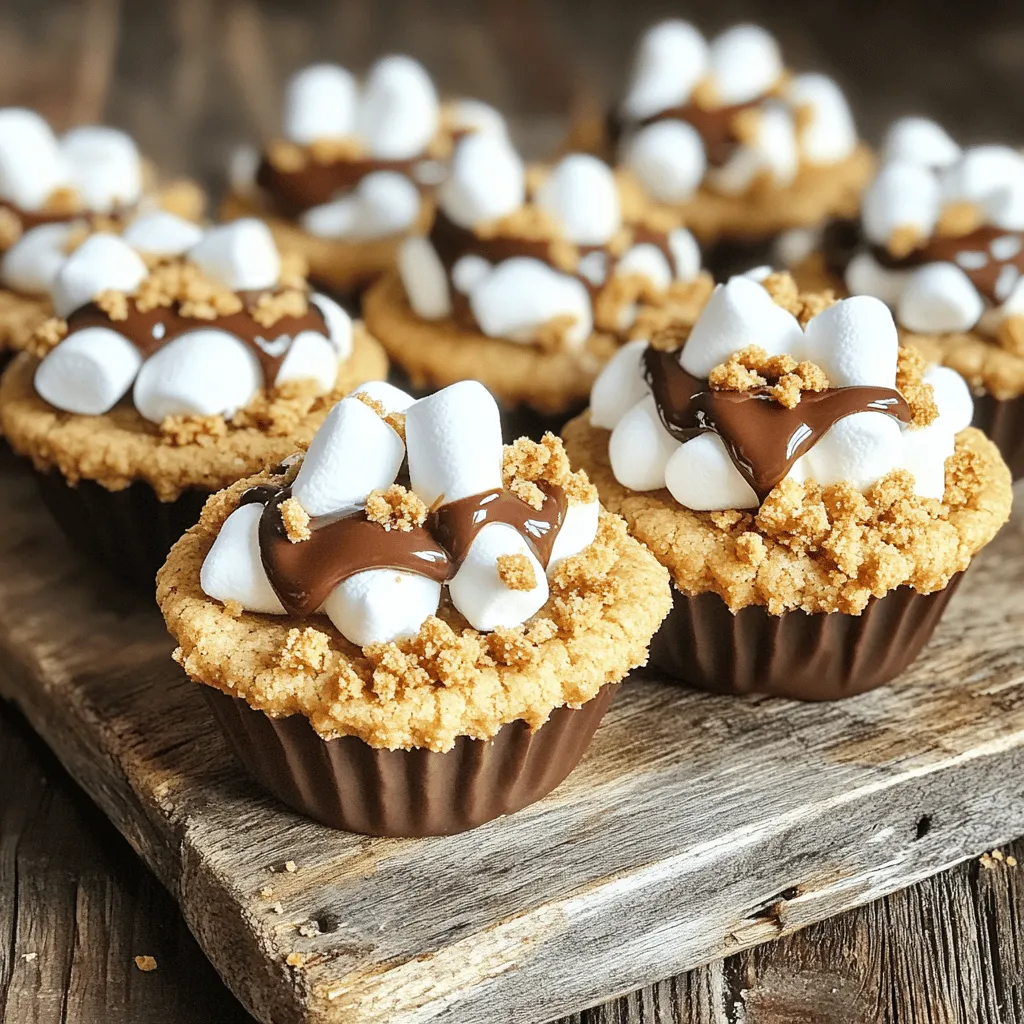
Get ready to indulge in a fun twist on a classic treat! S’mores Cookie Cups are easy to make and