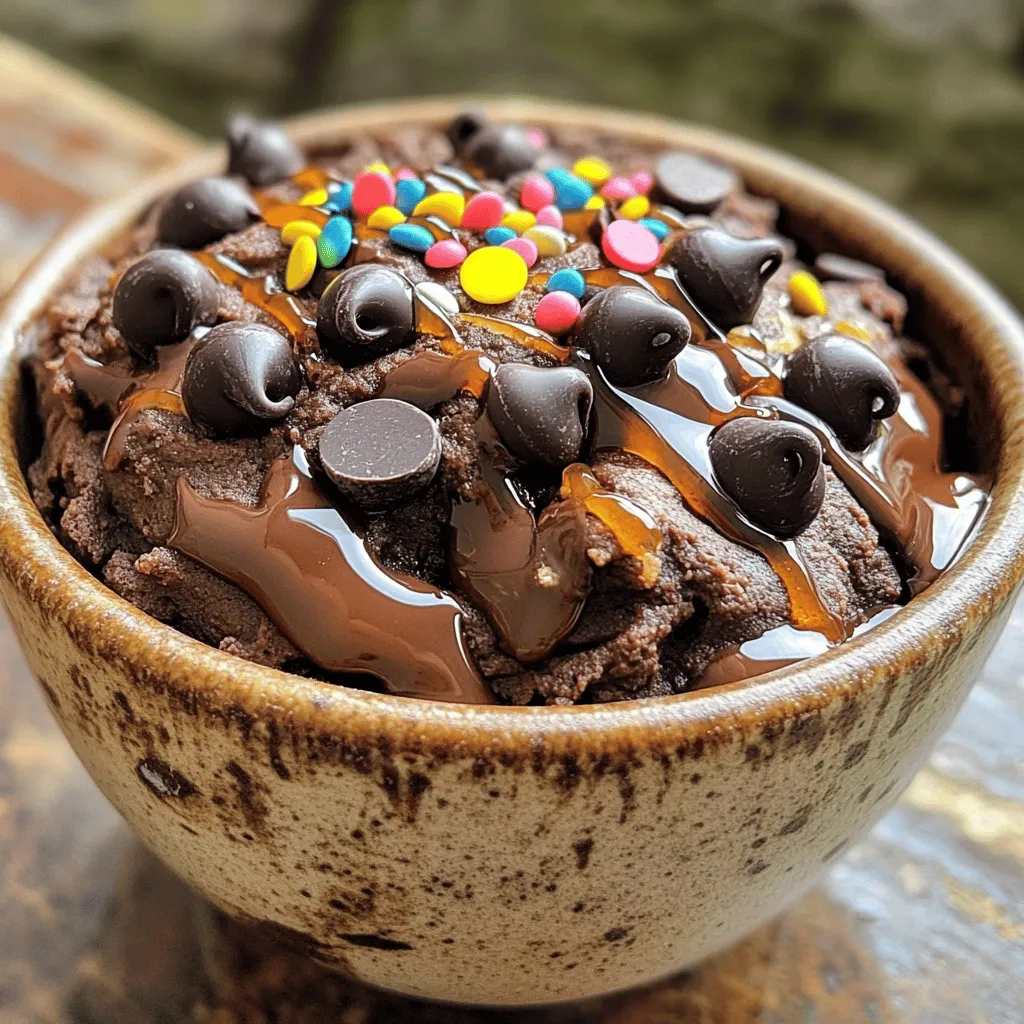
Edible Brownie Batter Delightful No-Bake Treat
Have you ever craved that rich brownie batter but hesitated to dig in? With this Edible Brownie Batter recipe, you

Have you ever craved that rich brownie batter but hesitated to dig in? With this Edible Brownie Batter recipe, you
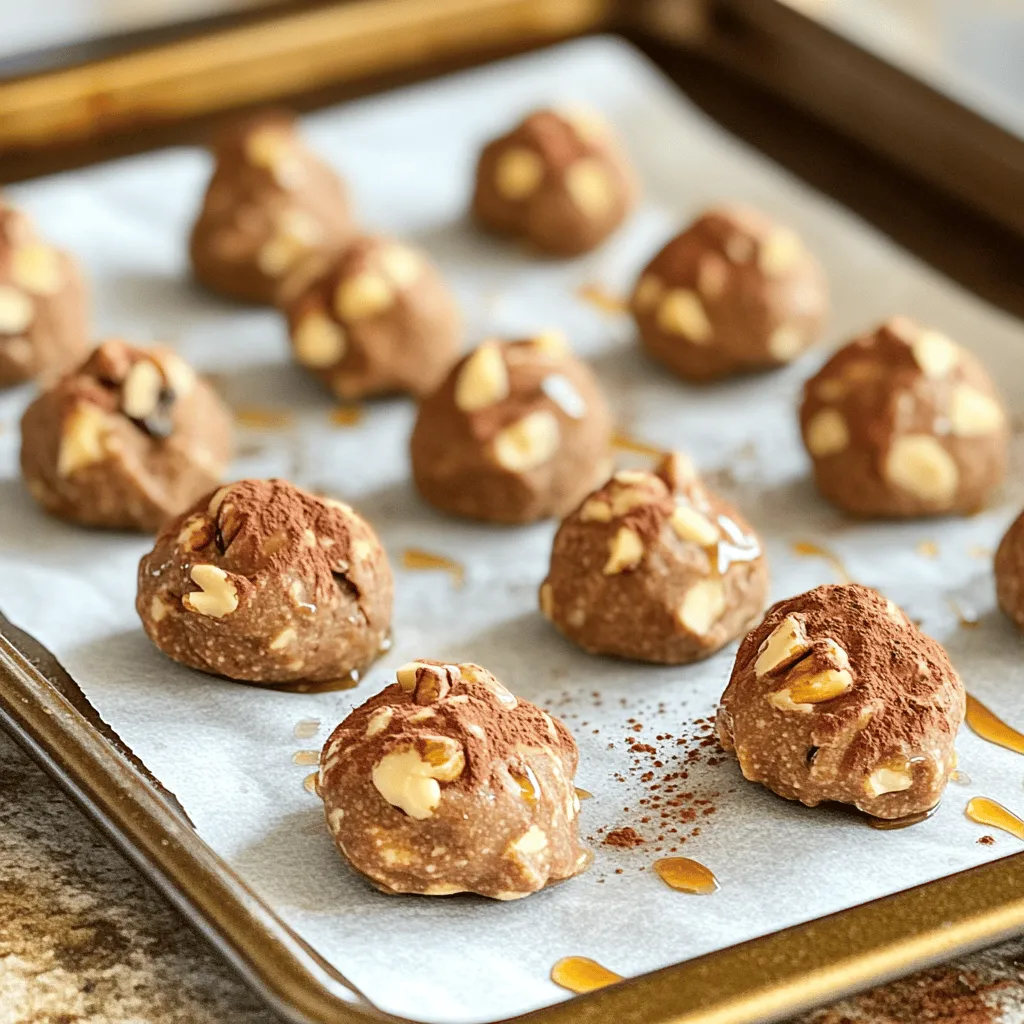
Looking for a quick and tasty snack? I’ve got just the thing for you! These No-Bake Cookie Dough Bites are

Looking for a dessert that’s easy to make and tastes amazing? You’ve found it! My No-Bake Oreo Cheesecake Bars are
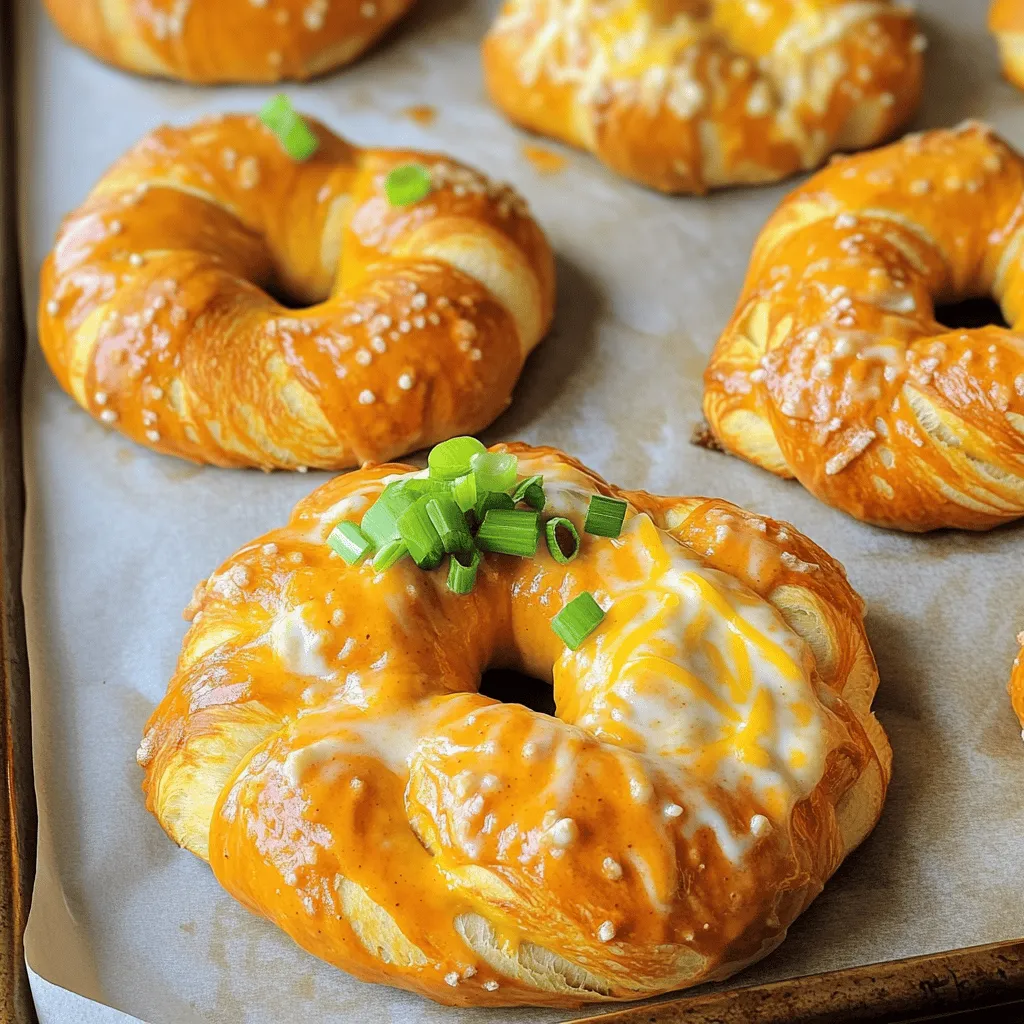
If you love bold flavors and easy snacks, you’re in for a treat! In this post, I’ll share my Buffalo
![Let's break down what you need for this creamy fall treat. Here’s the list of ingredients: - 1 cup vanilla ice cream - 1/2 cup pumpkin puree (canned or fresh) - 1/2 cup milk (dairy or plant-based) - 1/2 teaspoon vanilla extract - 1/2 teaspoon pumpkin pie spice - 1 tablespoon maple syrup (optional) - Whipped cream (for topping) - Cinnamon stick and graham cracker crumbs (for garnish) These ingredients come together to create a deliciously smooth milkshake. The vanilla ice cream gives a rich base, while pumpkin puree adds that warm flavor we love in fall. Milk helps blend everything smoothly, and the vanilla extract enhances the taste. Adding pumpkin pie spice brings in the classic autumn flavors. The maple syrup is optional, but it adds a nice sweetness if you prefer a richer taste. Don’t forget the whipped cream topping! It makes your milkshake look fancy. The cinnamon stick and graham cracker crumbs are great for garnish, adding a lovely touch to your drink. For the full recipe, check out the [Full Recipe]. - Step 1: Combine ingredients in a blender Start by gathering your ingredients. In your blender, add 1 cup of vanilla ice cream, 1/2 cup of pumpkin puree, and 1/2 cup of milk. Don’t forget to include 1/2 teaspoon of vanilla extract and 1/2 teaspoon of pumpkin pie spice. If you like, add 1 tablespoon of maple syrup for extra sweetness. - Step 2: Blend to desired consistency Blend the mixture on medium speed. Stop blending after about 30 seconds. You want it to be smooth and creamy. If it feels too thick, add a bit more milk. Blend again until it reaches your perfect consistency. - Step 3: Adjust sweetness if needed After blending, taste your milkshake. If you want it sweeter, add more maple syrup. Blend briefly to mix in the syrup. This step makes it just right for your taste. - Step 4: Pour into glasses Take two tall glasses and pour the milkshake into them. Fill them up to the top but leave some space for toppings. - Step 5: Top with whipped cream and garnish Generously add whipped cream on top of each milkshake. For a lovely finish, sprinkle graham cracker crumbs over the cream. Then, add a cinnamon stick for that festive touch. This creamy fall treat is ready to enjoy! You can find the full recipe for this delicious pumpkin pie milkshake and impress your friends with your skills. Choosing the right ice cream is key. I love using vanilla ice cream. It has a rich flavor that pairs well with pumpkin. You can also try caramel or cinnamon ice cream for a twist. To adjust thickness and creaminess, you can play with the milk amount. If your milkshake is too thick, add more milk a little at a time. Blend until smooth. If you want it thicker, use less milk. The right balance makes for a perfect drink. Enhancing flavor with toppings is fun. I recommend whipped cream on top. It adds a sweet touch. You can sprinkle graham cracker crumbs for crunch. A cinnamon stick makes a nice garnish and adds spice. Feel free to get creative with your toppings. For the full recipe, follow the simple steps outlined above. Enjoy your tasty treat! {{image_2}} When you make a pumpkin pie milkshake, you can mix things up. Try these fun ideas to create your own spin on this creamy treat. - Vegan pumpkin pie milkshake: Use coconut or almond milk instead of dairy milk. Swap vanilla ice cream for a vegan option. This keeps all the flavor but makes it plant-based. - Spiced pumpkin pie milkshake: Add a pinch of nutmeg or allspice to the mix. This gives your milkshake a warm, cozy flavor. You can also try adding a dash of ginger for a fun twist. - Add-ins for extra richness: Want a creamier milkshake? Add a spoonful of peanut butter or chocolate syrup. Both add a nice touch. You can also mix in some toasted pecans or walnuts for crunch. These variations let you enjoy the milkshake your way. You can find the full recipe above to start blending! To keep your pumpkin pie milkshake fresh, store it in the fridge. Use an airtight container. This helps keep the milkshake from absorbing other odors. Enjoy it within one day for best taste. If you want to save it for later, freezing is an option. However, milkshakes can lose some creaminess when frozen. Pour your milkshake into a freezer-safe container. Leave some space at the top, as liquids expand when frozen. Thaw it in the fridge overnight before enjoying. To maintain flavor and texture, avoid adding whipped cream before storing. Whipped cream can get soggy in the fridge. Instead, add it right before serving. If you notice the milkshake separates, just stir it gently before enjoying. For more details, check the Full Recipe for tips on making this treat. Can I use fresh pumpkin puree? Yes, you can use fresh pumpkin puree. It gives a nice flavor. Make sure to cook and blend the pumpkin until smooth. This can add a homemade touch to your milkshake. How long does the milkshake last in the fridge? The milkshake lasts about one day in the fridge. After that, it may lose its texture. To keep it fresh, store it in a sealed container. Can I make this ahead of time? You can make the milkshake ahead. Just blend the ingredients and store it in the fridge. When you are ready to serve, shake it or stir it well. This will help mix it back up nicely. For the best flavor, try to enjoy it fresh! For the full recipe, check out the detailed steps provided earlier. This blog post shared how to make a delicious pumpkin pie milkshake. We covered easy ingredients and clear steps for the perfect blend. You learned tips for making it creamy and adjusting flavors to your taste. Plus, we discussed fun variations and storage methods to keep your milkshake fresh. Now, it’s time to enjoy your treat! Customize it, share it, and savor every sip. Happy blending!](https://recipesinsight.com/wp-content/uploads/2025/07/0709a453-a678-47c1-a0c7-6d3070db2e27.webp)
Are you ready to indulge in a creamy fall treat? My Pumpkin Pie Milkshake is the perfect way to enjoy
![The Herb Garlic Butter Roasted Turkey is a standout dish for any feast. This recipe uses fresh herbs and garlic to create a rich flavor. You can find the complete recipe above. For this turkey, you need: - 1 whole turkey (about 12-14 pounds), thawed - 1 cup unsalted butter, softened - 6 cloves garlic, minced - 2 tablespoons fresh rosemary, finely chopped - 2 tablespoons fresh thyme, finely chopped - 2 tablespoons fresh sage, finely chopped - 1 lemon, zested and halved - 2 teaspoons salt - 1 teaspoon black pepper - 4 cups low-sodium chicken broth - 1 onion, quartered - 2 carrots, cut into large pieces - Fresh herbs for garnish (rosemary, thyme, sage) These ingredients bring out the best in the turkey. The butter helps keep it moist, while the herbs add depth. You might want to add a few things for extra taste: - Garlic powder for a stronger garlic flavor - Smoked paprika for a hint of smokiness - Fresh parsley for a pop of color - A splash of white wine in the broth for added richness These extras can create unique layers in your turkey dish. Mixing and matching these options can lead to your signature flavor. First, you need to prepare the turkey. Start by taking the whole turkey out of the fridge. Let it thaw if it’s still frozen. Pat the turkey dry with paper towels. This step helps the skin get crispy. Next, gently loosen the skin on the turkey breast. Be careful not to tear it. This will allow you to add flavor right where it counts. Now it's time to make the herb garlic butter. In a mixing bowl, combine one cup of softened unsalted butter with six minced garlic cloves. Then, add two tablespoons each of fresh rosemary, thyme, and sage. Don't forget to include the lemon zest and two teaspoons of salt. Add one teaspoon of black pepper for a bit of kick. Mix everything well until it’s creamy and smooth. This butter will keep your turkey moist and flavorful. With your turkey prepped and the herb garlic butter ready, it’s time to cook. Preheat your oven to 325°F (163°C). Spread half of the herb garlic butter under the skin on the turkey breast. Rub the rest over the outside of the turkey. Next, stuff the turkey cavity with the quartered onion and halved lemon. Place the turkey breast side up on a rack in a large roasting pan. Add chopped carrots and four cups of low-sodium chicken broth to the pan. This will help keep the turkey moist. Roast the turkey, calculating about 13-15 minutes per pound. Remember to baste the turkey every 30-40 minutes. This helps lock in flavor. Remove the foil during the last hour of cooking to let the skin brown. Check the turkey's doneness by using a meat thermometer. It should reach 165°F (74°C) in the thickest part of the breast and thigh. Once done, let the turkey rest for at least 30 minutes before carving. This ensures the juices stay in the meat. For the full recipe, check out the complete guide. Enjoy your flavorful feast! Basting your turkey adds flavor and helps keep it moist. Start by using the pan juices. Every 30 to 40 minutes, carefully spoon the juices over the turkey. Make sure to get the breast and the legs. This helps create a nice, golden skin. You can also use a baster for even easier basting. To keep your turkey juicy, use a few tricks. First, do not skip the herb garlic butter under the skin. This method locks in the flavors. Second, add broth to the roasting pan. The steam will help keep the turkey moist. Lastly, cover the turkey with foil during the first part of cooking. Remove it in the last hour for crisp skin. Resting is key for juicy turkey. Once you take it out of the oven, let it sit for at least 30 minutes. This step allows the juices to settle. If you cut too early, the juices will run out. After resting, carve your turkey and serve. For the full recipe, check the details provided above. {{image_2}} If you want to switch up the herbs, you have many options. Try using fresh parsley for a milder flavor. Oregano also adds a nice twist. If you like a bit of heat, add some crushed red pepper flakes. You can mix and match herbs based on your taste. Just remember to keep the measurements similar to the original recipe. Roasting gives your turkey a classic, juicy flavor. It allows the skin to crisp up nicely. Grilling, on the other hand, adds a smoky flavor that many love. If you grill, make sure to use indirect heat. This keeps the turkey moist and prevents burning. Both methods can yield great results, so choose what suits your style. The stuffing can really change the game. You can use traditional bread stuffing or try a rice-based mix for a gluten-free option. Adding fruits like apples or cranberries can bring a sweet note. Nuts like pecans or walnuts add crunch. Whatever you choose, make sure it complements the turkey well. For the complete guide, visit the [Full Recipe]. After enjoying your Herb Garlic Butter Roasted Turkey, proper storage is key. This keeps your turkey fresh and safe to eat later. Store leftover turkey in the fridge. Use airtight containers or wrap it tightly in foil. Make sure to keep the turkey in the coldest part of the fridge. Enjoy it within three to four days for the best taste. If you plan to eat it later, shred or slice it first. This helps it cool faster and stay fresh longer. Freezing is a great way to save turkey for later. Wrap pieces in plastic wrap and foil. Make sure to label them with the date. You can freeze turkey for up to six months. When you want to eat it, just thaw it safely in the fridge overnight. When reheating turkey, do it slowly. Heat it in the oven at 325°F (163°C) until it reaches 165°F (74°C). This keeps it moist. You can add a splash of broth or water to the pan to keep it juicy. If you want a quick option, use a microwave. Just cover it and heat in short bursts. Always check the temperature to ensure it’s hot throughout. For the complete recipe, check out the Full Recipe. Enjoy your flavorful feast! You should cook your turkey for about 13 to 15 minutes per pound. For example, a 12-pound turkey will take roughly 2.5 to 3 hours to cook. To be sure, always check the time based on your oven and the turkey's size. This method ensures your turkey stays juicy and full of flavor. The turkey should reach an internal temperature of 165°F (74°C). Use a meat thermometer to check the thickest part of the breast and thigh. This step is key for food safety. If your turkey is not fully cooked, it can lead to illness. Yes, you can prepare the turkey a day ahead. Rub the herb garlic butter under the skin and on the outside. Then, cover it and place it in the fridge. This method allows the flavors to soak in. Make sure to let it sit at room temperature for about an hour before cooking. This helps it cook evenly. For the full recipe, check the Herb Garlic Butter Roasted Turkey section. You learned how to make a delicious turkey with key ingredients and steps. We covered prepping the turkey, making herb garlic butter, and perfect cooking times. I shared tips to keep your turkey moist and flavorful. You can also try variations like different herbs or cooking methods. Finally, I explained how to store leftovers safely. With these insights, you can confidently create a turkey that impresses everyone. Enjoy your cooking journey and savor every bite!](https://recipesinsight.com/wp-content/uploads/2025/07/2b05eb29-6624-4b0c-8e69-77ca3e1e6884.webp)
Are you ready to wow your guests with a mouthwatering Herb Garlic Butter Roasted Turkey? This flavorful feast promises to
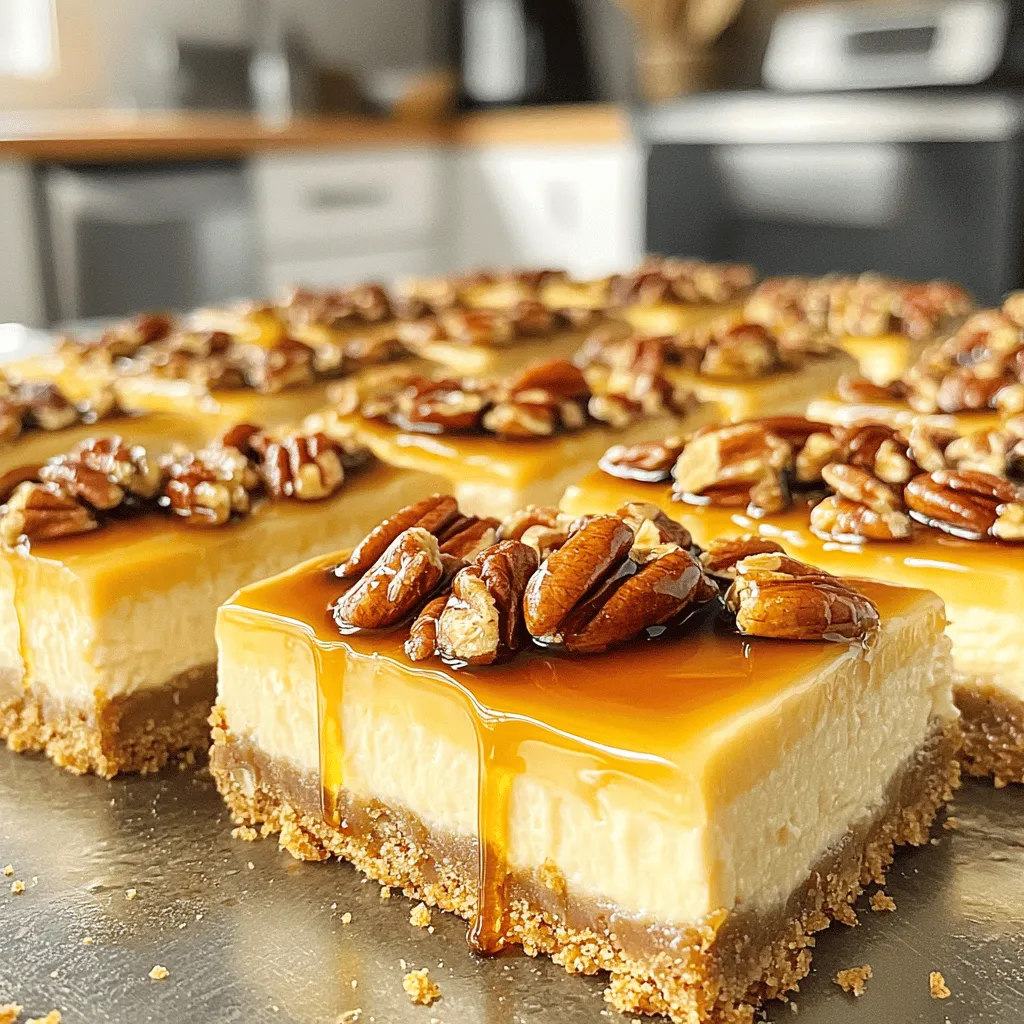
Get ready to treat your taste buds with my Maple Pecan Cheesecake Bars! These bars blend creamy cheesecake with a
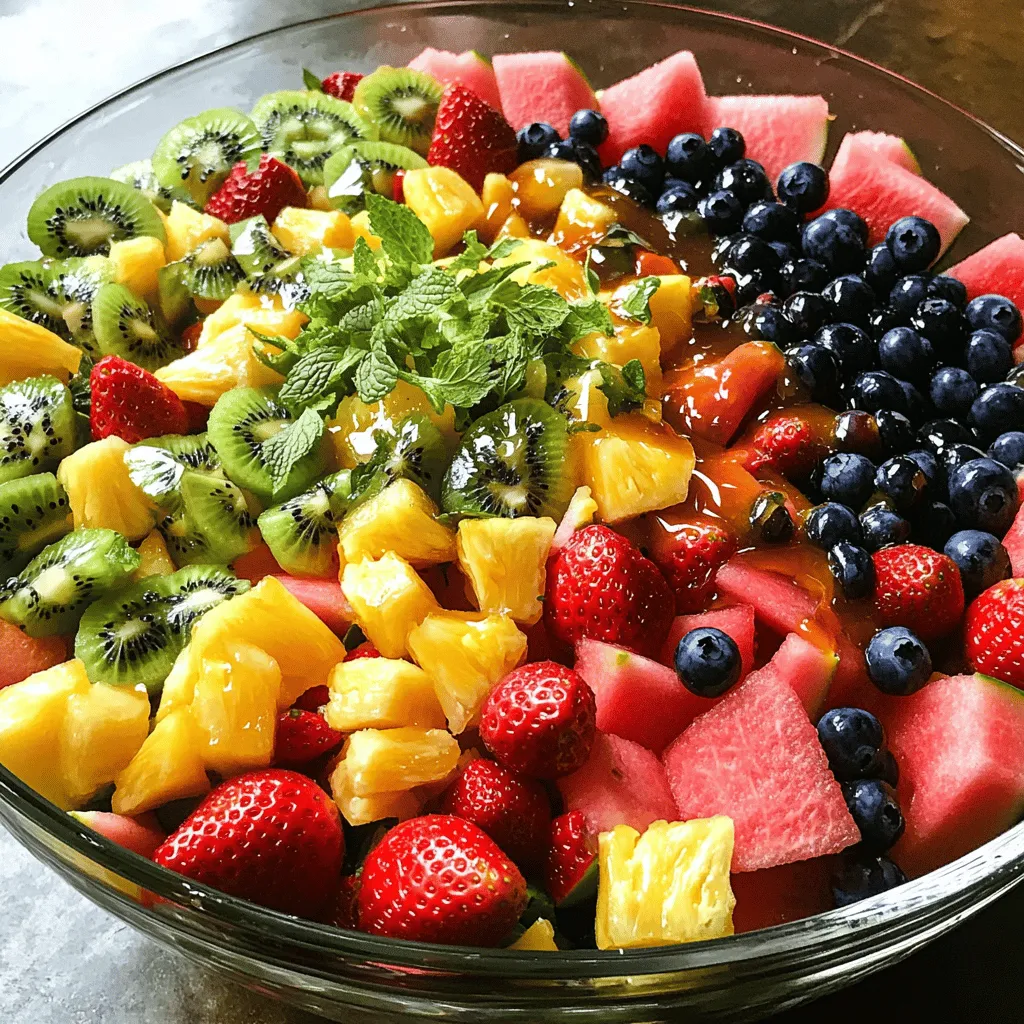
Looking for a quick and tasty dessert? You’re in the right place! My Honey Lime Fruit Salad is a perfect
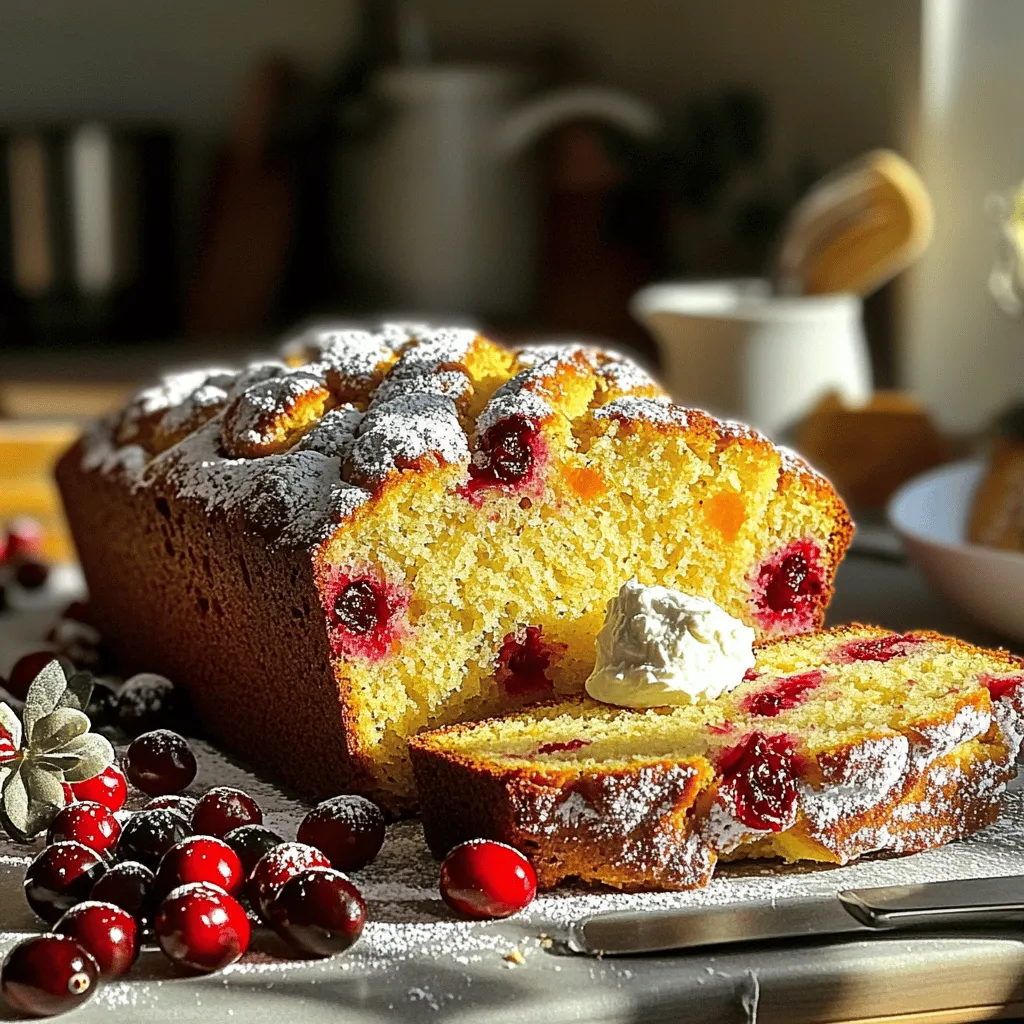
Are you ready to bake a fresh and flavorful treat? This cranberry orange bread recipe will delight your taste buds.
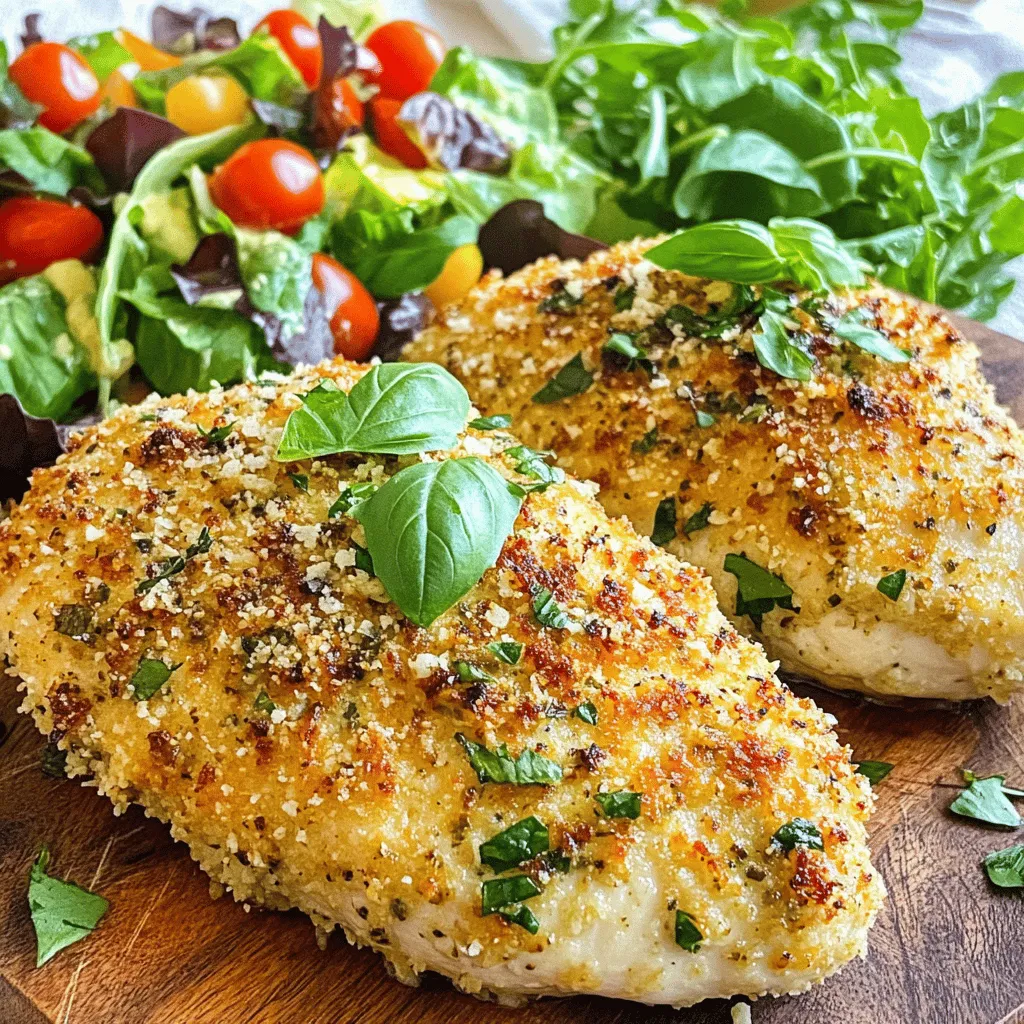
Are you ready to impress at dinner tonight? My Parmesan Herb Crusted Chicken is the answer! This flavorful dish is