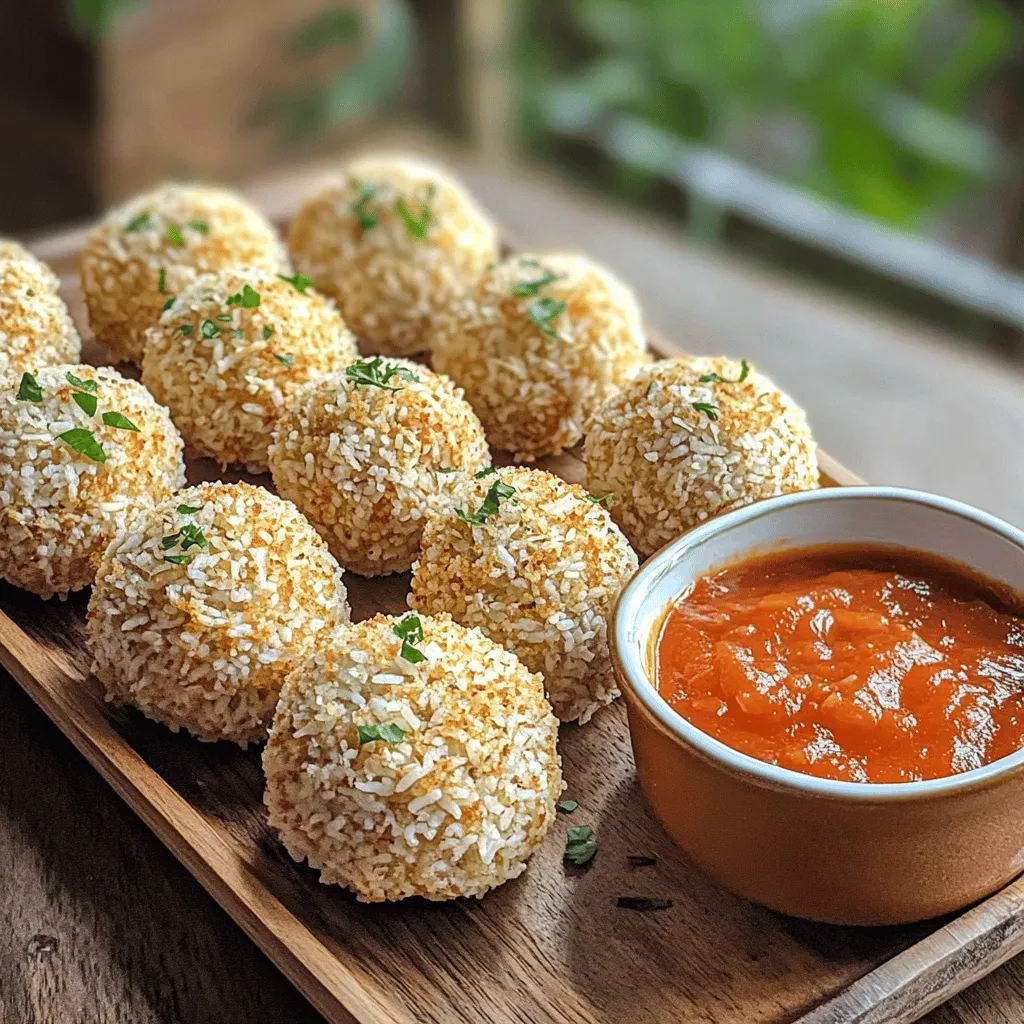
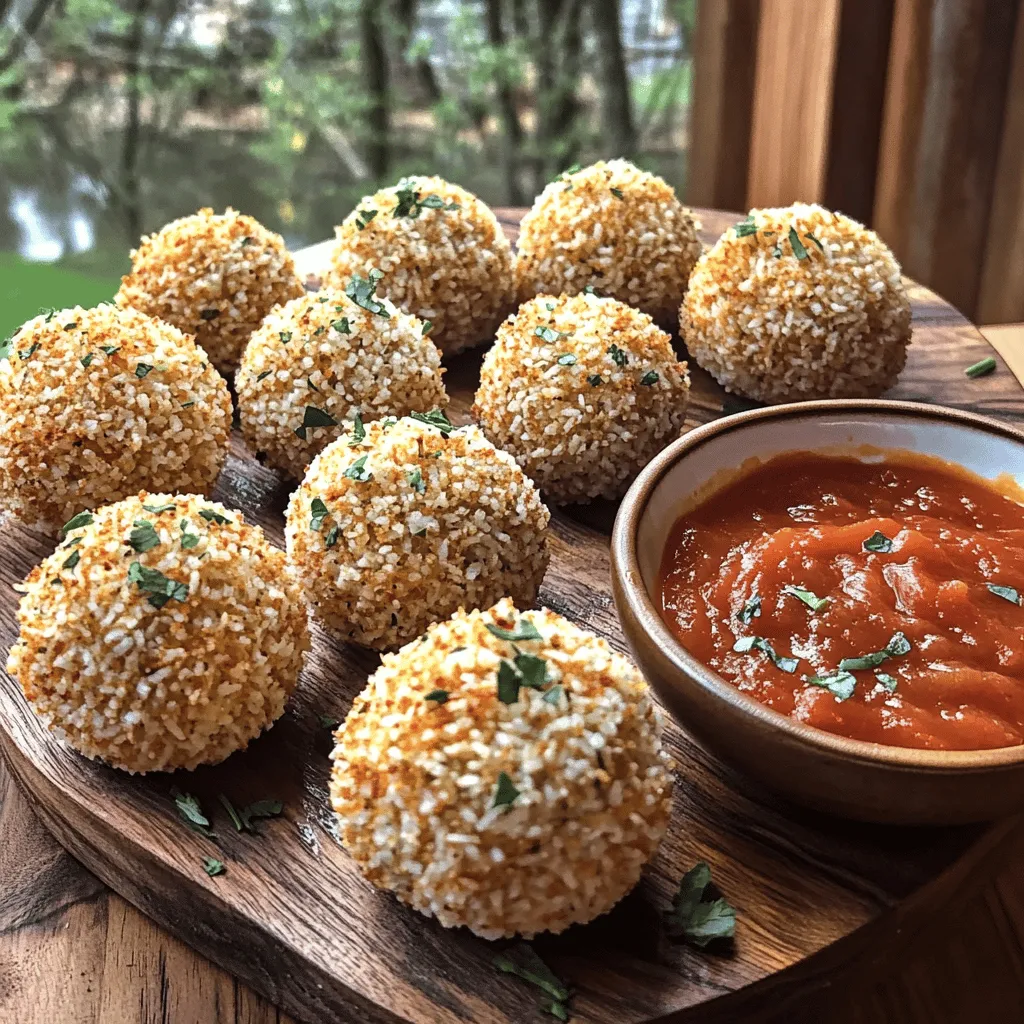
Looking for a quick and tasty snack? You’ll love my Easy Crispy Rice Balls! They’re simple to make and perfect for any occasion. With a crunchy outside and a soft inside, these rice balls satisfy your cravings in just a few steps. I’ll share essential ingredients, easy methods, and tips to get them just right. Let’s dive into this fun recipe and whip up a batch of deliciousness together!
Ingredients
Essential Ingredients for Easy Crispy Rice Balls
To make these rice balls, you need a few key items:
– 2 cups cooked sushi rice (or short-grain rice)
– 1/4 cup grated Parmesan cheese
– 1/2 teaspoon garlic powder
– 1/2 teaspoon onion powder
– 1/4 teaspoon black pepper
– 1/2 cup panko breadcrumbs
– 1/4 cup finely chopped fresh herbs (basil, parsley, or cilantro)
– Oil for frying (vegetable or canola)
These ingredients form the base of your rice balls. The cooked sushi rice gives a nice sticky texture. Parmesan cheese adds a savory kick. Spices like garlic and onion powder enhance the flavor. Panko breadcrumbs make them crispy when fried.
Optional Add-ins for Extra Flavor
Want to jazz up your rice balls? Here are some add-ins you might like:
– Cooked and crumbled bacon
– Chopped sun-dried tomatoes
– Shredded mozzarella or cheddar cheese
– Cooked veggies like spinach or bell peppers
Adding these will give your rice balls even more taste. You can mix and match to find your favorite combo.
Recommended Dipping Sauces
To serve these rice balls, try these tasty dipping sauces:
– Marinara sauce (perfect for a classic touch)
– Sweet chili sauce (for a spicy kick)
– Soy sauce (a nice twist for a Japanese flair)
– Garlic aioli (for creamy richness)
Each sauce brings a different flavor. You can choose based on your mood. These dips will make each bite even more fun and tasty.
Step-by-Step Instructions
Preparing the Rice Mixture
To start, gather your ingredients. You will need cooked sushi rice, Parmesan cheese, garlic powder, onion powder, and black pepper. In a large bowl, combine these ingredients. Mix until the rice is well coated. The cheese adds flavor and helps bind the rice. Make sure there are no dry spots in the mixture. This ensures even taste in each bite.
Shaping the Rice Balls
Now, it’s time to shape your rice balls. Wet your hands with water to keep the rice from sticking. Take about two tablespoons of the rice mixture. Form it into a ball with your hands. Make sure each ball is firm but not too tight. Place the shaped balls on a parchment-lined baking sheet. Repeat this until you use all the mixture. This step is fun and lets you get creative with the size.
Frying the Rice Balls
Next, heat oil in a deep frying pan. Use about one inch of oil and heat it to 350°F (175°C). Once the oil is hot, add the rice balls carefully. Don’t overcrowd the pan; fry them in small batches. Cook each side for 3-4 minutes until they turn golden brown. This is when they get crispy and delicious. Use a slotted spoon to remove them from the oil. Drain the excess oil on a paper towel-lined plate. Sprinkle fresh herbs on top for extra flavor. Serve them warm with marinara sauce for dipping. Enjoy your tasty snack!
Tips & Tricks
Achieving Perfect Crispiness
To make your rice balls nice and crispy, choose the right oil. I prefer vegetable or canola oil for frying. Heat the oil to about 350°F (175°C). If the oil is too cool, the rice balls will soak up oil, making them soggy. If it’s too hot, they will burn. You can test the oil by dropping in a small piece of bread. If it bubbles and browns quickly, you’re ready.
Ensuring Even Cooking
When frying, add only a few rice balls at a time. Overcrowding the pan lowers the oil’s temperature, leading to uneven cooking. Fry the balls for about 3-4 minutes on each side. You want them golden brown all over. Use a slotted spoon to turn them gently. This helps keep their shape while ensuring every side gets that perfect crunch.
Storing Leftover Rice Balls
If you have any rice balls left, wait until they cool completely before storing. Place them in an airtight container. They can last in the fridge for up to three days. To reheat, bake them in the oven at 350°F (175°C) until they are warm and crispy again. Avoid the microwave, as it can make them chewy. For long-term storage, you can freeze the rice balls. Just remember to separate them with parchment paper to prevent sticking.

Variations
Different Cheeses to Use
You can change the cheese for different tastes. Try mozzarella for a melty center. This cheese gives a nice stretch when you bite into the rice ball. Cheddar adds a sharp flavor that pairs well with the rice. If you want something creamy, use goat cheese. It mixes well with herbs and gives a unique taste. Each cheese brings its own twist to the dish.
Adding Vegetables or Proteins
You can boost the flavor by adding veggies or proteins. Chopped spinach or shredded carrots mix well with the rice. This adds color and nutrients. If you want more protein, try cooked chicken, bacon bits, or even tofu. Just make sure to chop them small. This way, they blend evenly with the rice mixture. It makes each bite tasty and filling.
Spicy and Sweet Flavor Twists
If you like heat, add chili flakes or jalapeños to the mix. This gives your rice balls a spicy kick. For a sweet twist, mix in cooked corn or diced bell peppers. You can also drizzle honey or sriracha on top before serving. This adds a fun flavor contrast to the crispy balls. Experimenting with flavors makes each batch exciting and new.
Storage Info
Best Practices for Storage
To keep your crispy rice balls fresh, store them in an airtight container. Place parchment paper between layers to avoid sticking. This helps maintain their crunch. Store them in the fridge for up to three days. If you don’t plan to eat them soon, freezing is a great option.
Reheating Tips for Leftovers
When reheating, use an oven instead of a microwave. Preheat the oven to 350°F (175°C). Place the rice balls on a baking sheet. Bake for about 10-15 minutes until hot and crispy. This method keeps them crunchy. Avoid the microwave, as it can make them soggy.
Freezing Rice Balls for Later Use
To freeze, first, cool the rice balls completely. Arrange them on a baking sheet in a single layer. Place them in the freezer for about 2 hours until firm. Then, transfer them to a freezer-safe bag. They can last for up to three months. When ready to eat, simply reheat them from frozen in the oven. Enjoy these tasty treats anytime!
FAQs
Can I use regular rice instead of sushi rice?
Yes, you can use regular rice, but sushi rice works best. Sushi rice is sticky, which helps the balls hold their shape. If you use regular rice, it may not stick as well. Consider adding a little more cheese or using a short-grain variety for better results.
How long do crispy rice balls last in the fridge?
Crispy rice balls last about 3 to 4 days in the fridge. Make sure to store them in an airtight container. They may lose some crispiness when stored, but they still taste great. To regain the crunch, you can reheat them in an oven or an air fryer.
What are some creative serving suggestions?
You can serve crispy rice balls in many fun ways. Try pairing them with different dips like spicy mayo or sriracha. You can also make a rice ball platter with cut veggies and dips. For a twist, add a sprinkle of sesame seeds or crushed nuts on top. Serve them as appetizers at parties or casual gatherings.
You now have all the tools to make easy crispy rice balls. We covered the key ingredients, from essential staples to fun add-ins and tasty dips. The step-by-step guide helps you shape, fry, and enjoy. Plus, tips on crispiness and storing leftovers ensure success.
Get creative with variations, whether it’s cheese, veggies, or unique flavors. These rice balls can be a hit at any meal. Enjoy your cooking, and don’t be afraid to experiment!


