
Introduction
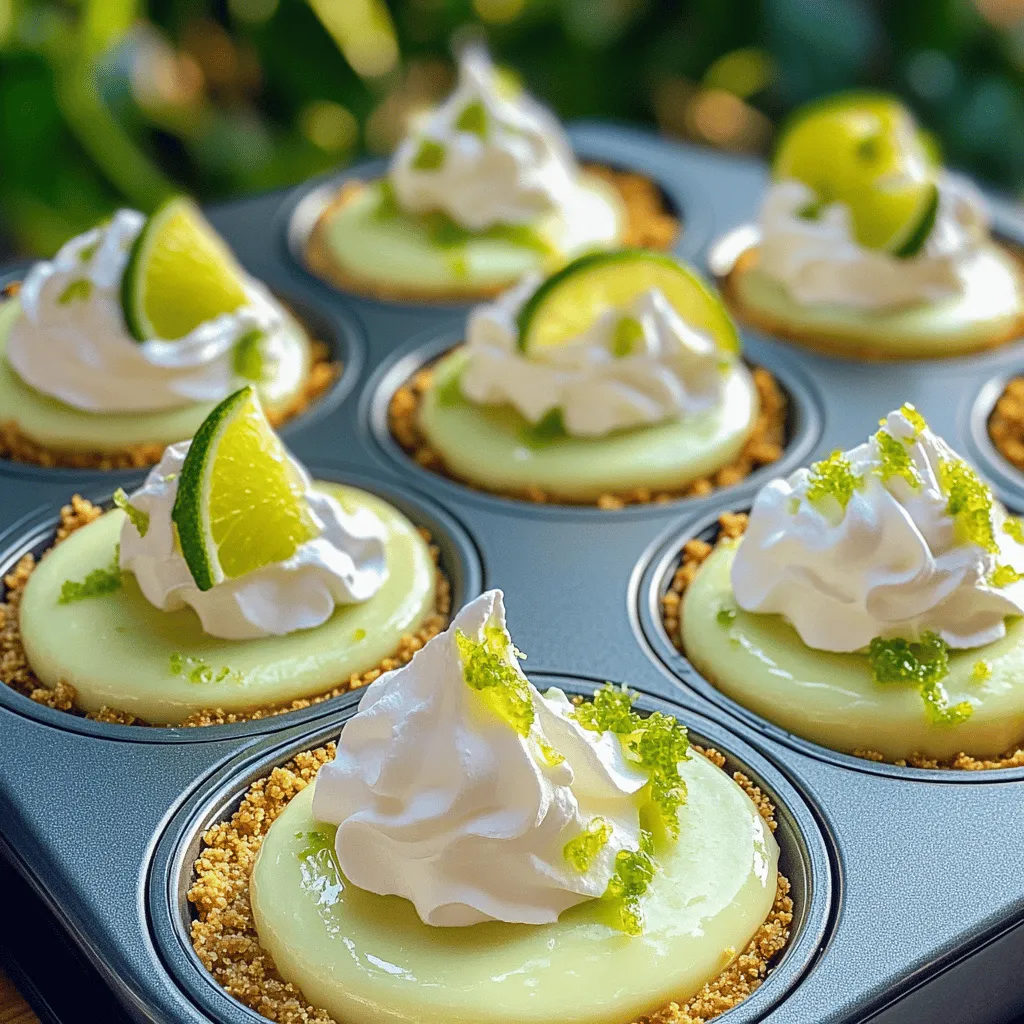
Mini key lime cheesecakes are a delightful twist on the classic dessert, offering a perfect balance of tangy and sweet flavors in a charming, bite-sized form. Their popularity has surged in recent years, as they provide a refreshing alternative to heavier desserts, making them ideal for warm weather gatherings, parties, or simply as a personal indulgence. The unique flavor profile of key lime—bright, zesty, and refreshing—ensures that these mini treats are a hit among dessert lovers of all ages.
One of the best aspects of mini cheesecakes is their versatility. They are easy to serve, can be made in advance, and offer a visually appealing presentation that enhances any dessert table. Whether you are hosting a summer barbecue, a birthday party, or just indulging yourself at home, these mini key lime cheesecakes will surely impress your guests and satisfy your sweet tooth.
Understanding Key Lime Cheesecakes
To appreciate the mini key lime cheesecake fully, it’s important to understand the essence of key lime itself. Key limes, smaller and more aromatic than the regular Persian limes, are native to the Florida Keys, where they thrive in the subtropical climate. Their juice is renowned for its unique tartness and bright flavor, which is the star of this dessert. Unlike standard limes, key limes have a more intense flavor that translates beautifully into both sweet and savory dishes.
Cheesecake, on the other hand, has a long-standing place in dessert culture. Originating from ancient Greece, this creamy dessert has evolved into numerous variations worldwide. The rich, creamy texture of cheesecake pairs beautifully with the tanginess of key lime, creating a harmonious blend of flavors.
What makes mini cheesecakes particularly appealing is their size. Unlike traditional full-sized cheesecakes, these mini versions offer portion control while still delivering all the indulgence of the original. They are perfect for those who want to sample a variety of desserts without overindulging. Their small stature makes them easy to transport, serve, and enjoy, making them a go-to choice for gatherings and celebrations.
Ingredients Breakdown
The Crust
The crust of the mini key lime cheesecakes is foundational to the overall flavor and texture of the dessert. Here’s a detailed look at each ingredient involved in creating the perfect crust:
– Graham Cracker Crumbs: These crumbs provide a classic, slightly sweet base that pairs wonderfully with the tangy filling. The crunchiness of the crust adds a delightful contrast to the smooth cheesecake filling. For the best results, use freshly crushed graham crackers to maintain optimal texture and flavor.
– Granulated Sugar: This ingredient adds a touch of sweetness to the crust. The granulated sugar helps to enhance the flavor of the graham cracker crumbs without overpowering the overall taste of the cheesecake.
– Unsalted Butter: Butter acts as a binding agent in the crust, helping to hold the crumb mixture together. It also adds richness and flavor. Using unsalted butter is advisable in baking, as it allows you to control the salt content in your dessert.
The Cheesecake Filling
The filling is where the magic happens, and understanding its components is essential for achieving the perfect mini key lime cheesecake:
– Cream Cheese: The base of any cheesecake, cream cheese provides a rich and creamy texture that is essential for the dessert. It should be softened before mixing to ensure a smooth consistency, free of lumps.
– Sour Cream: Adding sour cream to the filling contributes creaminess and a slight tang that complements the key lime juice. This ingredient also helps balance the sweetness, enhancing the overall flavor profile of the cheesecake.
– Fresh Key Lime Juice and Zest: The use of fresh key lime juice is crucial for authentic flavor. It infuses the cheesecake with that signature tanginess and brightness. The zest adds an aromatic quality that elevates the dessert, making every bite a burst of citrus goodness.
– Eggs: Eggs are essential for giving the cheesecake structure and richness. They help bind the filling together and contribute to the creamy texture. Be sure to use large eggs, as the size can affect the overall consistency of the cheesecake.
Topping Ingredients
No cheesecake is complete without the perfect topping to enhance its flavor and presentation:
– Whipped Cream: A light dollop of whipped cream adds a beautiful finish to the mini key lime cheesecakes. It provides a creamy contrast to the tart filling and enhances the dessert’s visual appeal.
– Lime Wedges: Adding a lime wedge as a garnish not only makes the dessert more visually appealing but also offers an extra burst of flavor for those who enjoy a more pronounced lime taste.
Preparation Steps for Mini Key Lime Cheesecakes
Now that you understand the ingredients and their roles in creating mini key lime cheesecakes, it’s time to dive into the preparation steps. These steps will guide you through the process, ensuring that your mini cheesecakes turn out deliciously every time.
1. Preheat the Oven: Begin by preheating your oven to 325°F (163°C). This ensures that your cheesecakes cook evenly and set properly.
2. Prepare the Crust: In a mixing bowl, combine the graham cracker crumbs, granulated sugar, and melted unsalted butter. Stir until the mixture resembles wet sand. You want to ensure that all the crumbs are coated in butter. Once combined, press the mixture firmly into the bottoms of a muffin tin lined with paper cupcake liners or greased with cooking spray. Use the back of a spoon or your fingers to pack the crumbs down tightly.
3. Bake the Crust: Place the muffin tin in the preheated oven and bake for about 8-10 minutes, or until the crusts are lightly golden. This step helps to set the crust and gives it a nice crunch.
4. Prepare the Filling: While the crust is baking, you can prepare the cheesecake filling. In a large mixing bowl, beat the softened cream cheese with an electric mixer until it is smooth and creamy. Gradually add the granulated sugar, continuing to beat until well combined.
5. Add Sour Cream and Eggs: Mix in the sour cream until fully incorporated. Then, add the eggs one at a time, mixing just until combined after each addition. Overmixing can lead to a dense texture, so be careful to mix only until the ingredients are blended.
6. Incorporate the Key Lime Juice and Zest: Finally, add the fresh key lime juice and zest to the mixture. Mix until everything is well combined, and the filling is smooth. This is the moment where the delightful tanginess of key lime truly shines through.
7. Fill the Crusts: Once the crusts have finished baking and have cooled slightly, remove them from the oven. Carefully pour or spoon the cheesecake filling over the crusts, filling each cup about three-quarters full. This allows room for the cheesecakes to rise slightly as they bake.
8. Bake the Cheesecakes: Return the muffin tin to the oven and bake for an additional 15-18 minutes, or until the centers are set but still slightly jiggly. Remember, they will continue to set as they cool.
9. Cool and Chill: Once baked, remove the cheesecakes from the oven and let them cool in the tin for about 10 minutes. Then, transfer them to a wire rack to cool completely. For the best flavor and texture, refrigerate them for at least 2 hours before serving.
These initial steps set the stage for crafting delicious mini key lime cheesecakes that deliver a refreshing burst of flavor in every bite. As you progress through the recipe, you’ll be guided further into the finishing touches and serving suggestions, ensuring that your mini cheesecakes are not only tasty but also visually stunning. Stay tuned for more details on how to elevate this dessert to perfection.
Preheating the Oven: Why Temperature Matters in Baking
Before diving into the delightful world of mini key lime cheesecakes, preheating your oven to the correct temperature is crucial. Preheating ensures that your cheesecake base and filling bake evenly, resulting in the perfect texture. For this recipe, set your oven to 325°F (163°C). This temperature is ideal because it allows the cheesecakes to cook slowly, preventing cracks and ensuring a smooth, creamy consistency. An oven thermometer can be an invaluable tool to ensure accuracy, as many ovens can be off by several degrees.
Making the Crust: Techniques for Achieving the Perfect Base
The crust of your mini cheesecakes is foundational, providing both flavor and texture. Start with graham cracker crumbs, which deliver a subtle sweetness that complements the tangy filling. You’ll also need melted butter and a pinch of sugar to bind the crumbs together.
1. Crumb Preparation: Use a food processor to crush the graham crackers finely. This ensures that there are no large chunks, which can interfere with the texture of the crust.
2. Mixing: In a mixing bowl, combine the crumb mixture with melted butter and sugar. Stir until the crumbs are fully coated; the mixture should resemble wet sand.
3. Taste Test: Before proceeding, taste the mixture. It should be sweet with a slight buttery flavor.
Tips for Pressing the Crust Evenly into Muffin Cups
To achieve a perfectly formed crust, you’ll need to press the mixture into your muffin tin properly. Here’s how:
– Distribution: Use a tablespoon to scoop the crumb mixture into each muffin cup. Aim for about 1-2 tablespoons per cup, depending on the size of your mini cheesecakes.
– Pressing Technique: With the back of a measuring cup or your fingers, press the crumbs firmly and evenly across the bottom of each cup. This step is crucial; a well-pressed crust will hold together once baked.
Baking the Crust: Signs of Readiness and Texture to Look For
Once your crust is pressed into the muffin tins, it’s time to bake. Place the muffin tin in your preheated oven for about 8-10 minutes. Here are some signs of readiness:
– Color: The crust should turn a light golden brown. This indicates that the sugars have caramelized slightly, enhancing the flavor.
– Texture: When you touch the crust, it should feel firm rather than crumbly. If it feels too soft, give it a few more minutes in the oven.
Preparing the Filling: Achieving the Perfect Creamy Texture
The filling is where the magic happens. For your mini key lime cheesecakes, you’ll need cream cheese, sour cream, sugar, eggs, key lime juice, and lime zest. The goal is to create a creamy, smooth filling that perfectly balances sweetness and tartness.
Importance of Mixing Order and Avoiding Overmixing
1. Mixing Order: Start by beating the cream cheese until smooth. Gradually add in the sugar, followed by the sour cream, eggs, key lime juice, and zest. This method ensures that each ingredient is well incorporated without overworking the batter.
2. Avoid Overmixing: Once you add the eggs, mix only until combined. Overmixing aerates the batter, which can lead to cracks in your finished cheesecakes.
Tips for Ensuring the Filling is Smooth
For a luxurious, smooth filling, consider these tips:
– Room Temperature Ingredients: Ensure that your cream cheese and eggs are at room temperature before mixing. Cold ingredients can lead to lumps in your filling.
– Scraping the Bowl: Frequently scrape down the sides of your mixing bowl while blending. This action helps incorporate all ingredients evenly.
Filling the Cups: Techniques for Even Distribution
Once your filling is ready, it’s time to fill the crusts:
1. Even Distribution: Use a measuring cup or a piping bag to pour or pipe the filling into each muffin cup, leaving about 1/4 inch of space at the top. This space allows for expansion during baking.
2. Leveling: Gently tap the muffin tin on the counter to help settle the filling and eliminate air bubbles.
Baking the Cheesecakes: Key Indicators for Doneness
Place your filled muffin tin back into the oven and bake for 15-20 minutes. Here’s what to look for:
– Slightly Jiggly Center: The cheesecakes should be set around the edges but still have a slightly jiggly center. This indicates that they will firm up as they cool.
– Surface Appearance: They should not be overly puffed or cracked, which can signify overbaking.
Understanding the “Slightly Jiggly” Concept
The “slightly jiggly” concept is essential for achieving the perfect cheesecake texture. The center will firm up as it cools, so it’s better to err on the side of underbaking than overbaking. This method ensures that your cheesecakes maintain a creamy consistency rather than becoming dry.
Cooling and Chilling: Importance of Refrigeration for Texture
After baking, allow the mini cheesecakes to cool in the pan for about 10 minutes before transferring them to a wire rack. Once they reach room temperature, cover them with plastic wrap and refrigerate for at least three hours, preferably overnight. Chilling is critical as it allows the flavors to meld and enhances the overall texture, making them creamy and delicious.
Serving Your Mini Key Lime Cheesecakes
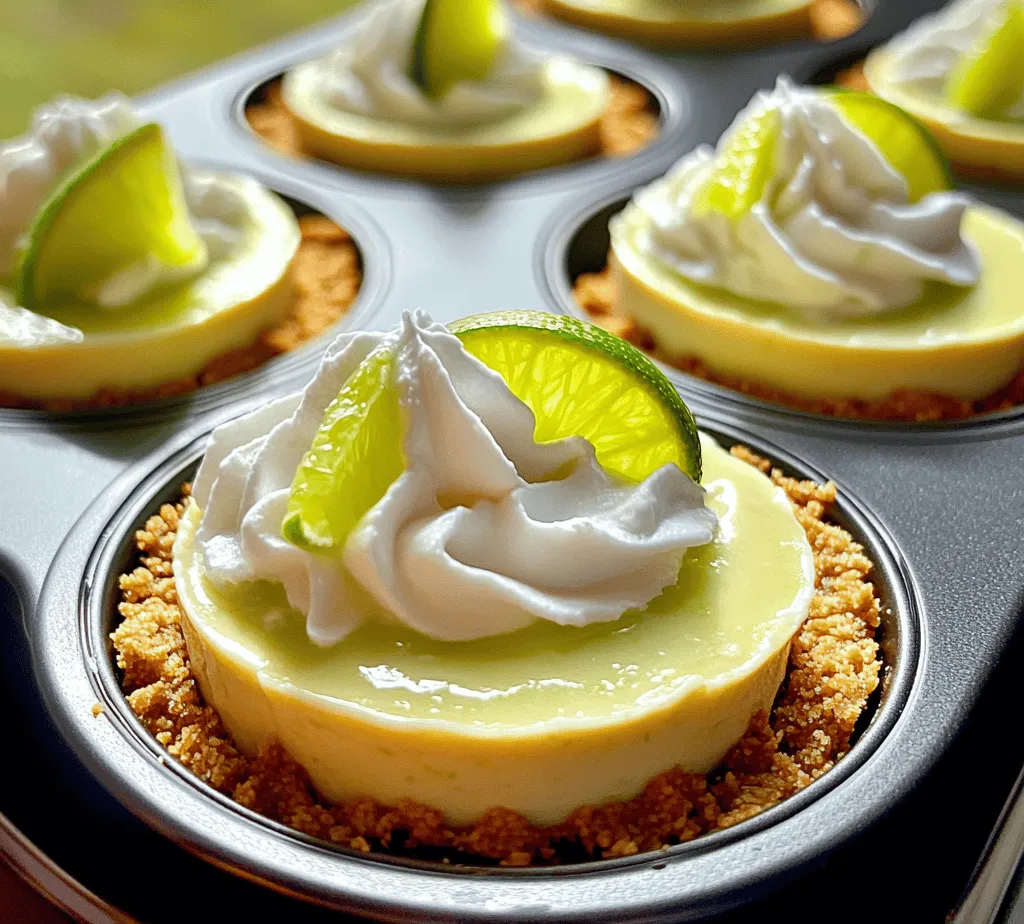
Presentation is key when it comes to serving your mini key lime cheesecakes. Here are some creative ideas to elevate your dessert:
Presentation Ideas for Serving
– Plating: Arrange the cheesecakes on a decorative platter or individual dessert plates. A sprinkle of graham cracker crumbs around each cheesecake adds a nice touch.
– Serving Temperature: Serve them chilled for the best flavor experience.
Creative Ways to Top with Whipped Cream
– Whipped Cream: Top each cheesecake with freshly whipped cream. For added flair, pipe the cream using a star tip for a professional finish.
– Flavor Infusions: Consider adding a hint of lime zest to the whipped cream for a cohesive flavor profile.
Garnishing Tips with Lime Wedges or Slices
– Fresh Garnishes: Top with a small lime wedge or thin lime slice for a pop of color and a hint of freshness.
– Mint Leaves: A sprig of mint can also enhance the presentation and add a refreshing aroma.
Suggested Pairings with Beverages
– Tea Pairings: Serve with a refreshing cup of iced tea, which complements the tanginess of the key lime.
– Cocktail Suggestions: For an adult twist, pair with a lime mojito or a classic gin and tonic. The citrus notes in these beverages enhance the cheesecake’s flavor.
Nutritional Information
Understanding the nutritional content of your mini key lime cheesecakes can help you enjoy them guilt-free:
– Caloric Content: Each mini cheesecake contains approximately 150-200 calories, depending on the specific ingredients and portion size.
– Serving Size: A serving is typically one mini cheesecake, making it easy to control portioning.
Discussion on Dietary Modifications
– Gluten-Free Options: Substitute graham crackers with gluten-free cookie crumbs or almond flour for a gluten-free crust.
– Sugar Alternatives: Consider using stevia or monk fruit sweetener to reduce sugar content without sacrificing flavor.
Conclusion
Making mini key lime cheesecakes is a delightful experience that combines the joy of baking with the satisfaction of sharing a delicious treat. These mini desserts offer a tangy and creamy indulgence that is sure to impress your family and friends. Whether for a special occasion or a casual gathering, these cheesecakes are versatile and can easily adapt to different flavor profiles.
I encourage you to try this recipe and savor the delightful tanginess of key lime, complemented by the smooth cream cheese filling and crunchy crust. With endless possibilities for presentation and pairing, mini key lime cheesecakes will undoubtedly become a staple in your dessert repertoire. Enjoy the process, and most importantly, enjoy every bite!


