No-Bake Chocolate Peanut Butter Bars Delightful Treat

WANT TO SAVE THIS RECIPE?

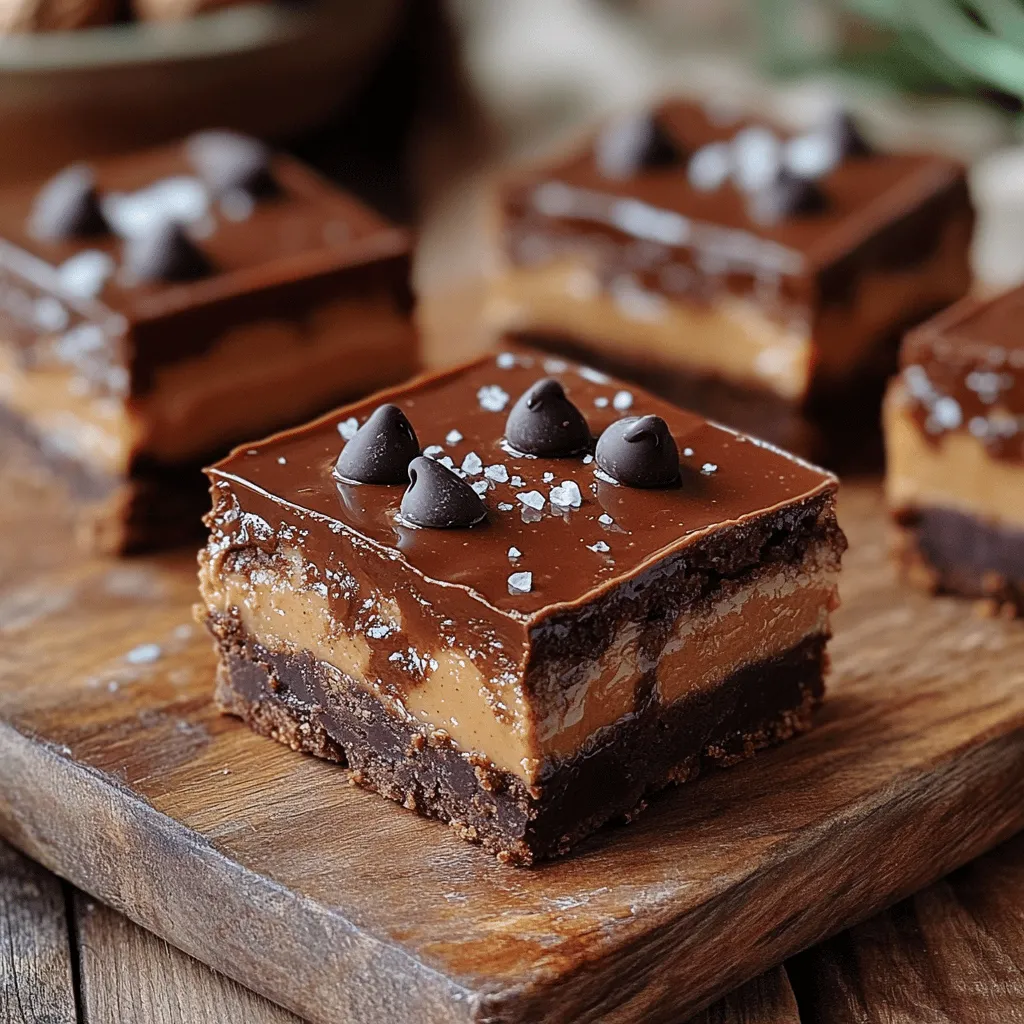
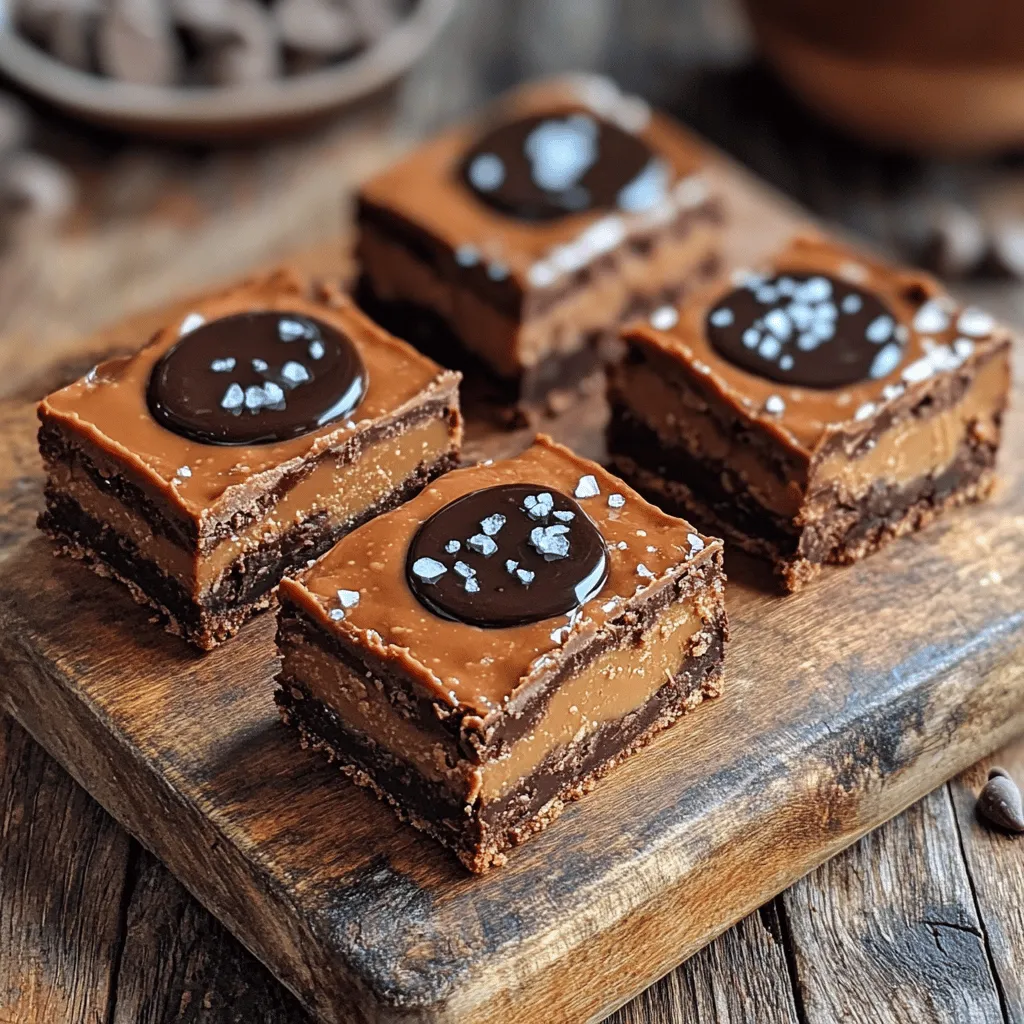
If you crave a sweet fix but want to avoid baking, you’re in the right place! My No-Bake Chocolate Peanut Butter Bars are easy to make and oh-so-delicious. With just a few simple ingredients, you can whip up a treat that’s perfect for snacks or desserts. Join me as we dive into this guide filled with tips, variations, and expert advice for creating your new favorite dessert!

Ingredients

List of Ingredients

1 cup rolled oats: These provide a hearty base. They add fiber and energy. You can swap them for gluten-free oats if needed.

1 cup natural peanut butter: This gives the bars their rich flavor. You can use any nut or seed butter, like almond or sunflower butter, for a different taste.

1/2 cup honey or maple syrup: This sweetens the bars. Both options bring a nice touch. Use maple syrup for a vegan choice.

1/2 cup cocoa powder: This adds deep chocolate flavor. Look for unsweetened cocoa for less sugar.

1/4 cup coconut oil, melted: This helps bind the ingredients. It also adds a slight coconut taste. Use any neutral oil if you prefer.

1/2 teaspoon vanilla extract: This enhances the flavor. It gives a warm, sweet note.

1/4 teaspoon sea salt: This balances the sweetness. It helps bring out the chocolate flavor.

1/2 cup dairy-free chocolate chips (optional): Adding these boosts the chocolatey goodness. Choose dark chocolate for a richer taste.

Nutritional Benefits

Peanut butter is high in protein, making these bars filling. It also contains healthy fats. Rolled oats are great for digestion. They keep you full longer. They also provide energy for your day.

Specialty Ingredients

For a vegan version, use maple syrup and dairy-free chocolate chips. You can also try protein powder for an extra boost. This adds flavor and nutrition.

Step-by-Step Instructions

Preparation Steps

To make no-bake chocolate peanut butter bars, you’ll need some simple tools. Grab a large mixing bowl, a whisk, and an 8×8 inch baking dish. A spatula will help you mix and press the ingredients. You will also need parchment paper to line your dish.

1. Mix the Dry Ingredients: In a large mixing bowl, combine 1 cup of rolled oats, 1/2 cup of cocoa powder, and 1/4 teaspoon of sea salt. Mix them well until they blend into a uniform mixture. This step is key for texture.

2. Whisk the Wet Ingredients: In another bowl, add 1 cup of natural peanut butter, 1/2 cup of honey or maple syrup, 1/4 cup of melted coconut oil, and 1/2 teaspoon of vanilla extract. Whisk them together until smooth and creamy. Proper mixing ensures that the bars hold together well.

3. Combine Wet and Dry Mixtures: Pour the wet mixture into the dry ingredients. Stir until fully combined. If you want more chocolate flavor, fold in 1/2 cup of dairy-free chocolate chips. Make sure everything is well mixed for the best flavor.

4. Prepare the Baking Dish: Line your 8×8 inch baking dish with parchment paper. Leave some paper hanging over the sides. This helps with easy removal later.

5. Add the Mixture: Pour the combined mixture into the lined dish. Press it down firmly to create an even layer. Use the back of your spatula or your hands to compact it well. The firmer it is, the better it will hold its shape.

6. Chill the Bars: Place the dish in the fridge for at least 2 hours. This helps the bars set properly. Once firm, lift them out using the parchment paper and cut into squares or rectangles.

7. Storage: Store any leftover bars in an airtight container in the fridge. They will stay fresh for up to a week.

These simple steps will help you create delicious no-bake chocolate peanut butter bars. For the full recipe, check out the details above. Enjoy your sweet treat!

Tips & Tricks

Expert Advice

To perfect the texture and flavor of your no-bake chocolate peanut butter bars, focus on the mixing. Start with the dry ingredients first. This helps blend the oats and cocoa powder evenly. When you mix the wet ingredients, ensure the peanut butter is smooth. A creamy peanut butter gives a rich flavor and smooth texture.

Temperature is key when melting coconut oil. Heat it gently in the microwave or on the stove. Too much heat can alter its properties, making it less effective. Aim for a warm, liquid state without boiling. This helps the bars set better.

Cutting and serving the bars can be tricky. After refrigerating, let the bars sit at room temperature for a few minutes. This makes them easier to cut. Use a sharp knife for clean cuts. You can also line the baking dish with parchment paper. This allows for easy removal and serving.

For a fun twist, consider adding toppings like crushed nuts or extra chocolate chips before chilling. This adds flavor and a nice crunch. Follow the Full Recipe for a step-by-step guide to ensure your bars are a hit!
Variations

Recipe Variations

You can make these no-bake chocolate peanut butter bars even more fun! Try adding nuts for a crunch. Walnuts or almonds work great. Chopped dried fruit can add sweetness. Consider raisins or cranberries for a fruity twist. Spices can also elevate the flavor. A pinch of cinnamon or a dash of sea salt can make a big difference.

If you want a healthier option, you can swap honey for a sugar substitute. Maple syrup also adds a nice flavor. Use stevia or erythritol to cut down on calories. You can even try different nut butters like almond or cashew butter. Each option gives a unique taste.

You can turn these bars into other desserts too. Use them as a crust for a pie or cheesecake. Simply press the mixture into a pie pan. You can also crumble the bars and mix them with yogurt for a parfait. The possibilities are endless!

For the full recipe, check out the steps above for a delicious treat.

Storage Info

Best Storage Practices

To keep your no-bake chocolate peanut butter bars fresh, store them in an airtight container. This helps prevent them from drying out or absorbing smells from your fridge. Layer parchment paper between the bars if you stack them. It keeps them from sticking together.

You can freeze these bars for longer storage. Cut them into squares or rectangles before freezing. Wrap each piece in plastic wrap and then place them in a freezer bag. They can last for up to three months in the freezer. To eat, just take out a bar and let it sit at room temperature for about 15 minutes. You can also microwave it for a few seconds if you want a warm treat.

If you store the bars in the fridge, they stay good for about a week. Make sure to check for any signs of spoilage, like an off smell or unusual texture. Enjoy your delicious treats while they are fresh!

FAQs

Common Questions

What are no-bake chocolate peanut butter bars?

No-bake chocolate peanut butter bars are a simple, delicious treat. They mix oats, peanut butter, honey, cocoa, and coconut oil. You can make them without an oven, saving time and effort.

How long do they take to set?

These bars take about 2 hours to set in the fridge. Make sure to let them chill completely. This helps them firm up for easy cutting and serving.

Can I use crunchy peanut butter instead of creamy?

Yes, you can use crunchy peanut butter! It adds a nice texture and extra flavor. Just remember it may change the final texture a bit.

What makes these bars a healthier treat option?

These bars use natural ingredients like oats and peanut butter. They have no added sugars or preservatives. The healthy fats from peanut butter keep you full longer.

How can I make these bars gluten-free?

To make these bars gluten-free, use certified gluten-free oats. This ensures no cross-contamination with gluten. All other ingredients are naturally gluten-free too!

For the full recipe, check out the details above.

In this post, we explored how to make delicious no-bake chocolate peanut butter bars. We covered the ingredients, their benefits, and step-by-step instructions to ensure success. I shared expert tips for flavor and texture, along with variations to try. Finally, we discussed the best ways to store your bars for freshness.

Making these treats is fun and simple. Enjoy experimenting with your flavors, and share them with others!

- 1 cup rolled oats: These provide a hearty base. They add fiber and energy. You can swap them for gluten-free oats if needed. - 1 cup natural peanut butter: This gives the bars their rich flavor. You can use any nut or seed butter, like almond or sunflower butter, for a different taste. - 1/2 cup honey or maple syrup: This sweetens the bars. Both options bring a nice touch. Use maple syrup for a vegan choice. - 1/2 cup cocoa powder: This adds deep chocolate flavor. Look for unsweetened cocoa for less sugar. - 1/4 cup coconut oil, melted: This helps bind the ingredients. It also adds a slight coconut taste. Use any neutral oil if you prefer. - 1/2 teaspoon vanilla extract: This enhances the flavor. It gives a warm, sweet note. - 1/4 teaspoon sea salt: This balances the sweetness. It helps bring out the chocolate flavor. - 1/2 cup dairy-free chocolate chips (optional): Adding these boosts the chocolatey goodness. Choose dark chocolate for a richer taste. Peanut butter is high in protein, making these bars filling. It also contains healthy fats. Rolled oats are great for digestion. They keep you full longer. They also provide energy for your day. For a vegan version, use maple syrup and dairy-free chocolate chips. You can also try protein powder for an extra boost. This adds flavor and nutrition. To make no-bake chocolate peanut butter bars, you'll need some simple tools. Grab a large mixing bowl, a whisk, and an 8x8 inch baking dish. A spatula will help you mix and press the ingredients. You will also need parchment paper to line your dish. 1. Mix the Dry Ingredients: In a large mixing bowl, combine 1 cup of rolled oats, 1/2 cup of cocoa powder, and 1/4 teaspoon of sea salt. Mix them well until they blend into a uniform mixture. This step is key for texture. 2. Whisk the Wet Ingredients: In another bowl, add 1 cup of natural peanut butter, 1/2 cup of honey or maple syrup, 1/4 cup of melted coconut oil, and 1/2 teaspoon of vanilla extract. Whisk them together until smooth and creamy. Proper mixing ensures that the bars hold together well. 3. Combine Wet and Dry Mixtures: Pour the wet mixture into the dry ingredients. Stir until fully combined. If you want more chocolate flavor, fold in 1/2 cup of dairy-free chocolate chips. Make sure everything is well mixed for the best flavor. 4. Prepare the Baking Dish: Line your 8x8 inch baking dish with parchment paper. Leave some paper hanging over the sides. This helps with easy removal later. 5. Add the Mixture: Pour the combined mixture into the lined dish. Press it down firmly to create an even layer. Use the back of your spatula or your hands to compact it well. The firmer it is, the better it will hold its shape. 6. Chill the Bars: Place the dish in the fridge for at least 2 hours. This helps the bars set properly. Once firm, lift them out using the parchment paper and cut into squares or rectangles. 7. Storage: Store any leftover bars in an airtight container in the fridge. They will stay fresh for up to a week. These simple steps will help you create delicious no-bake chocolate peanut butter bars. For the full recipe, check out the details above. Enjoy your sweet treat! To perfect the texture and flavor of your no-bake chocolate peanut butter bars, focus on the mixing. Start with the dry ingredients first. This helps blend the oats and cocoa powder evenly. When you mix the wet ingredients, ensure the peanut butter is smooth. A creamy peanut butter gives a rich flavor and smooth texture. Temperature is key when melting coconut oil. Heat it gently in the microwave or on the stove. Too much heat can alter its properties, making it less effective. Aim for a warm, liquid state without boiling. This helps the bars set better. Cutting and serving the bars can be tricky. After refrigerating, let the bars sit at room temperature for a few minutes. This makes them easier to cut. Use a sharp knife for clean cuts. You can also line the baking dish with parchment paper. This allows for easy removal and serving. For a fun twist, consider adding toppings like crushed nuts or extra chocolate chips before chilling. This adds flavor and a nice crunch. Follow the Full Recipe for a step-by-step guide to ensure your bars are a hit! {{image_2}} You can make these no-bake chocolate peanut butter bars even more fun! Try adding nuts for a crunch. Walnuts or almonds work great. Chopped dried fruit can add sweetness. Consider raisins or cranberries for a fruity twist. Spices can also elevate the flavor. A pinch of cinnamon or a dash of sea salt can make a big difference. If you want a healthier option, you can swap honey for a sugar substitute. Maple syrup also adds a nice flavor. Use stevia or erythritol to cut down on calories. You can even try different nut butters like almond or cashew butter. Each option gives a unique taste. You can turn these bars into other desserts too. Use them as a crust for a pie or cheesecake. Simply press the mixture into a pie pan. You can also crumble the bars and mix them with yogurt for a parfait. The possibilities are endless! For the full recipe, check out the steps above for a delicious treat. To keep your no-bake chocolate peanut butter bars fresh, store them in an airtight container. This helps prevent them from drying out or absorbing smells from your fridge. Layer parchment paper between the bars if you stack them. It keeps them from sticking together. You can freeze these bars for longer storage. Cut them into squares or rectangles before freezing. Wrap each piece in plastic wrap and then place them in a freezer bag. They can last for up to three months in the freezer. To eat, just take out a bar and let it sit at room temperature for about 15 minutes. You can also microwave it for a few seconds if you want a warm treat. If you store the bars in the fridge, they stay good for about a week. Make sure to check for any signs of spoilage, like an off smell or unusual texture. Enjoy your delicious treats while they are fresh! What are no-bake chocolate peanut butter bars? No-bake chocolate peanut butter bars are a simple, delicious treat. They mix oats, peanut butter, honey, cocoa, and coconut oil. You can make them without an oven, saving time and effort. How long do they take to set? These bars take about 2 hours to set in the fridge. Make sure to let them chill completely. This helps them firm up for easy cutting and serving. Can I use crunchy peanut butter instead of creamy? Yes, you can use crunchy peanut butter! It adds a nice texture and extra flavor. Just remember it may change the final texture a bit. What makes these bars a healthier treat option? These bars use natural ingredients like oats and peanut butter. They have no added sugars or preservatives. The healthy fats from peanut butter keep you full longer. How can I make these bars gluten-free? To make these bars gluten-free, use certified gluten-free oats. This ensures no cross-contamination with gluten. All other ingredients are naturally gluten-free too! For the full recipe, check out the details above. In this post, we explored how to make delicious no-bake chocolate peanut butter bars. We covered the ingredients, their benefits, and step-by-step instructions to ensure success. I shared expert tips for flavor and texture, along with variations to try. Finally, we discussed the best ways to store your bars for freshness. Making these treats is fun and simple. Enjoy experimenting with your flavors, and share them with others!
No-Bake Chocolate Peanut Butter Bars

Indulge your sweet tooth without turning on the oven with these No-Bake Chocolate Peanut Butter Bars! This simple recipe combines oats, peanut butter, honey, and cocoa for a delicious treat that's perfect for any occasion. Packed with protein and healthy fats, these bars are not only tasty but also nutritious. Check out the full recipe to learn how to whip up your new favorite dessert and enjoy exploring delicious variations that everyone will love!

Ingredients
  

1 cup rolled oats

1 cup natural peanut butter (or any nut/seed butter of choice)

1/2 cup honey or maple syrup

1/2 cup cocoa powder

1/4 cup coconut oil, melted

1/2 teaspoon vanilla extract

1/4 teaspoon sea salt

1/2 cup dairy-free chocolate chips (optional, for extra chocolate flavor)

Instructions
 

In a large mixing bowl, combine the rolled oats, cocoa powder, and sea salt. Mix until fully incorporated.

    In another bowl, whisk together the peanut butter, honey (or maple syrup), melted coconut oil, and vanilla extract until smooth and creamy.

      Pour the wet mixture into the dry ingredients and stir until everything is well combined. If using, fold in the dairy-free chocolate chips for an extra layer of chocolate goodness.

        Line an 8x8 inch baking dish with parchment paper, leaving some overhang for easy removal.

          Pour the mixture into the prepared baking dish, pressing it down firmly to create an even layer. Use the back of a spatula or your hands to compact it.

            Refrigerate for at least 2 hours or until firm. Once set, lift the bars out of the dish using the parchment overhang and cut into squares or rectangles.

              Store any leftover bars in an airtight container in the fridge for up to a week.

                Prep Time: 10 minutes | Total Time: 2 hours 10 minutes | Servings: 12 bars

                  WANT TO SAVE THIS RECIPE?

                  Leave a Comment

                  Recipe Rating