Introduction
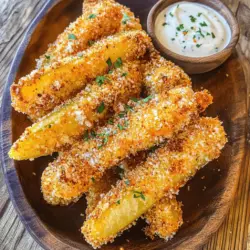
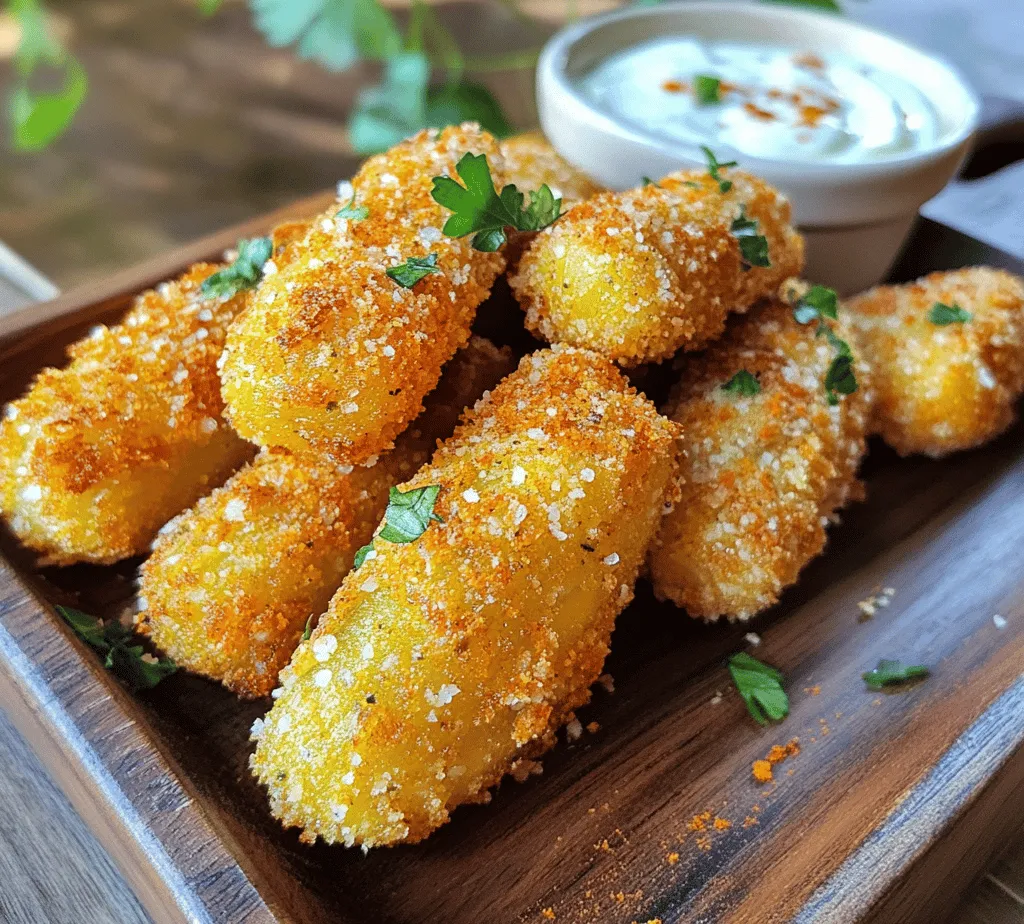
Fried pickles have surged in popularity over the years, emerging as a beloved snack and appetizer in various dining settings, from casual bars to upscale restaurants. The delightful juxtaposition of tangy pickles and a crispy, golden coating creates a sensory experience that appeals to many. Among these, the Crunchy Dill Delight Fried Pickles stand out with their unique blend of flavors and textures, delivering a punch of dill and a satisfying crunch in every bite.
This recipe is not only a crowd-pleaser but also a versatile choice that fits seamlessly into various occasions. Whether you’re hosting a game day gathering, planning a casual family dinner, or simply craving a tasty snack, these fried pickles are sure to impress. With their zesty flavor profile and irresistible crunch, they can be served as a standalone treat or paired with a variety of dipping sauces for an enhanced experience.
Understanding the Ingredients
To create the perfect batch of Crunchy Dill Delight Fried Pickles, it’s essential to understand the role of each ingredient in this delightful recipe. The following breakdown will guide you through the key components that contribute to the flavor and texture of these fried pickles.
Dill Pickle Slices
At the heart of this recipe are the dill pickle slices, which provide the signature tangy flavor that fried pickles are known for. The type of pickles you choose can significantly influence the final dish. For a classic taste, opt for traditional dill pickles, which have a robust flavor profile. If you prefer a bit of heat, consider using spicy dill pickles to give your fried pickles a kick. Alternatively, bread and butter pickles offer a sweet-tart balance that can also be delicious. Whichever variety you choose, ensure they are sliced uniformly to promote even frying.
Flour and Seasonings
The flour mixture is critical for creating a crispy coating that clings to the pickles and enhances their flavor. All-purpose flour is typically used, but you can also experiment with gluten-free flour if desired. The seasonings added to the flour mixture elevate the flavor profile of the fried pickles. Common choices include garlic powder, onion powder, cayenne pepper, and paprika, which impart a subtle warmth and depth to each bite. Adjust the level of seasoning to match your taste preferences, ensuring a well-rounded flavor that complements the dill pickles.
Egg and Buttermilk
Binding the coating to the pickles is crucial for achieving that perfect crunch, and this is where egg and buttermilk come into play. The egg acts as a glue, helping the flour and seasonings adhere to the pickles. Buttermilk, on the other hand, not only adds richness but also tenderizes the pickles, making them even more delicious. If you don’t have buttermilk on hand, you can create a quick substitute by mixing milk with a splash of vinegar or lemon juice. This combination will mimic the tangy flavor of buttermilk and work just as well in the recipe.
Breadcrumbs
To achieve the ultimate crunch, breadcrumbs are a must. While you can use regular breadcrumbs, panko breadcrumbs are highly recommended for their light and airy texture, which provides an extra crunch. Panko breadcrumbs are coarser than traditional breadcrumbs, resulting in a delightful crunch that elevates your fried pickles to the next level. For a twist on flavor, consider seasoning the breadcrumbs with additional herbs or spices to enhance the overall taste of the dish.
Oil for Frying
Choosing the right oil for frying is essential for achieving perfectly crispy fried pickles. Oils with a high smoke point, such as vegetable oil, canola oil, or peanut oil, are ideal for frying. These oils can withstand the high temperatures needed for frying without burning, ensuring a golden and crispy exterior. It’s also important to monitor the oil temperature to around 350°F (175°C) before adding the pickles. This temperature is crucial for achieving that coveted crunch while preventing the pickles from becoming overly greasy.
Preparing for Cooking
Before diving into the frying process, it’s important to prepare the pickles correctly to ensure the best results. Proper preparation will set the stage for a batch of fried pickles that are crispy, flavorful, and utterly irresistible.
Draining and Drying Dill Pickles
The first step in preparing the pickles is to drain them thoroughly. Excess moisture can lead to soggy fried pickles, so it’s essential to remove as much liquid as possible. Begin by placing the dill pickle slices in a colander and allowing them to drain for about 10 minutes. After draining, pat the pickles dry with paper towels to absorb any remaining moisture. This step is crucial in achieving the ideal texture and ensuring that the breading adheres well during frying.
Setting up a Breading Station
Creating an efficient breading station will streamline the frying process and make it easier to coat your pickles evenly. Here’s a step-by-step guide on how to set up your breading station:
1. Gather Your Ingredients: Start by assembling all your ingredients in one place. You will need the drained and dried dill pickle slices, flour mixture, egg and buttermilk mixture, and seasoned breadcrumbs.
2. Use Shallow Dishes: Place the flour mixture in a shallow dish, the egg and buttermilk mixture in another shallow dish, and the breadcrumbs in a third shallow dish. This setup will allow you to easily coat the pickles without making a mess.
3. Organize Your Workflow: Arrange the dishes in the following order: flour mixture, egg mixture, breadcrumbs. This setup will guide you through the breading process efficiently, preventing cross-contamination and ensuring a smooth workflow.
4. Prepare for Frying: In addition to your breading station, have a large plate or tray ready to place the coated pickles before frying. This will help keep the breaded pickles organized and prevent them from sticking together.
5. Heat the Oil: Before you start breading the pickles, heat your frying oil in a deep skillet or pot over medium heat. Use a thermometer to monitor the oil temperature, aiming for 350°F (175°C).
With your ingredients prepped and your breading station set up, you’re ready to start frying your Crunchy Dill Delight Fried Pickles. The next step will guide you through the frying process, ensuring that your pickles turn out perfectly crispy and delicious.
The Cooking Process
Frying pickles may seem straightforward, but achieving that perfect crunch requires attention to detail. Here’s how to fry your Crunchy Dill Delight Fried Pickles to crispy perfection.
1. Prepare the Oil: Start by pouring vegetable oil or canola oil into a deep frying pan or Dutch oven. You will need enough oil to submerge the pickles, typically around 2-3 inches deep. Heat the oil over medium heat until it reaches about 350°F (175°C). Use a kitchen thermometer for accuracy; this is crucial as the temperature directly affects the outcome of your fried pickles.
2. Monitor Oil Temperature: Maintaining the right oil temperature is essential for achieving crispy fried pickles without excessive greasiness. If the oil is too hot, the pickles will burn on the outside before cooking through. Conversely, if the oil is not hot enough, the pickles will absorb too much oil and become soggy. To test the oil, drop in a small piece of batter; if it sizzles and rises to the surface, you’re ready to fry.
3. Frying in Batches: To ensure the oil temperature remains consistent, fry the pickles in small batches. Overcrowding the pan will lower the oil temperature, resulting in uneven cooking. Depending on the size of your frying pan, aim to fry around 4-6 pickles at a time. Allow the oil to return to temperature between batches to ensure each pickle has that golden, crunchy exterior.
4. Flipping the Pickles: After about 2-3 minutes, use a slotted spoon or tongs to gently flip the pickles. This is essential for even cooking and browning. If you wait too long to flip, the batter may stick to the bottom of the pan. Look for a golden-brown color on one side before turning them over.
5. Visual Cues for Doneness: As your pickles fry, keep an eye on their color and texture. The batter should turn a beautiful golden brown, and the pickles should be visibly puffed up. A good indicator of doneness is a crispy texture without any visible moisture seeping through the batter. Typically, fried pickles take about 4-5 minutes in total to reach that ideal state.
6. Draining Excess Oil: Once removed from the oil, place the fried pickles on a plate lined with paper towels to absorb any excess oil. This step is vital for maintaining that desired crunch. Serve immediately while they’re still hot and crispy.
Serving Suggestions
Crunchy Dill Delight Fried Pickles are a versatile snack perfect for any gathering or as an appetizer. Here are some creative serving ideas that will impress your guests:
1. Dipping Sauces: Pair your fried pickles with a variety of dipping sauces to enhance their flavor. Here are a few recommendations:
– Ranch Dressing: This classic pairing complements the dill flavor beautifully.
– Spicy Remoulade: A zesty remoulade with a kick adds an exciting contrast to the pickles.
– Garlic Aioli: The creamy texture and rich flavor of aioli elevate the pickles to a gourmet level.
– Honey Mustard: A sweet and tangy honey mustard dipping sauce provides a delightful balance to the savory pickles.
2. Garnishing: For a visually appealing presentation, consider garnishing your serving platter with fresh herbs like dill or parsley. You could also add lemon wedges for a splash of color and an extra hint of flavor. Arrange the fried pickles in a decorative manner, perhaps in a cone made of parchment paper for a fun, rustic touch.
3. Serving Style: Serve your Crunchy Dill Delight Fried Pickles on a wooden board or a colorful plate, allowing everyone to help themselves. This casual style encourages sharing and creates a welcoming atmosphere. Consider adding other appetizers such as buffalo wings or mozzarella sticks for a complete snack spread.
Nutritional Information
When it comes to fried foods, it’s important to be mindful of their nutritional content. Here’s a closer look at the nutritional aspects of your Crunchy Dill Delight Fried Pickles:
1. Calorie Content: A standard serving of fried pickles (about 4-6 pieces) contains approximately 250-300 calories, depending on the thickness of the pickle slices and the type of batter used. This calorie count can vary based on the frying method, oil type, and additional ingredients.
2. Nutritional Benefits: Despite being a fried snack, pickles themselves are low in calories, high in antioxidants, and provide some vitamins. Dill, a common herb used in the recipe, offers digestive benefits and may help reduce inflammation.
3. Health-Conscious Modifications: For those looking to enjoy this delicious snack with fewer calories and less oil, consider air frying your pickles. An air fryer can produce similar crispiness with significantly less oil, making this dish a healthier option. Simply preheat the air fryer, lightly spray the pickles with oil, and cook them at 400°F (200°C) for about 10-12 minutes, flipping halfway through.
4. Gluten-Free Options: For gluten-sensitive individuals, substitute regular flour with almond flour or a gluten-free flour blend. This adjustment allows everyone to enjoy the crunchy goodness without compromising their dietary needs.
Conclusion
Making Crunchy Dill Delight Fried Pickles at home not only provides a satisfying crunch but also creates a delightful culinary experience. The process of frying, combined with the creativity of serving and flavor pairings, makes these pickles a favorite for gatherings or quiet evenings at home.
Encouraging readers to experiment with the recipe is essential. Whether you stick to the classic flavors or venture into variations with different spices or dipping sauces, the joy of creating and sharing homemade snacks is unmatched. Fried pickles embody comfort food, bringing friends and family together for a taste of nostalgia, no matter the occasion. So gather your ingredients, heat up that oil, and dive into the delicious world of Crunchy Dill Delight Fried Pickles!