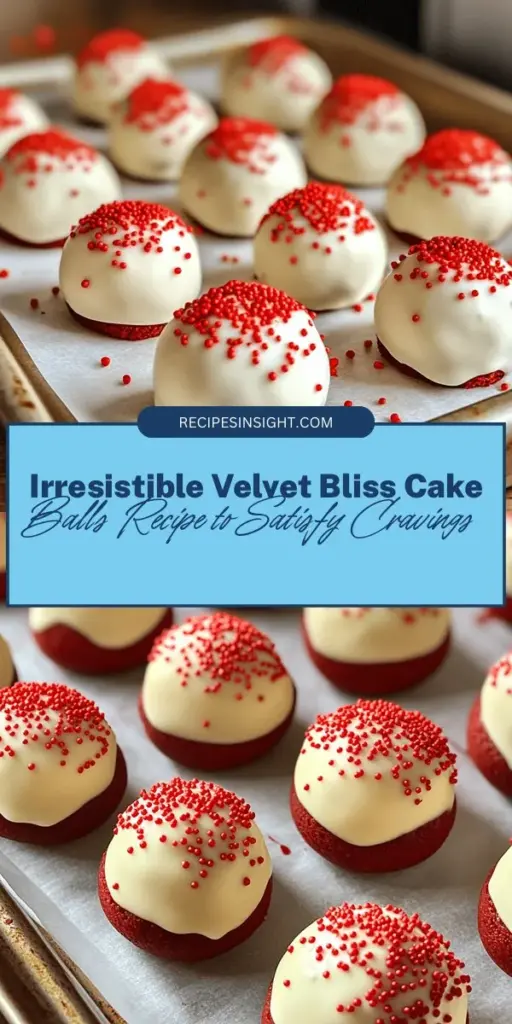
Introduction
If you’re searching for a dessert that’s both easy to make and deliciously satisfying, look no further than Velvet Bliss Cake Balls. These delightful treats combine the rich, velvety essence of classic red velvet cake with a fun, bite-sized format that’s perfect for any occasion. Whether you’re hosting a party, celebrating a special event, or simply satisfying your sweet tooth, these cake balls are sure to impress.
The importance of easy and delicious dessert recipes cannot be overstated. In a fast-paced world where time is of the essence, having a go-to recipe that requires minimal effort yet yields maximum flavor is invaluable. Velvet Bliss Cake Balls embody this ethos beautifully. They offer all the indulgence of a traditional cake without the fuss of slicing and serving.
Red velvet cake has carved a permanent niche in dessert culture, celebrated for its striking color, soft texture, and subtle cocoa flavor. It’s a dessert that evokes both nostalgia and sophistication, making it a timeless choice for various celebrations. By transforming this classic cake into cake balls, we not only make it more accessible but also elevate its appeal. The bite-sized versions are perfect for sharing and allow for endless creative decoration options.
In this article, we aim to provide you with a step-by-step guide to creating Velvet Bliss Cake Balls from scratch. From understanding the unique flavor profile to detailed instructions on preparation and assembly, you’ll be equipped with everything you need to make these delightful treats.
Understanding Velvet Bliss Cake Balls
Description of the Dessert
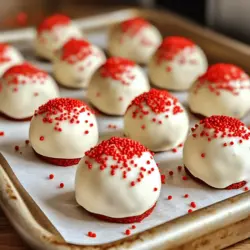
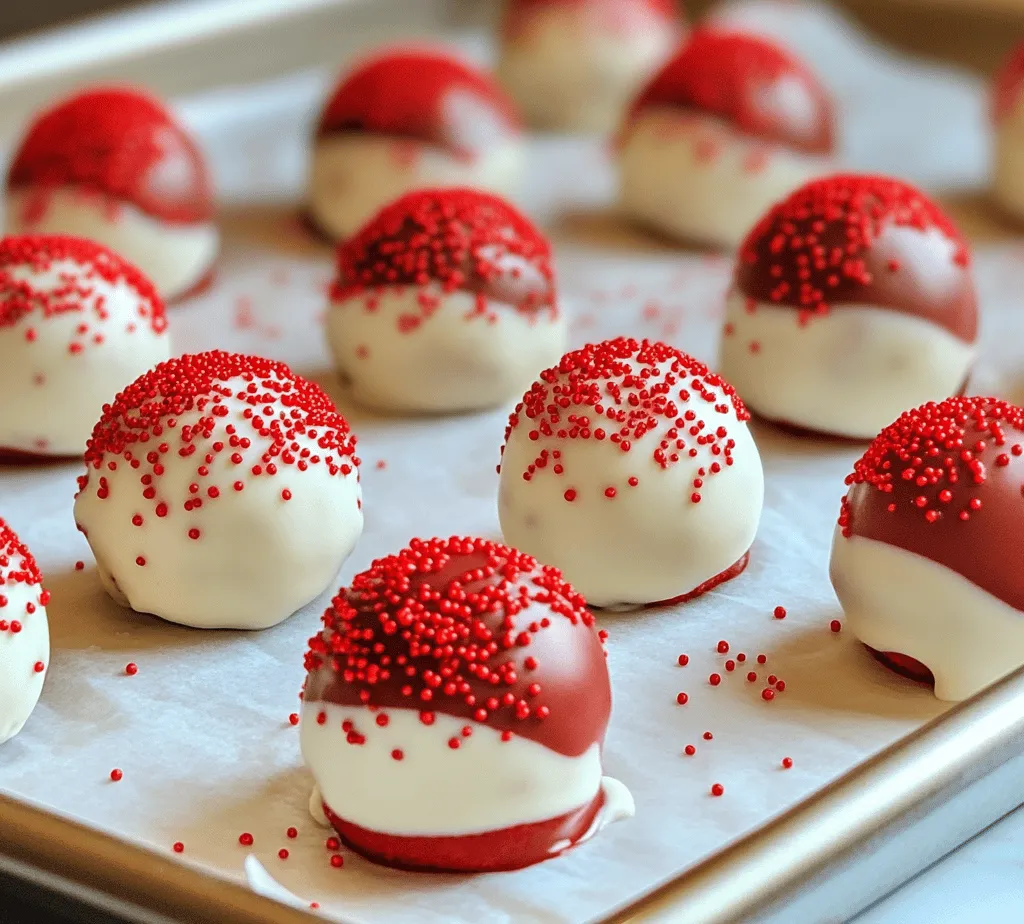
Velvet Bliss Cake Balls are a decadent dessert that captures the essence of red velvet cake in a compact, irresistible form. Each cake ball is soft and moist, boasting the signature red hue that makes red velvet so visually appealing. The unique flavor profile is characterized by a subtle sweetness complemented by hints of cocoa and a creamy richness, thanks to the addition of cream cheese frosting. When coated in a layer of white chocolate, these cake balls achieve a delightful contrast in both flavor and texture, making each bite a blissful experience.
Historical Context of Red Velvet Cake
Red velvet cake has an intriguing history that dates back to the 1920s, gaining popularity in the Southern United States. The cake’s distinctive color originally came from the reaction between acidic ingredients like buttermilk and cocoa powder, which resulted in a reddish tint. However, the modern version has evolved, often incorporating food coloring to enhance its vibrant appearance.
As culinary trends shifted, so did the ways in which red velvet cake was enjoyed. The emergence of cake balls can be traced back to the early 2000s when the trend of “popping” desserts gained momentum. Cake balls, made by crumbling baked cake and mixing it with frosting, quickly became a popular choice for their versatility and ease of serving. Today, Velvet Bliss Cake Balls serve not only as a delicious treat but also as a nod to the rich history of red velvet cake.
Popularity of Cake Balls
Cake balls have skyrocketed in popularity in recent years, becoming a staple at bakeries, dessert tables, and even home kitchens. Their versatility is one of the key factors contributing to their acclaim. Cake balls can be made from virtually any flavor of cake and are easily customizable to suit various occasions. Whether it’s a birthday party, wedding, or holiday gathering, cake balls provide a fun and festive way to enjoy dessert.
Additionally, the bite-sized nature of cake balls makes them perfect for sharing, allowing guests to indulge without the commitment of a full slice of cake. This aspect, combined with the ability to decorate and present them in unique ways, has solidified their place in contemporary dessert culture.
Ingredients Overview
Detailed Breakdown of Ingredients
To create Velvet Bliss Cake Balls, you’ll need a few key ingredients that come together to create the ultimate dessert experience. Here’s a detailed breakdown of each component:
1. Red Velvet Cake Mix: Using a red velvet cake mix is a convenient choice for this recipe, as it ensures consistent results without the need for precise measurements. The cake mix provides the signature flavor and color that red velvet is known for, making it an ideal base for our cake balls.
2. Cream Cheese Frosting: This ingredient is essential for adding moisture and richness to the cake balls. The tangy flavor of cream cheese balances the sweetness of the cake, creating a harmonious blend that enhances the overall taste. You can opt for store-bought frosting for convenience or make your own for a more personalized touch.
3. White Chocolate Chips: These chips are used to coat the cake balls, adding a sweet and creamy layer that complements the flavors of the red velvet. The smoothness of melted white chocolate also provides a beautiful finish, making the cake balls visually appealing.
4. Vanilla Extract: A splash of high-quality vanilla extract elevates the flavor profile of the cake balls, adding depth and warmth. It’s a simple yet effective way to enhance the overall taste.
5. Red Sprinkles: These sprinkles are not just for decoration; they also add a festive touch to your Velvet Bliss Cake Balls. They can be used to signify special occasions or simply to make the dessert more visually enticing.
Tips for Selecting High-Quality Ingredients
Choosing the right ingredients can make a significant difference in the final outcome of your Velvet Bliss Cake Balls. Here are some tips for selecting high-quality components:
– Red Velvet Cake Mix: Look for cake mixes that list real cocoa powder among the ingredients. This ensures a richer flavor and better texture.
– Cream Cheese Frosting: If you opt for store-bought frosting, check the ingredient list for real cream cheese instead of artificial flavorings. Homemade frosting can elevate the taste even further and allow you to control the sweetness.
– White Chocolate Chips: Choose high-quality white chocolate chips that contain cocoa butter, which will melt smoothly and provide a creamy coating.
– Vanilla Extract: Always opt for pure vanilla extract rather than imitation flavoring for the best taste.
– Sprinkles: Select vibrant, high-quality sprinkles that will hold their color and texture when added to your cake balls.
Step-by-Step Instructions
Now that you understand the ingredients and their significance, let’s dive into the step-by-step instructions for creating Velvet Bliss Cake Balls. This section will guide you through the process, ensuring a successful outcome.
Preparing the Baking Pan
Before you begin mixing your cake batter, it’s crucial to prepare your baking pan properly. This step will ensure that your cake comes out easily and retains its shape.
1. Grease the Pan: Start by greasing the bottom and sides of your baking pan with butter or cooking spray. This will help prevent the cake from sticking during baking.
2. Flour the Pan: After greasing, add a light dusting of flour to the pan. This additional step creates a barrier that further ensures the cake won’t stick. Tap out any excess flour, leaving a thin coating on the pan’s surface.
Mixing the Cake Batter
With the pan prepared, it’s time to mix your cake batter. This part of the process is essential for achieving a smooth and fluffy cake.
1. Combine Ingredients: In a large mixing bowl, combine the red velvet cake mix, water, eggs, and oil as per the instructions on the cake mix packaging.
2. Mixing Techniques: Use a hand mixer or stand mixer on medium speed to blend the ingredients. Mix until the batter is smooth and free of lumps—this typically takes about 2-3 minutes. Be careful not to overmix, as this can lead to a dense texture.
3. Significance of Ingredients: Each ingredient plays a vital role in the mixing process. The eggs provide structure and moisture, while the oil contributes to the cake’s tenderness. The water activates the dry ingredients, creating a cohesive batter.
Baking the Cake
Once your batter is ready, it’s time to bake the cake. Proper baking is crucial for ensuring that your cake has the right texture and flavor.
1. Optimal Baking Time and Temperature: Preheat your oven to the temperature specified on the cake mix package. Pour the batter into the prepared pan and spread it evenly.
2. Testing for Doneness: Bake the cake for the recommended time. To check for doneness, insert a toothpick into the center of the cake—if it comes out clean or with a few moist crumbs, the cake is ready. Avoid overbaking, as this can dry out your cake.
Crumbling the Cake
Once your cake has cooled completely, it’s time to crumble it into the perfect texture for cake balls.
1. Cooling the Cake: Allow the cake to cool in the pan for about 10 minutes, then transfer it to a wire rack to cool completely.
2. Crumbling Process: Once cooled, break the cake into large pieces and place them in a mixing bowl. Use your hands or a fork to crumble the cake into fine crumbs. The texture should be similar to that of sand, with no large chunks remaining.
With these initial steps complete, you’re well on your way to creating your own Velvet Bliss Cake Balls. Stay tuned for the next part, where we will delve deeper into the assembly, coating, and decorating processes, ensuring that your cake balls are as visually stunning as they are delicious.
Techniques for Achieving the Right Texture
Creating the perfect texture for your Velvet Bliss Cake Balls is crucial for achieving that melt-in-your-mouth experience. The key lies in the balance of moisture and structure. Ensure your cake is baked to perfection—this means avoiding overbaking, which can lead to a dry crumb. If you have a recipe that includes buttermilk or vinegar, these ingredients contribute to a tender crumb.
Once your cake has cooled, crumble it finely, ensuring there are no large pieces. The smaller the crumbs, the better they will bind together when mixed with the cream cheese frosting. Mixing should be done gently; overmixing can lead to a dense texture, while under-mixing may result in a crumbly cake ball that falls apart.
The Role of Cream Cheese Frosting in Binding the Cake
Cream cheese frosting is not just a delicious topping; it serves as the essential binding agent for your cake balls. Its creamy consistency helps to bring together the crumbled cake, creating a cohesive mixture that holds its shape. When adding frosting, start with a small amount and gradually incorporate more until the mixture is moist but not overly wet. The ideal consistency allows you to easily form the cake balls without them falling apart or becoming too sticky.
Rolling the Cake Balls
Once your mixture is ready, it’s time to roll the cake balls. Use your hands to scoop out portions of the mixture and roll them into smooth, round balls. The ideal size for cake balls is about 1 inch in diameter. This size ensures they are bite-sized and easy to handle. Uniformity is key, so consider using a cookie scoop or measuring spoon for consistency.
Tips for Handling the Mixture Without Sticking
Handling the cake mixture can be a sticky situation! To prevent the mixture from clinging to your hands, consider lightly greasing them with a bit of vegetable oil or rubbing them with a non-stick cooking spray. Another tip is to keep your hands slightly damp; this can help reduce stickiness. If the mixture becomes too soft while you work, refrigerate it for 15-20 minutes to firm it up before continuing to roll the balls.
Freezing the Cake Balls
After rolling your cake balls, freezing them for a short while is beneficial. Place the rolled balls on a parchment-lined baking sheet and put them in the freezer for about 30 minutes. This chilling step helps them firm up, making them easier to coat in chocolate later. It also enhances the flavors as they meld together during the chilling process.
Benefits of Chilling Before Coating
Chilling your cake balls before coating them in chocolate is a crucial step. Not only does it allow the cake balls to maintain their shape during the coating process, but it also helps the chocolate adhere better. If the cake balls are warm when dipped, the chocolate may melt and run off, leading to a messy situation.
Melting the White Chocolate
For the coating, white chocolate is the star of the show. Melting it correctly is essential for achieving a smooth and glossy finish. To melt white chocolate safely, you can use either a microwave or a double boiler.
Safe Melting Techniques in the Microwave
If you choose the microwave, chop the white chocolate into small, even pieces and place them in a microwave-safe bowl. Heat in 30-second intervals, stirring well between each interval. This method prevents the chocolate from scorching. Once melted, it should be smooth and shiny, perfect for dipping.
Importance of Stirring to Achieve Smoothness
Stirring is crucial after melting white chocolate. It helps to evenly distribute the heat and ensures that the chocolate remains smooth and lump-free. If your chocolate has thickened or seized up, you can add a teaspoon of vegetable oil or shortening to loosen it up.
Coating the Cake Balls
Now comes the fun part: coating the cake balls! Using a fork or a dipping tool, dip each chilled cake ball into the melted white chocolate, ensuring it is fully covered. Allow any excess chocolate to drip off before placing the coated ball back onto the parchment-lined baking sheet.
Step-by-Step Process for Even Coating
1. Prepare Your Workstation: Set out your melted chocolate, cake balls, and a baking sheet lined with parchment paper.
2. Dip the Cake Balls: Using a fork or dipping tool, immerse the cake ball in the melted chocolate.
3. Remove Excess Chocolate: Lift the cake ball out with the fork, gently tapping it against the bowl to remove excess chocolate.
4. Place on Baking Sheet: Carefully transfer the coated ball to the parchment paper.
Tips for Applying Sprinkles Before the Chocolate Hardens
If you’re looking to add a bit of flair to your cake balls, consider applying sprinkles before the chocolate hardens. After coating each ball, immediately sprinkle your desired toppings over the chocolate while it’s still wet. This ensures that the sprinkles adhere properly and enhance the visual appeal of your cake balls.
Setting the Chocolate
After coating all your cake balls, it’s time to let them set. Place the baking sheet in the refrigerator for about 30-60 minutes, allowing the chocolate to harden completely. This step is essential for achieving a clean, professional finish.
Recommended Refrigeration Time for Best Results
For optimal texture and flavor, allow the coated cake balls to chill for at least 30 minutes. However, if you can wait longer, refrigerating for up to two hours can enhance the flavors even further. Once the chocolate is set, you can store your Velvet Bliss Cake Balls in an airtight container in the refrigerator for up to a week.
Flavor Pairings and Serving Suggestions
Velvet Bliss Cake Balls are not only decadent on their own but also versatile for various occasions. Here are some creative ways to serve and enjoy them.
Creative Ways to Serve Velvet Bliss Cake Balls
1. Dessert Table: Include them in a dessert buffet alongside other treats like cupcakes, cookies, and brownies.
2. Gift Presentation: Place them in a decorative box or jar to create a charming gift for friends or family.
3. Party Favors: Wrap them in clear cellophane bags tied with a ribbon for a delightful party favor.
Ideas for Themed Parties and Celebrations
These cake balls are perfect for themed parties. Consider serving them at:
– Wedding receptions: Use pastel-colored sprinkles or a white chocolate drizzle for an elegant touch.
– Birthday parties: Customize the sprinkles to match the birthday theme or color palette.
– Holidays: Use festive sprinkles for occasions like Christmas or Halloween.
Pairing with Beverages Like Coffee or Dessert Wines
To elevate your dessert experience, consider pairing Velvet Bliss Cake Balls with beverages. Rich coffee or espresso complements the sweetness beautifully. For a sophisticated touch, serve them alongside dessert wines like Moscato or Port.
Variations to Consider (e.g., Different Coatings, Flavors)
Experiment with different flavor profiles by using various coatings or cake flavors. Some ideas include:
– Dark Chocolate Coating: For a richer taste, dip your cake balls in dark chocolate.
– Flavored Frosting: Consider using flavored cream cheese frosting, such as raspberry or lemon, to add a unique twist.
– Nut Coating: Roll the coated cake balls in crushed nuts or coconut for added texture.
Nutritional Information
Understanding the nutritional content of your Velvet Bliss Cake Balls can help you enjoy them mindfully.
Breakdown of Calories and Nutritional Content Per Serving
Each cake ball contains approximately 120-150 calories, depending on the size and ingredients used. The nutritional breakdown typically includes:
– Calories: 120-150
– Fat: 6-8g
– Carbohydrates: 15-20g
– Protein: 2g
This indulgence balances sweetness with the rich cream cheese frosting, making it a satisfying treat.
Discussion on the Balance of Indulgence and Moderation
While these cake balls are undeniably delicious, moderation is key. Enjoy them as an occasional treat rather than an everyday snack to balance indulgence with a healthy lifestyle.
Possible Alternatives for Dietary Restrictions (e.g., Gluten-Free Options)
If you or your guests have dietary restrictions, consider making these cake balls gluten-free by using gluten-free flour in your cake recipe. Additionally, there are dairy-free cream cheese alternatives available for a vegan version of the frosting.
Conclusion
Making Velvet Bliss Cake Balls is a delightful culinary experience that combines the rich flavors of red velvet cake with the smooth texture of cream cheese frosting. Whether you’re preparing them for a gathering or enjoying them solo, these cake balls are sure to impress.
The joy of creating and sharing these delicious desserts lies not just in their taste but also in the memories they create. So gather your ingredients, follow the steps, and indulge in the sweet satisfaction of your homemade Velvet Bliss Cake Balls. Enjoy this delightful treat, and don’t be surprised if they become a favorite for all your celebrations!