

Introduction
In the realm of snack foods, few things can rival the delightful crunch of homemade pita chips. These Crispy Herb-Infused Pita Chips offer a wholesome alternative to store-bought snacks, elevating your munching experience with their crispy texture and aromatic flavors. Infused with fresh herbs and spices, this simple yet satisfying recipe is perfect for dipping into your favorite hummus or enjoying straight from the oven. Not only are these pita chips easy to make, but they also allow for customization based on your taste preferences—whether you prefer a hint of garlic or a dash of chili flakes for an extra kick.
The journey of creating your own snacks brings the benefit of freshness and quality, ensuring that every bite is both delicious and wholesome. In this article, we will explore the essential ingredients, detailed preparation methods, and various pairing options for these crispy treats, all while highlighting the numerous advantages of preparing snacks at home.
Understanding Pita Chips
Defining Pita Chips
Pita chips are a popular snack made from pita bread that has been baked or fried until it becomes crispy. They are typically seasoned with various herbs, spices, or flavored oils, which contribute to their unique taste and aroma. The origins of pita chips can be traced back to the Middle East, where pita bread is a staple food. Over the years, these chips have gained widespread popularity across numerous cultures, thanks in part to their versatility and ability to be paired with a variety of dips.
Nutritional Benefits of Pita Chips
When compared to traditional potato chips, pita chips often boast a more favorable nutritional profile. They are generally lower in calories and fat, especially when baked rather than fried. Additionally, pita chips are made from whole grains, which provide fiber and essential nutrients. The inclusion of herbs and spices not only enhances flavor but also contributes beneficial antioxidants and anti-inflammatory properties.
Comparison with Traditional Chips
Unlike conventional potato chips, which can be high in unhealthy fats and sodium, homemade pita chips allow for a healthier snacking option. By controlling the ingredients, you can significantly reduce the amount of salt and oil used in the recipe. Moreover, pita chips can be crafted to suit various dietary needs, whether you’re looking for gluten-free options, vegan recipes, or simply a healthier alternative to processed snacks.
The Appeal of Homemade Snacks
Freshness and Quality
One of the most significant advantages of making your own snacks is the freshness and quality of the ingredients. Homemade pita chips are baked to perfection right in your kitchen, allowing you to savor the aroma of herbs and spices as they roast. You can select high-quality pita bread and fresh herbs, ensuring that every bite is bursting with flavor. This level of freshness is often absent in store-bought snacks, which may contain preservatives to extend shelf life.
Control Over Ingredients
When you prepare your own pita chips, you have complete control over what goes into them. This means you can choose to exclude artificial additives, preservatives, or excessive sodium that are often found in commercial snack products. Additionally, you can customize the flavor profile to suit your dietary preferences. Whether you prefer a subtle herb flavor or a more robust seasoning, the options are virtually limitless when you craft your chips from scratch.
Cost-Effectiveness
Making homemade snacks can also be a cost-effective approach to satisfying your cravings. Pita bread, olive oil, and herbs are generally inexpensive, and you can create a large batch of chips for a fraction of the cost of store-bought alternatives. Plus, the satisfaction of crafting your own snacks adds value beyond just monetary savings.
Ingredients Breakdown
Key Ingredients Overview
To create the perfect Crispy Herb-Infused Pita Chips, you’ll need a few essential ingredients that work together to deliver a delicious final product.
Pita Bread: Types and Selection Tips
Pita bread is the foundation of this recipe, and it comes in various forms, including whole wheat, white, and flavored options. When selecting pita bread, look for varieties that are soft and pliable, with no preservatives or artificial ingredients. Whole wheat pita is an excellent choice for those seeking additional fiber and nutrients. You can also experiment with flavored pitas, such as garlic or sun-dried tomato, to add an extra layer of taste to your chips.
Olive Oil: Health Benefits and Flavor Enhancement
Olive oil not only helps achieve the desired crispiness but also enhances the flavor of the chips. Known for its heart-healthy benefits, olive oil is rich in monounsaturated fats and antioxidants. For a more robust flavor, consider using extra virgin olive oil, which is less processed and retains more of the natural olive flavor. The oil also acts as a binding agent for the herbs and spices, ensuring that they stick to the pita chips during the baking process.
Herbs and Spices: Importance in Flavor Profiles
The choice of herbs and spices is critical when it comes to creating the flavor profile of your pita chips. Popular options include dried oregano, thyme, rosemary, garlic powder, and paprika. Fresh herbs can also be used, though they will require a bit more preparation. The key is to balance the flavors, so feel free to experiment with different combinations or adjust the quantities to suit your palate.
Optional Ingredients: The Role of Parmesan Cheese
For those looking to indulge their taste buds even further, adding grated Parmesan cheese can elevate the flavor of your pita chips. The cheese provides a savory, umami flavor that complements the herbs beautifully. However, for a vegan or dairy-free option, simply omit the cheese or substitute with a plant-based alternative.
Preparing the Pita Chips
Step-by-Step Preparation Method
Now that you have a good understanding of the ingredients, let’s dive into the step-by-step preparation method to create your Crispy Herb-Infused Pita Chips.
Preheating the Oven: Importance of Temperature Control
Begin by preheating your oven to 375°F (190°C). This temperature is ideal for baking the pita chips to ensure they become crispy without burning. Preheating the oven is crucial as it allows for even cooking, ensuring that every chip is baked to perfection.
Cutting the Pita: Techniques for Optimal Chip Shape
Once the oven is preheated, it’s time to prepare the pita bread. Start by stacking the pita rounds on a cutting board. Using a sharp knife or pizza cutter, slice each pita into sixths or eighths, depending on your desired chip size. The goal is to create uniform pieces that will cook evenly. If you prefer thicker chips, you can cut the pitas into quarters for a heartier snack.
Creating the Herb-Infused Oil: Balancing Flavors for the Best Taste
In a small bowl, combine the olive oil with your chosen herbs and spices. A general guideline is to use about 1 tablespoon of olive oil per pita round, adjusting based on the amount of chips you are making. Mix well to ensure that the herbs are evenly distributed throughout the oil. For an added flavor boost, consider gently warming the oil in a small saucepan before mixing in the herbs. This step releases the essential oils from the herbs, intensifying their flavor and aroma.
Once your herb-infused oil is ready, brush it generously over the cut pita pieces using a pastry brush. Ensure that both sides of the chips are coated to achieve maximum flavor and crispiness. Spread the seasoned pita pieces in a single layer on a baking sheet lined with parchment paper, taking care not to overcrowd them, as this can lead to uneven baking.
With these initial steps complete, you are well on your way to creating a batch of Crispy Herb-Infused Pita Chips that will delight your taste buds. As you prepare to bake, keep in mind that the beauty of homemade snacks lies in the freedom to experiment and adjust the flavors according to your preferences. Embrace the process, and get ready to enjoy a delicious, crunchy treat that is perfect for any occasion.
Coating the Chips: Tips for Even Distribution of Flavors
Achieving a perfect flavor profile in your Crispy Herb-Infused Pita Chips begins with the coating process. To ensure that every chip is evenly seasoned, follow these essential tips:
1. Use a Large Mixing Bowl: Start by placing your cut pita triangles into a large mixing bowl. A spacious bowl allows for easier tossing and ensures that the olive oil and herbs are distributed evenly.
2. Drizzle the Olive Oil: Generously drizzle olive oil over the pita triangles. Aim for about 2-3 tablespoons for every 4 pita breads, adjusting depending on the number of chips you’re preparing. The oil is crucial for achieving that crispy texture, as it helps in browning the chips while also infusing them with flavor.
3. Mix the Herbs and Spices Separately: In a separate small bowl, combine your chosen herbs (like dried oregano, thyme, and rosemary) and spices (such as garlic powder, onion powder, or paprika). Mixing them together first allows for a more uniform distribution when you sprinkle them over the pita.
4. Toss, Toss, Toss: After drizzling the oil and adding the herb mixture, use your hands to gently toss the pita triangles. Ensure that each piece is well-coated with oil and herbs. This step is essential for maximizing flavor and achieving crispy chips.
5. Let it Sit: Allow the coated pita chips to sit for a few minutes. This resting period lets the flavors meld and gives the oil time to penetrate the pita, enhancing the overall taste.
Baking the Pita Chips
Achieving the Perfect Crisp
The baking process is vital in transforming your seasoned pita triangles into delightfully crispy chips. Follow these steps for optimal results:
1. Preheat the Oven: Start by preheating your oven to 375°F (190°C). A properly heated oven ensures that your chips will bake evenly and develop that perfect crunch.
2. Baking Sheets: Line your baking sheets with parchment paper. This will prevent the chips from sticking and make for an easier cleanup.
3. Spreading the Chips: Arrange the coated pita triangles in a single layer on the baking sheet. Make sure they are not overlapping to allow hot air to circulate around each chip, promoting even cooking.
4. Baking Time: Bake the pita chips for 10 to 12 minutes. Keep a close eye on them, as baking times can vary based on your oven and the thickness of the pita. The chips should turn golden brown and begin to crisp up.
Baking Tips: Monitoring Time and Temperature
Monitoring the time and temperature during the baking process is crucial. Here are some pointers to ensure you achieve the best results:
– Set a Timer: Since the difference between perfectly baked chips and burnt ones can be just a minute or two, set a timer and check on them halfway through the baking time.
– Rotate the Baking Sheet: If your oven has hot spots, consider rotating the baking sheet halfway through to promote even baking.
Avoiding Overcrowding: Ensuring Even Cooking
Overcrowding the baking sheet can lead to uneven cooking, resulting in some chips being undercooked while others burn. Here’s how to avoid this issue:
– Bake in Batches: If you have a large number of pita chips, it’s better to bake them in smaller batches. This allows each chip to crisp up without being cramped together.
– Use Multiple Sheets: If you have enough baking sheets, use two and switch their positions in the oven halfway through baking. This method ensures that all chips get equal exposure to heat.
Cooling Process: Why It’s Essential for Crispness
Once your chips are done baking, it’s essential to let them cool properly:
1. Transfer to a Rack: Move the baked pita chips to a wire rack immediately after taking them out of the oven. This prevents condensation from forming underneath the chips, which can lead to sogginess.
2. Cool Completely: Allow the chips to cool for about 10 minutes. As they cool, they will continue to firm up, ensuring a satisfying crunch when you bite into them.
Serving Suggestions
Ideal Dips and Pairings
Now that your Crispy Herb-Infused Pita Chips are ready, it’s time to think about how to serve them. These chips are incredibly versatile and pair well with a variety of dips and spreads.
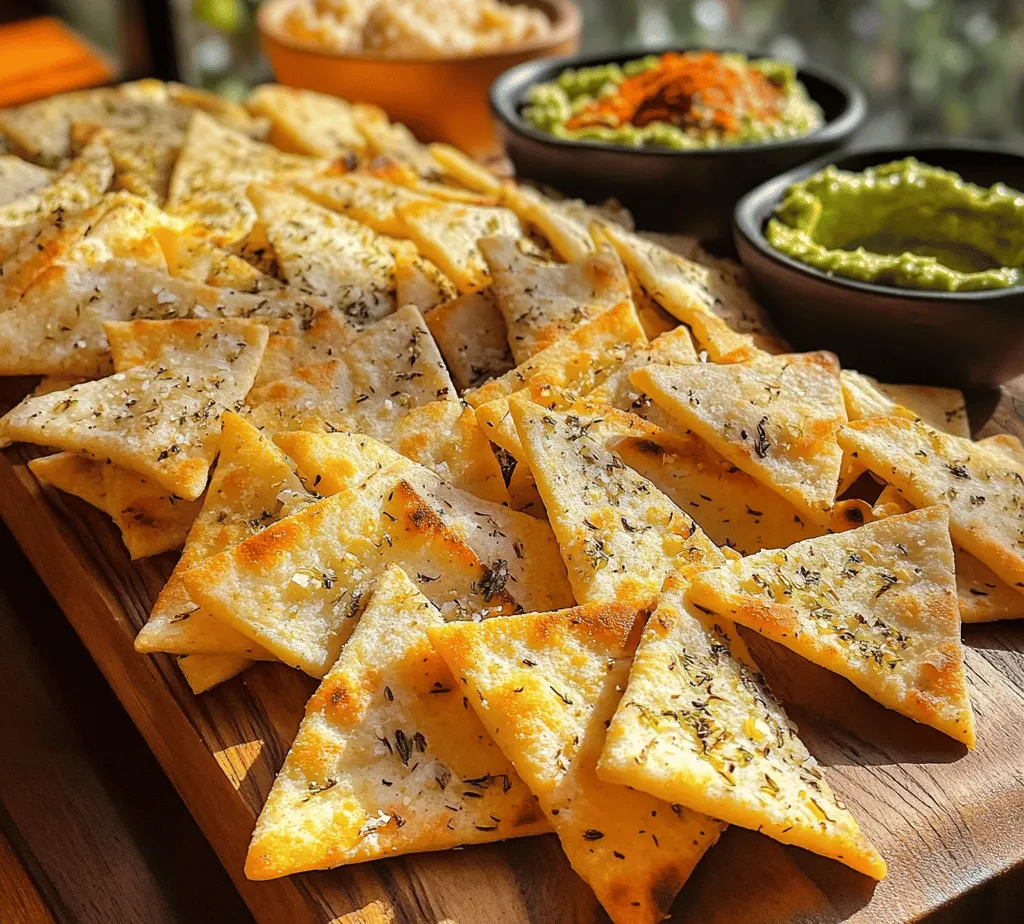
Classic Options: Hummus, Tzatziki, and Guacamole
1. Hummus: A classic choice, hummus adds a creamy texture and rich flavor that complements the herby chips beautifully. Try a roasted red pepper or garlic hummus for an extra kick.
2. Tzatziki: This cool, yogurt-based sauce with cucumber and dill is refreshing and pairs perfectly with the crispy chips, making for an excellent Mediterranean-inspired snack.
3. Guacamole: For a twist, serve your pita chips with freshly made guacamole. The creamy avocado adds a delightful contrast to the crunch of the chips.
Creative Pairings: Salsas, Bean Dips, and Creamy Spreads
1. Salsas: From fresh pico de gallo to fruit salsas like mango or pineapple, the bright flavors and textures enhance the experience of eating pita chips.
2. Bean Dips: A hearty black bean dip or a spicy refried bean dip can turn your pita chips into a more filling snack or appetizer.
3. Creamy Spreads: Cream cheese-based spreads, such as a spinach dip or a roasted garlic spread, can elevate your snack to a gourmet experience.
Presentation Ideas: Elevating Your Snack Experience
– Serving Platter: Arrange your pita chips on a large platter, accompanied by small bowls of various dips. This not only looks appealing but also allows guests to mix and match.
– Garnish: Add a sprinkle of fresh herbs or a dash of paprika on top of the dips for a pop of color and an inviting presentation.
Health Benefits of the Ingredients
Nutritional Insights
Understanding the health benefits of the ingredients in your Crispy Herb-Infused Pita Chips can enhance your appreciation for this snack.
1. Olive Oil: Rich in healthy monounsaturated fats, olive oil is known for its heart-healthy benefits. It can help lower bad cholesterol levels and reduce the risk of heart disease. Additionally, its anti-inflammatory properties contribute to overall health.
2. Herbs and Spices: The dried herbs and spices used in this recipe are not just for flavor; they also pack a nutritional punch. Many herbs, such as thyme and oregano, are rich in antioxidants, which help combat oxidative stress in the body.
3. Pita Chips vs. Traditional Chips: Compared to traditional potato chips, pita chips are often lower in calories and fat, especially when baked instead of fried. They also offer a higher fiber content, especially if you opt for whole wheat pita. This makes them a healthier choice for snacking.
Flavor Variations
Customizing Your Pita Chips
One of the best aspects of making your Crispy Herb-Infused Pita Chips at home is the ability to customize them according to your taste preferences. Here are some flavor variations you can try:
1. Spicy Version: For those who enjoy a bit of heat, add chili powder or cayenne pepper to your herb mixture. This will give your pita chips a delightful spicy kick that pairs well with creamy dips.
2. Sweet Version: If you’re in the mood for something sweet, consider incorporating cinnamon and a sprinkle of sugar into your seasoning mix. These sweet pita chips can be a unique treat, especially when served with yogurt or fruit dips.
3. Seasonal Variations: Take advantage of seasonal ingredients by using fresh herbs and spices. In the summer, consider adding fresh basil and oregano; in the fall, a hint of pumpkin spice can create a delightful autumnal flavor.
Conclusion
Homemade Crispy Herb-Infused Pita Chips are not just a tasty snack; they embody a healthier, flavorful alternative to processed chips. This recipe allows for creativity and personalization, making it a versatile addition to your culinary repertoire. Whether enjoyed with dips or on their own, these pita chips provide a satisfying crunch that’s hard to resist. Embrace the joy of homemade snacks and enjoy the process of creating something delicious right in your own kitchen. With the right techniques, serving suggestions, and flavor variations, these pita chips will become a staple in your snacking routine, delighting you and your guests alike.
