Looking for a fun and tasty dessert idea? Red Velvet Cake in a Jar is the perfect solution! This layered treat is not only beautiful but also easy to make. Whether you want to impress guests at a party or enjoy a sweet snack, these jars bring joy in every bite. Let’s dive into the delicious world of red velvet cake and discover how to create this delightful dessert!
What Are the Key Ingredients for Red Velvet Cake in a Jar?
Red velvet cake is a treat loved by many. To make this delightful dessert in a jar, you need key red velvet cake ingredients. Here’s what you need:
What are the essential ingredients for the cake?
1. Flour: Use 2 cups of all-purpose flour. It gives the cake its structure.
2. Sugar: You will need 1 ½ cups of granulated sugar. This adds sweetness.
3. Baking Soda: One teaspoon helps the cake rise.
4. Salt: A teaspoon balances the flavors.
5. Cocoa Powder: Just 1 teaspoon adds a hint of chocolate.
6. Vegetable Oil: Use 1 ½ cups. This keeps the cake moist.
7. Buttermilk: One cup at room temperature gives a nice tang.
8. Eggs: Two large eggs help bind the ingredients.
9. Red Food Coloring: Two tablespoons make it vibrant.
10. Vanilla Extract: One teaspoon adds flavor.
11. White Vinegar: One teaspoon enhances the cake’s texture.
These ingredients create a rich, moist cake that you can layer in jars.
How can I customize the red velvet cake ingredients?
You can easily switch up the red velvet cake ingredients. For a lighter cake, use cake flour instead of all-purpose flour. If you want a richer flavor, swap in brown sugar for white sugar.
You can also play with the frosting. Instead of cream cheese frosting, try whipped cream or chocolate ganache. Adding a bit of espresso powder to the cake mix can give it a unique twist.
What options are there for gluten-free red velvet cake?
For gluten-free red velvet cake, use a gluten-free flour blend. Ensure it has a good mix of starch and protein. You can also try almond flour or coconut flour. Just remember, the texture may differ from traditional flour.
Don’t forget to check if other ingredients, like the baking soda or food coloring, are gluten-free too. This way, everyone can enjoy your red velvet cake in a jar. For the full recipe, check out the details provided earlier.
How Do You Make Red Velvet Cake in a Jar?
To make red velvet cake in a jar, start with the right ingredients. Gather flour, sugar, cocoa powder, baking soda, and salt. In another bowl, mix vegetable oil, buttermilk, eggs, red food coloring, vanilla, and vinegar.
What are the step-by-step instructions for preparing the cake?
1. Preheat Oven: Set your oven to 350°F (175°C). Grease two 9-inch cake pans.
2. Mix Dry Ingredients: In a large bowl, sift flour, sugar, baking soda, salt, and cocoa powder. Set it aside.
3. Mix Wet Ingredients: In a separate bowl, blend oil, buttermilk, eggs, food coloring, vanilla, and vinegar until smooth.
4. Combine Mixtures: Slowly add the dry mix to the wet mix. Stir until just combined.
5. Bake: Divide the batter into the pans. Bake for 25-30 minutes, until a toothpick comes out clean.
6. Cool: Let cakes cool in the pans for 10 minutes. Then, transfer them to a wire rack to cool fully.
What is the baking time for red velvet cake?
Bake the red velvet cake for about 25 to 30 minutes. Check doneness with a toothpick. If it comes out clean, your cake is ready!
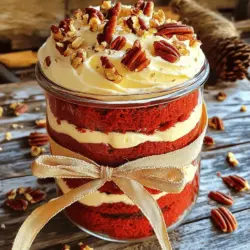
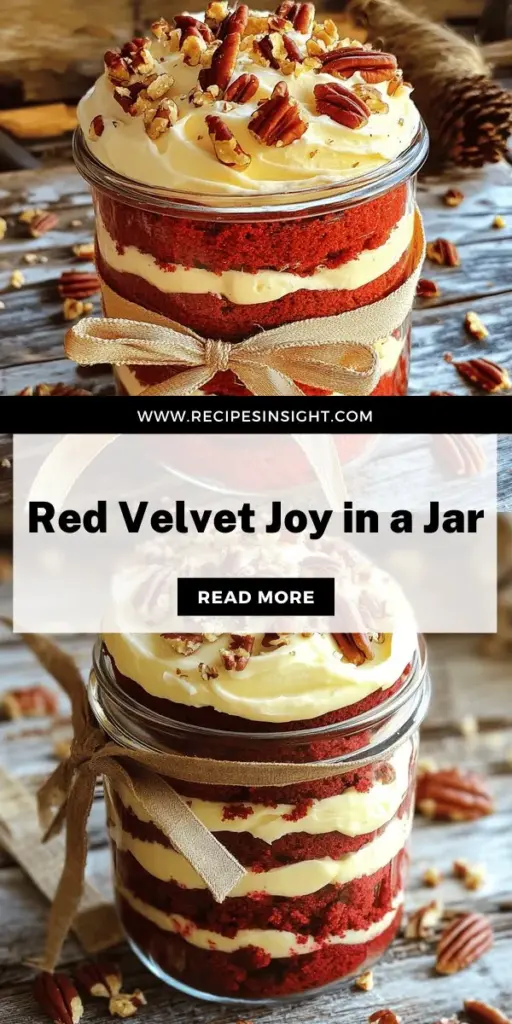
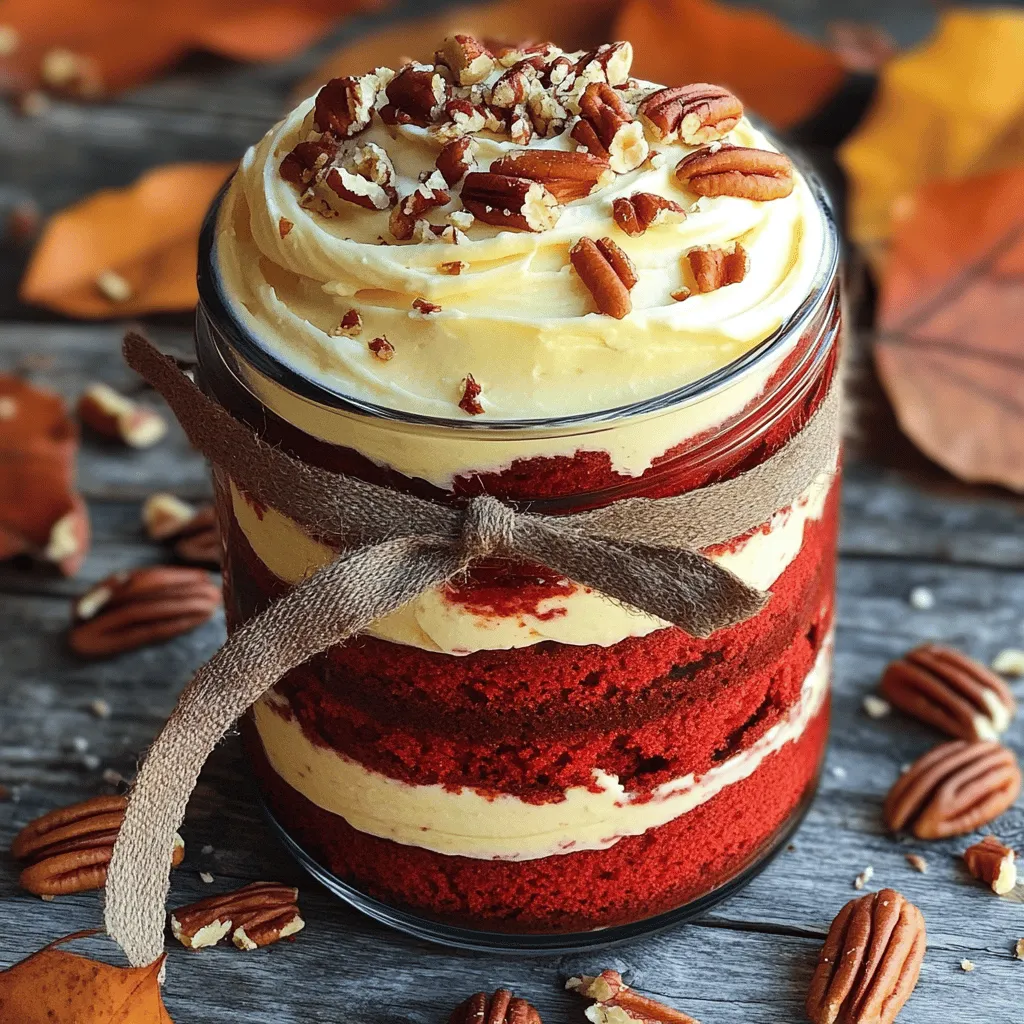
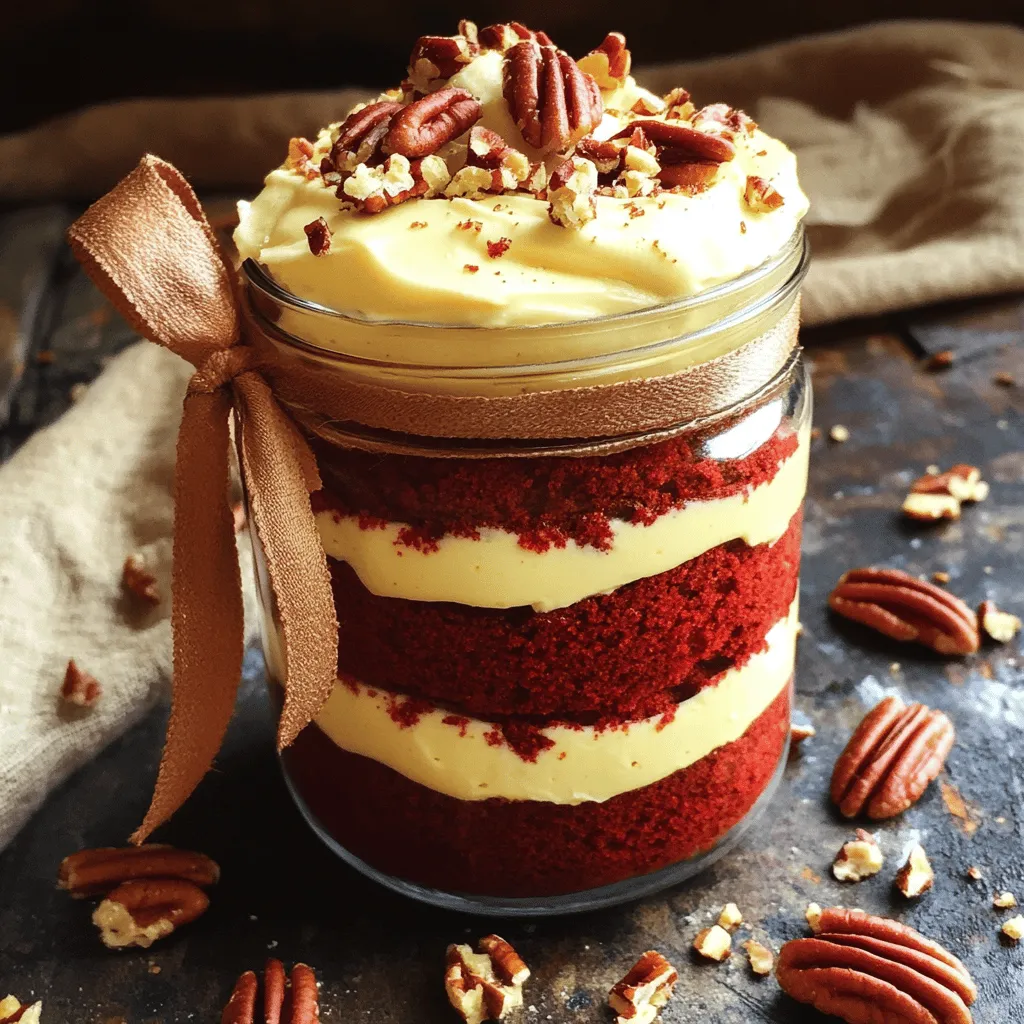
How can you layer the cake and frosting in jars?
Once your cakes cool, crumble them with your hands. In clean jars, start with a layer of cake. Add a dollop of frosting, then repeat. Finish with frosting on top.
You can add crushed nuts for crunch if you like. Chill the jars for at least 30 minutes before serving. This allows the flavors to mix and taste even better. Enjoy your red velvet cake in a jar! For the full recipe, check out the details provided.
What Are Some Creative Serving Ideas for Dessert in a Jar?
You can make your red velvet cake jars look great with some simple tricks. First, use clear jars. This lets the red layers and white frosting shine through. Next, layer the cake and frosting evenly. Start with crumbled cake, then add frosting. Repeat this until the jar is full.
To add a fun touch, tie a ribbon around the jar. This makes it feel special. A small spoon on the side makes it easy to enjoy. You can also add a label. Write a sweet note or the flavor on it.
For unique themes, think about the occasion. For a picnic, use jars with a gingham pattern. For a birthday, use colorful jars and add sprinkles. You can even match the jar color to the party theme.
To make your jars festive, consider the toppings. Use whipped cream for a light touch or chocolate shavings for a rich flavor. Add fresh berries for a pop of color and taste. For holidays, try red and green sprinkles or edible glitter.
These ideas make your dessert in a jar fun and eye-catching. You can find more details in the Full Recipe. Each jar tells a story and brings joy to every bite.
What Are Some Storage Tips for Jar Desserts?
Storing red velvet cake jars correctly helps keep them fresh and tasty.
How should I store red velvet cake jars to maintain freshness?
I suggest placing your jars in the fridge if you plan to eat them soon. Keep the lids on to protect the cake from drying out. These jars can stay fresh for about five days in the fridge.
Can I freeze red velvet cake in jars?
Yes, you can freeze red velvet cake in jars! Make sure the jars are freezer-safe. Leave a little space at the top to allow for expansion. When you want to enjoy them, move the jars to the fridge overnight to thaw.
What are the best practices for long-term storage of jar desserts?
For long-term storage, use airtight jars. This keeps moisture in and air out. Always label your jars with the date. This way, you will know when they were made. Red velvet cake jars can last up to three months in the freezer. Enjoy them at parties or gatherings! Check out the Full Recipe for more details.
How Can I Experiment with Variations of Red Velvet Cake?
Red velvet cake offers many fun ways to mix things up. You can play with flavors, textures, and even add unique toppings.
What are some delicious twists on the classic red velvet cake recipe?
You can try adding orange zest or almond extract to the batter. This gives a fresh twist. Another idea is to use different frostings. Cream cheese is great, but chocolate or buttercream can also shine. For a crunchy touch, sprinkle crushed cookies or nuts on top. Layering the cake with white chocolate shavings adds a nice look and taste.
How can I create no-bake red velvet jar desserts?
To make no-bake red velvet desserts, start with store-bought red velvet cake or cake mix. Crumble it into jars. Then, prepare a no-bake cheesecake filling. Mix cream cheese, powdered sugar, and whipped cream for a light texture. Layer the crumbled cake and filling in jars. You can also add some berries for a boost of flavor and color.
What are the latest trends in red velvet desserts?
Red velvet desserts keep evolving. One trend is red velvet cupcakes in jars. They are cute and easy to share. Another trend is using red velvet flavors in other treats, like cookies and brownies. You can find red velvet milkshakes or donuts too! These creative twists keep red velvet cake fresh and exciting.
For a full recipe to make your own red velvet cake in a jar, check out the details above!
What Are the Popular Occasions for Serving Red Velvet Cake in a Jar?
You can enjoy red velvet cake in a jar at many fun events. These jars make great festive desserts for holidays like Christmas and Valentine’s Day. The bright red color and creamy frosting look lovely on any table. You can also use these jars as gifts. Just tie a ribbon around them for an extra touch.
For weddings, red velvet cake jars can be a big hit. They fit well with many themes. You can serve them as a sweet treat during the reception. Guests can enjoy them while they mingle. They also work well for wedding favors. Just make sure to label each jar with the couple’s names.
Birthday parties are another great time for these desserts. Kids and adults alike love red velvet cake. You can set up a dessert table with jars for easy serving. Each guest can grab a jar and enjoy their own treat. You can even add fun decorations that match the party theme.
Red velvet cake in a jar is easy to adapt. You can add sprinkles, chocolate chips, or fruit to make them unique. This way, you can cater to different tastes. Whether for a party, wedding, or holiday, these jars are sure to impress.
Feel free to explore the Full Recipe for more details on how to make these delightful treats!
Red velvet cake in a jar is easy and fun to make. We covered key ingredients, from traditional options to gluten-free choices. I shared step-by-step tips for baking and layering your cake. You can brighten up any occasion with creative serving ideas and smart storage tips. Don’t forget to experiment with new twists on this classic dessert. Whether it’s holidays or weddings, red velvet jars fit beautifully. Enjoy making these delightful treats for yourself or your guests. Your baking journey is just beginning!