
Garlic Parmesan Roasted Broccoli Flavorful Vegetable Dish
Are you ready to transform your broccoli into a mouthwatering dish? Garlic Parmesan Roasted Broccoli is packed with flavor and

Are you ready to transform your broccoli into a mouthwatering dish? Garlic Parmesan Roasted Broccoli is packed with flavor and
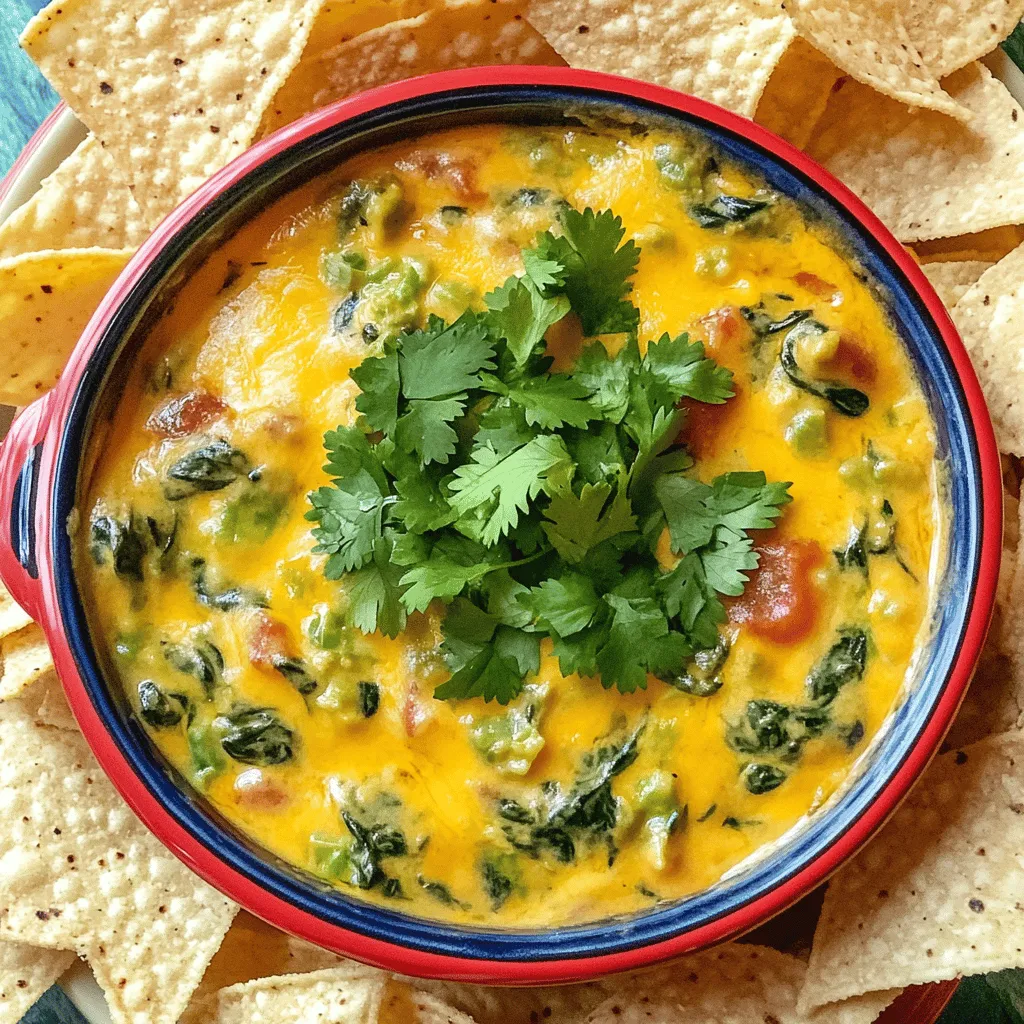
If you’re craving something cheesy, creamy, and packed with flavor, you’ve come to the right place! This Pepper Jack Spinach

Get ready to enjoy a cozy fall treat with my Pumpkin Cheesecake French Toast Roll Ups! This dish combines warm
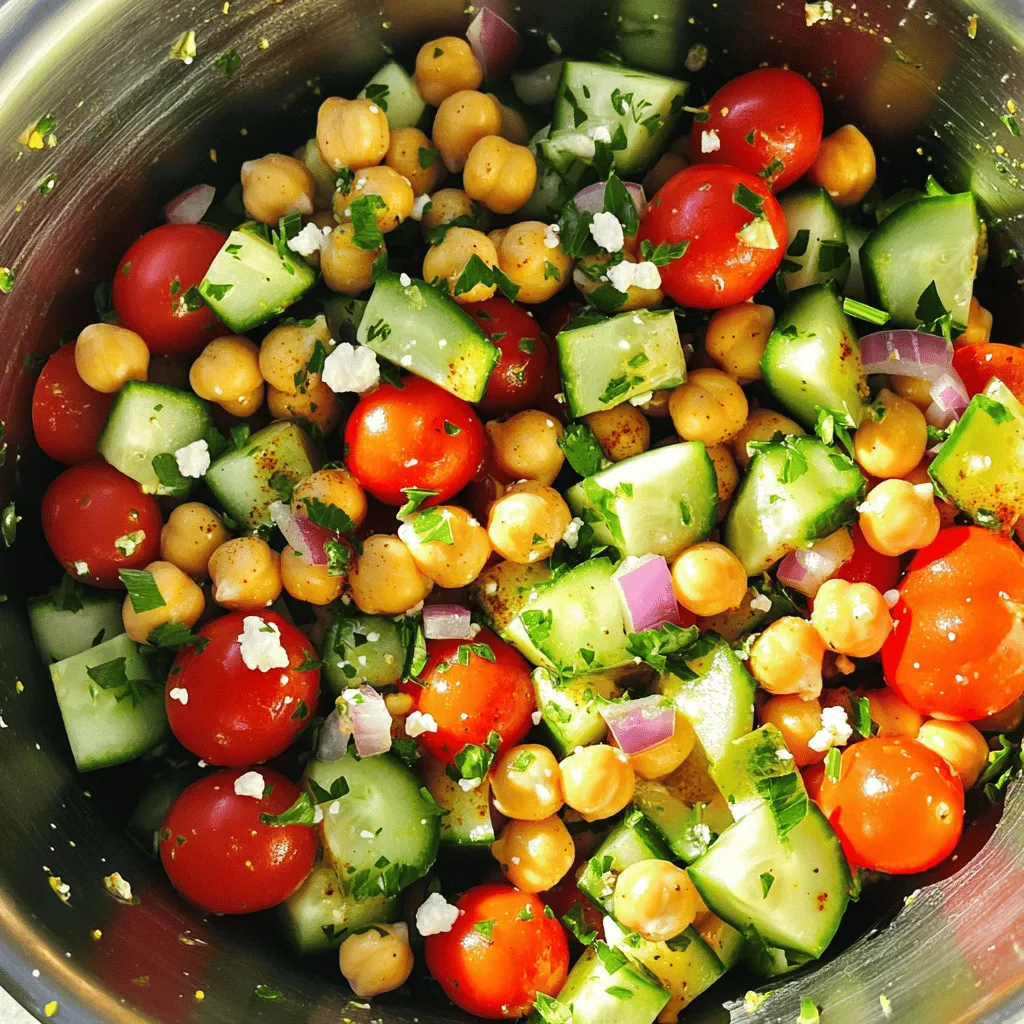
Looking for a quick and tasty meal? Try my Lemon Garlic Chickpea Salad! This dish is simple to make and
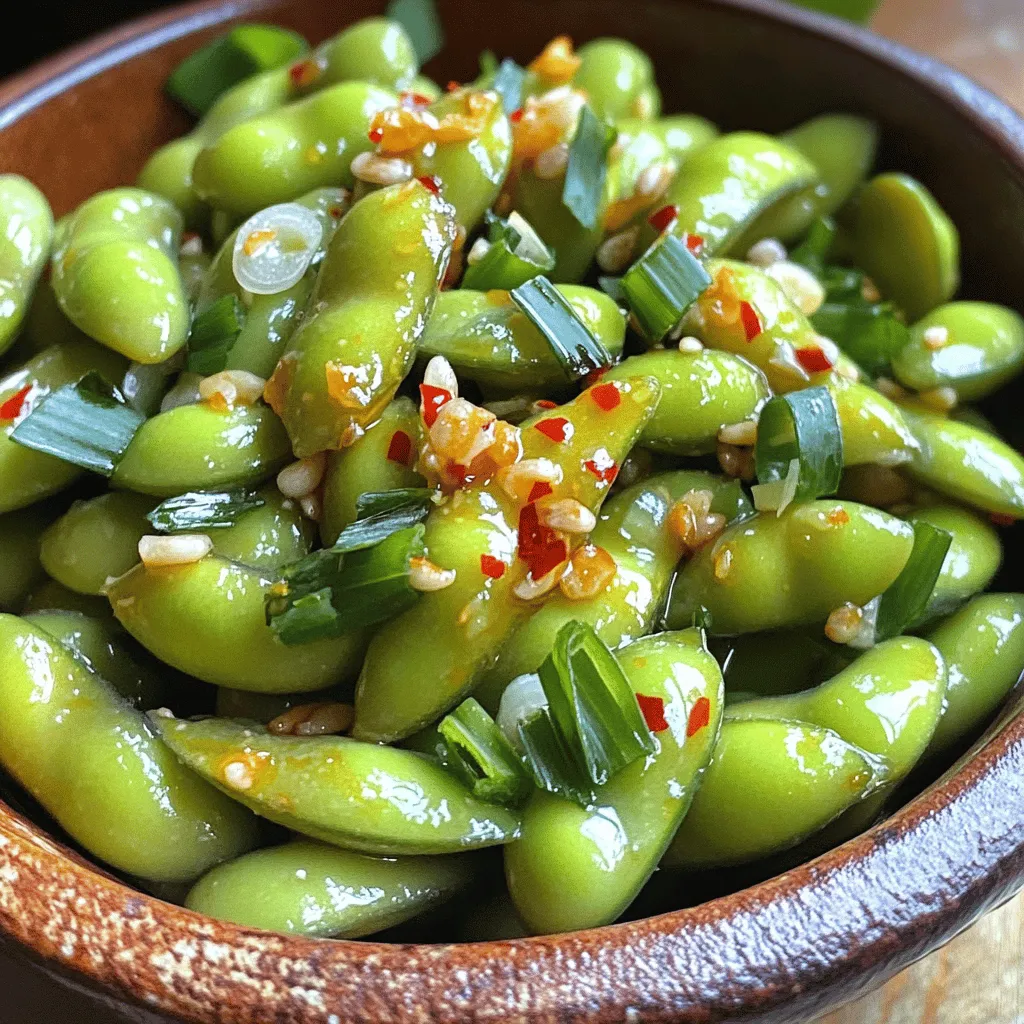
Are you craving a quick and tasty snack? Look no further! This Minute Spicy Garlic Edamame recipe packs bold flavors,

If you love sweet and salty snacks, you’re in for a treat! Chocolate Covered Pretzel Bark combines crunchy pretzels, rich
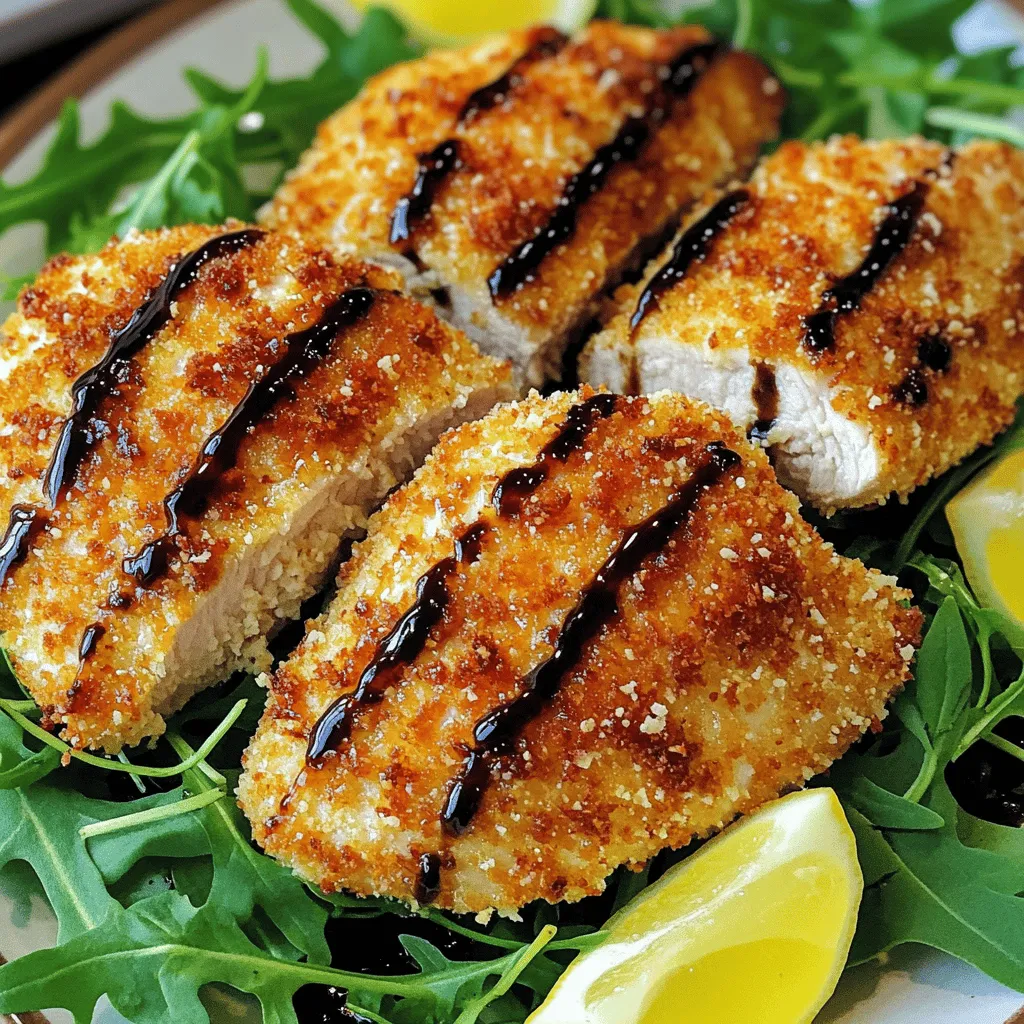
Craving a delicious meal that’s quick and easy? Look no further! This Air Fryer Parmesan Crusted Chicken recipe is a
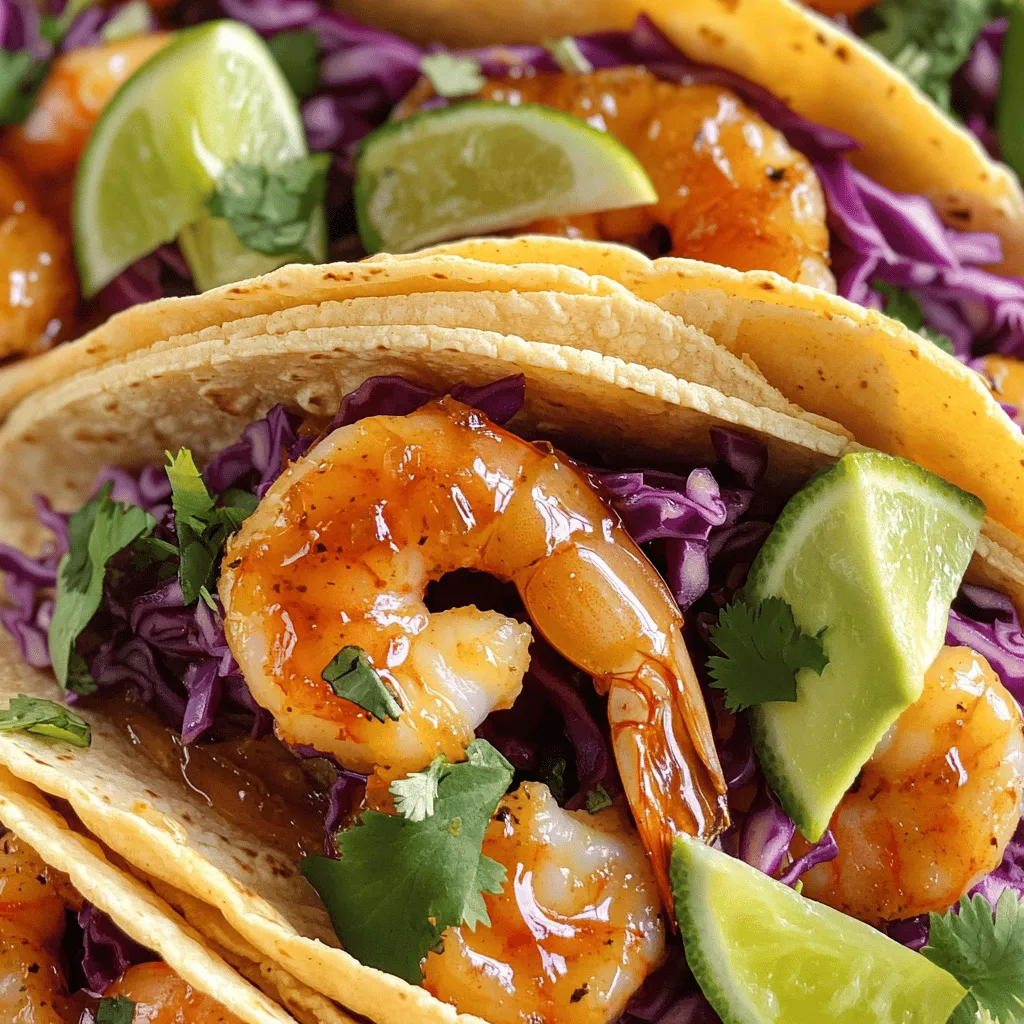
Craving a quick and tasty meal? Look no further! My Flavorful Sheet Pan Garlic Honey Shrimp Tacos are a game-changer.
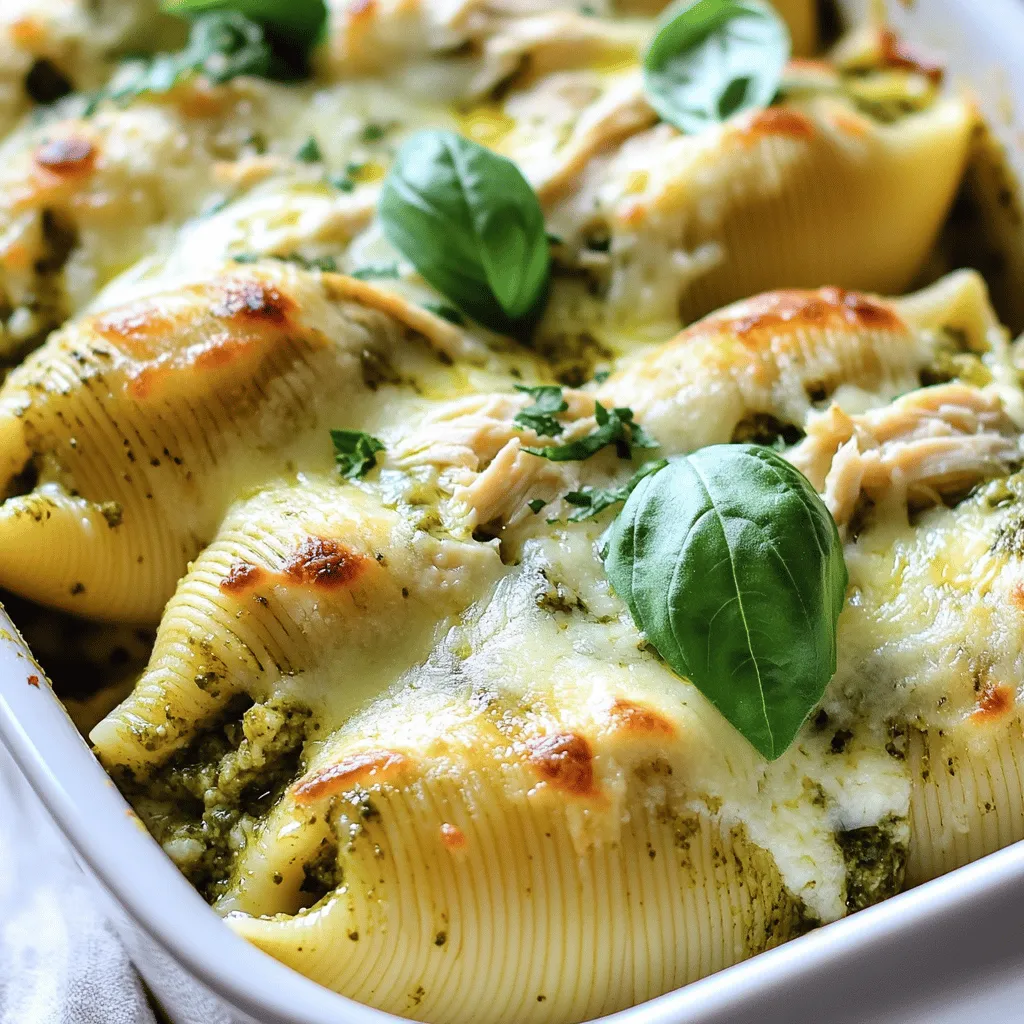
Are you ready for a tasty dish that’s easy to make? Creamy Pesto Chicken Stuffed Shells are a delightful meal
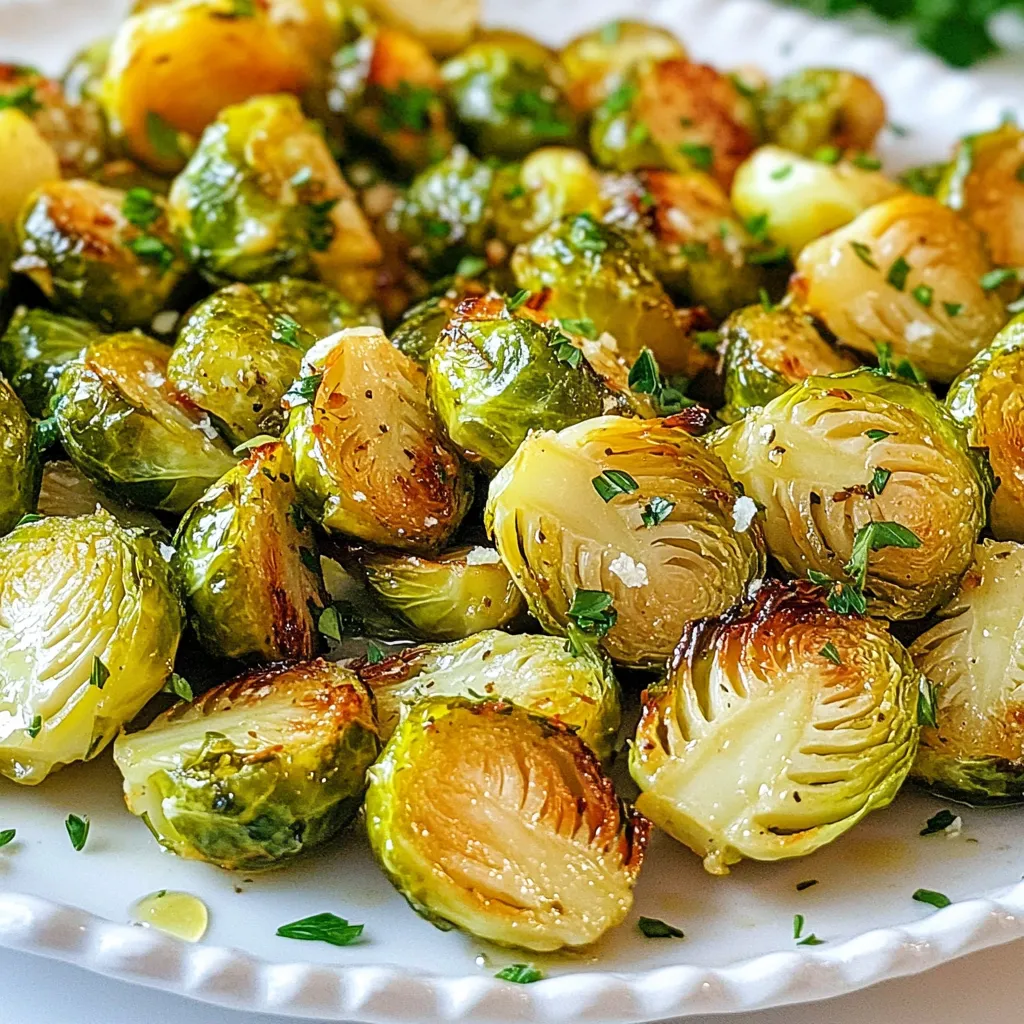
Looking for a side dish that packs a flavorful punch? Garlic Herb Roasted Brussels Sprouts are here to impress! I’ll