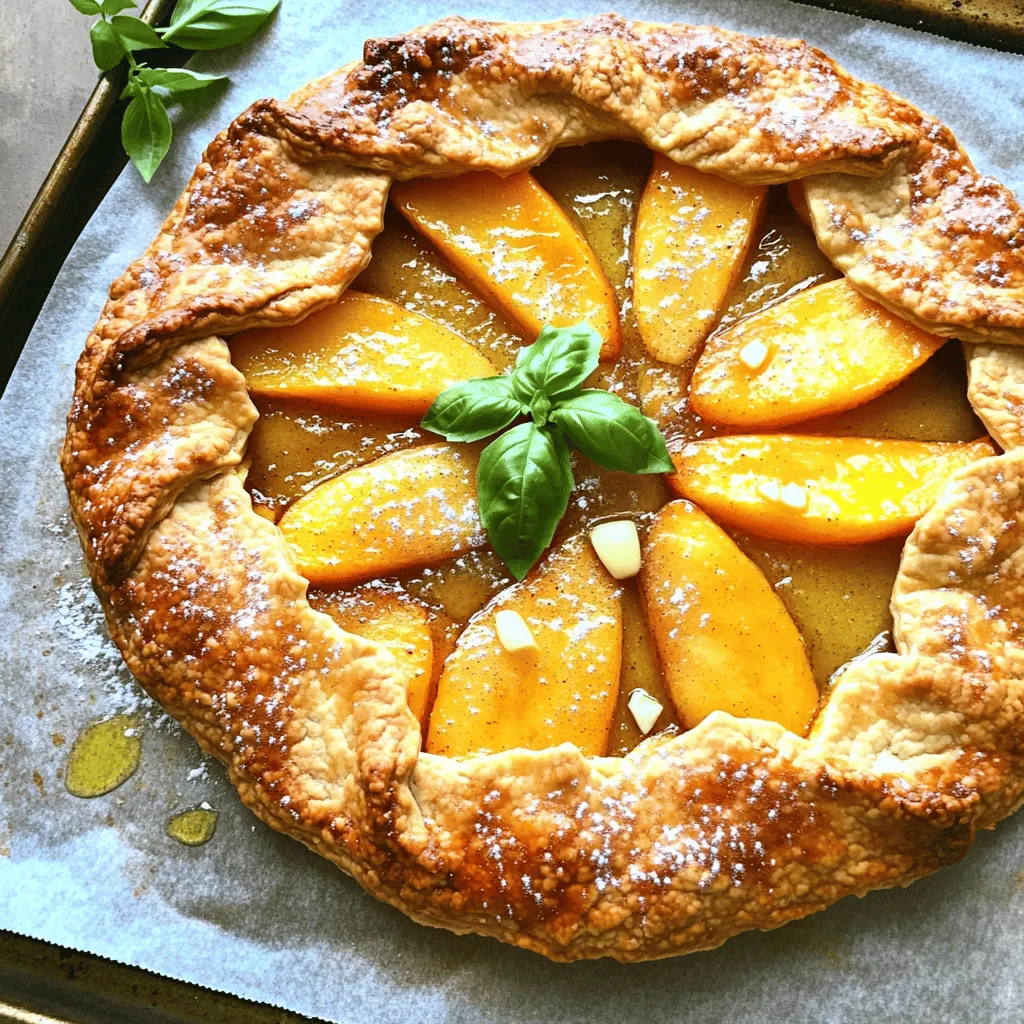
Rustic Peach Galette Delightful Summer Dessert Recipe
Are you ready to treat yourself to a delightful summer dessert? A Rustic Peach Galette is your answer! This simple

Are you ready to treat yourself to a delightful summer dessert? A Rustic Peach Galette is your answer! This simple
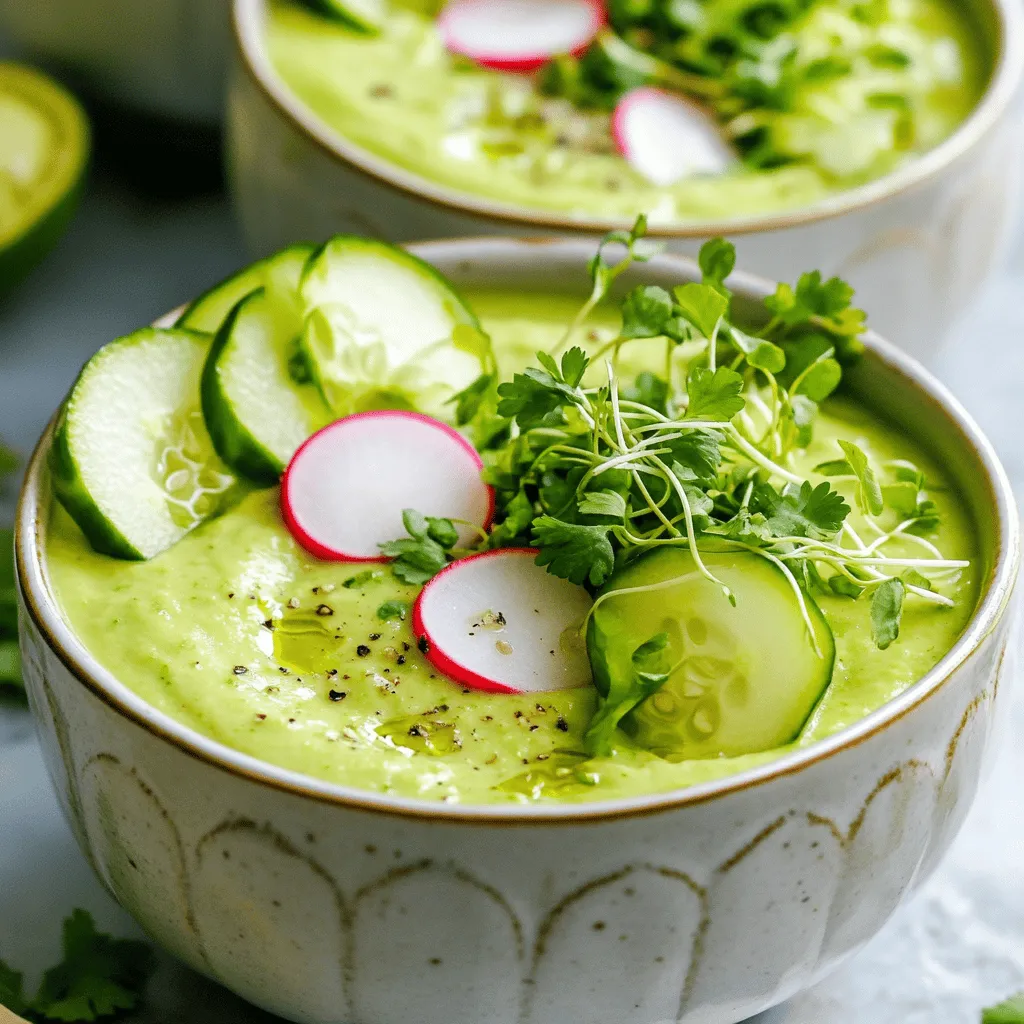
Cool down this summer with a bowl of Avocado Cucumber Gazpacho! This fresh, chilled soup combines creamy avocados and crisp

Are you craving a simple, delicious meal that brings comfort and flavor to your table? Look no further! My Cheesy
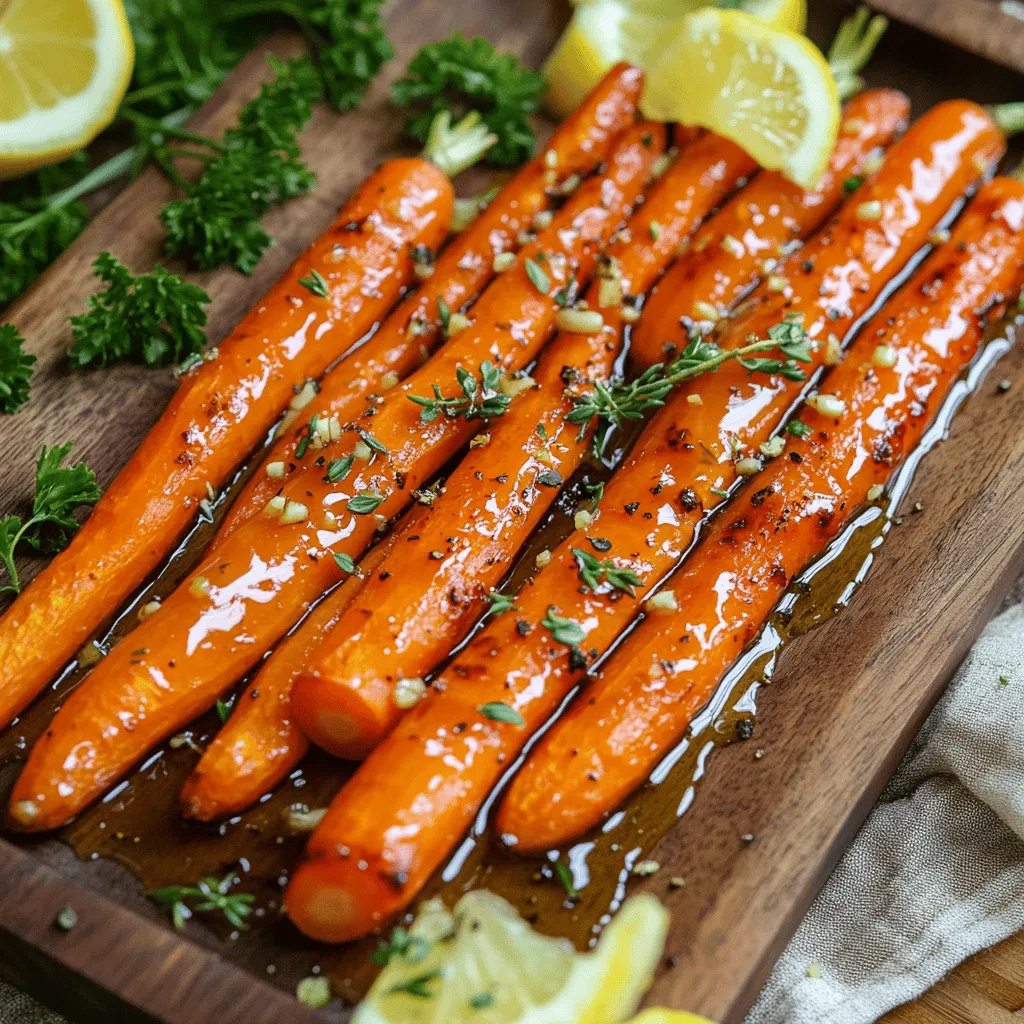
Looking for a delicious side dish that’s both easy and healthy? Honey Garlic Roasted Carrots are the perfect addition to
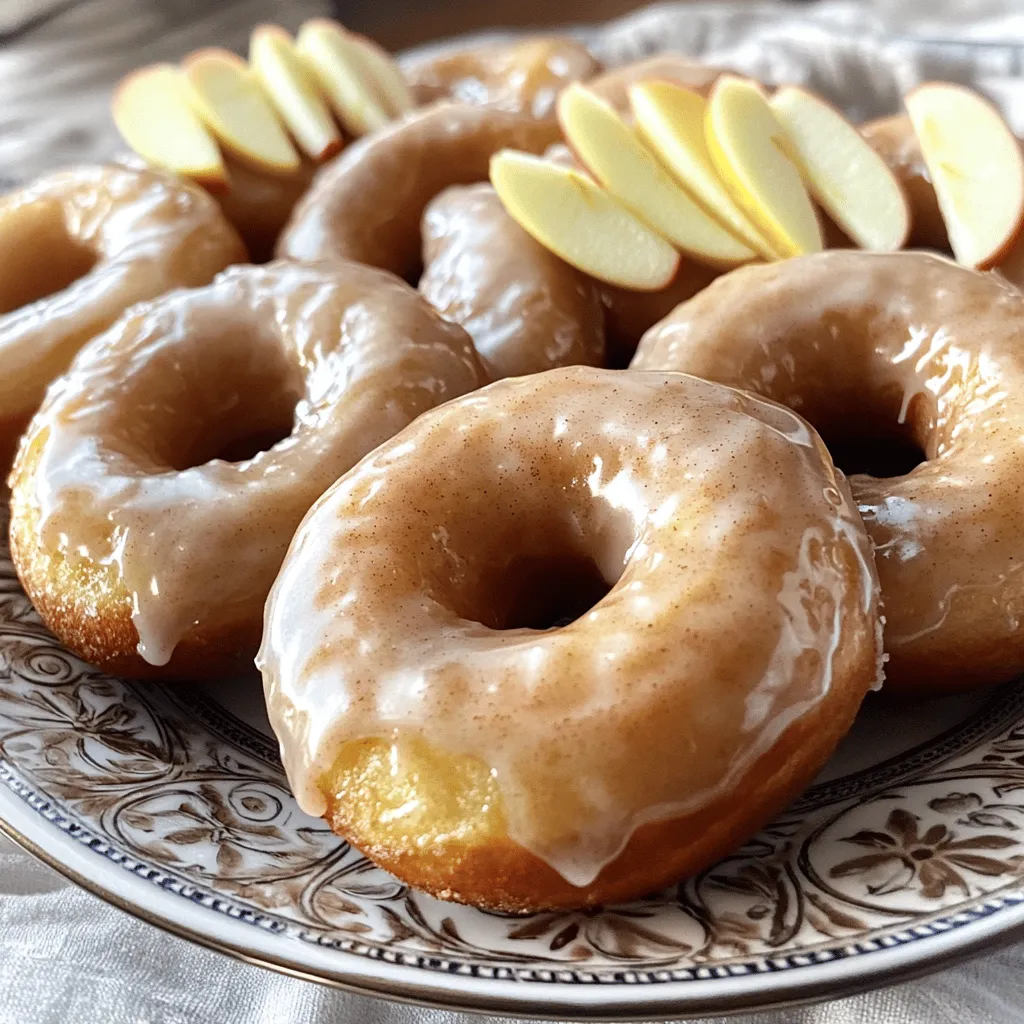
Craving a sweet treat that’s easy to make and incredibly delicious? You’re in the right place! In this guide, I’ll
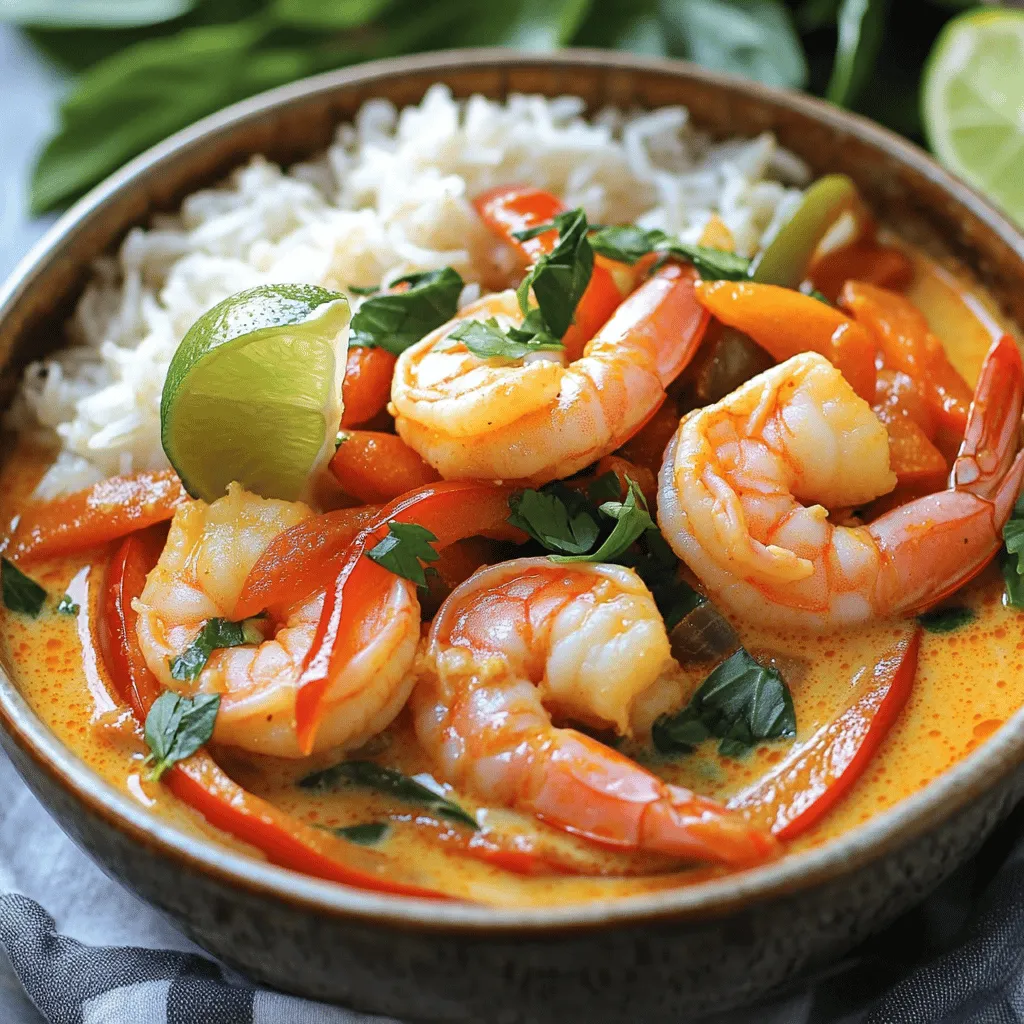
If you crave a dish that bursts with flavor, you’re in the right place! Thai Coconut Shrimp Curry is simple
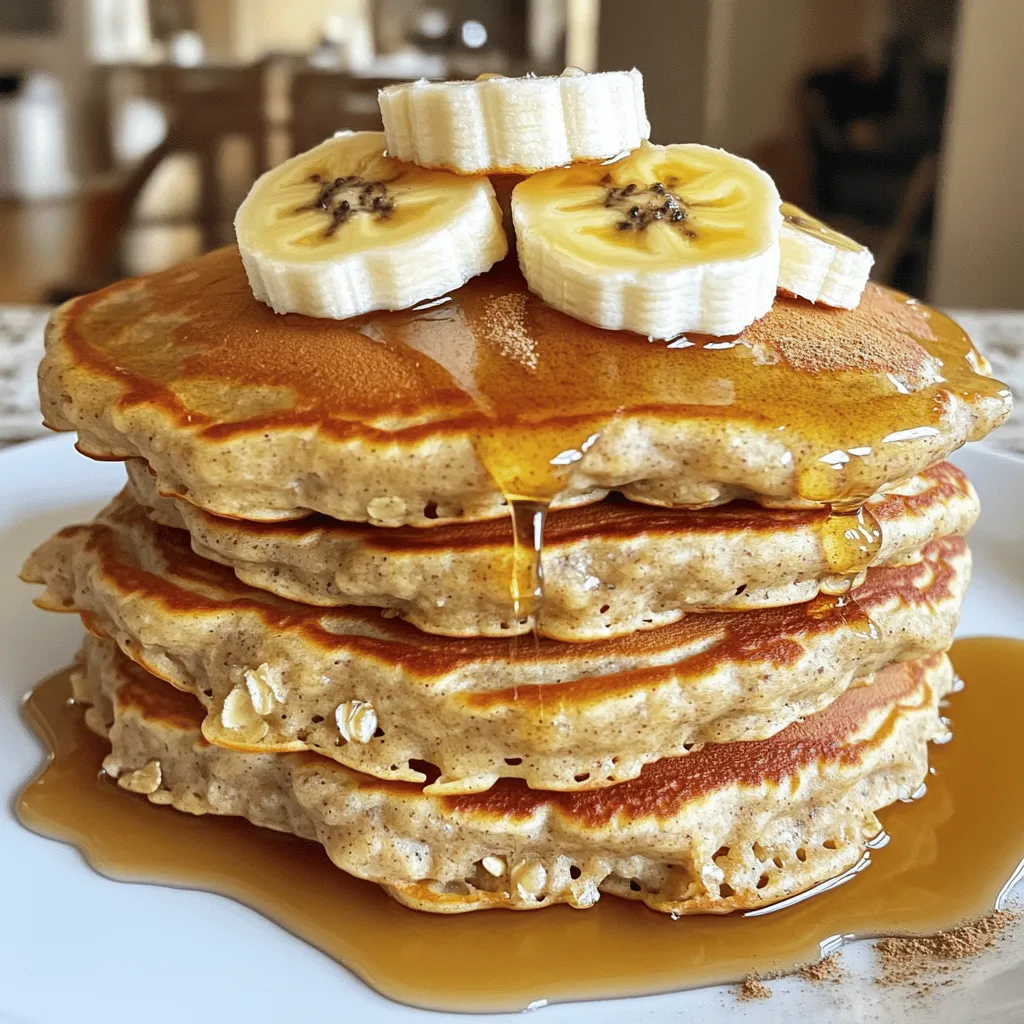
Are you ready to whip up a healthy breakfast? My Banana Oat Blender Pancakes are soft, fluffy, and packed with
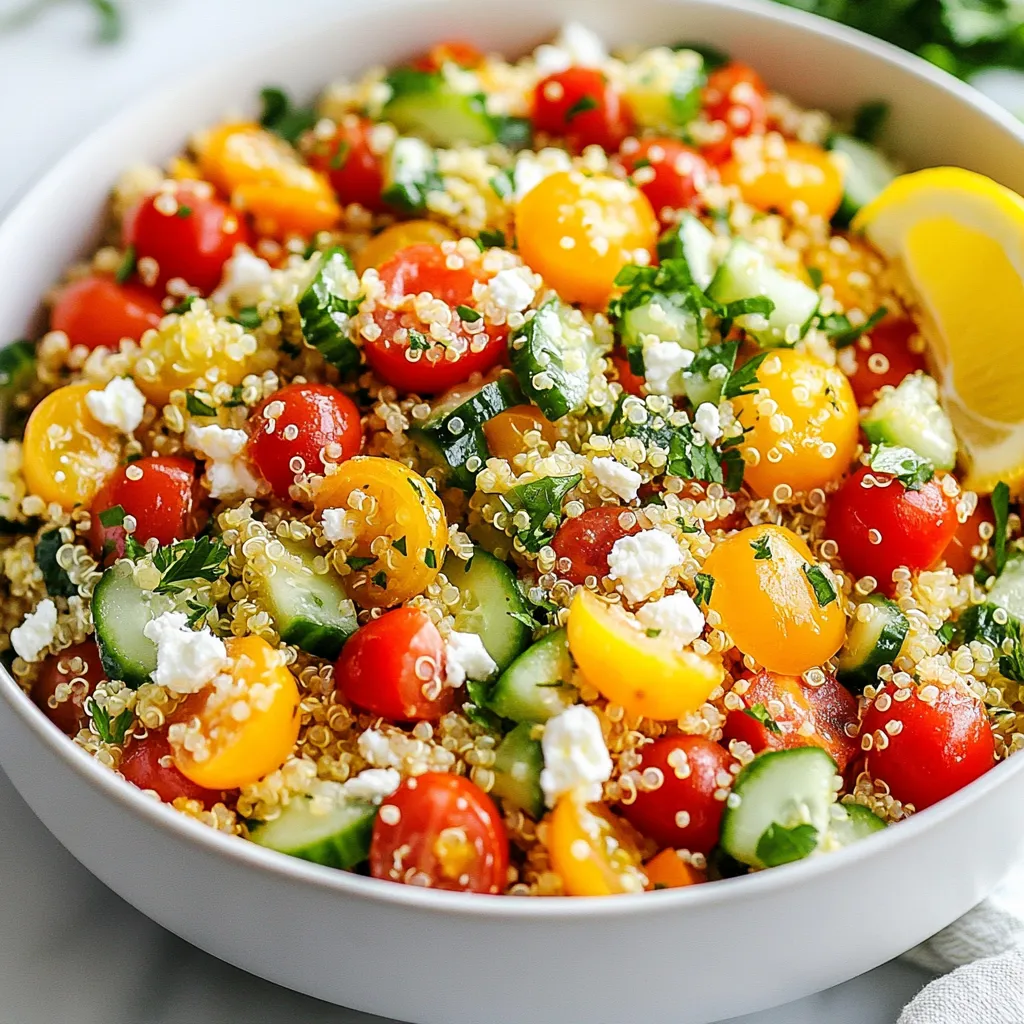
Looking for a fresh and tasty dish? You’ll love my Lemon Garlic Quinoa Salad! It’s packed with flavor and easy
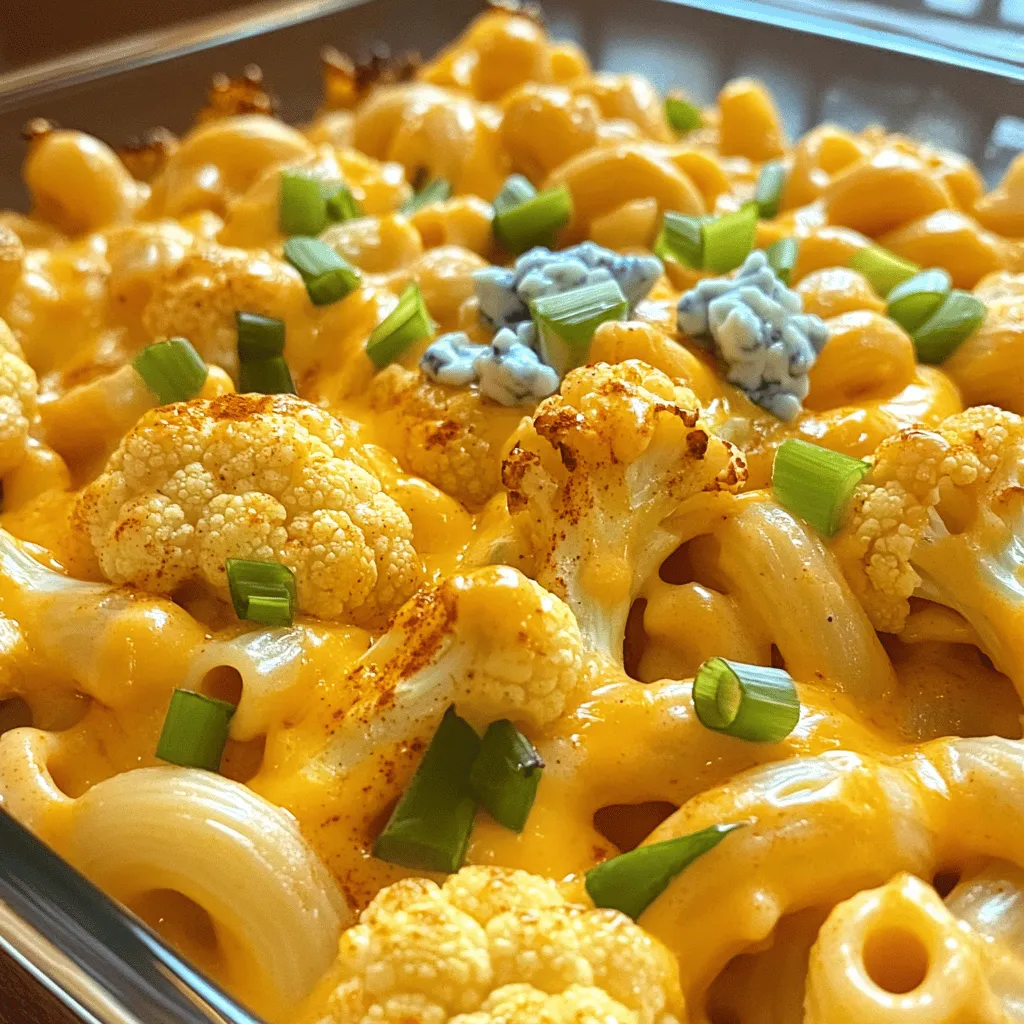
Get ready to dive into a delicious bowl of Buffalo Cauliflower Mac & Cheese! This recipe brings comfort food to
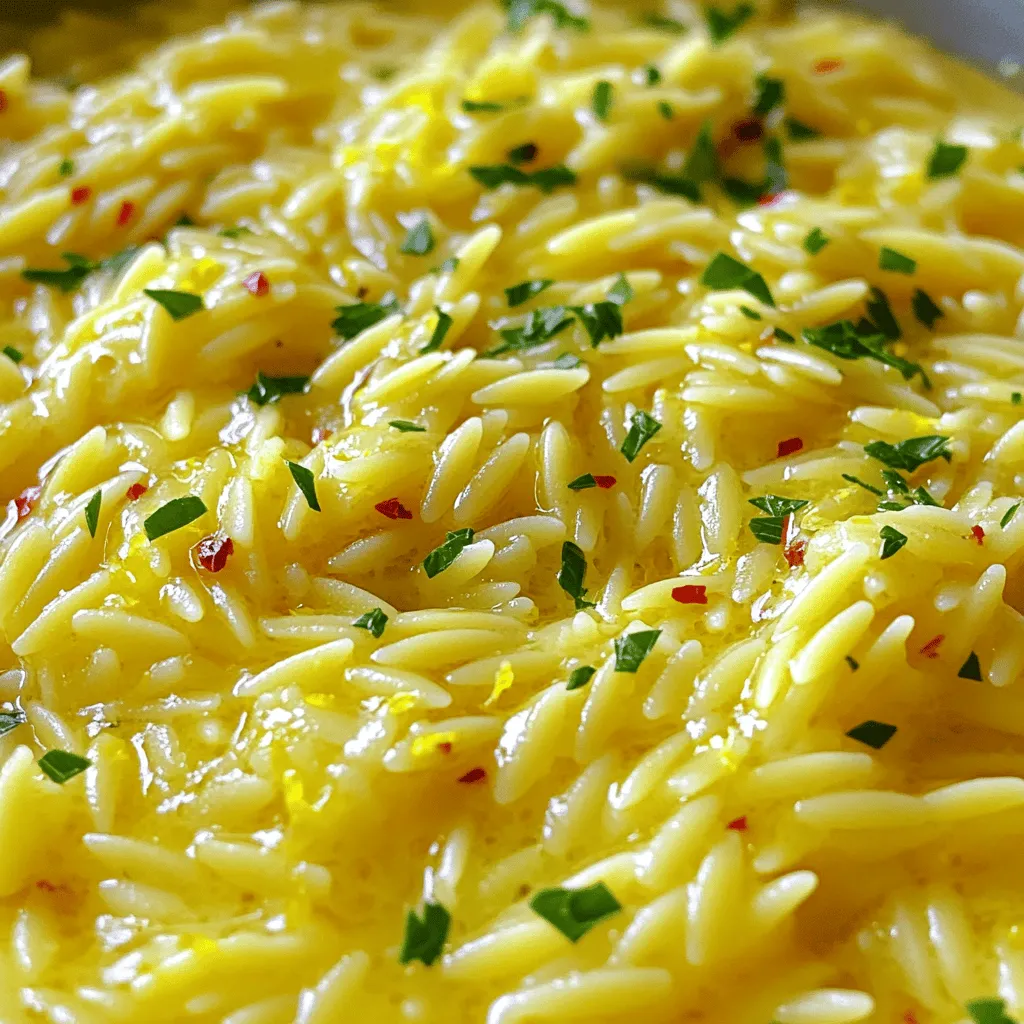
Looking for a quick and tasty dish? Lemon Garlic Butter Orzo is simple to make and bursting with flavor. This