
Spicy Jalapeno Popper Wonton Cups Flavorful Snack Idea
Looking for a tasty snack that packs a punch? Spicy Jalapeno Popper Wonton Cups are just what you need! These

Looking for a tasty snack that packs a punch? Spicy Jalapeno Popper Wonton Cups are just what you need! These
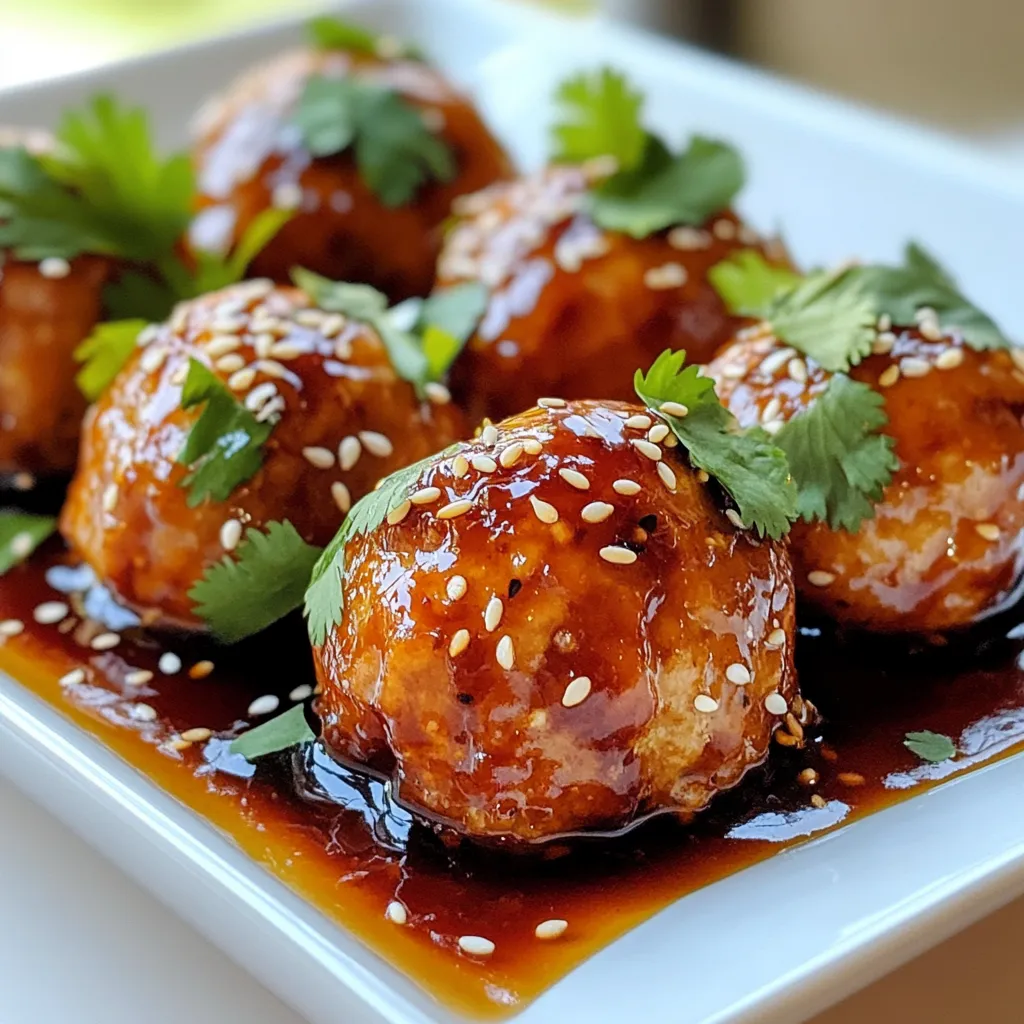
Looking for an easy dinner that packs a flavor punch? My Teriyaki Chicken Meatballs recipe is just what you need!
![Here’s what you need for your Pickle Ranch Chicken and Spinach Salad. Each item adds great taste. - 2 boneless, skinless chicken breasts - 1 cup pickle juice (dill) - 1 tablespoon ranch seasoning mix Marinating the chicken in pickle juice adds a tangy punch. The ranch seasoning gives it a nice, herby flavor. - 4 cups fresh spinach, washed and dried - 1 cup cherry tomatoes, halved - 1/2 cup cucumber, thinly sliced - 1/4 red onion, thinly sliced - 1/2 cup shredded cheddar cheese - 1/4 cup pickles, diced (optional for garnish) These veggies bring color and crunch to your salad. Spinach is packed with nutrients. - 1/4 cup olive oil - 2 tablespoons apple cider vinegar - Salt and pepper to taste This simple dressing ties all the flavors together. It’s easy to make and tastes fresh. For the full recipe, check the earlier sections. Get ready to enjoy a tasty salad! To start, place the chicken breasts in a medium bowl. Pour in the pickle juice, making sure the chicken is fully covered. Marinating enhances the flavor and keeps the chicken juicy. Let the chicken sit in the pickle juice for at least 30 minutes. This time allows the tangy flavor to soak in well. For cooking, you can either grill or use a skillet. Preheat your grill or skillet over medium heat. Remove the chicken from the pickle juice. Season it with ranch seasoning, salt, and pepper. Cook the chicken for 6-7 minutes on each side. You want the internal temperature to reach 165°F (75°C) for safety. After cooking, let the chicken rest for 5 minutes before slicing. This resting time helps keep the juices inside. Now, let’s make the salad. In a large bowl, add the fresh spinach, halved cherry tomatoes, sliced cucumber, and red onion. Make sure to wash and dry the spinach well. This step removes any dirt and keeps the leaves crisp. Combine all the vegetables gently. This ensures even distribution and a colorful mix. For the complete recipe, check out the [Full Recipe]. To make your chicken burst with flavor, marinate it well. Use pickle juice for at least 30 minutes. You can also try lemon juice or yogurt for a tangy twist. Adding garlic powder or smoked paprika can enhance the taste. Fresh herbs like thyme or rosemary work great too. Want to make your salad unique? Add more veggies! Try bell peppers, carrots, or radishes for color and crunch. You can also swap in different proteins. Grilled shrimp or tofu are tasty choices. Rotisserie chicken is a quick fix if you're in a hurry. Feeling adventurous? Change up your dressing! A balsamic vinaigrette gives a sweet touch. If you want creamy, mix Greek yogurt with ranch dressing. Just blend yogurt, a splash of lemon juice, and dill. This makes a lighter but still rich option for your salad. For the full recipe, check out the recipe section above. {{image_2}} You can change the veggies in your salad based on the season. In spring, add asparagus or radishes for a fresh crunch. Summer is great for sweet corn or bell peppers. In fall, think about roasted butternut squash or carrots. Winter calls for hearty greens like kale or Brussels sprouts. Fruits can add a sweet twist to your salad. In spring, toss in sliced strawberries or blueberries. Summer works well with peaches or watermelon. Come fall, add apples or pears to bring in some sweetness. In winter, try pomegranate seeds for a burst of color and flavor. If you're looking for gluten-free options, this salad is easy to adjust. Just check the ranch seasoning mix. Make sure it’s gluten-free. All the other ingredients are naturally gluten-free. For a vegetarian or vegan option, swap the chicken with chickpeas or grilled tofu. You can still use the pickle juice for flavor. Just skip the ranch seasoning or find a plant-based version. This way, you keep the taste without the meat. To make this meal even better, think about side dishes. Serve it with garlic bread or a bowl of soup. A light fruit salad goes well too. You can also transform your salad into a wrap or sandwich. Use a large tortilla or bread. Fill it with salad and sliced chicken. Roll it up for a tasty lunch on the go. To keep your Pickle Ranch Chicken and Spinach Salad fresh, use airtight containers. Glass or plastic containers work well. Make sure to seal them tightly. Store the leftovers in the fridge. They will stay fresh for 3 days. After that, the salad may become soggy. For meal prep, start by cooking extra chicken. You can marinate and grill several chicken breasts at once. Store them in separate containers with some pickle juice. Portion your salad ingredients into ready-to-go bags. This makes it easy to grab and toss together later. It keeps everything fresh and tasty. When reheating, warm the chicken in a skillet or microwave. Heat it until it reaches 165°F (75°C). Avoid reheating the salad. Instead, keep it cold and crisp. Add the chicken on top just before serving. This helps maintain the salad’s fresh taste and texture. You can marinate the chicken for up to 4 hours. This gives it great flavor. If you marinate for too long, the chicken may become too salty or mushy. I recommend sticking to 30 minutes to 4 hours for the best taste and texture. Yes, you can use other greens! Some great alternatives are arugula, kale, or mixed greens. Each green adds a different taste and texture to the salad. Try using a mix for added fun. This salad pairs well with many dishes. You might enjoy serving it with garlic bread or a light soup. For a more filling meal, consider adding rice or quinoa on the side. These options balance the salad nicely. Yes, you can make this salad ahead! To keep it fresh, store the chicken and salad separately. This helps prevent soggy greens. You can dress the salad just before serving for the best taste. This article shared a clear path to making a tasty Pickle Ranch Chicken and Spinach Salad. We covered key ingredients and step-by-step instructions for marinating and cooking the chicken. You learned how to build a colorful salad and customize it to your liking. I hope the tips on storage and variations make meal prep easier. Enjoy your fresh salad and feel proud of your cooking! Happy eating!](https://recipesinsight.com/wp-content/uploads/2025/07/e207d25c-2233-4c15-9f84-4446462ef0e4.webp)
Are you ready to try a salad that bursts with flavor? The Pickle Ranch Chicken and Spinach Salad Delight will
Looking for a tasty and healthy snack? You’re in the right place! In this blog post, I’ll guide you through
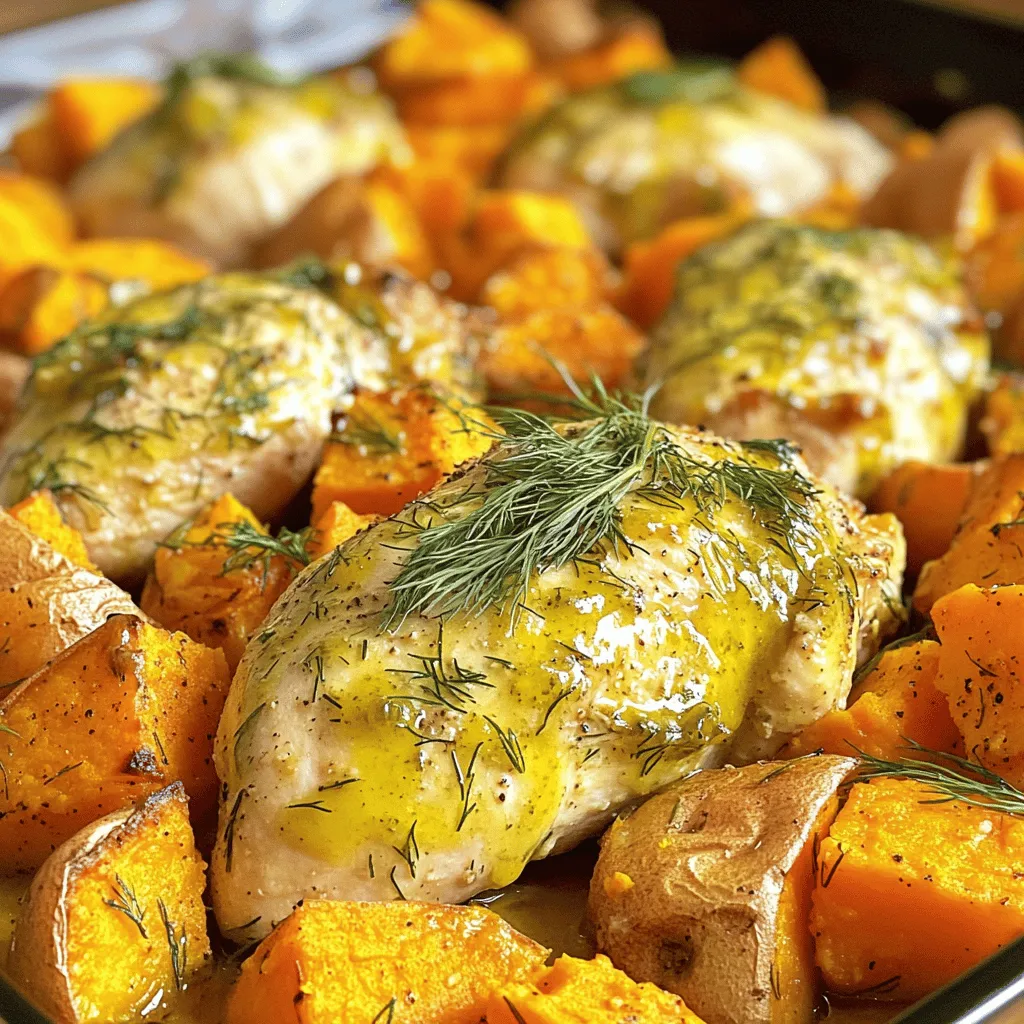
Are you ready to transform dinner into a flavorful experience? My Pickle Ranch Chicken and Sweet Potato Bake packs a
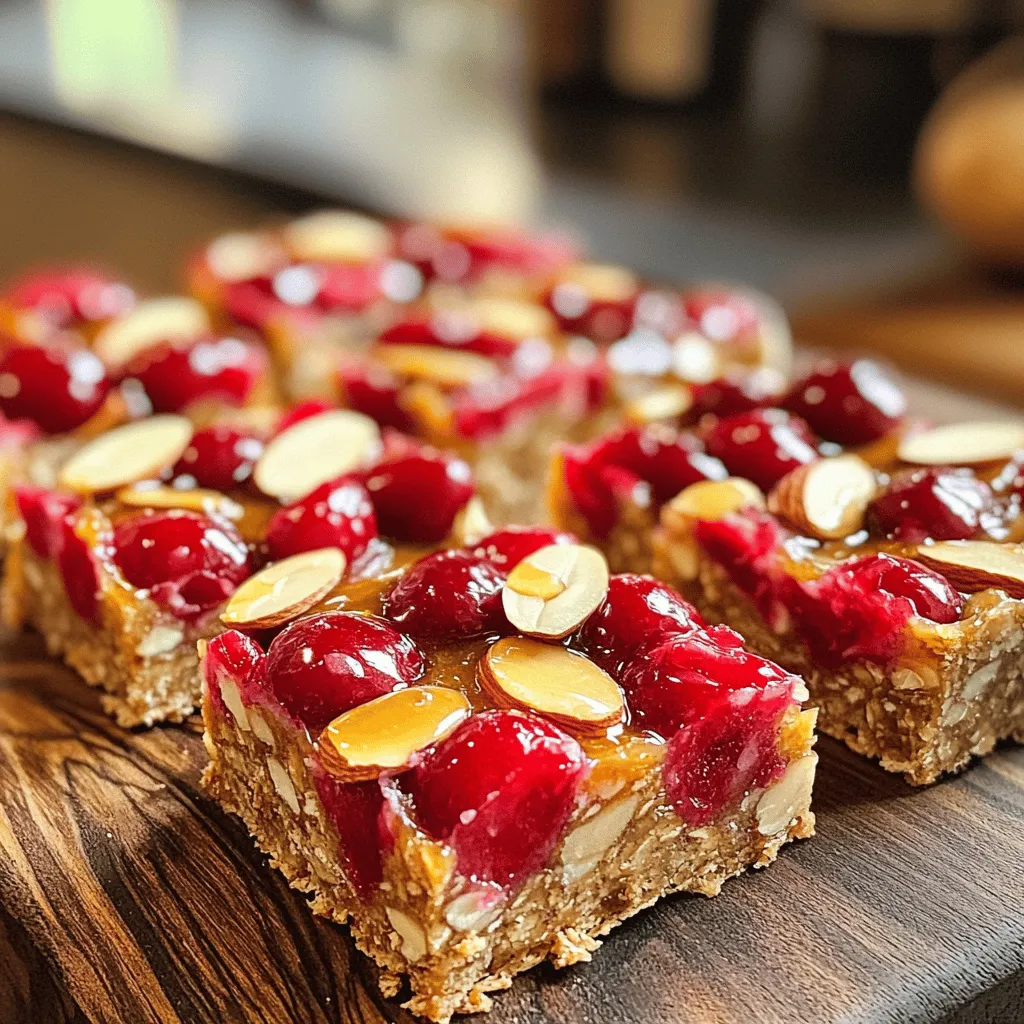
![- 1 cup rolled oats - 1/2 cup vanilla protein powder - 1 cup unsweetened applesauce - 1/2 cup honey or maple syrup - 1 cup fresh or frozen cherries, pitted and chopped - 1/4 cup almond butter (or peanut butter) - 1/2 teaspoon cinnamon - 1/4 teaspoon salt - 1/4 cup chopped nuts (optional, such as almonds or walnuts) - 1/4 cup dark chocolate chips (optional) You need simple ingredients for these cherry oatmeal protein bars. Each ingredient adds flavor and energy. The oats give a hearty base. They also provide fiber and help keep you full. Vanilla protein powder boosts the protein content. This helps with muscle repair and growth after exercise. Unsweetened applesauce adds moisture and sweetness without added sugar. Honey or maple syrup gives a natural sweetness. Use whichever you prefer. Cherries add a bright flavor and are rich in antioxidants. Almond butter or peanut butter brings creaminess and healthy fats. Cinnamon adds warmth and flavor. It also has health benefits like lowering blood sugar. Salt enhances all the flavors, making each bite delightful. If you want more crunch, add chopped nuts. Dark chocolate chips are optional but add a sweet touch. With these ingredients, you’ll create a tasty and nutritious snack. For the full recipe, check the section above. - Preheat your oven to 350°F (175°C). Line an 8x8 inch baking pan with parchment paper. - In a large bowl, mix 1 cup rolled oats, 1/2 cup protein powder, 1/2 teaspoon cinnamon, and 1/4 teaspoon salt. Stir until everything is well combined. - In another bowl, whisk together 1 cup unsweetened applesauce, 1/2 cup honey (or maple syrup), and 1/4 cup almond butter. Make sure it is smooth. - Pour the wet mix into the dry mix. Stir until just combined. Gently fold in 1 cup chopped cherries and any optional ingredients like nuts or chocolate chips. - Transfer the mixture to your prepared baking pan. Spread it evenly and press down with a spatula. - Bake for 20-25 minutes. Look for golden edges and a set center as signs it's done. - Let the bars cool in the pan for about 10 minutes. Then, move them to a wire rack to cool completely. - Once cooled, cut into bars of your choice. You can store them in an airtight container in the fridge for a week or freeze them for later. Follow this process for delicious Cherry Oatmeal Protein Bars! For the detailed recipe, check the Full Recipe. To get the right texture for your cherry oatmeal protein bars, you need to mix well. The mixture should be moist but not too runny. If it feels dry, add a little more applesauce. For the best results, measure ingredients accurately. Use a dry measuring cup for oats and protein powder. Make sure to pack the almond butter into the cup for a full scoop. If you need an alternative for almond butter, try peanut butter or sunflower seed butter. Both options work well and add nice flavors. For a vegan option, use maple syrup instead of honey. Maple syrup keeps the bars sweet and sticky. Cherry oatmeal protein bars pair nicely with yogurt or fresh fruit. You can also enjoy them with a cup of tea or coffee. For a fun twist, spread a little more almond butter on top. You can even crumble them over oatmeal for extra flavor. These bars are perfect for breakfast or a quick snack. They travel well, so take them on hikes or to work. You can find the full recipe above to create your own delicious batch. {{image_2}} You can easily change the flavors in these bars. Adding spices like nutmeg or ginger gives warmth. Try a teaspoon of nutmeg for a cozy taste. Ginger adds a nice zing. You can also swap fruits. Fresh blueberries or dried cranberries work well. Each fruit brings its own flavor and nutrients. Experiment until you find your favorite mix! Do you want chewy or crunchy bars? For chewy bars, stick to the base recipe. For crunch, add nuts or seeds. Almonds or walnuts add a nice bite. You can also mix in seeds like chia or flaxseed. These seeds add healthy fats and extra crunch. Play around with the texture until you find what you like best. Want more protein? You can add Greek yogurt to the mix. Just a few tablespoons will boost protein. You can also use protein-packed seeds like hemp seeds. These seeds are tiny but mighty. They add a protein punch without changing the flavor. With these enhancements, you can make your bars even better! For the complete recipe, check the [Full Recipe]. Store your cherry oatmeal protein bars in an airtight container. This keeps them fresh and tasty. I recommend using glass or plastic containers with tight lids. You can also wrap each bar in plastic wrap for extra protection. For best refrigeration practices, place the container in the fridge. These bars can last up to a week when stored this way. If you notice any moisture, it might be time to eat them! To properly freeze your bars, first cut them into individual pieces. Wrap each bar in plastic wrap or foil. Then, place them in a freezer-safe bag or container. This way, they won't stick together. Make sure to label the container with the date. When you're ready to enjoy one, simply thaw it in the fridge overnight. You can also let it sit at room temperature for about an hour. This method keeps the flavor and texture just right. Enjoy your homemade cherry oatmeal protein bars anytime! For the full recipe, check out the details above. These protein bars stay fresh for about a week in the fridge. If you freeze them, they last up to three months. Just wrap them well in plastic wrap or foil before freezing. This keeps them tasty and safe from freezer burn. You can modify the Cherry Oatmeal Protein Bars to fit your needs. Common allergens in this recipe include nuts and gluten. For nut allergies, use sunflower seed butter instead of almond or peanut butter. If you need a gluten-free option, choose certified gluten-free oats. This allows everyone to enjoy these tasty bars. To cut the bars neatly, let them cool completely first. Then, lift the bars out of the pan using the parchment paper. Place them on a cutting board and use a sharp knife. For best cuts, try to use a gentle sawing motion. This helps keep the bars intact. Store the cut bars in an airtight container, separating layers with parchment paper to prevent sticking. Yes, you can easily make these protein bars gluten-free! Use certified gluten-free oats as your base. This ensures no gluten contamination. You can also replace the vanilla protein powder with a gluten-free alternative. This way, everyone can enjoy these healthy snacks without worry. These cherry oatmeal protein bars are simple and fun to make. You now know the ingredients, steps for baking, and how to store your bars. Don’t forget the tips for ingredient swaps and variations to fit your taste. When you try these bars, enjoy the texture and taste. Experiment with flavors and toppings. Make them your own! They’re a great snack for any time. Happy baking!](https://recipesinsight.com/wp-content/uploads/2025/07/e8a2a75f-24de-44cd-8869-22da158c080a.webp)
Looking for a tasty and healthy snack? These Cherry Oatmeal Protein Bars are your answer! Packed with flavor and energy,
![- 2 cups cooked chicken, shredded or diced - 1/2 cup ranch dressing - 1/3 cup dill pickles, finely chopped - 1 cup mixed bell peppers, sliced (red, green, yellow) - 1 cup lettuce, shredded - 1/2 cup grated carrots - 4 large tortillas (flour or whole grain) - Salt and pepper to taste - Optional: fresh dill or parsley for garnish To make these Pickle Ranch Chicken and Veggie Wraps, gather your main ingredients first. The chicken gives a hearty base, while the ranch dressing adds a creamy touch. Don't forget the dill pickles; they add a nice crunch and tang. Next, prepare the vegetables. I love using a mix of bell peppers for color and taste. Shredded lettuce and grated carrots add fresh texture. You can choose either flour or whole grain tortillas for wrapping. For seasoning, just add salt and pepper to taste. If you're feeling fancy, sprinkle some fresh dill or parsley on top for a burst of flavor. This combination makes every bite satisfying. You’ll find the full recipe gives a clear guide to follow. Enjoy creating these delightful wraps! In a mixing bowl, combine two cups of shredded chicken, half a cup of ranch dressing, and one-third cup of finely chopped dill pickles. Stir well until the chicken is fully coated. This mixture gives the wraps a tangy flavor and creamy texture. In a separate bowl, mix one cup of sliced bell peppers, one cup of shredded lettuce, and half a cup of grated carrots. Toss gently to combine. This veggie mix adds crunch and color, making your wraps more appealing. Lay a large tortilla flat on a clean surface. Spread a generous amount of the chicken mixture down the center. Top it with a portion of the vegetable mix. Season with a pinch of salt and pepper to taste. Fold the sides of the tortilla over the filling, then roll it tightly from the bottom. Repeat this with the remaining tortillas. For added crispiness, heat a skillet over medium heat. Place each wrap in the skillet and toast for 2-3 minutes on each side until golden brown. This step enhances the flavor and makes the wraps more enjoyable. Now you're ready to enjoy your savory Pickle Ranch Chicken and Veggie Wraps! For the full recipe, check back for all the details. To make your wraps burst with taste, try different ranch dressings. You can use spicy ranch or garlic ranch to switch things up. Adding spices can also enhance flavor. Consider paprika, garlic powder, or even a hint of cayenne for a kick. Each small change can make your wraps even more exciting. Achieving a crispy wrap is simple. After assembling your wraps, heat a skillet over medium heat. Lightly toast each wrap for 2-3 minutes on each side. This step adds a nice crunch and golden color. It also warms the fillings, making every bite delicious. For a fresh touch, serve your wraps with extra ranch dressing for dipping. A side salad also pairs well, adding more veggies to your meal. You can mix greens with a light vinaigrette or even a creamy dressing. This balance keeps the meal light yet satisfying. Enjoy your Pickle Ranch Chicken and Veggie Wraps! For the full recipe, check out the recipe section. {{image_2}} You can easily switch up the protein in your wraps. Instead of shredded chicken, try using: - Shredded turkey - Diced ham - Crumbled tofu These options keep the wraps tasty and fun. Each protein brings a unique flavor to the dish. Turkey offers a lean choice, while ham adds a nice sweetness. Tofu is perfect for a plant-based version. If you want a vegetarian wrap, there are great swaps you can make. Replace the chicken with: - Chickpeas - Quinoa Chickpeas add protein and a creamy texture. Quinoa is a great grain that boosts fiber. Both options keep the wraps hearty and satisfying. You won’t miss the chicken at all! For those who like a little heat, adding spice can elevate your wraps. Consider mixing in: - Jalapeños - Hot sauce These additions give your wraps a fun kick. Slice jalapeños for a fresh crunch, or drizzle hot sauce for a spicy blast. Adjust the amount to suit your taste. Enjoy the extra flavor! For the complete recipe, check the [Full Recipe]. To keep your wraps fresh in the fridge, wrap each one in plastic wrap or foil. Place them in a sealed container. This method keeps the wraps from drying out. They will stay good for up to three days. If you want to keep them longer, consider freezing. If you want to freeze your wraps, assemble them first. Wrap each one tightly in plastic wrap. Then, place them in a freezer bag. Be sure to remove as much air as you can. They can last up to two months in the freezer. When you are ready to eat, just thaw in the fridge overnight. To reheat your wraps, use an oven or a skillet. If using an oven, preheat to 350°F. Place the wraps on a baking sheet for 10-15 minutes. If using a skillet, heat over medium-low heat. Cook each wrap for about 3-4 minutes per side. This keeps the wraps crisp and tasty. Enjoy your Pickle Ranch Chicken and Veggie Wraps warm! It takes about 15 minutes to prep. The total time is 25 minutes. This quick prep time helps you enjoy a tasty meal fast. Yes, you can make these wraps ahead of time. Just prepare the filling and store it in the fridge. When you are ready to eat, assemble the wraps fresh. This way, they stay crunchy and delicious. These wraps pair well with: - A side salad with mixed greens - Crispy potato wedges - Fresh fruit, like apple slices or grapes - Extra ranch dressing for dipping Each of these sides adds a nice touch to your meal. Yes, these wraps offer a good balance of protein and veggies. The chicken gives you protein, while the veggies add vitamins and fiber. You can use whole grain tortillas to boost the health factor even more. Check the full recipe for more details on nutrition. Wraps are easy and quick to make. You just mix chicken, ranch, and veggies. Then, you fill and roll the tortillas. Toasting them gives a nice crunch. You can change the meat or veggies to fit your taste. Store extras in the fridge or freeze them for later. This dish is healthy and satisfying. Enjoy your tasty wraps any day of the week!](https://recipesinsight.com/wp-content/uploads/2025/07/4f789935-6639-40b7-bb36-575a497991fe.webp)
If you’re looking for a quick, tasty meal, you’ll love these Savory Pickle Ranch Chicken and Veggie Wraps. Packed with
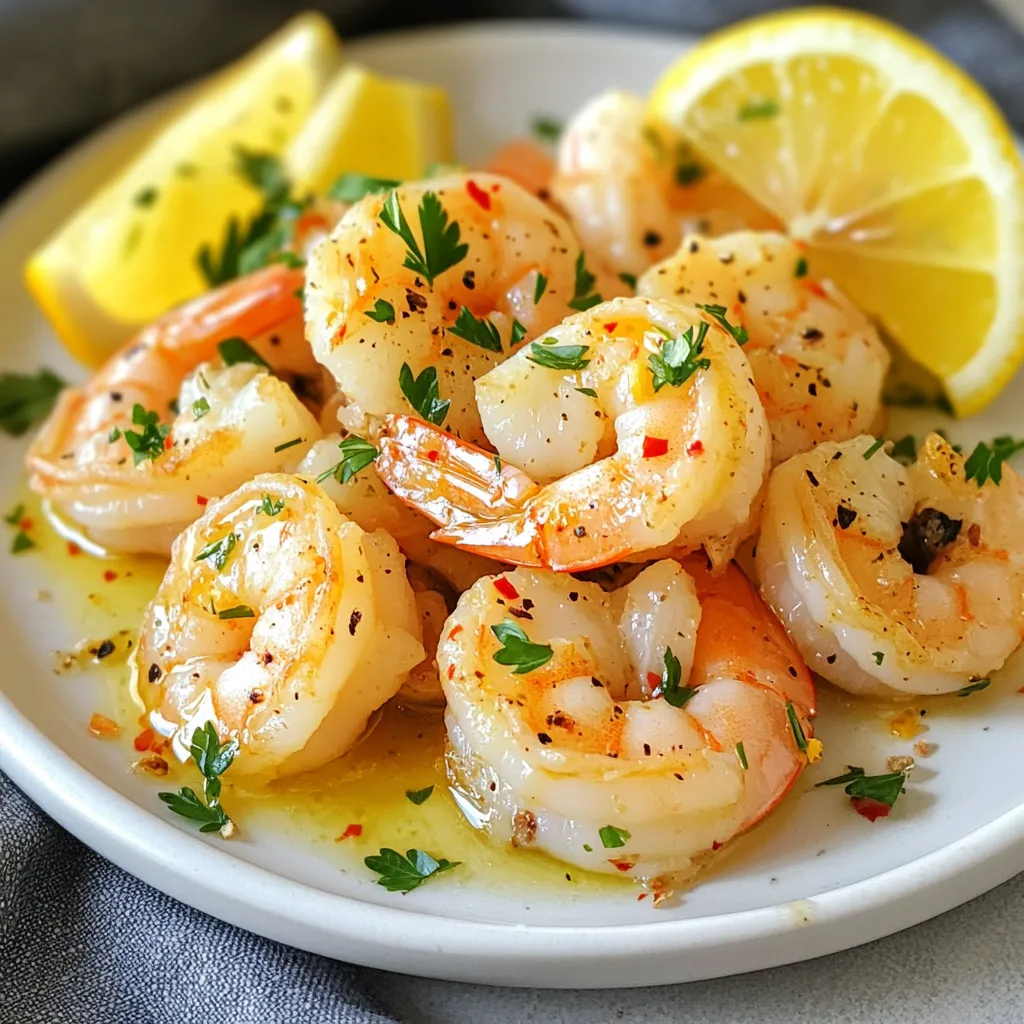
Looking for a quick and tasty meal? You’ve come to the right place! This Lemon Garlic Roasted Shrimp recipe is
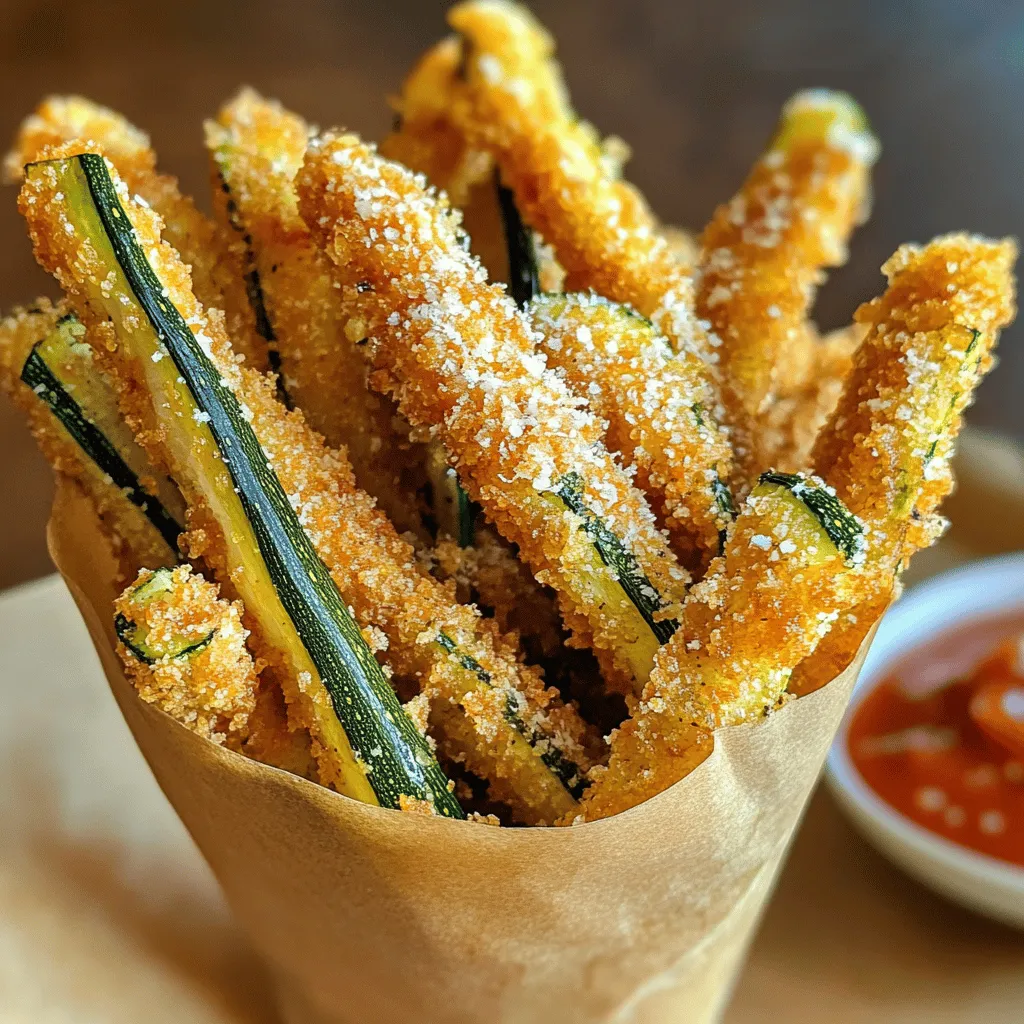
Are you looking for a tasty snack that’s both simple and fun? Crispy Parmesan Zucchini Fries will hit the spot!
![- 3 large red bell peppers - 2 tablespoons olive oil - 3 cloves garlic, minced - 1/2 teaspoon red pepper flakes - 1 cup heavy cream - 1 cup Parmesan cheese, grated - 400g (14 oz) pasta (penne or fettuccine) - Salt and pepper to taste - Fresh basil leaves for garnish - Toasted pine nuts for topping (optional) You can switch out the pasta for gluten-free options like rice or quinoa pasta. If you want a lighter dish, you can use non-dairy cream made from cashews or coconut milk. For cheese lovers, try using nutritional yeast for a vegan option or goat cheese for a tangy twist. This recipe not only offers a creamy and flavorful experience but also provides flexibility. You can mix and match ingredients based on what you have at home. This adaptability makes the Roasted Red Pepper Pasta a delight for every cook. To see the full recipe, check out the [Full Recipe]. 1. Preheat your oven to 400°F (200°C). Line a baking sheet with parchment paper. 2. Cut the red bell peppers in half and remove the seeds and stems. Place them cut-side down on the prepared baking sheet. 3. Roast the peppers in the oven for about 25-30 minutes, or until the skins are charred and blistered. Remove from the oven and let them cool slightly, then peel off the skins. 1. In a large skillet, heat the olive oil over medium heat. Add the minced garlic and sauté for about 1 minute until fragrant. Be careful not to burn it. 2. Add the roasted peppers, chopped into pieces, and red pepper flakes to the skillet. Cook for another 2 minutes, stirring well. 3. Pour in the heavy cream, stirring to combine everything. Let it simmer for another 5 minutes until slightly thickened. 4. Using an immersion blender or a countertop blender, blend the sauce until smooth. If using a countertop blender, let the mixture cool slightly before blending to avoid splatters. 1. Cook your pasta according to package instructions until al dente. Reserve about 1 cup of pasta water, then drain the pasta. 2. Add the blended sauce to the skillet with the cooked pasta, and toss to combine. If the sauce is too thick, add reserved pasta water a little at a time until you reach the desired consistency. 3. Stir in the grated Parmesan cheese and season with salt and pepper to taste. Cook on low for another minute to heat through. For details on the ingredients used, check the Full Recipe. - How to perfectly roast bell peppers: Start by cutting your red bell peppers in half. Remove the seeds and stems. Place them cut-side down on a baking sheet lined with parchment paper. Roast at 400°F (200°C) for 25-30 minutes. Look for charred and blistered skins. Let them cool, then peel off the skins. This method gives the best flavor and texture. - Importance of reserving pasta water: Always save about one cup of pasta water before draining. This water is starchy and helps to thicken your sauce. It can also help the sauce stick to the pasta. Add it slowly if your sauce is too thick. This simple step makes a big difference in the dish's creaminess. - Avoiding burnt garlic: When sautéing garlic, watch the heat closely. Cook it over medium heat and stir often. Garlic cooks quickly and can burn in seconds. If it burns, it will taste bitter. If you see it starting to brown, remove it from the heat right away. - Best ways to present Roasted Red Pepper Pasta: Serve the pasta in bowls for a cozy look. Top it with fresh basil leaves and a sprinkle of toasted pine nuts. A drizzle of olive oil adds a touch of shine. This makes the dish look elegant and inviting. - Complementary side dishes: Pair your pasta with a simple salad. A fresh green salad with lemon vinaigrette complements the flavors well. Garlic bread is also a great side. It soaks up any leftover sauce. - Wine pairings: For wine, choose a light red or a crisp white. A Pinot Grigio or a light Chianti works nicely. These wines enhance the flavors without overpowering the dish. Enjoying the right wine can make your meal even better. Enjoy exploring these tips as you prepare your Roasted Red Pepper Pasta. For the complete recipe, check out [Full Recipe]. {{image_2}} You can make your pasta even heartier by adding protein. Grilled chicken is a great choice. It adds a nice flavor and texture. Shrimp is another fantastic option. Cook it until pink and toss it in with the pasta. If you prefer vegetarian options, consider using chickpeas or lentils. They pack a punch of protein and pair well with the sauce. Tofu is also a nice swap. Simply cube it and sauté it until golden. To elevate the taste of your dish, try adding fresh herbs. Basil or parsley can add a fresh kick. You might also enjoy a sprinkle of oregano for a warm flavor. If you like spice, adjust the heat level. You can add more red pepper flakes for a fiery taste. A pinch of cayenne pepper can work wonders too. Just remember to add a little at a time. For those who need gluten-free options, use gluten-free pasta. Many brands offer great taste and texture. You won't miss the wheat at all. If you're looking for a vegan version, swap the heavy cream with coconut cream. Nutritional yeast can replace the Parmesan cheese. It adds a cheesy flavor without dairy. You can find all these ideas in the Full Recipe. To keep your Roasted Red Pepper Pasta fresh, store leftovers in an airtight container. This helps lock in flavor and moisture. Make sure to let the pasta cool down before sealing it. In the fridge, it stays good for about 3 to 5 days. If you want to save some for later, freezing is a great option. First, let the pasta cool completely. Then, place it in a freezer-safe container or bag. Squeeze out as much air as possible to avoid freezer burn. Your pasta can last up to 3 months in the freezer. When you're ready to enjoy it again, thaw the pasta overnight in the fridge. To reheat, warm it on the stove over low heat. Add a splash of cream or reserved pasta water to keep it creamy. This makes your dish taste fresh again. How do I make the sauce spicier? To spice up your sauce, add more red pepper flakes. You can also use fresh chili peppers. Start with a small amount and taste as you go. This way, you keep the flavor balanced. Can I use jarred roasted red peppers? Yes, jarred roasted red peppers work well. They save time and still add great flavor. Just drain them and chop before adding to your sauce. What pasta shapes work best for this recipe? Penne and fettuccine are great choices. Penne holds the sauce well, while fettuccine adds a nice texture. You can also try spaghetti or any pasta you enjoy. Caloric breakdown of Roasted Red Pepper Pasta One serving of Roasted Red Pepper Pasta has around 600 calories. This can vary based on the pasta and added cheese. The heavy cream adds richness, so keep that in mind. Health benefits of using red bell peppers Red bell peppers are full of vitamins A and C. They are low in calories and high in fiber. Eating them may help your immune system and improve skin health. Best practices for food storage Store leftovers in an airtight container. Keep them in the fridge for up to three days. If you want to save them longer, freezing is a great option. Signs that leftovers may be bad Check for off smells or changes in color. If the pasta looks slimy or has mold, it's time to throw it away. Always trust your senses to ensure food safety. This blog post shared how to make delicious Roasted Red Pepper Pasta. We covered key ingredients, cooking steps, and tips for great results. You learned about ingredient swaps and dietary options to customize your dish. We also explored serving ideas and how to store leftovers properly. Remember, cooking is fun and creative. Don’t hesitate to experiment with flavors and textures. Enjoy your culinary journey with Roasted Red Pepper Pasta!](https://recipesinsight.com/wp-content/uploads/2025/07/41c347a3-e37b-4e5b-937a-25f4c6b0c05f.webp)
If you’re looking for a creamy and flavorful dish, you’ve found it! This Roasted Red Pepper Pasta brings bold taste