![- Quinoa and Cooking Liquid Options - 1 cup quinoa, rinsed - 2 cups water or vegetable broth Quinoa is the star of this salad. It adds a nice nutty flavor and full texture. You can use water for a lighter taste or vegetable broth for a richer flavor. - Fresh Produce for Flavor and Texture - 1 ripe mango, diced - 2 ripe avocados, diced - 1 cup cherry tomatoes, halved - 1/4 cup red onion, finely chopped - 1/4 cup fresh cilantro, chopped Mango and avocado bring creaminess and sweetness. Cherry tomatoes add a pop of color and juiciness. Red onion gives a slight bite. Fresh cilantro ties it all together with a bright taste. - Dressing Ingredients for Enhanced Taste - 1 tablespoon lime juice - 1 tablespoon olive oil - Salt and pepper to taste - Optional: 1/2 jalapeño, minced (for a spicy kick) The dressing is simple but powerful. Lime juice adds acidity. Olive oil brings richness. Salt and pepper enhance the flavors. If you want more heat, add jalapeño for a nice kick. This recipe makes a fresh and flavorful dish. Find the Full Recipe above to guide you through every step. To start, you need to rinse the quinoa. This helps remove any bitter taste. Use a fine-mesh strainer and rinse it under cold water for about a minute. After rinsing, combine the quinoa and water (or broth) in a medium saucepan. Bring this mixture to a boil over high heat. Once it boils, reduce the heat to low. Cover the pot and let it simmer for about 15 minutes. You want the liquid to absorb completely. When done, take it off the heat and let it cool for a few minutes. Fluff the quinoa with a fork for the perfect texture. Next, grab a large bowl to mix the salad. Add the fresh diced mango, avocado, halved cherry tomatoes, chopped red onion, and cilantro. These ingredients bring a burst of flavor and color. Then, gently fold in the cooked quinoa. Be careful not to mash the avocado; you want it to stay chunky and fresh. Now it’s time for the dressing. In a small bowl, whisk together lime juice, olive oil, salt, and pepper. This simple dressing adds brightness to your salad. Taste it and adjust the seasoning as needed. If you like heat, fold in minced jalapeño for a spicy kick. Pour the dressing over the salad and toss gently to coat all the ingredients. You can find the full recipe [here]. Preparing ingredients ahead of time makes cooking easy. Chop up your mango, avocado, and veggies in advance. You can store them in airtight containers. Keep each ingredient separate to prevent browning. When you store prepped ingredients, use the fridge. This keeps them fresh for a few days. For avocados, sprinkle lime juice to slow browning. This simple trick keeps them vibrant and green. To boost flavor, consider adding a few spices. A pinch of cumin or chili powder can add depth. You can also try a dash of smoked paprika for a unique twist. If you want it spicier, add more jalapeño. You can also use red pepper flakes. For a milder taste, skip the jalapeño or add a little honey for sweetness. Serving your salad in beautiful bowls makes it special. Use white or colorful dishes to showcase the vibrant colors. Layer the ingredients for a nice visual effect. For garnishing, add extra cilantro leaves and lime wedges on top. This adds a fresh look and extra flavor. Enjoy this feast for the eyes as much as for the taste! This salad is not just tasty; it’s also a feast of colors. Try the full recipe for a delightful meal! {{image_2}} You can make this salad heartier by adding protein. Grilled chicken is a great choice. Just slice it thinly and mix it in. If you want a vegan option, try tofu. - Grilled Chicken: Cook it on a grill or stovetop. Slice it and add it to the salad. - Tofu: Press it to remove extra water. Cube and sauté until golden. Add it to the salad. - Legumes: You can also add canned beans like black beans or chickpeas. They add protein and fiber. The beauty of this salad is its adaptability. You can change the fruits based on what is in season. - Substituting Fruits: Try peaches in summer or pomegranate seeds in winter. Both add a unique taste. - Adjusting Ingredients: Use fresh herbs like basil or dill when they are in season. This change can give the salad a fresh twist. This salad is easy to modify for different diets. You can keep it gluten-free and vegan easily. - Gluten-Free: Quinoa is naturally gluten-free. Ensure your other ingredients are too. - Vegan Options: Replace honey or any animal products in dressings with plant-based options. - Modifying for Allergies: If you are allergic to avocados, try using nuts or seeds instead. For the full recipe of Mango Avocado Quinoa Salad, check out the details above! To keep your mango avocado quinoa salad fresh, use airtight containers. Glass or BPA-free plastic works well. These containers seal tightly, keeping air out. This helps slow down spoilage. When storing, keep the dressing separate. This keeps the salad from getting soggy. You can store the dressing in a small jar. Just shake it before using. When stored correctly, this salad lasts about 3 days in the fridge. However, the avocado can brown quickly. Check for signs of spoilage, like a sour smell or slimy texture. If you see these signs, it’s best to toss it. You can serve leftovers cold or at room temperature. If you want to warm it up, use the microwave. Heat it in short bursts to avoid cooking the avocado. You can also transform the salad into new dishes. Mix it into a wrap or add it to a grain bowl. This way, you can enjoy the flavors in different ways. For the detailed recipe, check the Full Recipe. Yes, you can make this salad ahead of time. It tastes great after chilling in the fridge. - Cook the quinoa and let it cool. - Chop the mango, avocado, and veggies. - Mix everything a few hours before serving. To keep the salad fresh, store the dressing separately. Combine it just before serving. This step helps keep the avocado from browning. If you want a change, you can use other grains. Brown rice or farro works well too. - Couscous is another quick option. - You can use millet for a gluten-free choice. Quinoa is high in protein and fiber. Other grains may have different nutrient profiles. Check labels if you need specific nutrition. Yes, this salad is great for meal prep. You can store it for quick meals during the week. - Use airtight containers for storage. - Keep the ingredients separate to avoid sogginess. Divide the salad into single servings. This method makes it easy to grab a meal on busy days. In this blog post, we explored how to make a tasty Mango Avocado Quinoa Salad. We discussed key ingredients, step-by-step cooking methods, and clever tips for meal prep. I shared fun ways to vary the salad, plus storage tips to keep it fresh. With these steps, you can create a salad that is flavorful and filled with nutrients. Enjoy trying out your own twists and share your favorites!](https://recipesinsight.com/wp-content/uploads/2025/07/084b1b84-47f3-452b-aaa3-3432ef78ff30.webp)
Mango Avocado Quinoa Salad Fresh and Flavorful Dish
Ready to prepare a bright and tasty dish? This Mango Avocado Quinoa Salad is fresh, flavorful, and super easy to

Ready to prepare a bright and tasty dish? This Mango Avocado Quinoa Salad is fresh, flavorful, and super easy to
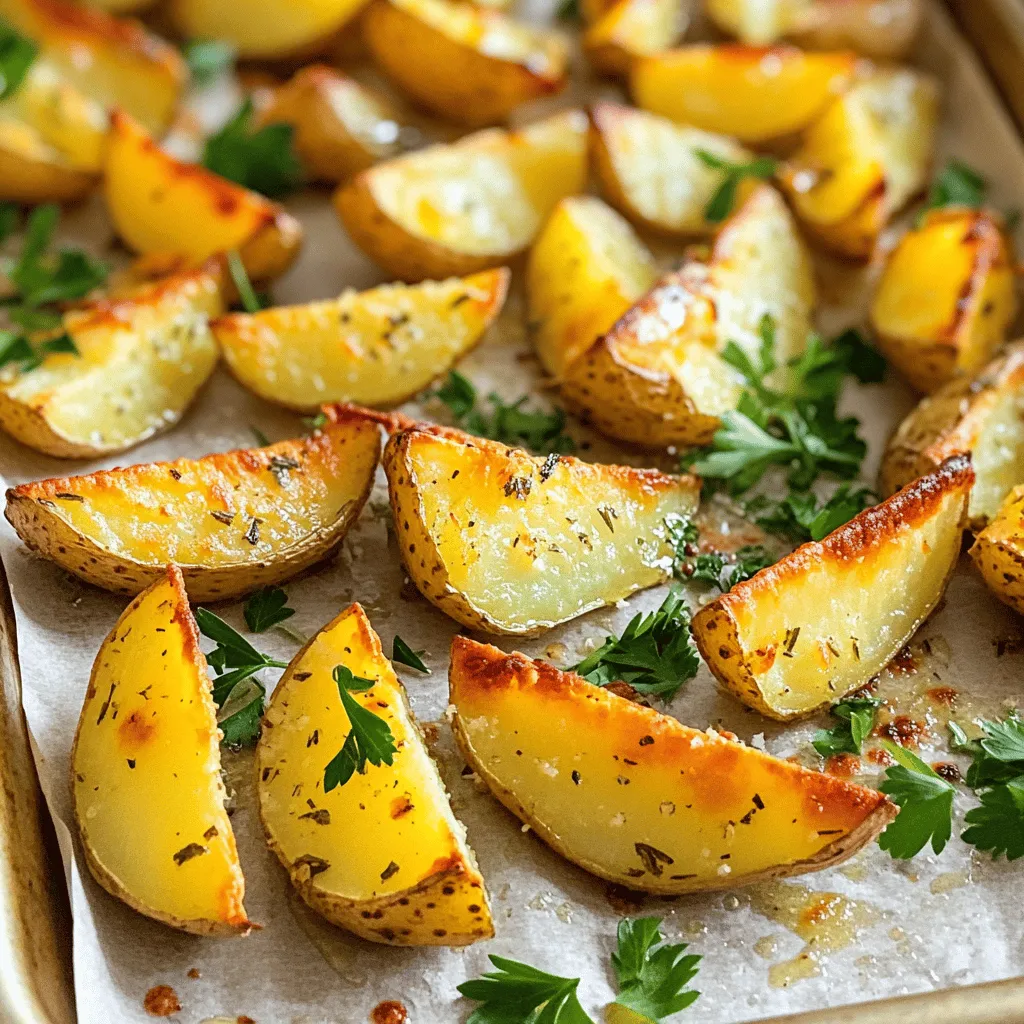
Are you ready to make the best Garlic Roasted Potato Wedges? This crispy and flavorful treat will impress your taste

Craving a tasty snack that’s easy to make? Let me introduce you to Loaded Veggie Nachos! This dish is colorful,
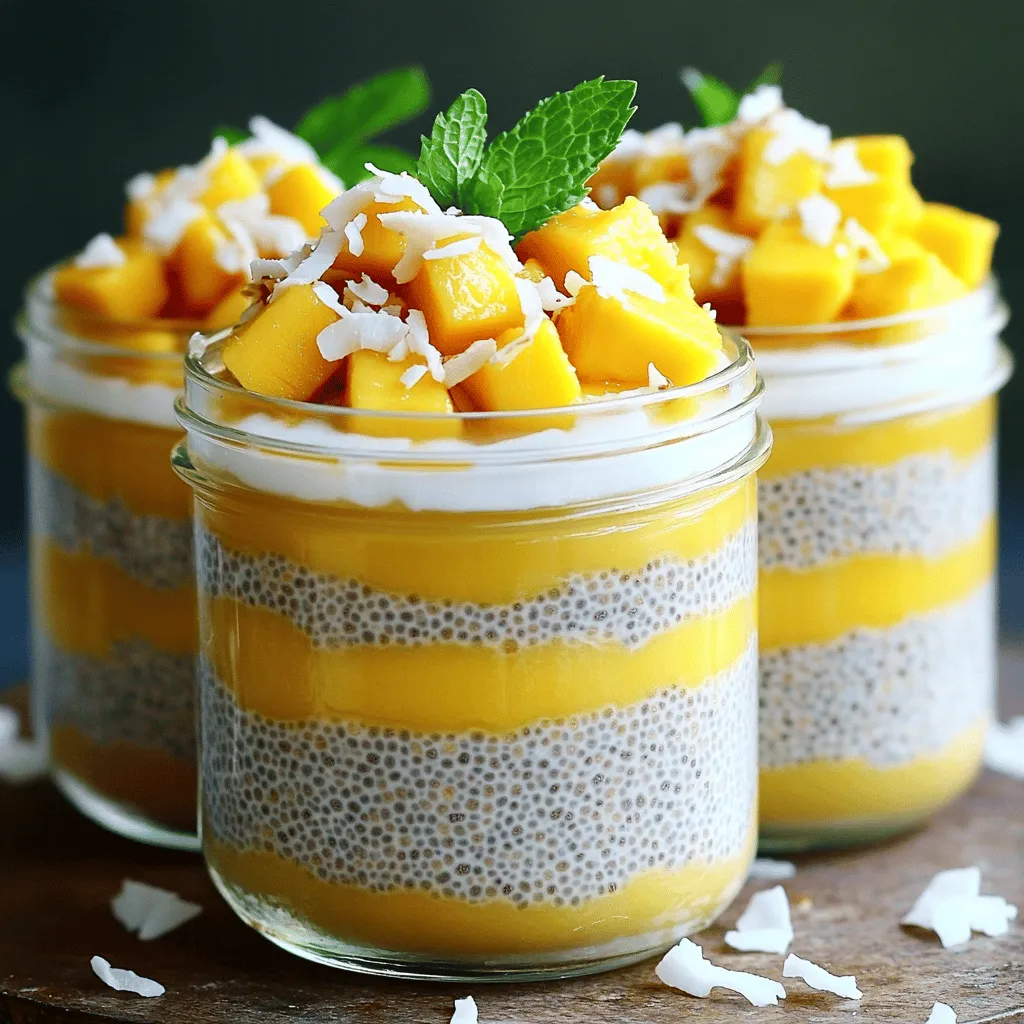
Craving a tasty and refreshing treat? You’re in for a delight! Coconut Mango Chia Pudding is incredibly easy to make
![For these baked buffalo chicken meatballs, you need a few key items: - 1 pound ground chicken - 1/2 cup whole wheat breadcrumbs - 1/4 cup grated Parmesan cheese These main ingredients create a hearty base. Ground chicken keeps the meatballs moist. The breadcrumbs help hold everything together while adding a nice texture. Parmesan cheese brings a rich, savory flavor that enhances each bite. Next, let’s add some flavor: - 1/4 cup finely chopped green onions - 1/4 cup buffalo sauce - 1 teaspoon garlic powder - 1 teaspoon onion powder Chopped green onions add a fresh crunch. Buffalo sauce gives the meatballs that famous spicy kick. Garlic and onion powder boost the overall flavor, making each meatball taste amazing. Finally, we need a few seasonings: - Salt and pepper to taste - Cooking spray Salt and pepper are essential for balancing flavors. They bring out the taste of the chicken and other ingredients. Cooking spray helps the meatballs bake evenly without sticking to the pan. With these ingredients, you are ready to make a tasty treat! For the full recipe, check out the [Full Recipe]. First, preheat your oven to 400°F (200°C). This step warms the oven for even cooking. Next, line a baking sheet with parchment paper. It helps prevent sticking. Lightly spray the parchment with cooking spray. This makes cleanup easy. In a large mixing bowl, combine all ingredients. Use ground chicken, breadcrumbs, Parmesan cheese, and chopped green onions. Add the egg and buffalo sauce. Don't forget the garlic powder, onion powder, and season with salt and pepper. Mix until all ingredients are well combined. This ensures every bite is full of flavor. Now it’s time to shape the meatballs. Use your hands to form the mixture into 1-inch meatballs. This size cooks evenly and is easy to eat. Place the meatballs on the prepared baking sheet. Make sure to leave some space between each one. This allows hot air to circulate and cook them well. Bake the meatballs for 20-25 minutes. They should reach an internal temperature of 165°F (74°C). This ensures they are safe to eat. If you want extra flavor, drizzle more buffalo sauce over the meatballs in the last 5 minutes. This adds a tasty kick. Once cooked, remove them from the oven. Let them cool slightly before serving. This makes them easier to handle and enhances their flavor. For the full recipe, be sure to check out the detailed instructions. Enjoy your delicious baked buffalo chicken meatballs! To make great meatballs, your mixture needs to be just right. If it is too dry, the meatballs will fall apart. If it is too wet, they may not hold their shape. Combine ground chicken, breadcrumbs, and the other ingredients well. Use your hands to mix them together, but do not overwork it. When you bake meatballs, preheat your oven to 400°F (200°C). This hot temperature helps them cook evenly. Line your baking sheet with parchment paper to keep them from sticking. Lightly spray the parchment with cooking spray for added ease. Garnishing your meatballs can elevate their look. Drizzle extra buffalo sauce over them just before serving. This adds flavor and makes them shine. Chopped green onions on top give color and freshness. You can also add celery sticks on the side. They provide a nice crunch and balance the heat. Pair these meatballs with a side of veggie sticks, like carrots or bell peppers. You can also serve them with a cool dip, like ranch or blue cheese dressing. This combo can help tone down the spice. You can adjust the spice level in your meatballs. If you want them milder, use less buffalo sauce. You can also mix in a little honey to balance the heat. If you love heat, try adding more buffalo sauce or a dash of cayenne. For a twist, try different sauces for drizzling. A sweet chili sauce can complement the buffalo sauce well. You can also use a tangy barbecue sauce for a unique flavor. Don't be afraid to experiment! {{image_2}} You can change a few ingredients and still enjoy tasty meatballs. Try using lean ground turkey instead of ground chicken. It gives a lighter taste. You can also swap in lean beef for a richer flavor. For those needing gluten-free options, use gluten-free breadcrumbs. They work just as well and keep the meatballs moist. Want to jazz up your meatballs? Add herbs or spices to the mix. Fresh parsley, dill, or oregano can add a nice touch. You can also try different hot sauces. Not all hot sauces taste the same. Some are tangy, while others are more fiery. Experimenting with sauces can help you find your perfect flavor. If you want a quicker method, consider using an air fryer. It cooks the meatballs fast and keeps them juicy. Just set it to 375°F (190°C) and check after 10-15 minutes. You can also cook the meatballs on the stovetop. Sauté them in a pan with a bit of oil. Cook until they're browned and cooked through. Each method offers a new way to enjoy your meatballs. For the complete recipe, check the [Full Recipe]. To keep your baked buffalo chicken meatballs fresh, use airtight containers. Glass or plastic containers work well. Store them in the fridge right after they cool down. The ideal fridge temperature is below 40°F (4°C). This helps keep the meatballs safe and tasty for up to four days. When you want to enjoy leftover meatballs, you have three easy options. You can use the oven, microwave, or stovetop. For the oven, preheat it to 350°F (175°C) and bake for about 10 minutes. If you use the microwave, heat for 1 to 2 minutes on high. Make sure to check if they are hot all the way through. For stovetop, place them in a pan with a splash of water. Cover and heat over medium for about 5 minutes, turning them occasionally. If you want to save your meatballs for later, freezing is a great option. First, let the meatballs cool completely. Then, place them in a freezer-safe bag or container. Remove as much air as you can. This can help prevent freezer burn. Baked buffalo chicken meatballs can last up to three months in the freezer. When you are ready to eat them, thaw overnight in the fridge. You can also use the microwave to defrost them quickly. Just make sure they are fully heated before enjoying! For more details, check the Full Recipe. To check if the meatballs are done, look for a few signs. First, they should be golden brown on the outside. Next, use a meat thermometer to check the center. The internal temperature should reach 165°F (74°C). If you do not have a thermometer, cut one open. The meat should no longer be pink inside. The juices should run clear. These signs will tell you they are fully cooked. Yes, you can make these meatballs ahead of time. To do this, prepare the meatballs and shape them. Then, place them on a baking sheet and freeze them for about an hour. Once frozen, transfer them to a zip-top bag. You can store them in the freezer for up to three months. When you're ready to cook, just bake them straight from frozen. Add a few extra minutes to the cooking time. These meatballs pair well with many side dishes. Consider serving them with celery sticks and carrot sticks for a crunch. A fresh salad with a light dressing also works well. For a fun twist, serve them in a slider bun with some ranch dressing. If you want a drink, a cold beer complements the spicy flavor well. You can also try a refreshing soda or iced tea. This blog shared a simple recipe for baked buffalo chicken meatballs. We discussed the main ingredients, like ground chicken and whole wheat breadcrumbs. You learned how to prepare, form, and bake these tasty meatballs. Tips for perfect results and serving ideas were also covered. In closing, making these meatballs can be fun and tasty. Feel free to experiment with flavors or storage methods. Enjoy serving them with your favorite sides for a delicious meal.](https://recipesinsight.com/wp-content/uploads/2025/07/556ece13-d234-473a-b7d4-53f79f2e382b.webp)
Looking for a delicious, easy snack? Baked Buffalo Chicken Meatballs might be your new favorite treat! With simple ingredients like
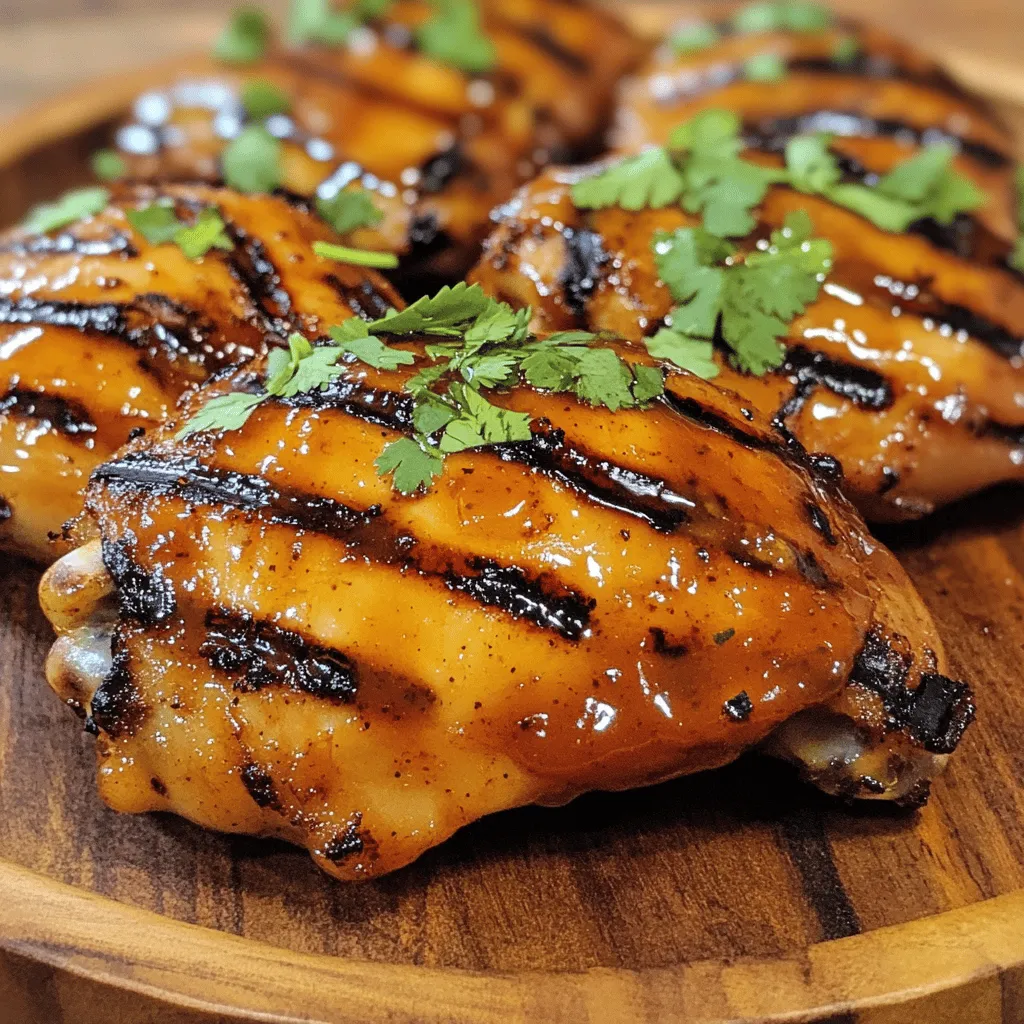
Are you ready to take your grilling game to the next level? In this post, I’ll show you how to
![For a Classic Cobb Salad, you need the right mix of fresh and tasty ingredients. Here’s what you will need: - 4 cups mixed greens (romaine, arugula, and spinach) - 2 large eggs, hard-boiled and chopped - 1 cup cooked chicken breast, diced - 1 avocado, diced - 1 large tomato, diced - ½ cup blue cheese, crumbled - ½ cup cooked bacon, crumbled (or use turkey bacon for a healthier option) - ¼ cup red onion, thinly sliced - ½ cup ranch dressing (or your choice of dressing) These ingredients create a colorful dish that is both flavorful and nutritious. The greens provide a fresh base, while the chicken adds protein. The eggs and bacon bring richness to each bite. Avocado adds creaminess, and blue cheese gives a tangy kick. You can always switch up the dressing based on your taste. This salad is not just a meal; it’s a feast for the eyes and the palate. For a complete guide on how to make this delicious salad, check out the Full Recipe. 1. Hard-boiling the eggs: Start by placing the eggs in a pot. Cover them with water and bring it to a boil. Once boiling, reduce the heat and let them simmer for 10-12 minutes. After that, transfer the eggs to an ice bath. This cools them down quickly. Once cool, peel and chop them into pieces. 2. Cooking the chicken breast: If you don’t have pre-cooked chicken, you need to cook it. Season the chicken breast with salt and pepper. You can grill or pan-cook it until it is fully cooked. This should take about 6-7 minutes on each side. Let it rest for a few minutes before dicing it into bite-sized pieces. 3. Dicing and slicing components: Now, take the avocado and tomato. Dice them into small pieces. For the red onion, slice it thinly. This will help with the salad's texture and flavor. 1. Creating layers in the salad bowl: Grab a large mixing bowl. Start with 4 cups of mixed greens as your base. On top of the greens, create sections for each ingredient. Add the diced chicken, chopped eggs, diced avocado, diced tomato, crumbled blue cheese, crumbled bacon, and sliced red onion. This layering makes it look colorful and inviting. 2. Drizzling the dressing: Once your salad is layered, drizzle ½ cup of ranch dressing over the top. You can use your favorite dressing if you prefer. Season with salt and pepper to taste for extra flavor. - Tossing vs. serving as-is: You can choose to gently toss the salad just before serving. This mixes the flavors well. If you want to showcase the layers, serve it as-is. Both ways are delicious! For the full recipe, you can find all the details here: [Full Recipe]. Layering makes your salad pop. Use a clear bowl to show off the colors. Start with mixed greens as your base. Then add sections of each ingredient. This way, the salad looks beautiful and inviting. To keep chicken juicy, don’t overcook it. Grill or pan-cook for 6-7 minutes on each side. Let it rest before cutting. This helps the juices stay inside. For perfect hard-boiled eggs, follow these steps: 1. Place eggs in a pot and cover them with water. 2. Bring the water to a boil. 3. Reduce the heat and simmer for 10-12 minutes. 4. Transfer eggs to an ice bath to cool, then peel and chop. You can choose between homemade or store-bought dressings. Homemade dressings taste fresh and unique. Store-bought options are quick and easy. For variety, try different dressings like balsamic vinaigrette or a zesty lemon dressing. Each adds new flavors to your Cobb salad. Check out the Full Recipe for more details on making this classic dish! {{image_2}} You can easily make a vegetarian Cobb salad. Simply swap the chicken with chickpeas. Chickpeas bring a nice texture and protein boost. You can also add more vegetables like cucumbers or bell peppers. These will add crunch and color to your salad. To make the salad gluten-free, check your ingredient labels. Some dressings may contain gluten, so choose wisely. Look for dressings made from natural ingredients or make your own. A simple olive oil and lemon mix works great! If you're looking for different protein options, try using tofu or tempeh. Both are great at soaking up flavors and add a nice texture. For a seafood twist, consider shrimp or crab. They can add a delicious, fresh taste to your Cobb salad. You can find the full recipe here: [Full Recipe]. To keep your leftover Cobb salad fresh, use airtight containers. Glass or plastic containers work well. Seal them tightly to prevent air from getting in. Store the salad in the fridge for up to three days. After this time, the greens may wilt, and flavors can fade. You can prepare many salad components in advance. Chop the veggies, cook the chicken, and hard-boil the eggs a day before serving. Store each in separate containers. When it's time to eat, simply assemble the salad. This keeps the greens crisp and the flavors bright. If you have leftover cooked chicken, reheat it safely. Use a microwave or skillet on low heat. Make sure it warms through but does not overcook. To keep your salad fresh, avoid reheating the greens. Instead, serve the chicken warm on top of the cold salad. This contrast adds a nice touch! Yes, you can make Cobb salad in advance. To do this, prepare the ingredients separately. Keep the greens and dressing apart until serving. This way, the salad stays fresh and crisp. Layer the salad in a bowl for a nice look. If you want to pack it for lunch, use a jar. Start with the dressing, then add the greens, and layer the other ingredients on top. Just shake it up when you are ready to eat. Ranch dressing is the most popular choice for Cobb salad. It adds a creamy touch that blends well with the other ingredients. You can also try blue cheese dressing for a stronger flavor. If you prefer a lighter option, a vinaigrette works too. A simple mix of olive oil, vinegar, salt, and pepper can be great. Choose a dressing that you enjoy to make the salad your own. To make Cobb salad healthier, consider these swaps: - Use turkey bacon instead of regular bacon. - Substitute blue cheese with feta or omit it entirely. - Add more veggies like bell peppers or cucumbers for extra crunch. - Use grilled chicken breast instead of fried. These changes keep the taste while making it lighter. Enjoy the fresh flavors without the extra calories. For the complete recipe, check the [Full Recipe]. This blog post covered how to make a delicious Cobb salad. We looked at ingredients, preparation steps, and assembly. Tips for presentation and cooking ensure your salad looks great and tastes even better. Variations let you explore new flavors and cater to dietary needs. Lastly, we discussed storage and reheating for leftovers. With these ideas, you can create and enjoy a fresh Cobb salad any time.](https://recipesinsight.com/wp-content/uploads/2025/07/6adefaea-420d-4a82-a8a4-122007e9cfee.webp)
If you’re looking for a meal that’s both tasty and healthy, the Classic Cobb Salad is for you. Packed with
![- 4 medium zucchini - 1 pound ground turkey or beef - 1 cup black beans - 1 cup corn For Loaded Taco Zucchini Boats, the main ingredients create a hearty base. Zucchini serves as the boat, holding flavorful fillings. Ground turkey or beef adds protein and richness. Black beans and corn contribute texture and nutrition. Together, these elements make a filling dish that packs a punch. - 1 packet taco seasoning - Salt and pepper to taste Spices bring life to our dish. Taco seasoning adds a mix of spices, making it bold and zesty. It’s easy to use, and it enhances the flavor of the meat and veggies. Don’t forget to add salt and pepper to suit your taste. Adjust these to make your dish just right. - Sliced jalapeños - Avocado - Lime wedges - ½ cup sour cream - ¼ cup chopped fresh cilantro Toppings elevate your Loaded Taco Zucchini Boats. Sliced jalapeños add heat for spice lovers. Creamy avocado balances flavors and adds richness. Lime wedges give a bright, zesty kick. Sour cream adds creaminess, while cilantro brings freshness. Feel free to mix and match toppings to fit your mood or gather friends for a fun meal. For the full recipe, check out the link provided. - Preheat your oven to 375°F (190°C). - Slice the zucchini in half lengthwise and scoop out the insides. Scooping out the insides creates space for the tasty filling. You can use a spoon to do this. Save the flesh for later. It adds flavor to the filling. - Brown the ground turkey or beef in a skillet. - Add taco seasoning, black beans, corn, diced tomatoes, and the reserved zucchini flesh. Cook the meat over medium heat until it turns brown. This usually takes about 5 to 7 minutes. After that, mix in the taco seasoning and other ingredients. Stir until everything is hot and fragrant. - Fill the zucchini halves with the cooked mixture. - Top with shredded cheddar cheese. Use a spoon to fill each zucchini boat with the mixture. Press it down a bit to pack it in. Then, sprinkle cheese on top. Cheese makes everything better! - Bake in the oven for 20-25 minutes. - Let cool before serving. Place the filled zucchini boats on a baking sheet. Bake them until the zucchini is soft and the cheese is bubbly. After baking, let them cool for a few minutes. This makes them easy to handle. For the full recipe, check the earlier section where I list all the ingredients! To make sure your zucchini boats are tender, here’s what I do: - Choose fresh zucchini: Look for firm, medium-sized ones. They cook better. - Scoop carefully: Remove just enough flesh to create space for filling while keeping the sides strong. - Pre-bake briefly: Bake the zucchini boats for 5-10 minutes before adding filling. This softens them a bit. For browning meat, follow these steps: - Use medium heat: This helps render fat and keeps the meat juicy. - Don’t overcrowd the pan: Brown in batches if needed. This avoids steaming and helps achieve a rich color. - Stir less often: Let the meat sit a bit before stirring. This allows it to brown nicely. Arranging your zucchini boats for a great look is simple: - Use a colorful platter: A bright dish makes your food pop. - Space them out: Don’t pack the boats too close. This shows off the filling. - Layer toppings: Sprinkle cheese and cilantro in layers for a nice effect. For garnishing, consider these options: - Add lime wedges: This adds a fresh burst of flavor. - Use extra cilantro: It not only looks good but also enhances taste. - Try sliced jalapeños: They add a splash of color and spice. To prevent soggy zucchini, keep these tips in mind: - Avoid overcooking: Bake just until tender. Check them often. - Don’t add too much liquid: Drain canned items like beans and tomatoes well. To ensure flavor balance in the filling, remember: - Taste as you go: Adjust spices and seasoning while cooking. - Mix ingredients well: This helps distribute flavors evenly throughout the filling. For the full recipe, check the [Full Recipe]. {{image_2}} You can easily switch up the meat in your Loaded Taco Zucchini Boats. For a vegetarian option, use beans or lentils. Black beans add great flavor and protein. Lentils are also a good choice, as they cook quickly and soak up all the spices. If you prefer meat, try chicken or pork. Shredded rotisserie chicken makes a quick filling. Ground pork offers a different taste while keeping it hearty. To take your tacos to the next level, add spices like cumin or paprika. Cumin gives a warm and earthy flavor. Paprika adds a hint of sweetness and color. You can also experiment with different cheeses. Cheddar is classic, but pepper jack adds a spicy kick. Try feta for a tangy twist. Mixing cheeses can create a fun flavor profile that keeps every bite interesting. Pair your zucchini boats with sides like rice or salad. A light cilantro lime rice complements the boats well. A fresh salad adds crunch and balance. You can also turn leftovers into a taco salad. Just chop the zucchini boats and toss them with lettuce, tomatoes, and your favorite dressing. This way, you can enjoy the flavors in a new way! For the full recipe, check out the earlier section. To store your loaded taco zucchini boats, let them cool first. Place them in an airtight container. This keeps them fresh and safe. You can keep them in the fridge for up to three days. When you are ready to eat, reheat them in the oven. Set the oven to 350°F (175°C). Heat for about 10-15 minutes or until warm. You can also use the microwave, but this may make the zucchini soggy. Yes, you can freeze loaded zucchini boats. Just make sure they are completely cool. Wrap each boat tightly in plastic wrap or foil. Place them in a freezer-safe bag or container. They will stay fresh for about three months. To defrost, move them to the fridge overnight. You can also reheat them directly from the freezer. Just add a few extra minutes to the cooking time. Loaded taco zucchini boats last for about three days in the fridge. Look for signs of spoilage, like a change in color or a bad smell. If the zucchini feels slimy, it’s best to throw it away. Always check before you eat leftovers to stay safe. For more details on making these tasty boats, check out the Full Recipe. Yes, you can. Bell peppers, eggplant, and portobello mushrooms work well. Each vegetable holds the filling nicely. Bell peppers add a sweet crunch. Eggplant brings a creamy texture when cooked. Portobello mushrooms add a deep, earthy flavor. You can mix and match to find your favorite. To add heat, try these tips: - Use spicy taco seasoning. - Add diced jalapeños to the filling. - Top with hot sauce before serving. - Mix in crushed red pepper flakes while cooking. These options will give your meal a nice kick without overpowering the other flavors. If you want a meatless option, try these: - Black beans or pinto beans for fiber and protein. - Lentils for a hearty texture. - Crumbled tempeh or tofu can also work well. These substitutes keep the filling tasty and satisfying, perfect for any diet. You can enjoy leftovers in fun ways: - Chop and mix into a salad for lunch. - Heat them up with rice for a filling meal. - Make a taco salad by adding tortilla chips. - You can even create a veggie wrap with the filling. These ideas keep your meals exciting and reduce food waste. Loaded taco zucchini boats are fun, tasty, and easy to make. You learned about the key ingredients, from zucchini to spices and toppings. I shared step-by-step instructions for prep, cooking, and baking. I also offered tips to avoid common mistakes and enhance your dish's look and taste. With variations and storage ideas, you can get creative and enjoy these meals multiple ways. Make these simple changes to fit your taste and enjoy!](https://recipesinsight.com/wp-content/uploads/2025/07/2d321373-0b71-4458-848c-8723c45f1c06.webp)
Looking for a meal that’s both tasty and easy? Let me introduce you to Loaded Taco Zucchini Boats! This fun
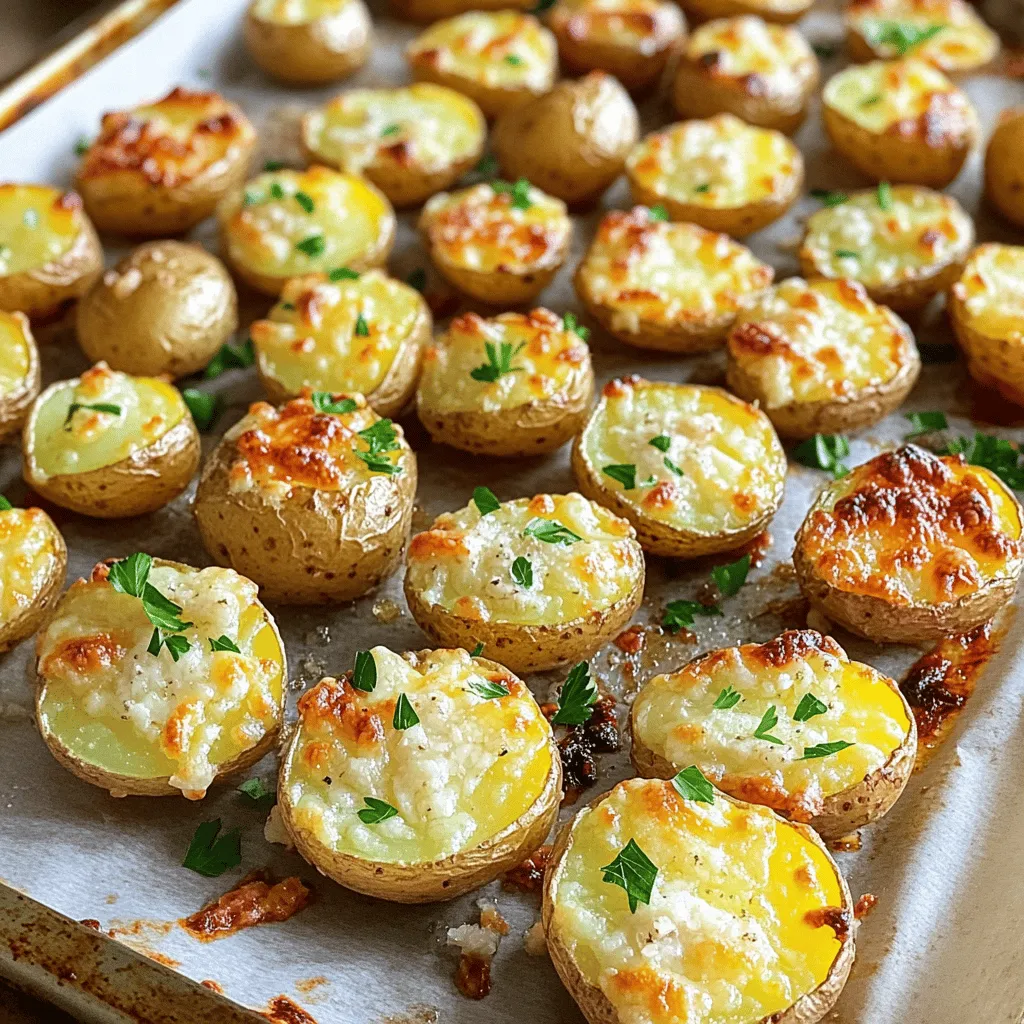
Are you ready to elevate your potato game? Garlic Parmesan Roasted Potatoes are crispy, flavorful, and easy to make. You’ll
![- 2 ripe avocados - 1 cup breadcrumbs (preferably panko) - ½ cup all-purpose flour - 1 teaspoon garlic powder - 1 teaspoon onion powder - ½ teaspoon smoked paprika - Salt and pepper to taste - ½ cup Greek yogurt - 1 tablespoon lime juice - Pinch of salt - Optional garnish: Fresh cilantro or parsley When making crispy avocado fries, start with ripe avocados. A ripe avocado feels soft when gently pressed. If they are too hard, let them ripen for a few days. Next, you will need panko breadcrumbs. They give the fries a great crunch. You can use regular breadcrumbs, but panko works best for this recipe. For flavor, use garlic powder, onion powder, and smoked paprika. These spices add depth and a tasty kick. Don’t forget the salt and pepper to enhance the flavors. The dipping sauce is simple yet delicious. Mix Greek yogurt with lime juice for a creamy dip. Add a pinch of salt for seasoning. You can also garnish the sauce with fresh cilantro or parsley for a pop of color. This recipe makes a fun snack or side dish. It is easy to prepare, and everyone will enjoy it. For the full recipe, check the section above. 1. Preheat your oven to 425°F (220°C). This temperature helps the fries get crispy. 2. Line a baking sheet with parchment paper. This prevents sticking and makes cleanup easy. 3. Slice the ripe avocados in half and remove the pit. Use a spoon to scoop out the flesh. 4. Cut the avocado halves into wedges. Aim for about eight wedges per avocado. 1. Set up your breading station. Place flour on one plate, beat the eggs in a bowl, and mix breadcrumbs, garlic powder, onion powder, smoked paprika, salt, and pepper on another plate. 2. Dredge each avocado wedge in flour. Shake off any extra flour. This helps the egg stick. 3. Dip the floured wedges into the beaten eggs. Let any excess egg drip off. 4. Coat the dipped wedges in the seasoned breadcrumbs. Make sure they are fully covered for the best crunch. 1. Arrange the breaded avocado fries on the baking sheet. Make sure they don't touch each other to allow air to flow. 2. Bake in the preheated oven for 15-20 minutes. Flip them halfway through to ensure even cooking. 3. While the fries bake, prepare the dipping sauce. Mix Greek yogurt, lime juice, and a pinch of salt in a bowl. 4. Once cooked, remove the fries from the oven. Let them cool a bit before serving. You can find the full recipe in the previous sections. Enjoy your crispy avocado fries! To get the best crunch, use panko breadcrumbs. They create a light and airy crust. Regular breadcrumbs can work, but panko gives a better result. For even baking, space the fries apart on the tray. This allows heat to circulate and helps them crisp up nicely. Present your avocado fries on a colorful platter. A vibrant dish catches the eye. You can sprinkle fresh cilantro or parsley on top for a pop of color. Serve them with the zesty dipping sauce on the side. This makes each bite fresh and flavorful. You can use an air fryer for a quicker option. Air frying gives a crispy finish with less oil. If you prefer frying in oil, heat it to 350°F (175°C). Carefully add the fries to the hot oil. Fry them until golden brown, then drain on paper towels to remove excess oil. Both methods work well, so choose what you like best. {{image_2}} To take your crispy avocado fries up a notch, try adding some spice. You can sprinkle cayenne or chili powder on the breadcrumbs. This will give your fries a kick that many people love. You can also make herb-infused coatings. Use fresh spices like thyme or oregano for a nice twist. They add a lot of flavor and make every bite special. If you need a gluten-free option, you can swap out regular breadcrumbs for gluten-free ones. There are many brands available that work great. For those who are vegan, you can replace the eggs with a mix of ground flaxseed and water. This will help bind the coating to the avocado without any eggs needed. Dipping sauces can really enhance your crispy avocado fries. You might want to try spicy mayo or ranch dressing for a creamy taste. If you like a zesty kick, mix Greek yogurt with lime juice for a fresh dip. These fries also pair well with other snacks, like veggie sticks or chips, to make a fun platter. Don't forget to explore these flavors with the [Full Recipe] for even more ideas! To keep your crispy avocado fries fresh, place them in an airtight container. They will stay good in the fridge for about 1-2 days. Make sure to place a paper towel inside the container. This helps absorb moisture and keeps the fries crispy. To reheat, you can use an oven or an air fryer. Preheat your oven to 350°F (175°C). Spread the fries on a baking sheet and heat for about 10 minutes. This method helps maintain their crispiness. Avoid the microwave if you can, as it can make them soggy. Yes, you can freeze crispy avocado fries! First, let them cool completely. Then, spread them on a baking sheet in a single layer and freeze for about 1-2 hours. After they are frozen, transfer them to a freezer bag. To reheat, bake directly from the freezer at 425°F (220°C) for about 20-25 minutes. This keeps them crispy and delicious. For the full recipe, check the Crispy Avocado Fries section above. To pick the right avocados, look for ones that feel slightly soft but not mushy. Gently press the skin with your thumb. If it gives a bit, it is ripe. The skin should be dark green or black, depending on the variety. Avoid any with large dark spots or cracks. If you need them to ripen faster, place them in a paper bag with an apple or banana. The ethylene gas speeds up the ripening process. Yes, you can prepare crispy avocado fries ahead of time. Slice the avocados and coat them in the breading. Place them on a baking sheet, then cover and refrigerate. When you are ready to cook, bake them straight from the fridge. If you want to freeze them, place the coated fries in a single layer on a baking sheet. Freeze until solid, then transfer to a bag. Bake from frozen, adding a few extra minutes to the cooking time. You can use several egg substitutes to bind the breadcrumbs to the avocados. A popular choice is a mixture of ground flaxseed and water. Mix one tablespoon of flaxseed with three tablespoons of water and let it sit until it thickens. You can also use unsweetened applesauce or mashed banana. These options work well and keep the fries crispy. To add heat, sprinkle cayenne pepper or chili powder into the breadcrumb mix. You can also add hot sauce to the dipping sauce for extra kick. If you want to go bold, slice jalapeños and serve them alongside the fries. For a smoky flavor, consider using chipotle powder in the seasoning mix. These small changes can turn a tasty snack into a spicy delight! To make crispy avocado fries, gather ripe avocados, panko breadcrumbs, and seasonings. You’ve learned great steps to prepare, coat, and bake them for a yummy snack. Remember to try different sauces for dipping. You can even switch up the flavors or make vegan versions. These fries are quick, easy, and a fun treat for any meal. Enjoy experimenting with various ingredients and cooking methods!](https://recipesinsight.com/wp-content/uploads/2025/07/708dba70-17b5-4cdf-8bec-8109a741b9a4.webp)
Looking for a tasty snack that’s both easy to make and good for you? Crispy avocado fries are your answer!