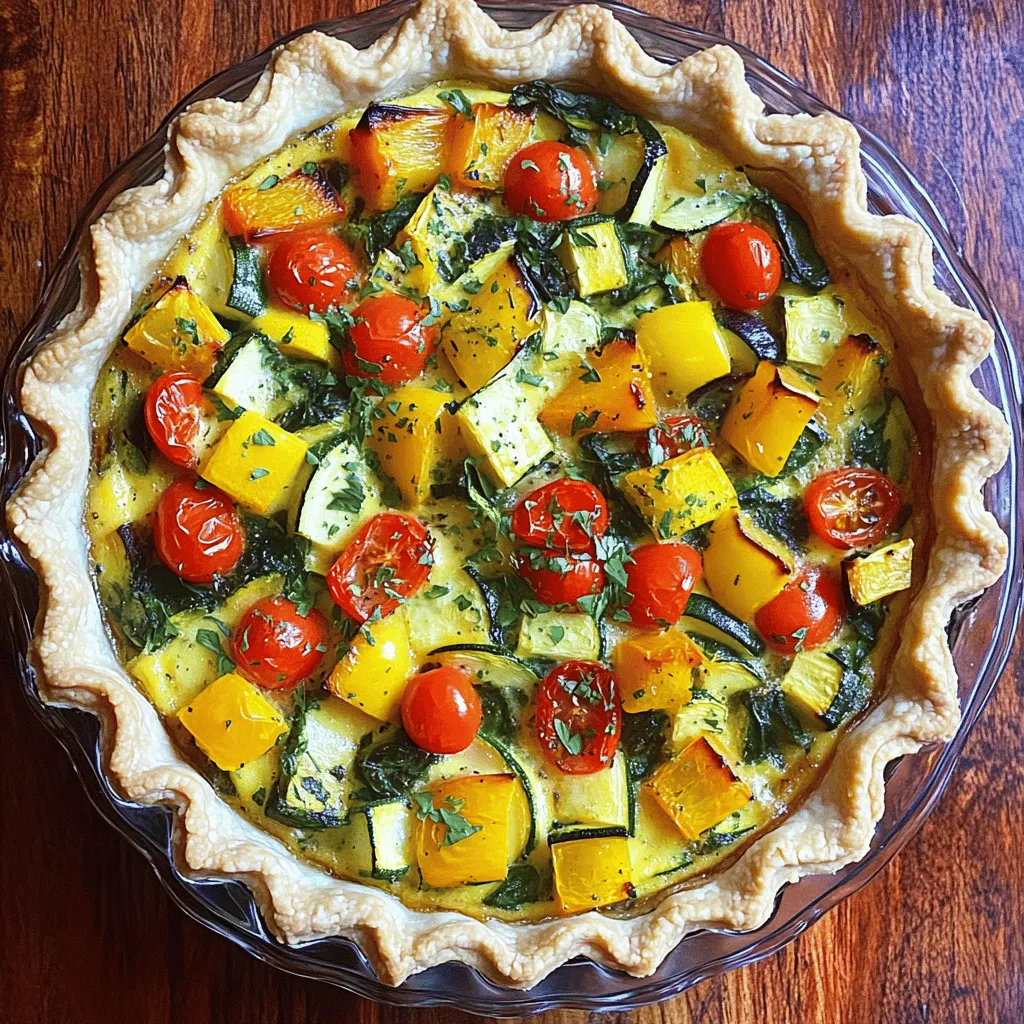
Roasted Vegetable Quiche Delightful and Nutritious Dish
Are you ready to enjoy a dish that’s both tasty and healthy? This Roasted Vegetable Quiche is just what you

Are you ready to enjoy a dish that’s both tasty and healthy? This Roasted Vegetable Quiche is just what you

Get ready to brighten up your dinner with my Rainbow Veggie Pizza! This colorful dish is not only fun to
![- 2 large sweet potatoes - 2 tablespoons olive oil - 1 teaspoon ground cinnamon - 1 teaspoon smoked paprika - 1/2 teaspoon salt - 1/2 teaspoon black pepper - 1 tablespoon maple syrup (optional) - Fresh parsley for garnish To make baked sweet potato fries, start with fresh, large sweet potatoes. Sweet potatoes are sweet and healthy. They have vitamins and fiber. You will need two of them. Peel and cut them into fry shapes. Next, use olive oil for cooking. It adds a nice flavor and helps them crisp up. You’ll need two tablespoons. Now, let's spice things up! Ground cinnamon adds warmth and a hint of sweetness. Use one teaspoon for that cozy flavor. Smoked paprika gives a nice smoky taste. Again, one teaspoon works well. For seasoning, add salt and black pepper. Both enhance all the flavors. A half teaspoon of each is perfect. If you want a little sweetness, drizzle one tablespoon of maple syrup on the fries. Lastly, fresh parsley makes a lovely garnish. It adds color and freshness. All these ingredients come together to create crispy, flavorful sweet potato fries. For the full details on how to prepare and cook them, you can check the Full Recipe. To start, grab your sweet potatoes. Wash them well and peel off the skin. You want to make sure they are clean. Next, cut each sweet potato into fries. Aim for even sizes. This helps them cook at the same time. You can make them as thick or thin as you like. Thinner fries will be crispier, while thicker ones will be soft inside. Now, let’s move on to the fun part—seasoning! In a large bowl, mix the fries with olive oil. Add ground cinnamon, smoked paprika, salt, and black pepper. If you like some sweetness, drizzle in the maple syrup. This step is where the magic happens! Toss everything together until the fries are fully coated. You want every fry to soak up that flavor. Before baking, preheat your oven to 425°F (220°C). This is key to getting them crispy. Once the oven is hot, arrange the fries on a baking sheet lined with parchment paper. Make sure they are in a single layer. Crowding them will make them steam instead of bake. Bake the fries for about 25-30 minutes. Halfway through, flip them over to ensure even cooking. You’ll know they’re ready when they look golden brown and crispy on the edges. Once you take them out, let them cool for a few minutes. They will be hot! Serve warm and enjoy your crispy and flavorful delight. For the full recipe, check out the details above. To get perfect crispy sweet potato fries, keep them in a single layer. This helps hot air flow around each fry. If the fries are crowded, they will steam instead of crisp. Flipping them halfway through baking is also key. This ensures even cooking and browning. You can spice up your fries in many ways. Try adding garlic powder or chili powder for a kick. If you love herbs, sprinkle in dried thyme or rosemary. Different oils can change the taste too. Avocado oil gives a nice flavor and is healthy. For sweetness, maple syrup is a great touch. It brings out the natural sweetness of the sweet potatoes. Sweet potato fries pair well with many dips. Ketchup is a classic choice, but ranch or spicy aioli works too. You can create a fun platter by serving them with a salad or grilled veggies. For a twist, top fries with cheese, avocado, or fresh herbs. These ideas make for a delicious and colorful meal. For the full recipe, check out the [Full Recipe]. {{image_2}} You can change up your sweet potato fries to fit your taste. For a spicy kick, add chili powder. This gives a nice heat that pairs well with the natural sweetness of the potatoes. A garlic and herb option is also a great choice. Mix in garlic powder and dried herbs like rosemary or thyme for a fresh flavor. Both options will elevate your fries. How you serve your fries can make a big difference. Try serving them with a side salad for a colorful plate. You can also add toppings like cheese or avocado for extra flavor and texture. A sprinkle of feta or a few slices of creamy avocado can make your fries even more delightful. Want to try a different cooking method? You can use an air fryer for a crispy finish. Cook them at 400°F (200°C) for about 15-20 minutes, shaking the basket halfway through. If you prefer pan-frying, heat a few tablespoons of oil in a skillet. Cook the fries in batches until they turn golden brown. This method adds a nice crunch and flavor, too. For the full recipe and more details, check out the [Full Recipe]. After you enjoy your baked sweet potato fries, store them in an airtight container. This keeps them fresh and tasty. Place the fries in the fridge. They will stay good for about 3 days. To keep them crispy, avoid stacking them too high. For the best taste, use the oven to reheat your fries. Preheat your oven to 400°F (200°C). Spread the fries out on a baking sheet. Heat them for about 10-15 minutes until they are warm and crispy again. If you need to use the microwave, place the fries on a microwave-safe plate. Heat them in 30-second bursts. This method is faster, but the fries may lose some crispiness. You can freeze the fries if you have leftovers. First, let them cool completely. Then, place them in a single layer on a baking sheet. Freeze for 1-2 hours until firm. After freezing, transfer them to a freezer bag. They can last for up to 3 months in the freezer. When you're ready to cook, thaw them in the fridge overnight. Bake them directly from frozen for about 25-30 minutes. This way, you'll enjoy crispy fries any time! To make baked sweet potato fries crispy, follow these key tips: - Cut evenly: Slice your fries into similar sizes for even cooking. - Use oil: Coat the fries well with olive oil. This helps them crisp up. - Single layer: Spread the fries in a single layer on the baking sheet. Overcrowding makes them soggy. - Flip halfway: Turn the fries halfway through baking for even browning. - High heat: Bake at 425°F (220°C) for a crispy finish. These steps help create that perfect crunchy texture. You’ll love the result! Yes, you can use other types of potatoes! Yukon Gold and Russet potatoes work well. - Yukon Gold: These have a creamy texture and buttery flavor. - Russet: These are great for fries, yielding a fluffy inside when baked. Each type offers a unique taste and texture. Experiment to find your favorite! Sweet potatoes are packed with nutrients and offer many health benefits: - Rich in vitamins: They contain high amounts of vitamin A, which supports eye health. - Good source of fiber: Fiber aids digestion and keeps you full longer. - Antioxidants: Sweet potatoes are rich in antioxidants, which help fight inflammation. Including sweet potatoes in your diet can boost your health while satisfying your taste buds. Enjoy them guilt-free! Baked sweet potato fries are easy to make and full of flavor. We covered the main ingredients, step-by-step instructions, and tips for crispiness. Think about adding spices or unique toppings for a twist. Storing leftovers properly keeps them fresh for later. Remember, sweet potatoes are not just tasty; they also bring health benefits. Enjoy these fries with your favorite dips and watch your meals become more exciting.](https://recipesinsight.com/wp-content/uploads/2025/07/d6747cf0-460e-4e21-a0ce-6454e3ed3fad.webp)
Looking for a tasty snack that’s both crispy and healthy? Baked Sweet Potato Fries are your answer! These golden delights
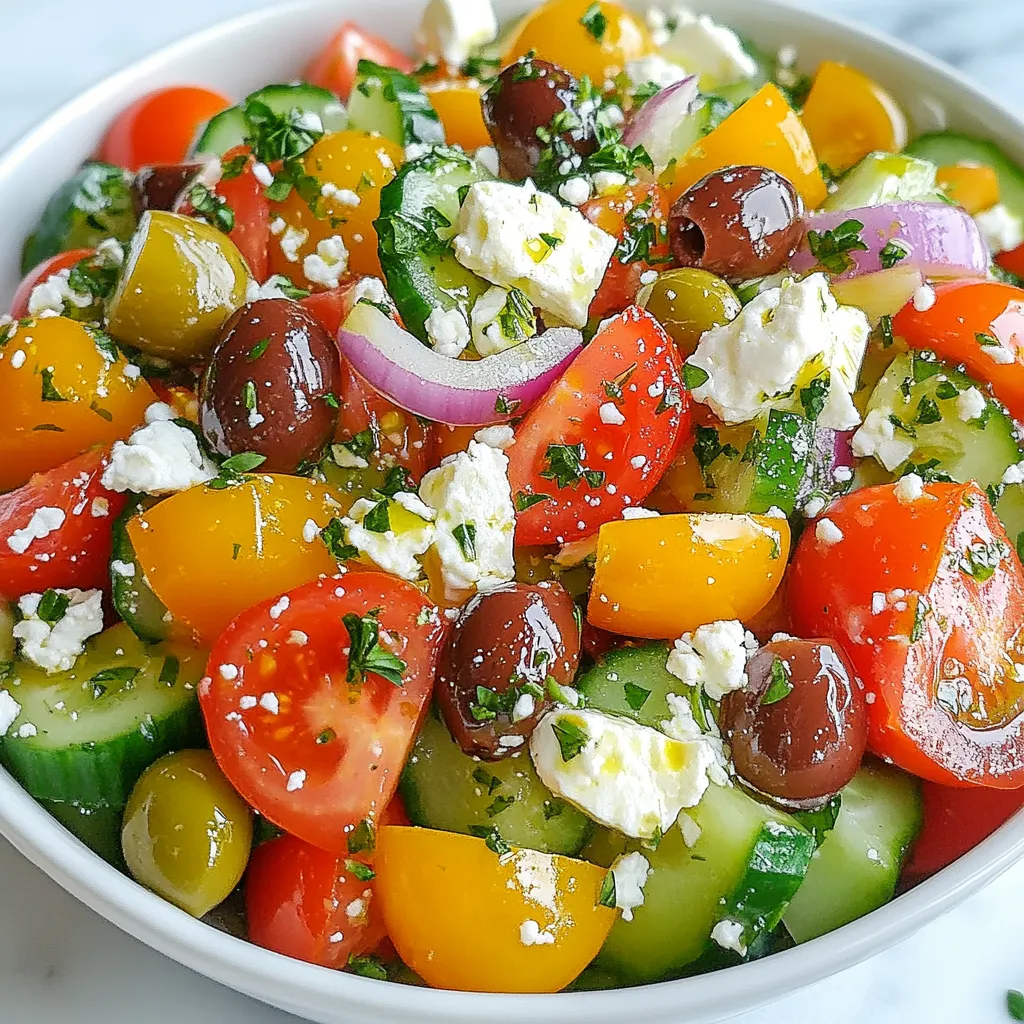
Are you ready for a fresh and flavorful dish that embodies the essence of summer? The Greek Tomato Cucumber Salad
![- 2 cups cucumbers, thinly sliced - 1 carrot, julienned - 1 red bell pepper, thinly sliced - 1/4 cup red onion, finely sliced - 1/4 cup fresh cilantro, chopped - 1/4 cup roasted peanuts, roughly chopped - 2 tablespoons lime juice - 1 tablespoon fish sauce (or soy sauce for a vegetarian option) - 1 tablespoon chili paste - 1 teaspoon sugar - Salt to taste To make the Spicy Thai Cucumber Salad, gather all these ingredients. Fresh cucumbers are the star here. They bring crunch and a cool taste. The carrot and red bell pepper add color and more crunch. Red onion gives a nice bite, while cilantro adds freshness. The dressing ties it all together. Lime juice brings a zesty tang. Fish sauce adds umami flavor, but soy sauce works too. Chili paste gives heat, so adjust it based on your taste. Sugar balances the flavors, and a pinch of salt enhances everything. Each serving of this salad is low in calories. It has about 120 calories, with 7 grams of fat and 12 grams of carbs. You get 3 grams of protein too. This salad is a great source of vitamins A and C. It also has potassium and magnesium, making it a healthy choice. For the full recipe, you can check out the complete instructions and tips. Enjoy this light and refreshing salad! To start, slice your cucumbers thin. I like to use a sharp knife for this. Thin slices make the salad crunchy and fresh. For the carrot, julienne it carefully. This means cutting it into long, thin strips. This helps it mix well with the cucumber. Blend the flavors before serving. This is crucial for a tasty salad. Letting it sit allows the veggies to soak up the dressing. You will love how the flavors come together. Whisk the dressing in a small bowl. Add lime juice, fish sauce or soy sauce, chili paste, sugar, and a pinch of salt. Make sure to mix well until it is smooth. If you want more heat, add extra chili paste. Adjust it to your spice level. Now, it’s time to mix the salad. Toss the cucumber, carrot, red bell pepper, and onion gently. This keeps the vegetables from getting mushy. Once they are mixed, add the cilantro and peanuts. Toss it again gently. Let the salad rest for 10 to 15 minutes. This resting time helps the flavors meld together. Taste it before serving. You can adjust with more salt or lime juice if needed. Enjoy this refreshing dish! For the full recipe, check here: [Full Recipe]. To make a great spicy Thai cucumber salad, start with fresh ingredients. Here are some tips: - Cucumbers: Choose firm, shiny cucumbers. Look for ones with no soft spots or wrinkles. English cucumbers work well for their thin skin and fewer seeds. - Carrots: Select bright orange carrots. They should feel crisp and have a smooth surface. - Bell Peppers: Pick bell peppers that are heavy for their size. They should have a vibrant color and firm skin. For easy preparation, use these kitchen tools: - Sharp Knife: A good knife makes slicing easier and safer. - Cutting Board: A sturdy cutting board helps keep your workspace tidy. - Mixing Bowl: Use a large bowl to mix the salad without spilling. You can elevate the flavor of your salad. Consider adding these herbs and spices: - Mint: Fresh mint adds a cool touch. - Thai Basil: This herb brings a unique flavor twist. - Chili Flakes: If you want more heat, sprinkle some chili flakes on top. For protein, try these options: - Grilled Chicken: Sliced grilled chicken adds heartiness. - Shrimp: Cooked shrimp adds a nice seafood flavor. These simple additions can make your salad even more delicious. For the full recipe, check out the [Full Recipe]. {{image_2}} For a vegetarian or vegan twist, you can easily swap out the fish sauce. Use soy sauce or tamari to keep it flavorful. Both options provide a rich umami taste. You can also add tofu. Firm tofu works best. Simply cube it and toss it into the salad for extra protein. This makes the dish heartier without losing its freshness. You can change up the veggies based on what’s in season. In summer, add some ripe tomatoes or radishes for a crunch. During fall, thinly sliced apples can add a sweet touch. You can even mix in fruits like mango. The sweetness of mango pairs well with the spicy dressing. This adds a fun twist to your salad. If you like heat, adjust the chili paste in the recipe. Start with a small amount and taste as you go. You can also try different types of chili sauces. Sriracha or sambal oelek can add a unique flavor. For less heat, use sweet chili sauce instead. This way, you can make the salad just right for your taste buds. Feel free to explore these variations to keep your salad exciting. Each change can bring a new flavor and experience to your table. For the full recipe, check out the details provided earlier. To keep your Spicy Thai Cucumber Salad fresh, use an airtight container. Glass or plastic containers work well. This salad stays good in the fridge for about 2 days. After that, the veggies may get too soft. You don’t need to heat this salad. Serve it cold for the best taste. If you make it ahead of time, stir it gently before serving. This will help mix the flavors again. When making portions, store the dressing separately. This way, the salad stays crisp and tasty! For the full recipe, check the recipe card. You can use soy sauce or tamari instead of fish sauce. Both give a salty taste. Tamari is a great choice for gluten-free diets. These options keep the flavor rich while being vegetarian-friendly. Yes, you can make this salad a few hours before serving. Just add the dressing right before you eat. This keeps the veggies crunchy and fresh. If you store it too long, the salad may become soggy. The spice level depends on how much chili paste you use. If you like it mild, start with a small amount. You can always add more later. This way, you control the heat. This salad pairs well with grilled meats or fish. It also complements rice dishes nicely. Try serving it with spring rolls for a fun meal. The salad adds a fresh crunch to any plate. You can buy roasted peanuts at most grocery stores. Look in the snack aisle or the bulk section. If you prefer, you can roast raw peanuts at home. Just toss them in a pan over low heat until golden. This blog post covered key ingredients, preparation steps, and tips for making a fresh salad. You learned about nutritional values and how to adjust flavors. With variations for different diets and seasons, there's something for everyone. Storing and reheating tips ensure your salad stays fresh. Try making this salad your own. Experiment with flavors and enjoy the process. Your healthy eating journey can be fun and tasty!](https://recipesinsight.com/wp-content/uploads/2025/07/ee9bb865-50a8-4c53-8fc1-e43c27ac2071.webp)
Looking for a quick and tasty salad to brighten your day? You’ll love my Spicy Thai Cucumber Salad! This dish
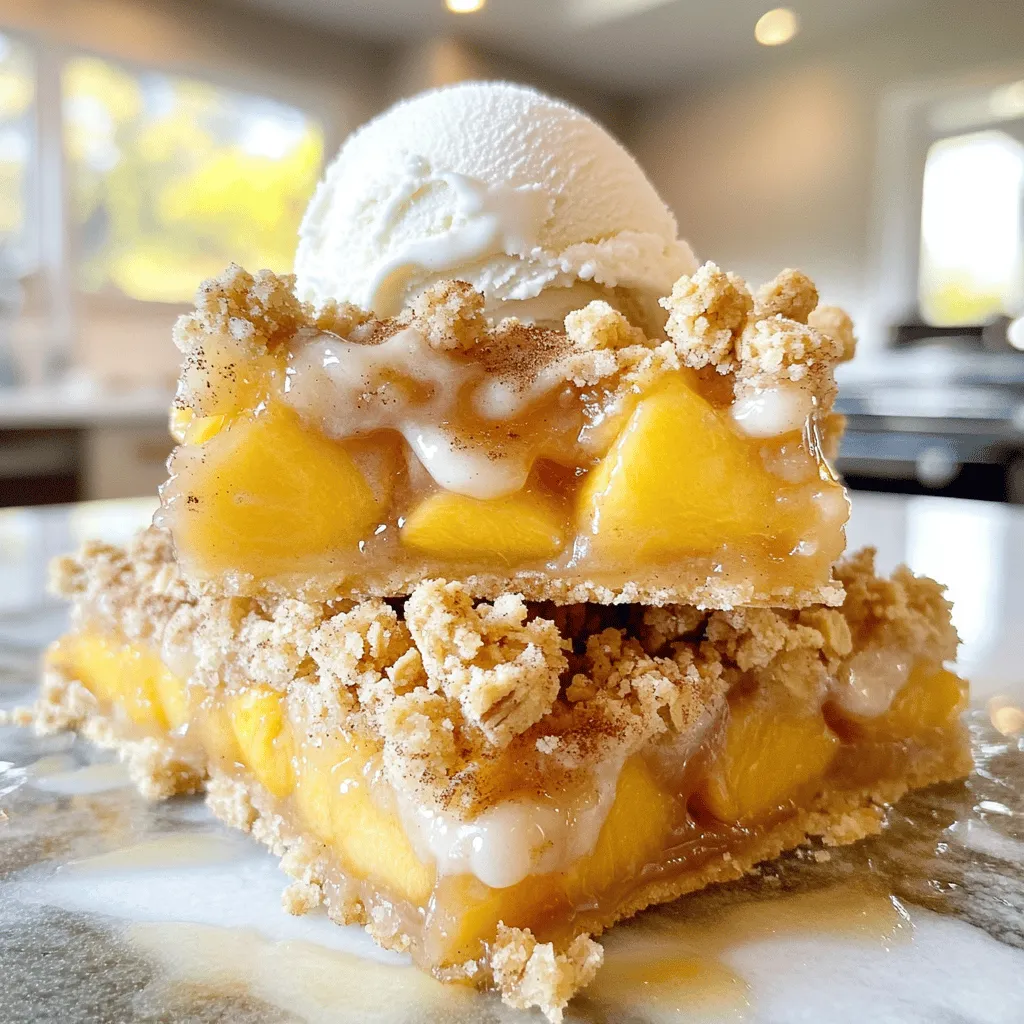
Looking for a simple dessert that packs a flavor punch? You’re in the right place! These Peach Crumble Bars are
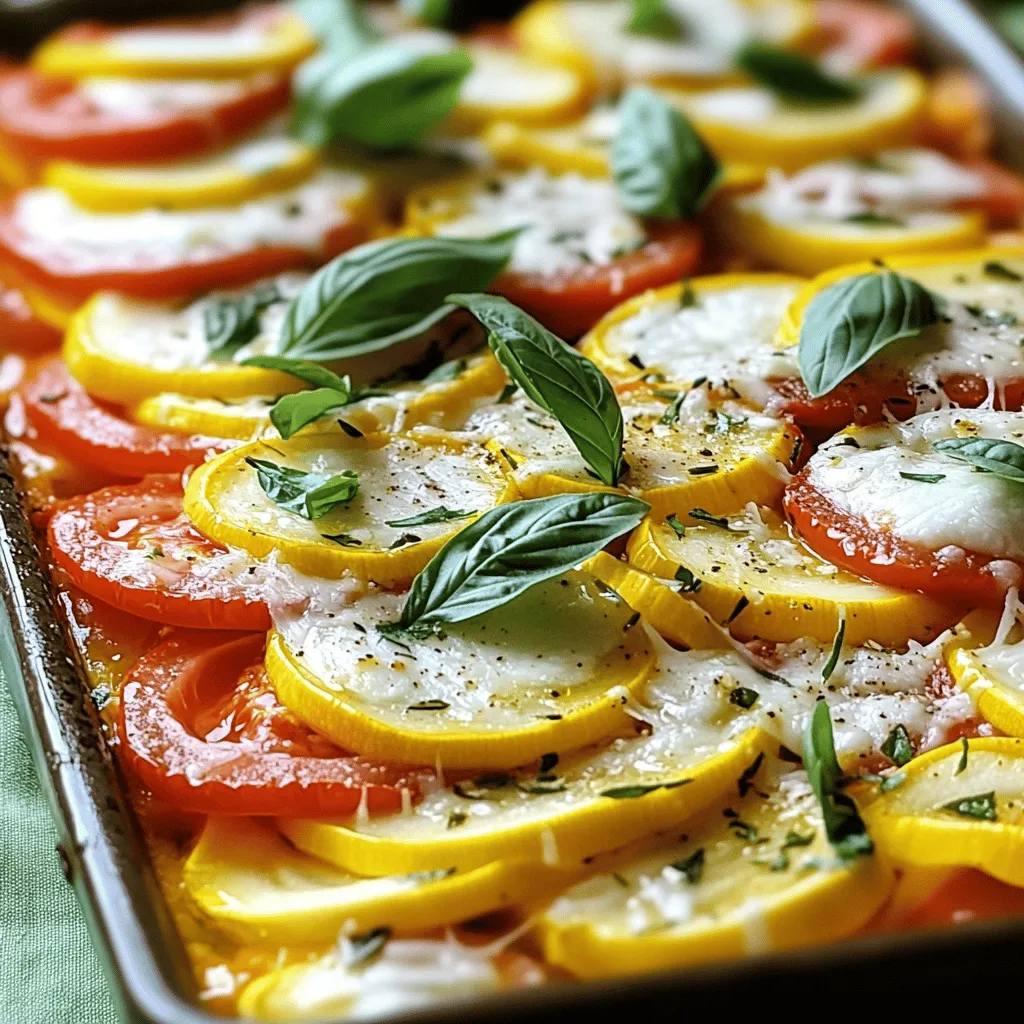
Are you ready to savor the fresh taste of summer? My savory summer squash and tomato bake combines vibrant veggies
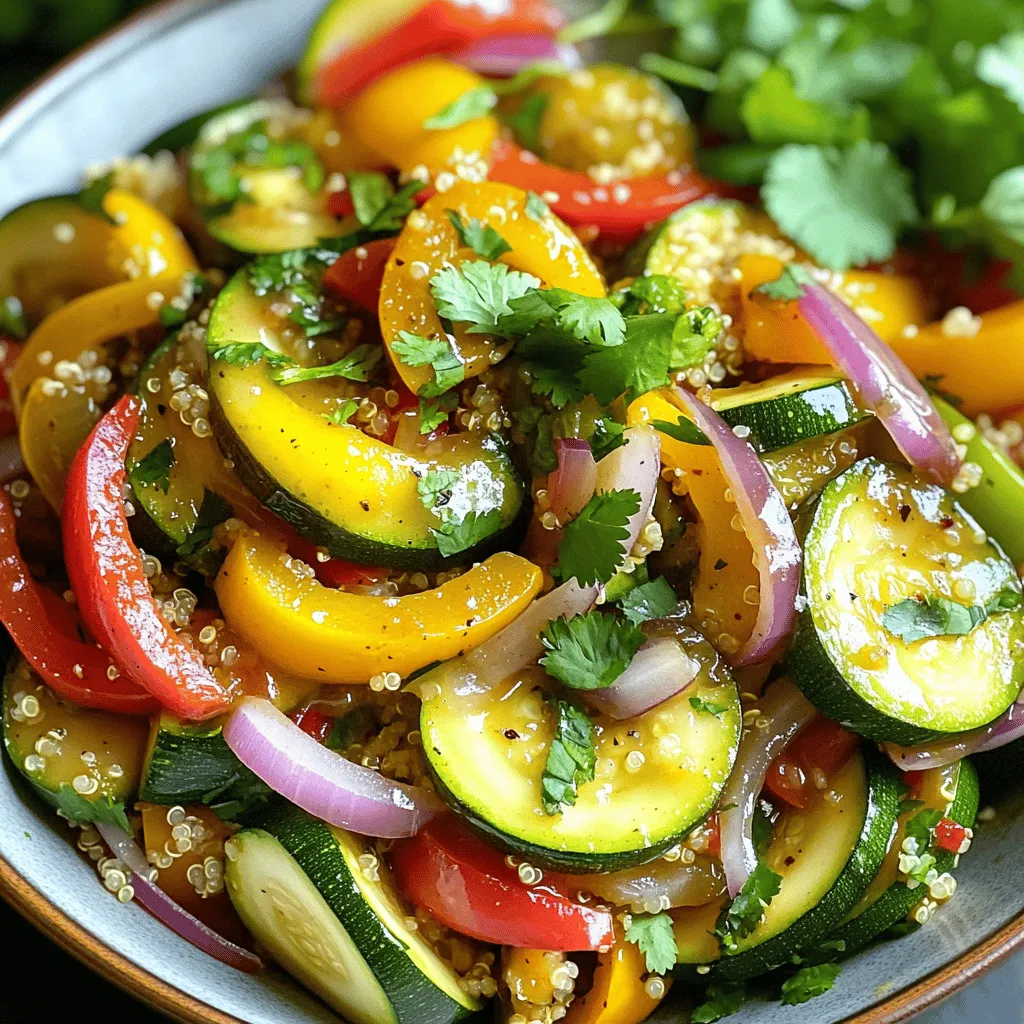
Are you looking for a quick and tasty meal? Try my Zucchini and Pepper Stir Fry! With vibrant veggies and
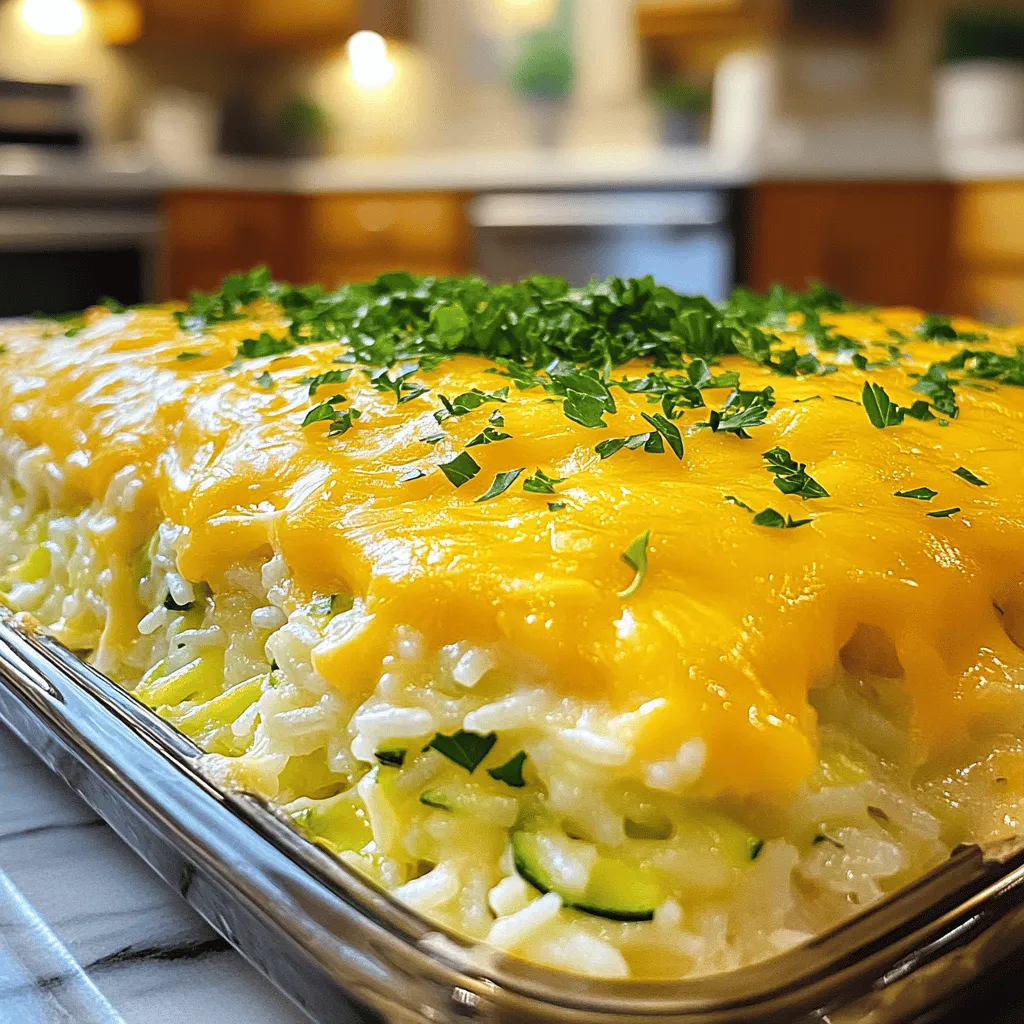
Looking for a delicious dinner idea? This Cheesy Zucchini Rice Bake is packed with flavor and simple to make! You’ll
![- 4 large russet potatoes - 1 cup grated Parmesan cheese - 1/4 cup olive oil - 1 tablespoon garlic powder - 1 tablespoon onion powder - 1 teaspoon smoked paprika - 1 teaspoon dried oregano - Salt and black pepper to taste - Fresh parsley, chopped (for garnish) For this crispy Parmesan potato wedges recipe, the main ingredients are simple yet essential. The russet potatoes provide a fluffy inside while the Parmesan adds a rich flavor. You want to choose large russet potatoes for the best results. The marinade is key to infusing flavor. I use olive oil, garlic powder, and onion powder. This blend makes the wedges taste amazing before they even hit the oven. Seasoning is where the magic continues. Smoked paprika adds warmth, while dried oregano gives a fresh note. Don't forget to season with salt and black pepper to enhance all those flavors! Lastly, fresh parsley is a lovely touch. It makes the dish pop visually and adds a hint of freshness. If you want the full recipe with detailed steps, check out the [Full Recipe]. 1. Preheat your oven to 425°F (220°C). Line a baking sheet with parchment paper. This helps prevent sticking and makes for easy cleanup. 2. Wash the potatoes thoroughly under cold water. Cut each potato into wedges, making sure to leave the skin on for extra crunch. 1. In a large bowl, combine 1/4 cup olive oil, 1 tablespoon garlic powder, 1 tablespoon onion powder, 1 teaspoon smoked paprika, 1 teaspoon dried oregano, salt, and black pepper. Mix well until all spices blend together. 2. Add the potato wedges to the bowl. Toss them in the marinade until they are evenly coated. Make sure each wedge gets a good amount of flavor. 1. In a separate shallow dish, spread out 1 cup of grated Parmesan cheese. This will give the wedges that crispy, cheesy finish. 2. Take each potato wedge and dredge it in the Parmesan cheese. Press lightly to ensure the cheese sticks well. 3. Arrange the coated wedges in a single layer on the prepared baking sheet. Make sure they are not touching to allow for maximum crispiness. 4. Bake in the preheated oven for 30-35 minutes. Flip the wedges halfway through to get an even golden brown color. 5. Once baked, remove them from the oven and let them cool for a few minutes. Garnish with fresh chopped parsley before serving. For the complete recipe, check out the [Full Recipe]. Enjoy your crispy Parmesan potato wedges! To get your potato wedges crispy, space them well on the baking sheet. If the wedges touch, they steam instead of crisping. Aim for a single layer. This allows hot air to circulate and makes each wedge golden and crunchy. Flipping the wedges halfway through baking is also key. This step helps both sides cook evenly. Use a spatula to turn them gently, ensuring you don’t break them. Want to kick up the flavor? Add spices like cayenne pepper or Italian seasoning for a twist. You can also try smoked paprika for a unique taste. Fresh herbs like rosemary or thyme can add a fresh touch. Sprinkle them on top right before serving for a burst of flavor. Using the right kitchen tools makes a big difference. For baking sheets, choose heavy-duty ones. They hold heat well, helping your wedges crisp up nicely. When cutting your potatoes, a sharp knife is your best friend. It allows you to cut even wedges, which cook evenly. A sturdy cutting board also helps keep everything safe and steady while you work. For the full recipe, refer to the original guide provided earlier. {{image_2}} You can change the cheese for your potato wedges. Cheddar adds a sharp taste. Try mozzarella for a creamy, melt-in-your-mouth feel. Mixing cheeses is fun too! Combining Parmesan with cheddar gives a rich, bold flavor. You can create your own special blend by using what you have at home. Want to spice things up? Add chili powder for a kick! This makes the wedges bold and exciting. You can also use herbs like rosemary or thyme. These herbs give a fresh taste and make your wedges smell amazing. Mixing flavors makes every bite different and fun! Pair your crispy wedges with dips. Ketchup is a classic, but try ranch or garlic aioli for a twist. Serving them with burgers or grilled chicken makes a great meal. You can even serve these wedges as a snack at parties. They are perfect for sharing, and everyone will love them! For the full recipe, check out the complete instructions above. To keep your crispy Parmesan potato wedges fresh, store them in the fridge. Use an airtight container to lock in flavor and texture. Place a paper towel in the container to absorb any moisture. This helps keep them crispy longer. When reheating, the oven is best. Preheat it to 400°F (200°C). Place the wedges on a baking sheet and heat for about 10-15 minutes. This method keeps them crispy. If you use a microwave, they may turn soft. So, avoid the microwave if you can. You can freeze cooked wedges. Just let them cool first. Then, place them in a freezer bag. Remove as much air as possible. This helps prevent freezer burn. If you want to freeze raw, marinated wedges, you can do that too. Just make sure to use a freezer-safe bag. Yes, you can make these potato wedges ahead of time. To prepare, follow the steps until you coat the wedges in Parmesan cheese. Place the coated wedges on a baking sheet, cover with plastic wrap, and store them in the fridge. You can keep them there for up to 24 hours. When you're ready, bake them straight from the fridge. This way, you save time and enjoy fresh, crispy wedges. If you don’t have Parmesan cheese, don’t worry! You can use other cheeses like cheddar or mozzarella. For a dairy-free option, try nutritional yeast. It gives a cheesy flavor without the dairy. Another option is to use a mix of breadcrumbs and spices for a crunchy topping. Each choice will change the taste a little, but they all work great! You can tell when the wedges are done by looking for a golden-brown color. The outside should be crispy, and a fork should easily pierce the potato. If they feel soft inside and crispy outside, they are ready. Baking time may vary, so keep an eye on them during the last few minutes. This blog post covered how to make tasty potato wedges using simple ingredients. You learned how to prepare the potatoes, mix the marinade, and bake them to perfect crispiness. I shared tips for flavoring and storing leftovers, plus fun ways to change up the recipe. Remember, making these wedges is easy and fun. With a few tweaks, you can impress your family and friends. Enjoy your cooking adventure and savor every bite!](https://recipesinsight.com/wp-content/uploads/2025/07/e4cb08ec-7119-4fac-a223-5092327134d8.webp)
Are you craving a snack that’s both crunchy and cheesy? Look no further! My Crispy Parmesan Potato Wedges are the