Pumpkin Cheesecake Brownie Cups Delightful Fall Treat
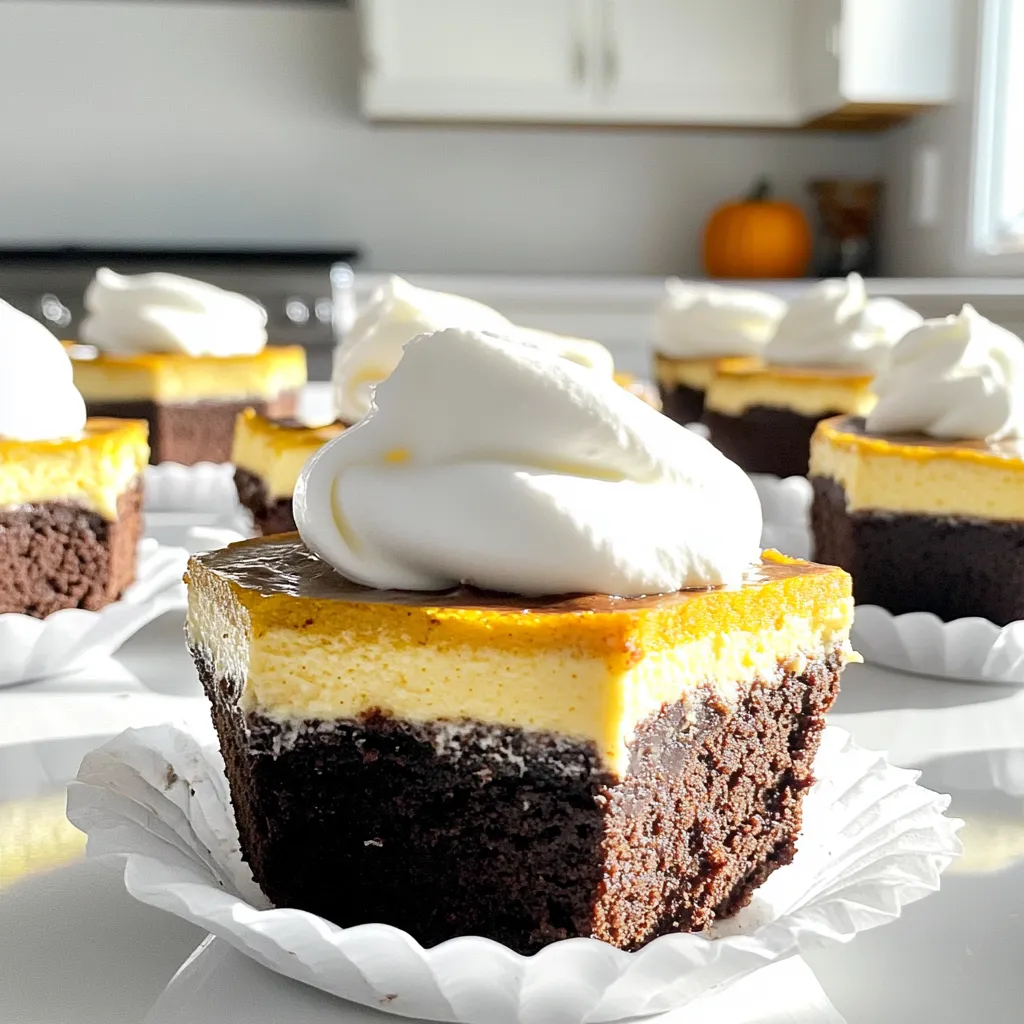
If you crave a dessert that captures the warmth of fall, you’ll love these Pumpkin Cheesecake Brownie Cups. Picture this:

If you crave a dessert that captures the warmth of fall, you’ll love these Pumpkin Cheesecake Brownie Cups. Picture this:
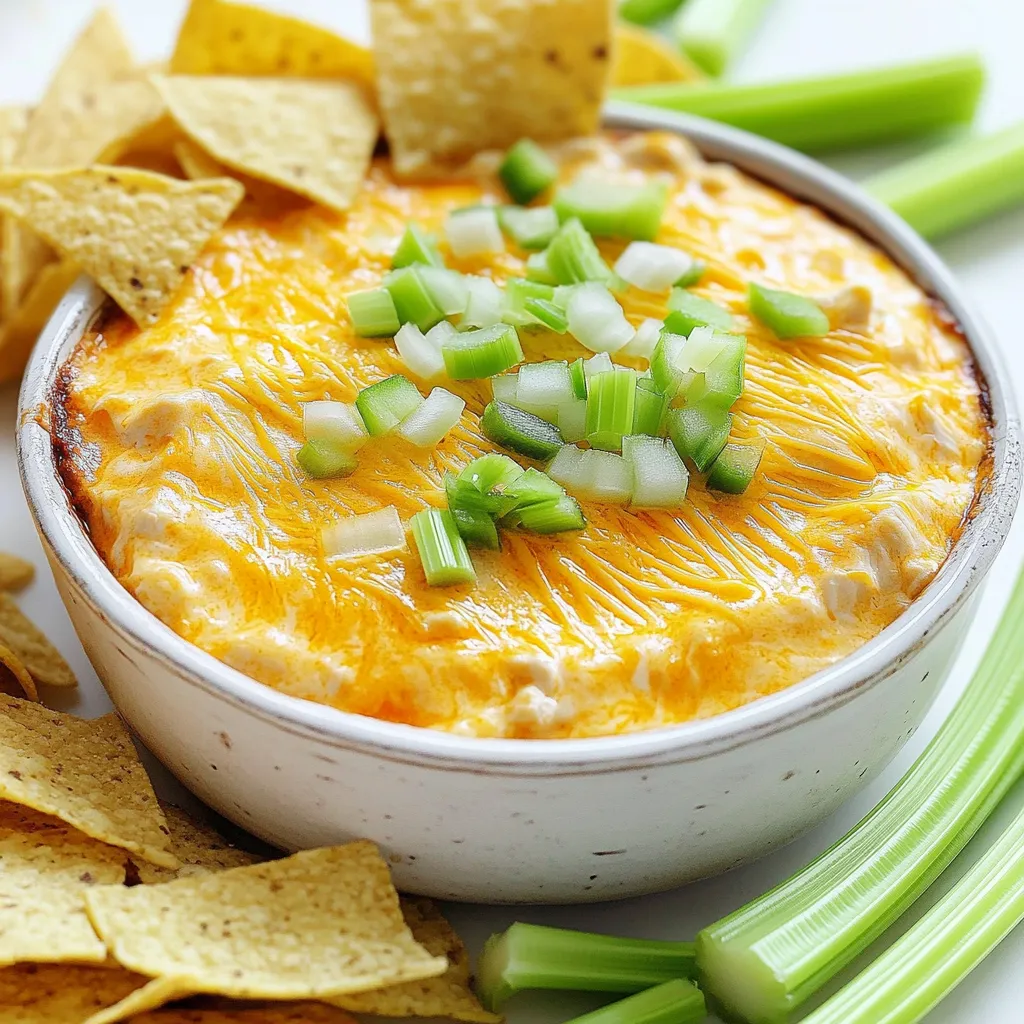
If you’re looking for a crowd-pleaser that’s easy to make, you’ve found it! This Creamy Buffalo Chicken Dip is perfect
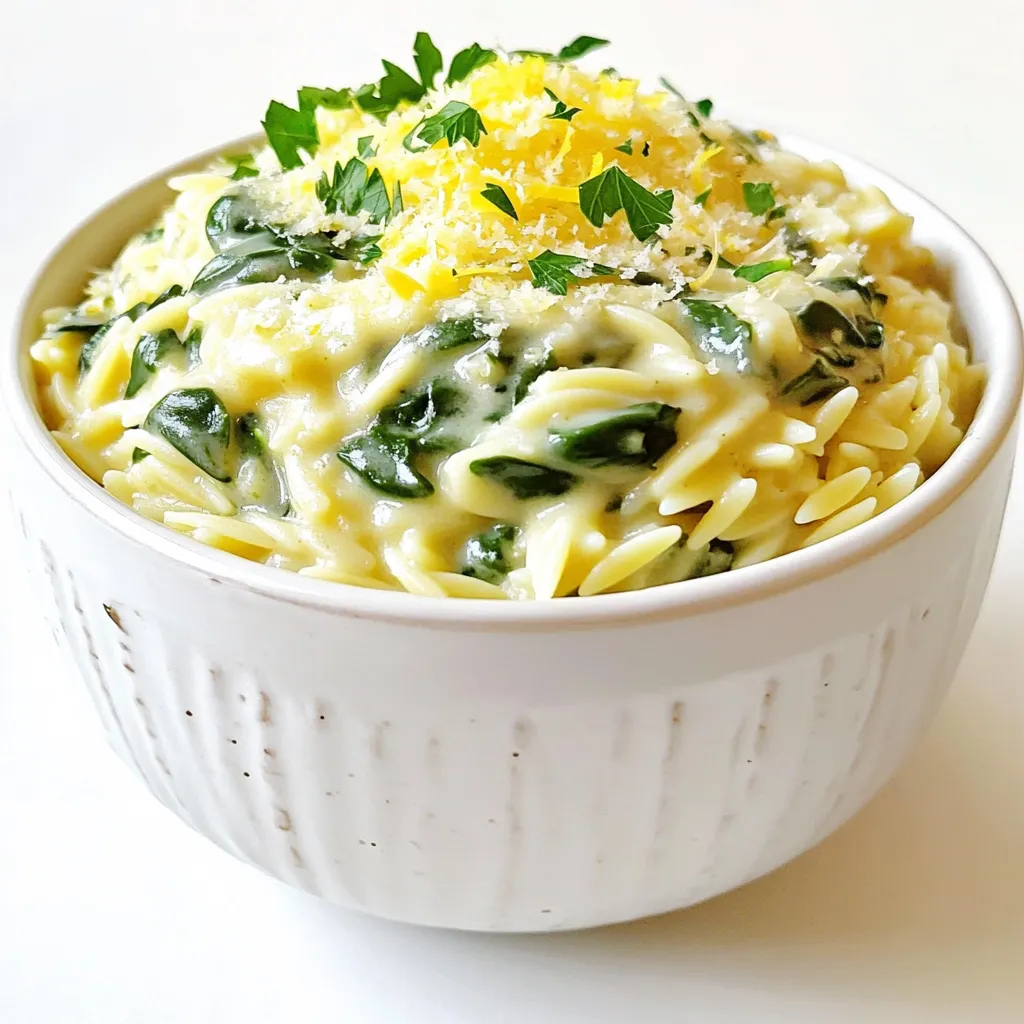
Ready to indulge in a creamy, savory dish that’s easy to make? This One-Pot Garlic Parmesan Orzo with Spinach is

Craving a sweet treat that brightens your day? These Bakery-Style Blueberry Lemon Streusel Muffins are the answer! With tangy lemon
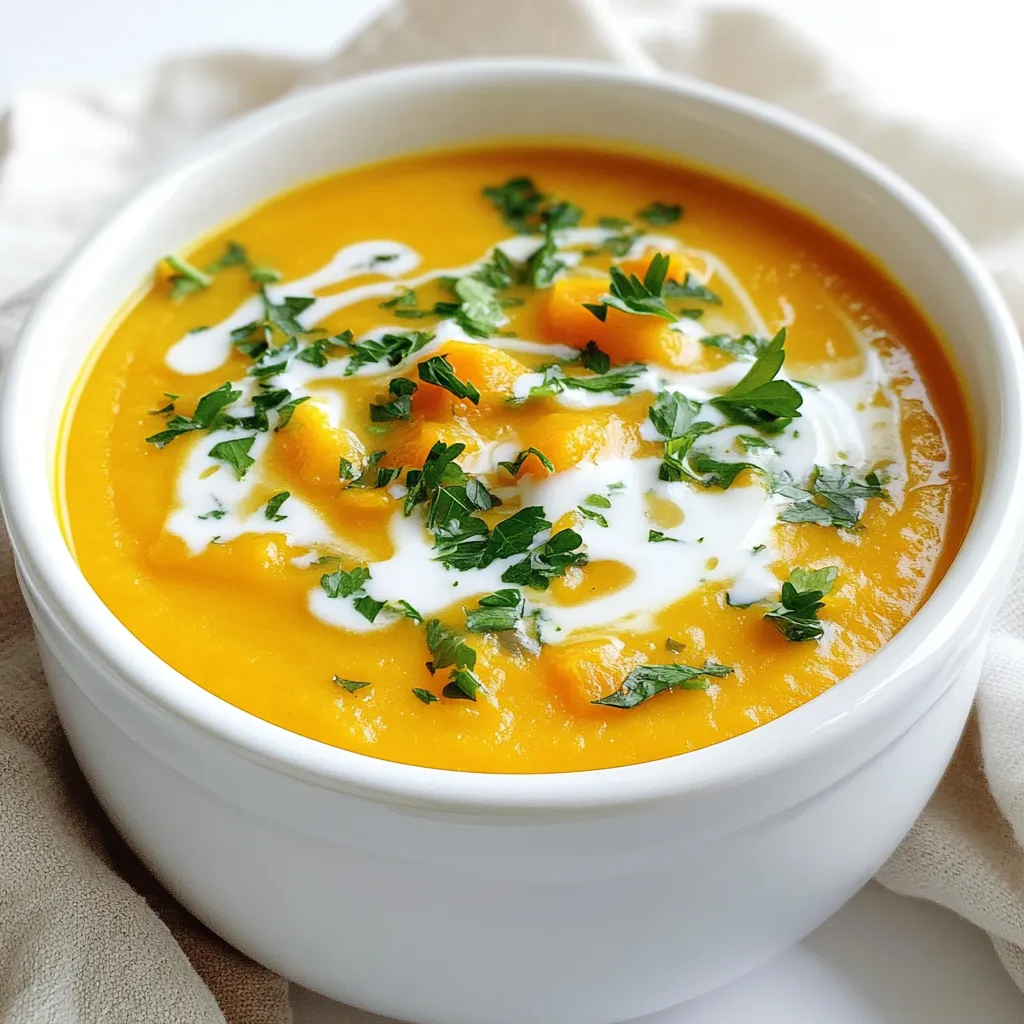
Craving warmth and comfort? My Cozy Slow Cooker Butternut Squash Soup Delight is the answer! This creamy, rich soup combines

Get ready to treat your taste buds with my No-Bake Salted Caramel Pretzel Cheesecake Bars Delight! These bars combine the
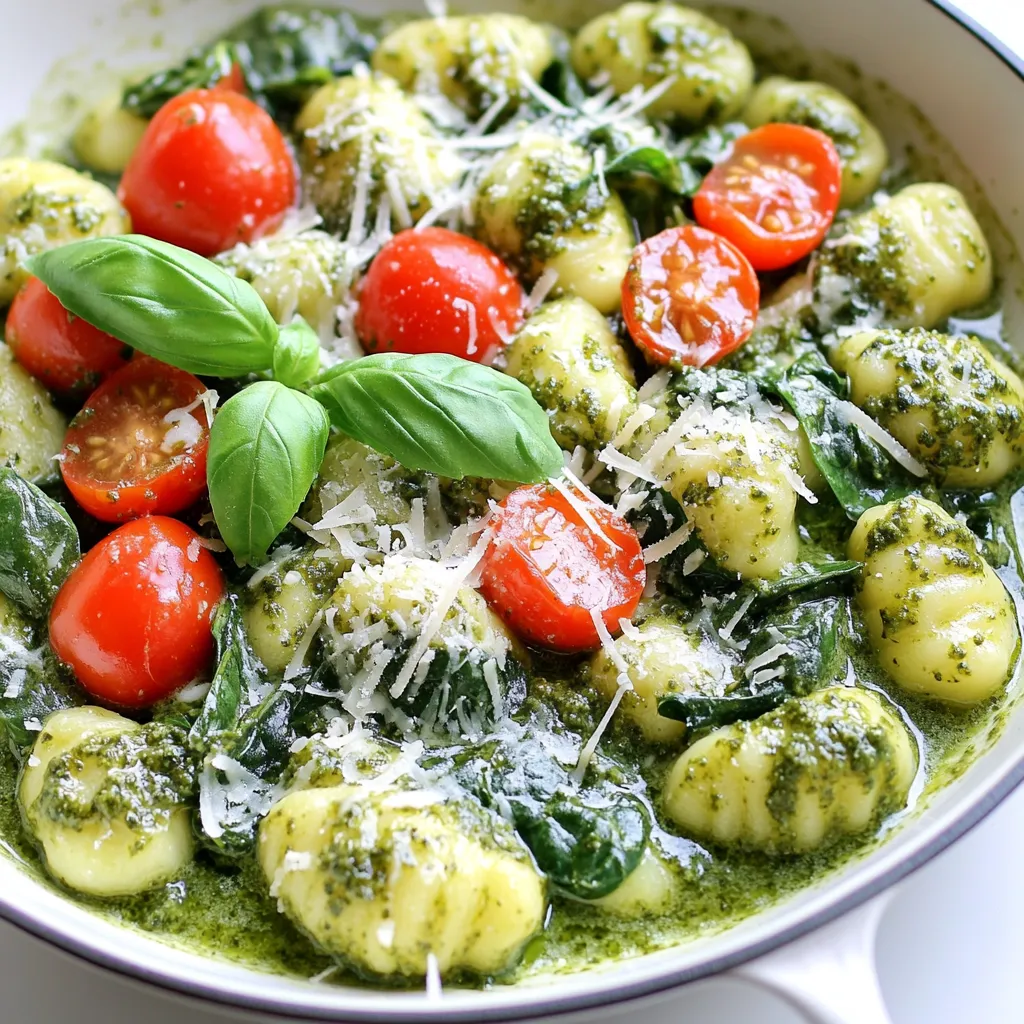
If you crave a quick and creamy meal, you’re in for a treat! My Minute Creamy Pesto Gnocchi Skillet is
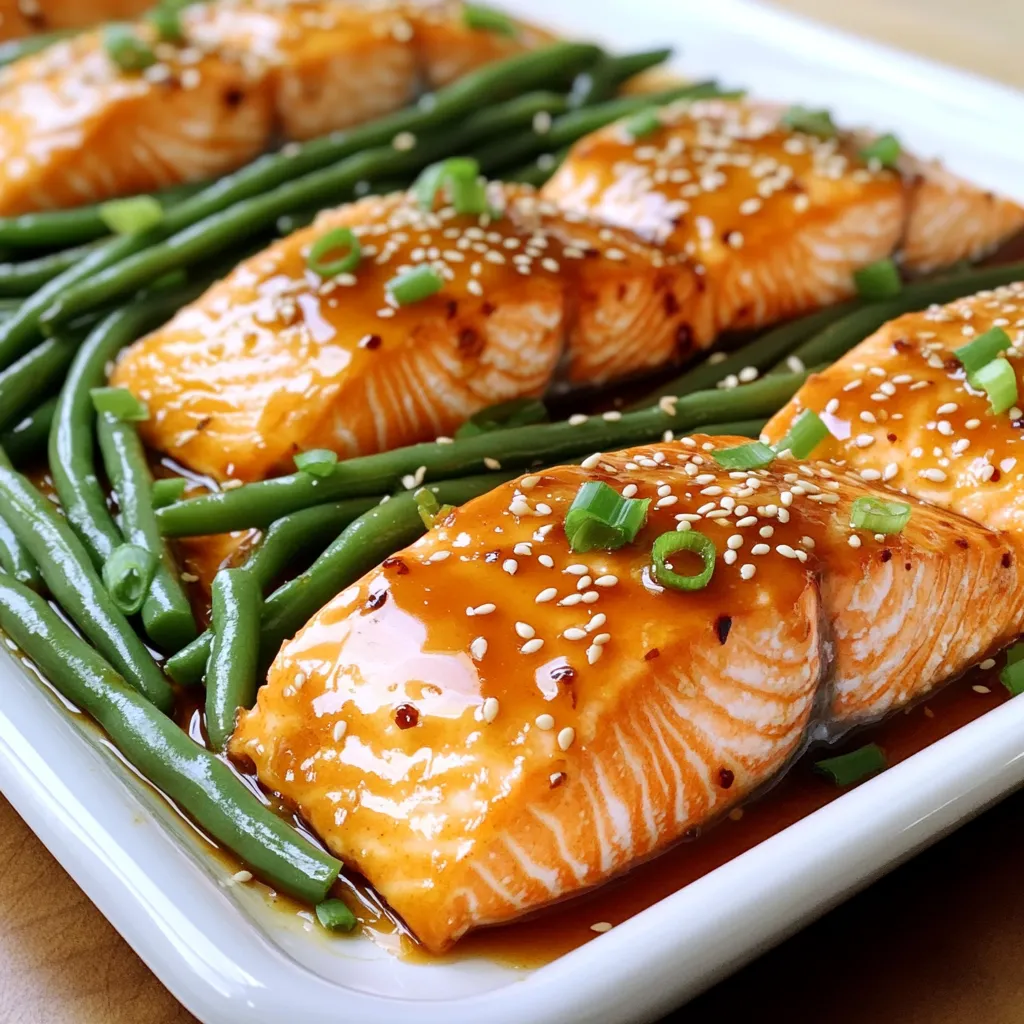
Looking for a quick, tasty dinner? Try my Sheet-Pan Honey Sriracha Salmon and Green Beans! This dish is packed with
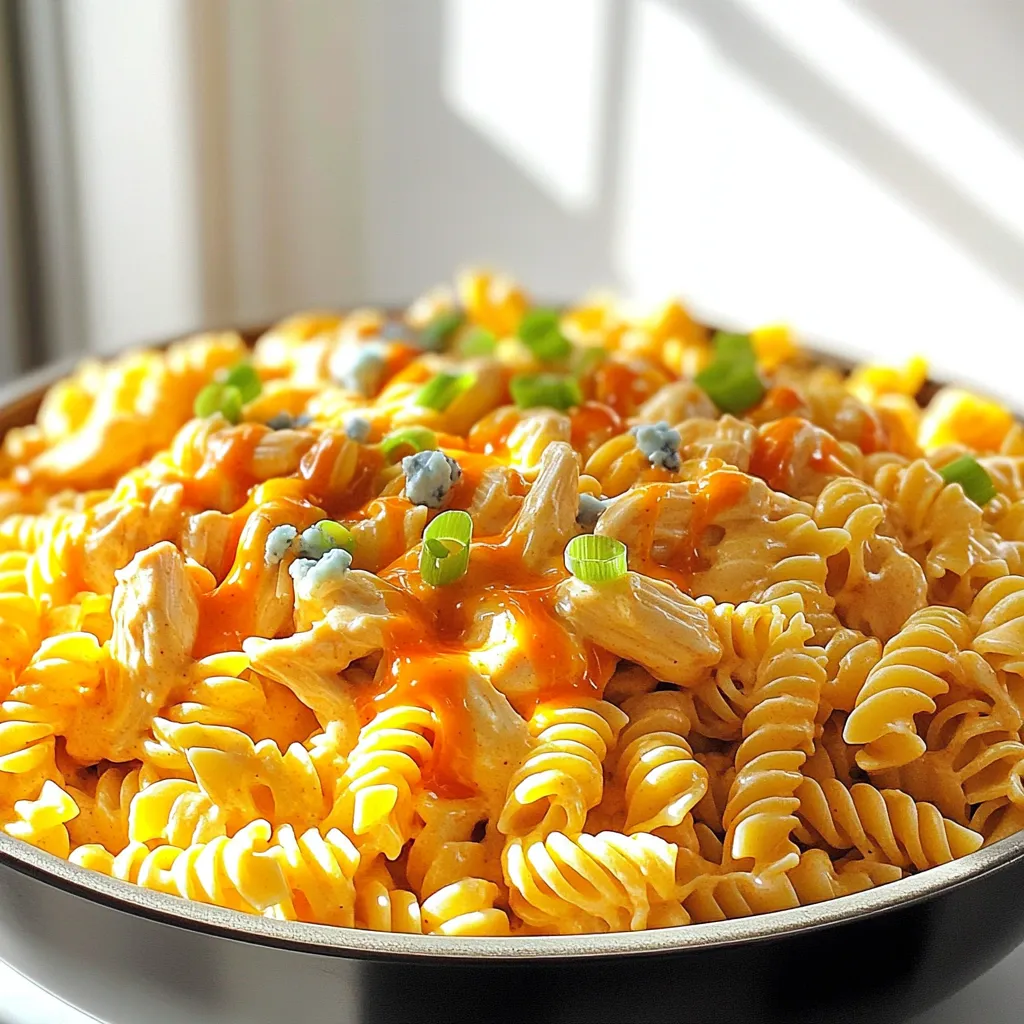
If you love bold flavors and creamy comfort, this One Pot Creamy Buffalo Chicken Pasta is for you! In just

Want to elevate your green bean game? My Air Fryer Garlic Parm Green Beans are the answer! They’re simple, quick,