Introduction
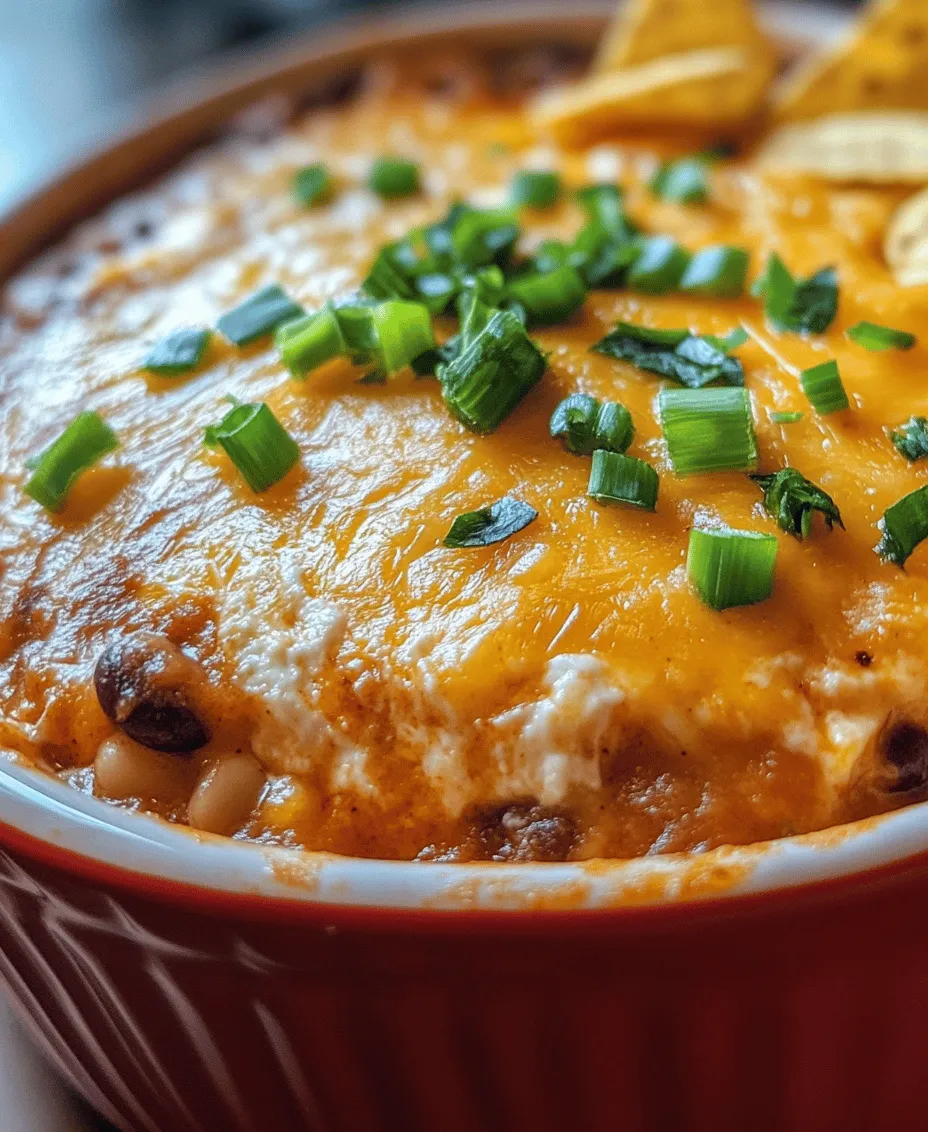
When it comes to party recipes that are sure to please a crowd, few can rival the irresistible allure of Cheesy Fiesta Chili Dip. This delicious dip combines the rich, creamy textures of cheese and sour cream with the hearty, spiced flavors of chili beans, creating an appetizer that is not only easy to prepare but also incredibly satisfying. Whether you’re hosting a game day gathering, a birthday bash, or just a casual get-together with friends, this dip is a standout choice that will have everyone reaching for more.
Easy and delicious party recipes have become a staple in our busy lives, allowing us to entertain without the stress of complex cooking. Cheesy dips, in particular, hold a special place in social gatherings, often serving as the centerpiece of snack tables. Their creamy, cheesy goodness pairs well with an array of dippers, from tortilla chips to fresh vegetables, making them versatile and universally loved. In this article, we will explore the delightful world of Cheesy Fiesta Chili Dip, breaking down its ingredients and preparation steps to ensure you can whip it up effortlessly for your next celebration.
Understanding the Ingredients
To create the perfect Cheesy Fiesta Chili Dip, understanding the key ingredients is crucial. Each element contributes its unique flavor and texture, making the dip a harmonious blend of tastes.
Key Ingredients Overview
1. Chili Beans: The star of this dip, chili beans come in various forms, including black beans, pinto beans, and kidney beans. They not only add a hearty texture but also provide a robust flavor that complements the creaminess of the cheese. The type of beans you choose can significantly impact the overall taste—black beans offer a slightly earthy flavor, while pinto beans bring a creamy, buttery profile.
2. Cream Cheese and Sour Cream: These two ingredients are the backbone of the dip’s texture. Cream cheese adds a rich, velvety consistency, while sour cream contributes a tangy flavor that balances the dish. Together, they create a luscious base that envelops the other ingredients, ensuring every bite is creamy and flavorful.
3. Cheese Selections: The choice of cheese can elevate the flavor profile of your dip. Cheddar cheese is a classic option, known for its sharpness and depth. On the other hand, pepper jack cheese introduces a spicy kick, perfect for those who enjoy a bit of heat. You can also opt for a combination of both, achieving a perfect balance between sharpness and spice.
4. Bell Peppers and Green Onions: Adding bell peppers not only enhances the flavor of your dip but also infuses it with a pop of color and crunch. Their sweetness balances the heat from the chili beans and cheese. Green onions, or scallions, provide a fresh, mild onion flavor that brightens the dip. Nutritionally, both ingredients are low in calories and high in vitamins, making them a healthy addition to your party platter.
Preparation of Cheesy Fiesta Chili Dip
Now that you’re familiar with the key ingredients, let’s dive into the preparation process. This recipe is designed to be straightforward, making it accessible for cooks of all skill levels.
Step-by-Step Preparation
1. Preheat Your Oven: Before you start mixing your ingredients, it’s essential to preheat your oven to 350°F (175°C). Preheating ensures that your dip bakes evenly and reaches the perfect consistency. A hot oven also reduces cooking time, allowing the dip to bubble and brown beautifully.
2. Mix the Base: In a large mixing bowl, combine the softened cream cheese and sour cream. Use a hand mixer or a spatula to blend them until smooth and creamy. This step is crucial for achieving a lump-free dip. The texture will set the foundation for the rest of your ingredients.
3. Incorporate the Chili Beans: Gently fold in the chili beans. You can use canned beans for convenience; just make sure to drain and rinse them to remove excess sodium. The beans should be evenly distributed throughout the cream mixture, providing a hearty base.
4. Add Cheese and Vegetables: Next, mix in your chosen cheeses—whether you opt for cheddar, pepper jack, or a blend of both. Also, fold in chopped bell peppers and green onions. Mixing these ingredients well ensures that every scoop of dip is packed with flavor.
5. Transfer to Baking Dish: Once all your ingredients are well combined, transfer the mixture into a greased baking dish. An 8×8 inch dish works well for this recipe. Spread the mixture evenly, smoothing the top to create a uniform layer.
Importance of Mixing Ingredients
The way you mix your ingredients can significantly affect the flavor distribution in your dip. Ensure that you don’t overmix after adding the beans and vegetables to maintain texture. A gentle folding motion helps keep the ingredients intact while ensuring that the cream cheese and sour cream coat everything evenly. This process is key to achieving a dip that is flavorful in every bite.
Optional Toppings
While the base of Cheesy Fiesta Chili Dip is delicious on its own, consider adding optional toppings to elevate the dish further. Ingredients like additional shredded cheese, sliced jalapeños, or a sprinkle of taco seasoning can add an exciting twist to your dip. Fresh cilantro or diced tomatoes can also provide a burst of freshness and color, enhancing the overall presentation.
Baking Your Dip to Perfection
Once your dip is assembled in the baking dish, it’s time to bake it to perfection. The baking process is essential for melding the flavors and ensuring a bubbly, golden top.
Baking Temperature and Time
Place your dip in the preheated oven and bake for approximately 20-25 minutes. Keep an eye on it during the last few minutes; you want the cheese to melt completely and the dip to be hot and bubbly. If you’ve added extra cheese on top, it should be melted and slightly browned, creating a delicious crust.
Baking at the right temperature is crucial for achieving the ideal consistency. Too low, and the dip may not heat through properly, leading to a cold center. Too high, and you risk burning the top before the inside is fully heated. A moderate temperature ensures that the dip warms evenly, allowing all the flavors to blend beautifully.
—
In the next section, we’ll explore serving suggestions and additional tips for making your Cheesy Fiesta Chili Dip a show-stopping appetizer at your next gathering. Get ready to impress your guests with this mouthwatering dish that is sure to become a favorite!
How to Tell if the Dip is Done: Visual Cues and Texture
Knowing when your Cheesy Fiesta Chili Dip is perfectly cooked can elevate your snacking experience. Here are some visual cues and texture indicators to guide you:
1. Color Change: The dip should exhibit a beautiful, golden-brown color on the surface. This indicates that the cheese has melted and is beginning to caramelize, adding a rich flavor.
2. Bubbling: Look for gentle bubbling around the edges of the dip. This is a clear sign that the ingredients are heated through and the cheese is melting properly.
3. Texture: When you stir the dip, it should be creamy and smooth without any chunks of unmelted cheese. If it feels too thick or grainy, it may need a little more time in the oven.
4. Temperature: Use a food thermometer to check the internal temperature, which should reach at least 165°F (74°C) to ensure it’s hot and safe to consume.
5. Cheese Consistency: The cheese should be stretchy when you scoop some onto a chip, indicating that it has melted appropriately. If it clumps together, it might need a few more minutes.
Tips for Achieving a Golden Cheese Layer Without Burning
Achieving that perfect golden cheese layer requires a bit of technique. Here are some tips to help you get it right:
1. Temperature Control: Bake your dip at a moderate temperature, around 350°F (175°C). High temperatures can cause the cheese to burn quickly, leaving you with an undesirable taste.
2. Covering: If your dip is browning too fast, cover it loosely with aluminum foil for part of the baking time. This will prevent direct heat from burning the cheese while still allowing it to cook through.
3. Broiling Technique: For the last few minutes of baking, you can switch to broil mode. Keep a close eye on it, as it can go from perfectly golden to burnt in seconds.
4. Cheese Selection: Use a blend of cheeses for the best melt and flavor. Cheddar, Monterey Jack, and cream cheese work well together, but feel free to experiment with others like Gouda or Pepper Jack for extra flavor.
Serving Suggestions for Cheesy Fiesta Chili Dip
The presentation of your Cheesy Fiesta Chili Dip can enhance its appeal and make it a hit at any gathering. Here are some best practices and creative ideas for serving:
Best Practices for Serving: Ideal Accompaniments
1. Tortilla Chips: The classic pairing for your dip, tortilla chips provide the perfect crunch and scoopability. Opt for thick, sturdy chips that can hold up against the creamy dip.
2. Vegetable Sticks: For a healthier option, serve the dip with an assortment of vegetable sticks like carrots, celery, and bell peppers. This provides a refreshing crunch and a nutritious alternative.
3. Pita Chips: These offer a different flavor profile and texture, making them a fun alternative to traditional tortilla chips.
Creative Serving Ideas for Parties and Gatherings
1. Mini Taco Bowls: Use small taco bowls to serve individual portions of the dip. This not only looks appealing but also makes it easy for guests to grab and enjoy.
2. Chili Cheese Nachos: Layer tortilla chips in a baking dish, top with the Cheesy Fiesta Chili Dip, and add additional toppings like diced jalapeños, olives, and green onions for a nacho bar experience.
3. Bread Bowl: Hollow out a round loaf of bread and fill it with the hot dip. Serve with the bread pieces for dipping, creating a fun and shareable presentation.
Pairing Suggestions with Beverages
1. Beers: Light lagers or IPAs complement the cheesy richness of the dip. Choose something refreshing that won’t overpower the flavors.
2. Cocktails: Margaritas or mojitos can provide a delightful contrast to the spicy and cheesy elements of the dip.
3. Non-Alcoholic Options: Offer soda or sparkling water with lime to cleanse the palate and refresh your guests.
Variations and Customizations
One of the best things about Cheesy Fiesta Chili Dip is its versatility. Here are some ideas to customize your dip to suit different tastes and dietary needs:
Exploring Different Bean Options: No Beans vs. With Beans
1. With Beans: Adding black beans or pinto beans can enhance the dip’s texture and nutritional value. They add fiber and protein, making the dip even more satisfying.
2. No Beans: For a smoother texture, you can skip the beans altogether, allowing the cheesy and chili flavors to take center stage.
Substitutions for Dietary Restrictions
1. Vegan Cheese: If you’re catering to a vegan audience, substitute dairy cheese with high-quality vegan cheese. Look for brands that melt well for the best results.
2. Gluten-Free Options: Ensure all ingredients used, including chips and seasoning blends, are certified gluten-free.
3. Low-Fat Alternatives: Use reduced-fat cream cheese and cheese options to create a lighter version without sacrificing too much flavor.
Experimenting with Spices and Additional Toppings for Personalized Flavor
1. Spices: Experiment with adding spices such as cumin, smoked paprika, or cayenne pepper to elevate the flavor profile. Adjust the spice levels according to your preference.
2. Toppings: Consider garnishing with fresh cilantro, diced tomatoes, or sliced green onions for added freshness and presentation.
3. Meat Additions: For meat lovers, incorporating cooked ground beef or shredded chicken can turn the dip into a hearty dish that’s sure to satisfy.
Nutritional Information
Understanding the nutritional content of your Cheesy Fiesta Chili Dip can help you enjoy it guilt-free. Here’s a breakdown of what to expect:
1. Nutritional Content per Serving: A standard serving (about 1/4 cup) of Cheesy Fiesta Chili Dip may contain approximately:
– Calories: 250
– Total Fat: 18g
– Saturated Fat: 10g
– Protein: 10g
– Carbohydrates: 15g
– Fiber: 2g
2. Discussion on Calorie Count, Fat Content, and Protein Levels: While this dip provides a satisfying snack, it’s important to enjoy it in moderation due to its higher calorie and fat content. However, it also offers a good source of protein, particularly if you include beans or meat.
3. Healthier Alternatives and Modifications for a Lighter Version: Consider reducing the amount of cheese and using low-fat cream cheese or Greek yogurt in place of sour cream. This can cut down on calories while still maintaining a creamy texture.
Conclusion
Cheesy Fiesta Chili Dip is not just a snack; it’s a versatile dish that brings people together. Its creamy, cheesy goodness paired with a touch of spice makes it a perfect appetizer for gatherings, game days, and casual snacking. The ability to customize this dip with various ingredients ensures it can cater to diverse tastes and dietary needs, making it a crowd-pleaser.
Whether you stick to the classic version or explore new variations, this dip is sure to impress. So, gather your friends and family, whip up a batch, and experience the joy of cooking and sharing delicious food. The next time you need an easy yet impressive dish, remember this Cheesy Fiesta Chili Dip—it’s bound to be a hit!