
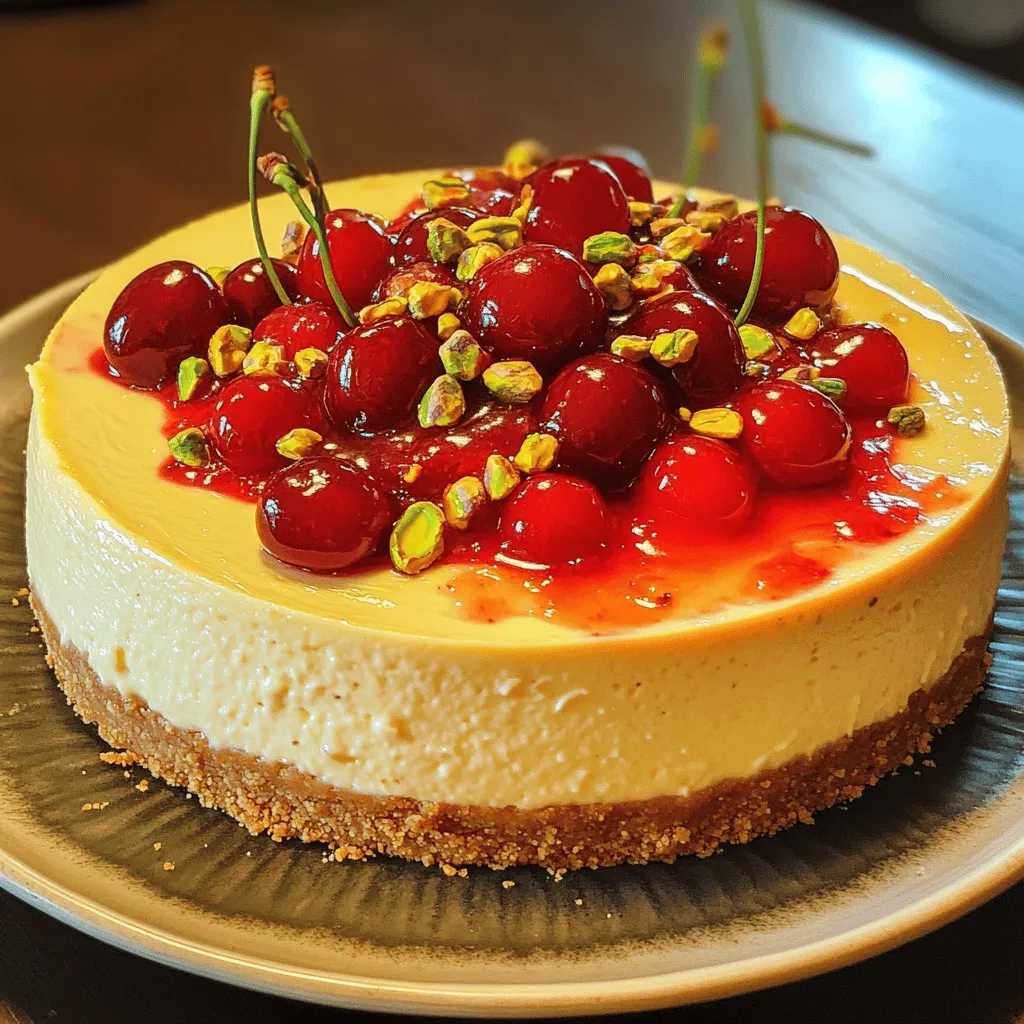
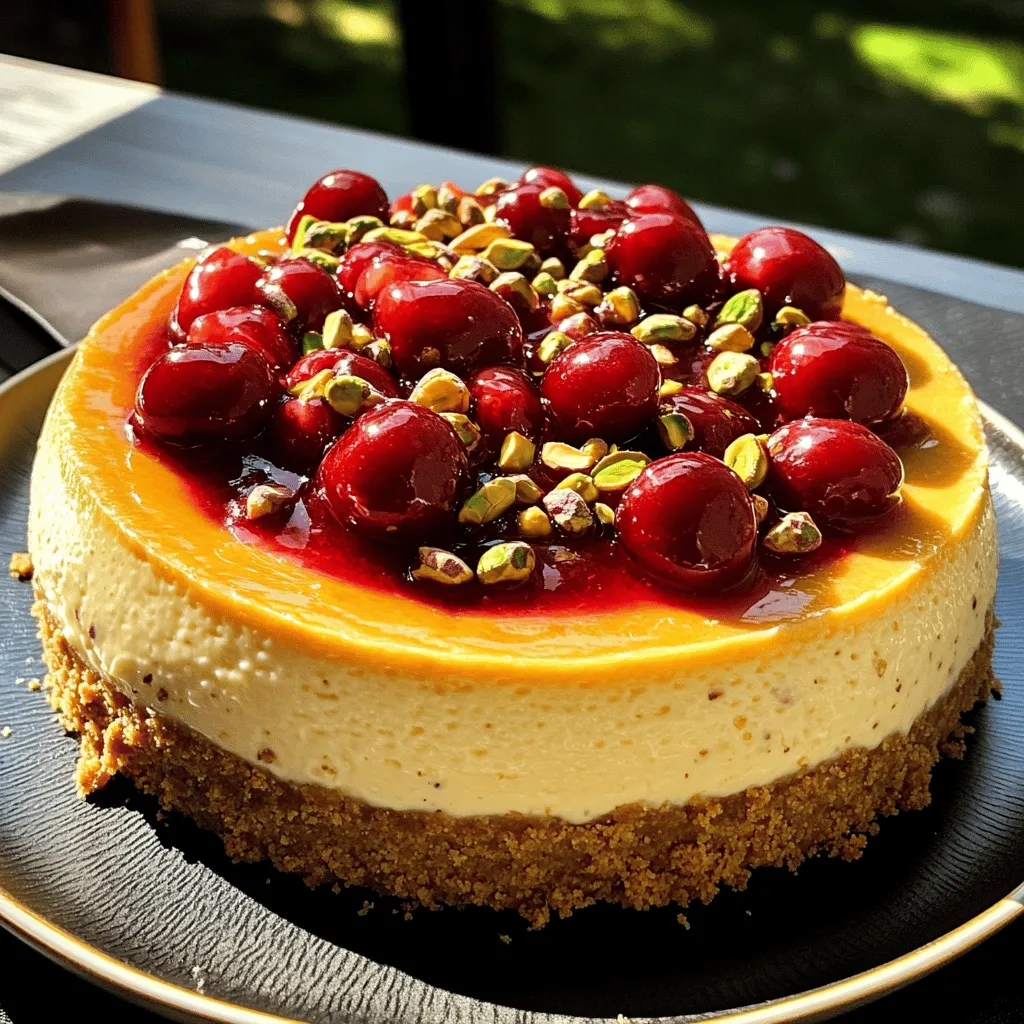
Are you ready to indulge in a deliciously creamy treat? This Cherry Pistachio Cheesecake mixes rich flavors and textures in a unique way. With a buttery graham cracker crust, a smooth cream cheese filling, and delightful cherry and pistachio toppings, this dessert will impress everyone at your gathering. Get your apron on as we dive into the easy steps to create this delightful masterpiece!
Ingredients
List of Ingredients
– 1 ½ cups graham cracker crumbs
– ½ cup unsalted butter, melted
– 2 tablespoons granulated sugar
– 16 oz cream cheese, softened
– 1 cup powdered sugar
– 1 teaspoon vanilla extract
– 1 cup sour cream
– 2 large eggs
– 1 cup cherry pie filling
– ½ cup pistachios, chopped (plus extra for topping)
– A pinch of salt
When I make Cherry Pistachio Cheesecake, I always start with the ingredients. This cheesecake shines with a mix of flavors. The graham cracker crumbs form a sweet, crunchy crust. The melted butter makes it rich and holds it all together. Granulated sugar adds just the right touch of sweetness.
Next, I use cream cheese for that creamy texture. I always let it soften first. This step makes mixing easier. Then, I add powdered sugar to sweeten the filling. A hint of vanilla extract brightens the flavor.
Sour cream is a must for a bit of tang. It balances out the sweetness. I also add two large eggs. They help the cheesecake set and give it a smooth feel.
The stars of this dish are the cherry pie filling and chopped pistachios. The cherries add a burst of fruitiness. The pistachios bring a lovely crunch. I also add a pinch of salt, which enhances all the flavors.
Step-by-Step Instructions
Preparing the Crust
– Preheat the oven to 325°F (160°C).
– In a bowl, combine 1 ½ cups of graham cracker crumbs, ½ cup of melted butter, and 2 tablespoons of granulated sugar.
– Mix until all the crumbs are wet.
– Press this mixture into the bottom of a 9-inch springform pan.
– Bake for 10 minutes. Let it cool.
Making the Cheesecake Filling
– In a large bowl, beat 16 oz of softened cream cheese until smooth.
– Gradually add 1 cup of powdered sugar while mixing.
– Next, add 1 teaspoon of vanilla extract, 1 cup of sour cream, a pinch of salt, and 2 large eggs.
– Mix until the mixture is creamy. Be careful not to overmix.
Combining Cherry and Pistachio
– Gently fold in 1 cup of cherry pie filling and ½ cup of chopped pistachios.
– Make sure the cherries stay intact.
Baking and Cooling the Cheesecake
– Pour the cheesecake filling over the cooled crust.
– Bake for 45-50 minutes until the edges are set but the center is slightly jiggly.
– Turn off the oven and crack the door. Let the cheesecake cool for about an hour.
Chilling and Serving
– Refrigerate for at least 4 hours or overnight for the best flavor.
– Before serving, top with extra cherry pie filling and chopped pistachios.
– Remove the sides of the springform pan and slice with a clean knife.
Tips & Tricks
Achieving the Perfect Texture
To get a smooth cheesecake, avoid overmixing the filling. Mix just until the ingredients blend well. Overmixing adds air, which can make the cheesecake crack. Chilling time is crucial. Let your cheesecake cool in the oven with the door cracked. Then, refrigerate for at least four hours. Overnight chilling is best for flavors to develop.
Flavor Enhancements
You can add fun flavors to your cheesecake. Try mixing in citrus zest for a fresh kick. Chocolate swirls also create a rich taste. For serving, consider topping with whipped cream or a drizzle of chocolate sauce. This adds a nice touch and makes each slice look beautiful.
Serving Recommendations
Presentation matters when serving your cheesecake. Use elegant dessert plates to impress your guests. Top each slice with extra cherry filling and pistachios for a pop of color. This cheesecake shines at parties, holidays, or family gatherings. It’s a great way to celebrate any occasion.
Variations
Alternative Fruit Toppings
You can switch up the cherry topping for fresh berries or other fruits. Strawberries, blueberries, and raspberries work well. You can also use fruit compotes for a sweet sauce. Seasonal fruits make each cheesecake unique. In summer, use peaches or plums. In fall, pumpkins or apples can add a twist.
Health-Conscious Adjustments
If you want a low-carb crust, use almond flour instead of graham crackers. You can also use gluten-free cookies for a base. For dairy alternatives, try using cashew cream in place of cream cheese. Coconut yogurt can replace sour cream for a creamy texture. These swaps can make this dessert fit different diets.
Mini Cheesecake Versions
To create mini cheesecakes, use a muffin tin with liners. Fill each liner with crust and filling. Bake for about 20-25 minutes. Keep an eye on them as they bake. They should look set but still jiggle slightly in the center. These bite-sized treats are great for parties or gifts.
Storage Info
Best Storage Practices
To keep your cherry pistachio cheesecake fresh, follow these steps:
– Let the cheesecake cool completely at room temperature.
– Wrap it tightly in plastic wrap.
– Place it in an airtight container.
For best results, use a springform pan to store any leftovers. It helps keep the shape intact. You can also use a glass container with a lid. This method keeps moisture in and prevents odors from getting in.
Freezing the Cheesecake
If you want to enjoy your cheesecake later, freezing is a great option. Here’s how:
1. Cut the cheesecake into slices.
2. Wrap each slice in plastic wrap tightly.
3. Place the wrapped slices in a freezer-safe bag.
4. Label the bag with the date and type of cheesecake.
When you are ready to eat, thaw the cheesecake. Place it in the fridge overnight to keep the texture smooth. Avoid thawing at room temperature to prevent it from getting too soft.
Shelf Life
In the fridge, this cheesecake lasts for about 5 to 7 days. Always check for signs of spoilage. Look for:
– An off smell
– Changes in texture
– Mold growth
If you notice any of these signs, it’s best to throw it away. Enjoying your cheesecake while it’s fresh ensures you taste all the wonderful flavors.
FAQs
Can I use a different type of nut instead of pistachios?
Yes, you can! Almonds or walnuts work well in this recipe. They add a nice crunch and flavor. If you want a sweeter taste, try using hazelnuts. Just chop them up like you would the pistachios. Each nut will change the taste a bit but will still be yummy.
Is it possible to make this cheesecake dairy-free?
Absolutely! You can use dairy-free cream cheese instead of regular cream cheese. Coconut cream is a great alternative for sour cream. For the eggs, you can use flaxseed meal or applesauce as a binder. This way, you can enjoy a creamy cheesecake without dairy.
Can I make this cheesecake in advance?
Yes, you can! I often make it a day before serving. Just prepare and bake the cheesecake, then let it cool. Store it in the fridge for up to three days. It tastes even better after chilling as the flavors blend nicely.
How do I know when the cheesecake is done baking?
Look for the edges to be set and the center to be slightly jiggly. If the outer parts are firm and the middle still moves, it’s perfect. It will firm up as it cools. Trust me, this is the best way to ensure a creamy texture!
This cheesecake recipe is simple and fun. We covered the ingredients, steps, and tips to make it perfect. Remember to chill it well for the best taste and texture. You can even customize it with different fruits or nuts. Storing leftovers is easy, so enjoy it later. With practice, you can impress your friends and family. Now, grab your springform pan and start baking your delicious cheesecake today!


