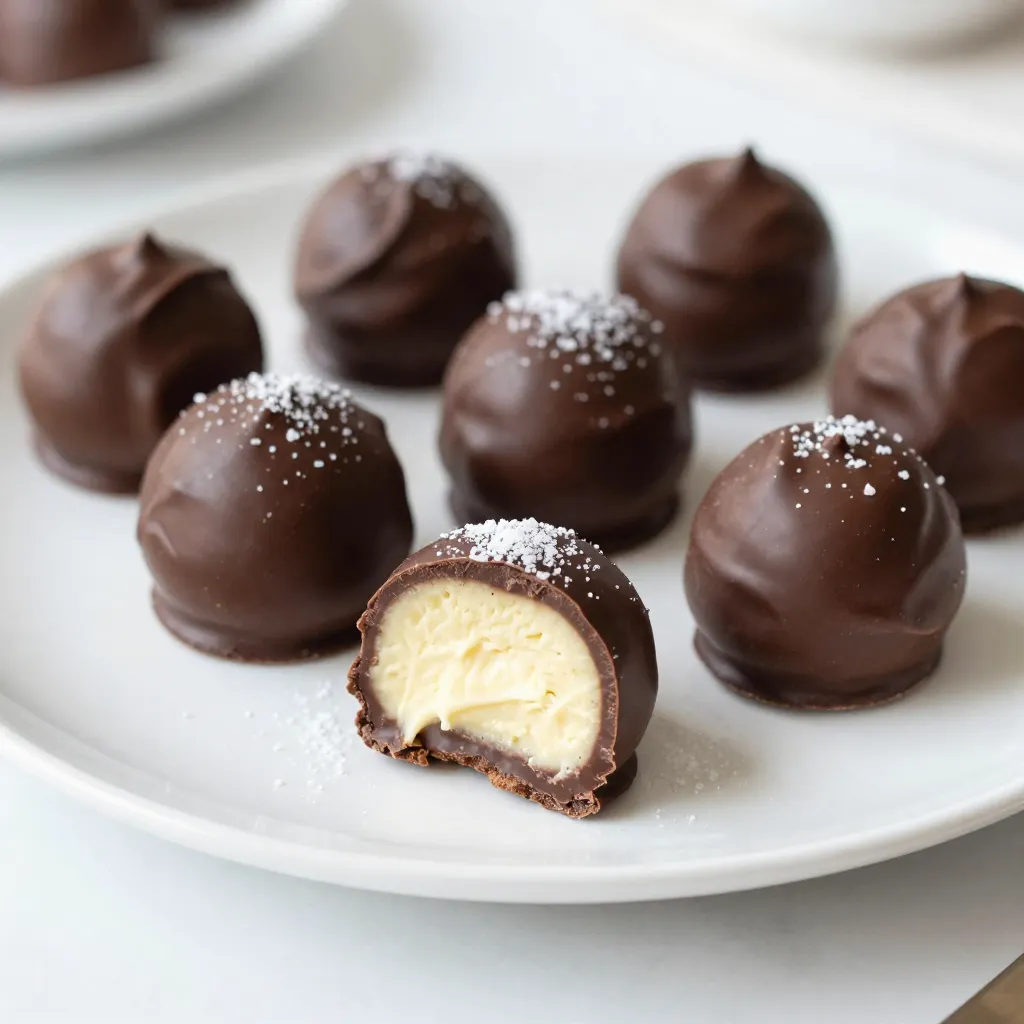
Indulge in a sweet treat that you won’t forget! These Chocolate Covered Cheesecake Bites are pure bliss. With a creamy base and a rich chocolate coating, they are simple to make. Whether you’re hosting a party or just want a tasty snack, these bites will impress everyone. Let’s explore how you can create this irresistible delight step by step! You deserve this delicious experience!
Why I Love This Recipe
- Decadent Flavor: These cheesecake bites combine the rich creaminess of cheesecake with the indulgent taste of chocolate, creating a dessert experience that’s hard to resist.
- Easy to Make: With simple ingredients and straightforward steps, these bites are perfect for both novice and experienced bakers alike.
- Perfect for Parties: These bite-sized treats are ideal for gatherings, allowing guests to enjoy a sweet treat without a fork or plate.
- Customizable: Feel free to experiment with different toppings or chocolate types, making each batch uniquely yours!
Ingredients
Cream Cheese Base
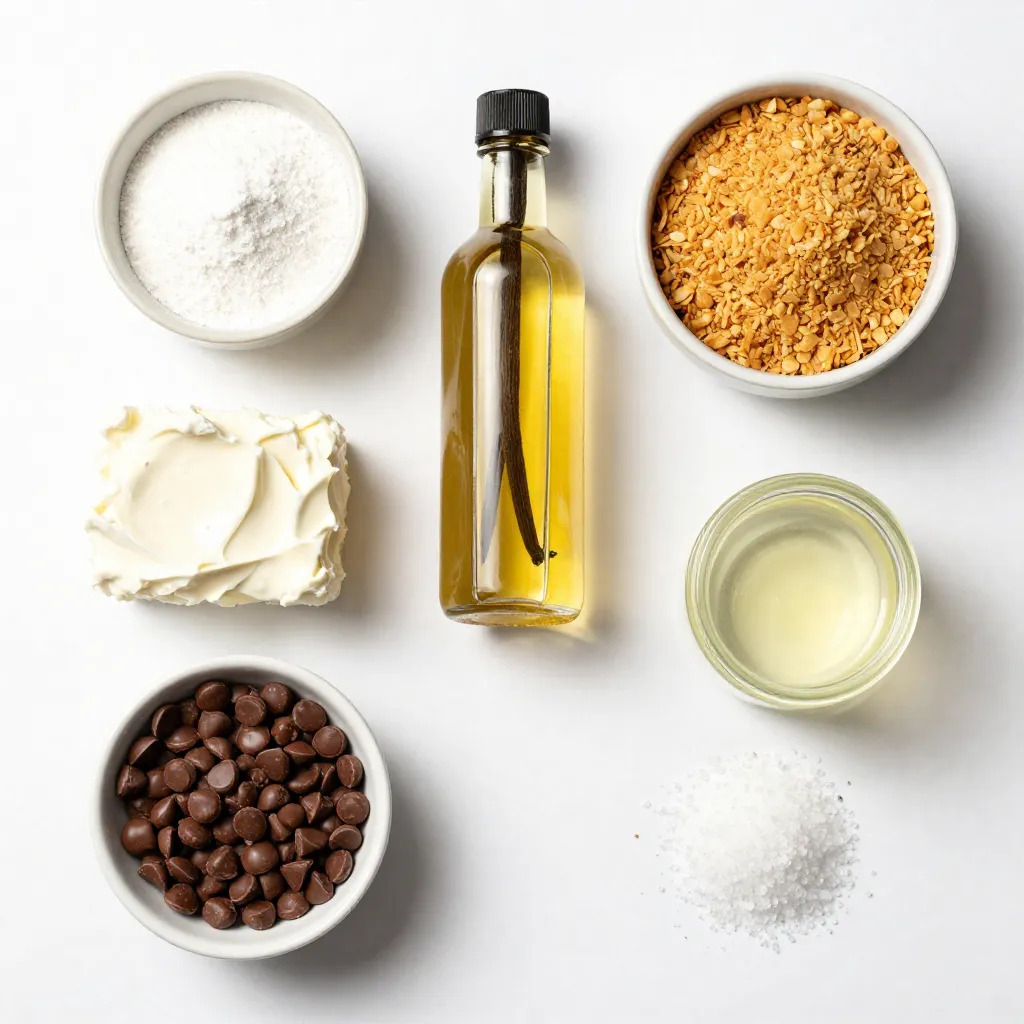
To make the base of these bites, gather the following ingredients:
– 8 oz cream cheese, softened
– 1/2 cup powdered sugar
– 1 tsp vanilla extract
– 1 cup crushed graham crackers
In a big bowl, mix the softened cream cheese with the powdered sugar and vanilla extract. Use an electric mixer to blend until smooth. This mixture gives a rich and creamy taste to the bites.
Chocolate Coating
For the chocolate coating, you’ll need:
– 1/2 cup semi-sweet chocolate chips
– 1 tbsp coconut oil (or vegetable oil)
Melt the chocolate chips and coconut oil together in a microwave-safe bowl. Heat in 30-second bursts, stirring in between until it’s smooth. This coating adds a sweet, rich layer to each cheesecake bite.
Optional Garnishes
To enhance the flavor, consider these garnishes:
– Sea salt, for sprinkling on top
A small pinch of sea salt balances the sweetness and adds a nice touch. You can skip it if you prefer a sweeter bite.
Step-by-Step Instructions
Mixing the Cheesecake Filling
To make the filling, start with a large bowl. Add 8 oz of softened cream cheese. Then, mix in 1/2 cup powdered sugar and 1 tsp vanilla extract. Use an electric mixer to beat the mixture until it is smooth and creamy. This step is key for a great taste. After that, gently fold in 1 cup of crushed graham crackers. Mix until everything is well combined. This adds that classic cheesecake flavor and texture.
Forming the Cheesecake Bites
Next, you need to form the bites. Use a mini ice cream scoop or your hands. Grab some mixture and roll it into small balls. Each ball should be about 1 inch in diameter. Place the formed bites on a baking sheet lined with parchment paper. This helps prevent sticking. Once all are shaped, freeze them for at least 30 minutes. This step helps them hold their shape when coated.
Melting and Coating with Chocolate
While the bites freeze, it’s time to melt the chocolate. In a microwave-safe bowl, combine 1/2 cup semi-sweet chocolate chips and 1 tbsp coconut oil. Heat this mixture in 30-second intervals. Stir in between until the chocolate is fully melted and smooth. This will be your delicious coating. After the bites are firm, take them out of the freezer. Dip each frozen bite into the melted chocolate. Let any excess chocolate drip off before placing them back on the baking sheet.
Final Touches
For an extra touch, sprinkle a pinch of sea salt on top of each chocolate-covered bite before the chocolate sets. This adds a nice contrast to the sweetness. Once all the bites are coated, return them to the freezer for about 15 minutes. This will help the chocolate firm up completely. After that, serve them chilled and enjoy these sweet, creamy treats!
Tips & Tricks
Ensuring Perfect Texture
To get the best texture, start with room-temperature cream cheese. It blends easily and creates a smooth mixture. Mixing the cream cheese, sugar, and vanilla well is key. Aim for a creamy, lump-free filling. When you fold in the graham crackers, do it gently. This keeps the mixture light and fluffy.
Chocolate Melting Techniques
Melting chocolate can be tricky. I recommend using a microwave for ease. Place chocolate chips and coconut oil in a microwave-safe bowl. Heat for 30 seconds, then stir. Repeat until smooth. Stirring helps avoid burning. If you prefer, you can use a double boiler on the stove. Both methods will work well if done right.
Serving Suggestions
Serve these bites chilled for the best flavor. You can also add a touch of sea salt on top for a salty-sweet combo. Arrange them on a pretty plate for a nice presentation. They make great treats for parties or gatherings. Pair them with fresh fruit or a nice coffee for a delightful dessert moment.
Pro Tips
- Chill the Cream Cheese: Ensure your cream cheese is fully softened to room temperature for a smoother mixture. This makes it easier to incorporate the powdered sugar and vanilla extract.
- Perfectly Coated Bites: When dipping the cheesecake bites in chocolate, make sure they are firm from the freezer to prevent them from melting. A quick dip in warm chocolate will create a perfect shell.
- Graham Cracker Crunch: For added texture, use a mix of finely crushed graham crackers and some larger pieces. This will give your cheesecake bites a delightful crunch.
- Experiment with Flavors: Feel free to add a splash of your favorite liqueur or flavored extract to the cheesecake mixture for a twist. Almond or orange extracts work beautifully!
Variations
Flavor Add-Ins
You can easily change the flavor of your cheesecake bites. Try adding 1 tablespoon of lemon juice for a tangy twist. You can also mix in a few tablespoons of your favorite fruit puree. How about raspberry or strawberry? They add color and taste. You can even add a few chocolate chips for a richer feel. Experiment with flavors to find your favorite!
Alternative Coatings
While semi-sweet chocolate is great, you can try white chocolate or dark chocolate. Melt them the same way as before. If you want a fun crunch, use crushed nuts or sprinkles. You can even dip them in candy melts for bright colors. Each coating gives a unique taste and look.
Dietary Modifications
If you need dairy-free options, use vegan cream cheese. You can swap powdered sugar with coconut sugar for a healthier choice. For gluten-free bites, choose gluten-free graham crackers. These changes let everyone enjoy the treat without worry. Always check labels to ensure they meet your needs!
Storage Information
Refrigeration Tips
To keep your chocolate covered cheesecake bites fresh, store them in the fridge. Use an airtight container to avoid moisture. Place parchment paper between layers if you stack them. This helps prevent sticking. They stay fresh for about a week this way.
Freezing Instructions
You can freeze these bites too! Once they are fully set, place them in a single layer on a baking sheet. After they freeze, transfer them to a freezer-safe container. Make sure to separate layers with parchment paper. They can stay frozen for up to three months. Just thaw them in the fridge before serving.
Shelf Life
When stored correctly, these bites have a good shelf life. In the fridge, they last about 7 days. In the freezer, they can last for up to three months. Just remember, the fresher they are, the better they taste!
FAQs
Can I use different types of chocolate?
Yes, you can use any chocolate you like! Dark chocolate adds a rich taste. Milk chocolate gives a sweeter flavor. White chocolate is creamy and sweet. Each type brings a unique twist to your cheesecake bites. Just remember to melt it the same way as semi-sweet chocolate.
How do I make these cheesecake bites ahead of time?
Making cheesecake bites ahead is easy. You can freeze them after coating in chocolate. Place them in an airtight container. Keep them in the freezer for up to three months. Thaw them in the fridge before serving. This way, you always have a sweet treat ready!
What are the best serving suggestions for cheesecake bites?
Serve your cheesecake bites chilled for the best taste. They look great on a dessert platter. You can also top them with fresh fruit or whipped cream. For a fun twist, try drizzling caramel or chocolate sauce on top. These bites are perfect for parties or a sweet snack!
We explored the fun and easy steps to make delicious cheesecake bites. First, we combined cream cheese and crafted a chocolate coating. Then, I shared tips for perfect texture and serving ideas. You can also try different flavors and dietary shifts to fit your needs. Store these treats properly for the best taste. Now, you have all the tools to make tasty cheesecake bites. Enjoy the process and share your result