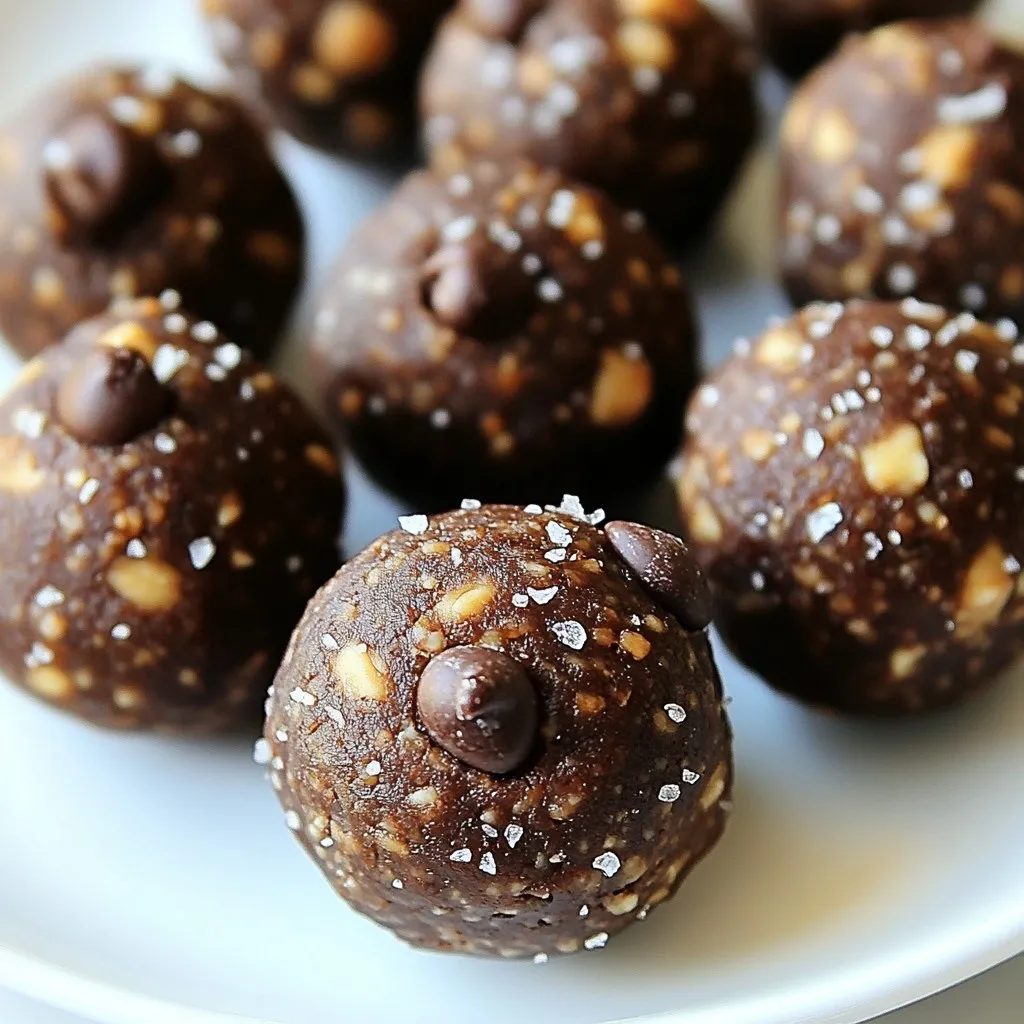
Are you ready to satisfy your sweet tooth while boosting your energy? These Chocolate Peanut Butter Protein Balls are both yummy and simple to make! In this post, I’ll guide you through step-by-step instructions, nutritional benefits, and tips for perfecting your treats. Whether you’re a workout warrior or just love a good snack, this recipe is for you. Let’s dive in and whip up a batch of these delicious bites!
Why I Love This Recipe
- Nutritious Energy Boost: These protein balls are packed with wholesome ingredients, providing a great source of energy and nutrition for your busy day.
- Easy to Make: With just a few simple steps, you can whip up a batch in no time, making them perfect for meal prep or a quick snack.
- Customizable Flavor: You can easily tweak the recipe by adding your favorite nuts, seeds, or dried fruits for a personalized touch.
- Deliciously Satisfying: The combination of chocolate and peanut butter creates a tasty treat that satisfies your sweet cravings without the guilt.
Ingredients
List of Ingredients
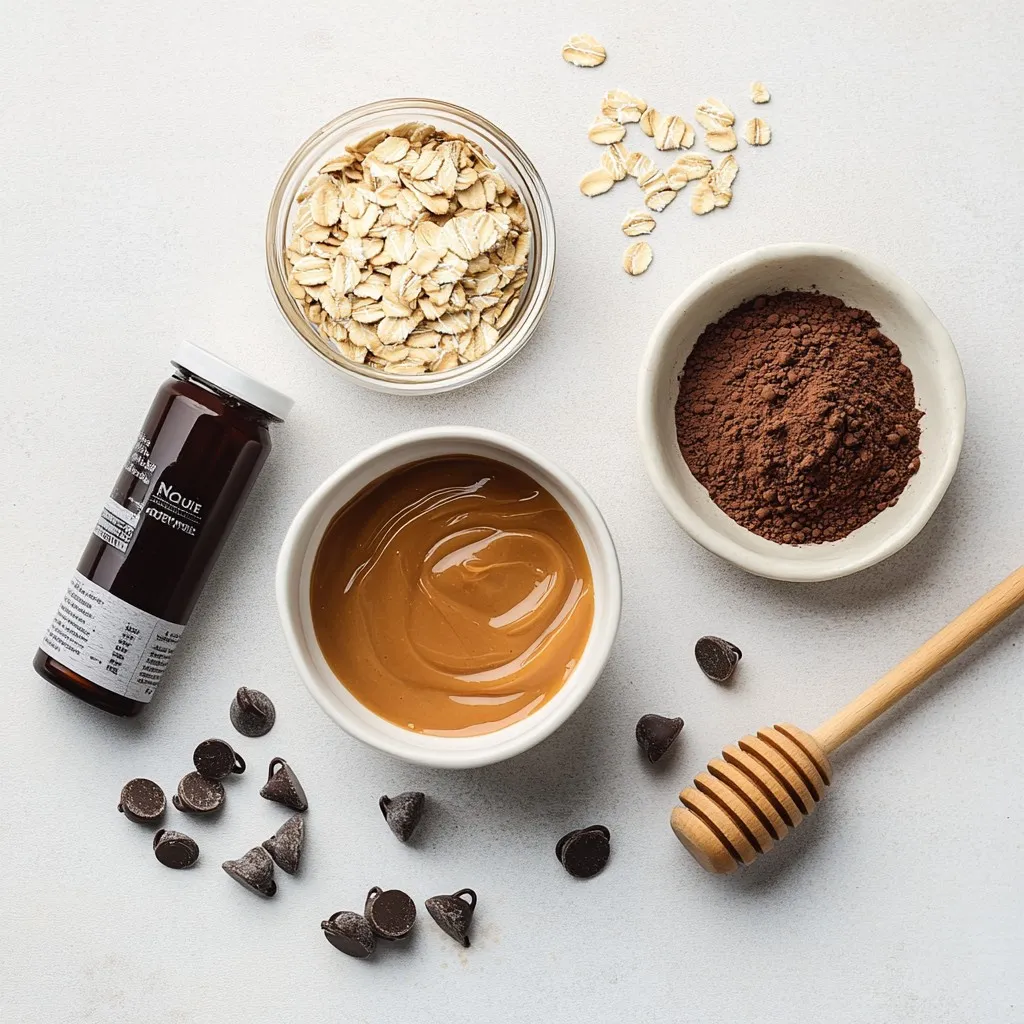
To make these tasty Chocolate Peanut Butter Protein Balls, you will need:
– 1 cup natural peanut butter
– 1/2 cup honey or maple syrup
– 1 cup rolled oats
– 1/2 cup chocolate protein powder
– 1/4 cup unsweetened cocoa powder
– 1/4 cup mini dark chocolate chips
– 1/2 teaspoon vanilla extract
– Pinch of sea salt
Nutritional Benefits
These protein balls pack a punch of nutrition. They provide protein from the peanut butter and protein powder. This helps build and repair muscles. The oats give you fiber, which aids digestion and keeps you full longer. Honey or maple syrup adds natural sweetness and some quick energy. Dark chocolate chips give antioxidants, which are great for your health. The cocoa powder adds flavor and is rich in iron and magnesium.
Ingredient Substitutions
If you want to change things up, you can swap some ingredients. For a nut-free option, try sunflower seed butter instead of peanut butter. If you want it vegan, use maple syrup instead of honey. You can use almond flour or coconut flour in place of oats if you prefer a different texture. If you don’t have chocolate protein powder, vanilla protein powder works just fine. Just remember, each change might slightly alter the taste or texture.
Step-by-Step Instructions
Preparation Steps
To make these chocolate peanut butter protein balls, start with a big bowl. First, mix the peanut butter and honey together. You can also use maple syrup if you like. Stir until the two combine well. Next, add rolled oats, chocolate protein powder, cocoa powder, vanilla extract, and a pinch of sea salt. Mix everything well. Be sure to get all the dry ingredients in. Finally, fold in mini dark chocolate chips. This gives your protein balls a sweet touch.
Tips for Mixing and Rolling
When rolling the balls, wet your hands a bit if the mixture sticks. This helps you form nice, round balls. Aim for about 1 inch in size. If you want, you can also use a cookie scoop to make this easier. Just be sure to pack the mixture well in the scoop. Place each ball on a parchment-lined baking sheet or plate. It keeps them from sticking.
Setting Time Requirements
Now that you have your balls shaped, it’s time to chill them. Put the baking sheet in the fridge for at least 30 minutes. This helps the protein balls firm up. After that, they are ready to eat! You can store them in an airtight container in the fridge for up to two weeks. Enjoy these tasty treats anytime you need a quick snack!
Tips & Tricks
How to Get the Perfect Texture
To achieve the best texture for your protein balls, balance is key. Use natural peanut butter, as it has the right oil content for smoothness. Make sure your peanut butter is well-mixed before adding it to the bowl. If you find the mix too sticky, dampen your hands when rolling the balls. This method helps shape them easily. Aim for a size of about 1 inch; this gives a nice bite.
Avoiding Common Mistakes
One common mistake is not measuring ingredients correctly. Always use measuring cups for accuracy. Another issue can arise from using too much cocoa powder, which can make the balls dry. Stick to the recipe for balance. Some might skip the refrigeration step, but chilling helps the balls firm up. This is important for keeping their shape.
Serving Suggestions
These protein balls are a great snack on the go. You can serve them as a pre-workout boost or a post-meal treat. Pair them with fresh fruit or yogurt for extra nutrition. You can also add them to lunch boxes for a healthy option. They are perfect for sharing at gatherings or as a quick snack for kids after school.
Pro Tips
- Use Natural Peanut Butter: Opt for a natural peanut butter without added sugars or oils for a healthier alternative.
- Experiment with Sweeteners: Feel free to substitute honey with maple syrup or agave nectar to cater to your taste preferences or dietary needs.
- Chill for Better Texture: Allowing the protein balls to chill in the refrigerator not only helps them firm up but also enhances the flavors.
- Customize Add-ins: Mix in other ingredients like chopped nuts, seeds, or dried fruits for additional flavor and texture variations.
Variations
Flavor Variations
You can switch up the nut butter in this recipe. Try almond butter or cashew butter. Each nut butter gives a new taste. If you love coconut, add some coconut butter. This change makes the balls richer and creamier. You can also swap the cocoa powder for carob powder. This will give a sweet, unique flavor.
Dietary Modifications
Want a vegan option? Use maple syrup instead of honey. All the other ingredients are already vegan. For a gluten-free version, just use gluten-free oats. This keeps the protein balls safe for those with gluten issues. You can also find gluten-free protein powders for extra safety.
Additional Mix-ins
Add nuts or seeds for extra crunch. Chopped almonds or walnuts work great. You could also add chia seeds or flaxseeds for added health benefits. These seeds boost fiber and omega-3s. Dried fruits like cranberries or raisins can add a sweet twist. Just remember, mix-ins change the texture. Adjust the binding ingredients if needed.
Storage Info
Best Practices for Storage
To keep your Chocolate Peanut Butter Protein Balls fresh, store them in an airtight container. This will prevent them from drying out or absorbing other smells from the fridge. You can also layer parchment paper between the balls to avoid sticking. Make sure to keep them in the refrigerator. This will help them stay firm and tasty.
Freezing Instructions
If you want to keep your protein balls longer, freezing is a great option. Place the balls on a baking sheet in a single layer. Freeze them for about 1-2 hours until firm. After that, move the balls to a freezer-safe bag or container. This way, they will stay fresh for up to three months. Just thaw them in the fridge before you enjoy them!
Shelf Life
When stored correctly in the fridge, these protein balls last up to two weeks. If you freeze them, they can last up to three months. Keeping track of your batch is key. Always check for any changes in smell or texture before eating. This will ensure you enjoy every bite of your delicious snack!
FAQs
How long do Chocolate Peanut Butter Protein Balls last?
These protein balls last up to two weeks in the fridge. Store them in an airtight container. Make sure to keep them cool to maintain their texture and taste. After a week, check for any changes in smell or texture. If they seem off, it’s best to toss them.
Can I use another type of protein powder?
Yes, you can use different protein powders. Look for flavors that match or enhance the chocolate and peanut butter. Vanilla protein powder works well, too. Just keep in mind that this may change the taste and texture slightly. Test it out to see what you like best.
What are the health benefits of these protein balls?
Chocolate peanut butter protein balls are a great snack. They are high in protein, which helps build and repair muscles. The oats provide fiber, keeping you full and satisfied. Peanut butter offers healthy fats, while cocoa adds antioxidants. This snack is not only tasty but also good for you!
This blog post covered all you need to know about making Chocolate Peanut Butter Protein Balls. You learned about the key ingredients and their benefits, plus some useful substitutions. We explored step-by-step instructions for prep and mixing, and I shared tips to avoid common mistakes. I also discussed variations, storage tips, and answered some FAQs.
Now, you can enjoy these tasty snacks with confidence. They are healthy, simple, and fun to mak