Introduction
There’s something uniquely comforting about the smell of homemade biscuits wafting through the kitchen. Whether you enjoy them alongside a warm bowl of soup, as a base for savory dishes, or simply slathered with butter and jam, biscuits evoke feelings of warmth and nostalgia. They’re a staple in many households, especially in the South, where they’re often served at breakfast or as part of a hearty meal. What sets a truly great biscuit apart from the rest? The secret lies in the ingredients and techniques, particularly the use of buttermilk, which not only enhances the flavor but also contributes to the delightfully fluffy texture that makes each bite irresistible.
Buttermilk is a key player in biscuit-making. Its acidity reacts with the baking soda, producing carbon dioxide bubbles that give biscuits their signature lift. This unique ingredient also adds a slight tang, balancing the richness of the butter and creating a depth of flavor that elevates your biscuits to the next level. If you’re eager to learn how to make the perfect fluffy buttermilk biscuits that can complement any meal, then get ready to roll up your sleeves and dive into this delicious recipe.
Understanding the Ingredients
To create the ultimate fluffy buttermilk biscuits, it’s essential to understand the role of each ingredient in the recipe. Each component contributes to the final product’s texture, flavor, and overall success.
All-Purpose Flour
All-purpose flour serves as the foundation of the biscuit dough. It provides the necessary structure and texture, allowing the biscuits to rise beautifully while still remaining tender. When measuring flour, it’s crucial to use the spoon-and-level method to avoid packing too much flour into your measuring cup, which can lead to dense biscuits.
Baking Powder and Baking Soda
The combination of baking powder and baking soda is what gives your biscuits their lift. Baking powder, a leavening agent, contains both an acid and a base, creating carbon dioxide bubbles when mixed with moisture and heated. Baking soda, on the other hand, needs an acid (in this case, buttermilk) to activate. The dual action of these leavening agents ensures that your biscuits rise properly and have a light, airy texture.
Salt
Though it may seem like a small addition, salt is crucial for enhancing the overall flavor of your biscuits. It brings out the natural flavors of the other ingredients and balances the richness of the butter. Be sure to include salt in your dry ingredient mixture to ensure even distribution throughout the dough.
Cold Butter
Using cold butter is vital for achieving the flaky layers that are characteristic of a great biscuit. When cold butter is cut into the flour, it creates pockets of fat that, during baking, steam and expand, resulting in tender, flaky layers. Make sure your butter is chilled before you begin, and consider cutting it into small cubes for easier incorporation into the flour mixture.
Buttermilk
Buttermilk is the star ingredient in this recipe. It not only provides moisture but also contributes to the biscuits’ tender crumb and tangy flavor. The acidity of buttermilk works in tandem with the baking soda, creating the lift that makes biscuits fluffy. If you don’t have buttermilk on hand, you can easily make a substitute by mixing milk with a tablespoon of vinegar or lemon juice and letting it sit for about five minutes.
Optional Honey
While traditional buttermilk biscuits are not sweet, a touch of honey can add a subtle sweetness that complements the savory flavors. If you choose to include honey, it will enhance the flavor profile of the biscuits without overpowering them. Just be mindful of the additional moisture it brings, and adjust your liquid ingredients accordingly.
Extra Flour for Dusting
When working with biscuit dough, having extra flour on hand for dusting is crucial. It prevents the dough from sticking to your work surface and your hands, making it easier to roll out and shape your biscuits. Be generous but cautious; too much flour can alter the dough’s texture.
Step-by-Step Guide to Making Fluffy Buttermilk Biscuits
Now that you understand the importance of each ingredient, let’s walk through the steps to create your fluffy buttermilk biscuits. Follow these instructions carefully for the best results.
Prepping the Kitchen for Success
Before you start mixing your ingredients, it’s essential to prepare your kitchen for a smooth cooking experience. Begin by preheating your oven to 425°F (220°C). This high temperature is crucial for achieving that perfect rise and golden-brown finish.
Next, line a baking sheet with parchment paper or lightly grease it to prevent the biscuits from sticking. Having your baking sheet ready to go will save you time and allow you to transfer your biscuits to the oven promptly after cutting them out.
Mixing the Dry Ingredients
In a large mixing bowl, combine your all-purpose flour, baking powder, baking soda, and salt. Use a whisk to thoroughly mix these dry ingredients together. Whisking is important as it ensures that the leavening agents are evenly distributed throughout the flour, which is vital for consistent rising. Take your time with this step to ensure an even mixture.
Incorporating Cold Butter
Once your dry ingredients are well combined, it’s time to incorporate the cold butter. Add the chilled butter cubes to the flour mixture. Using a pastry cutter, fork, or your fingertips, cut the butter into the flour until the mixture resembles coarse crumbs. It’s essential to work quickly and efficiently during this step to maintain the cold temperature of the butter.
You want to see small pea-sized pieces of butter throughout the mixture; these will create those flaky layers when baked. Avoid overworking the dough, as this can lead to tough biscuits. If you find the butter has warmed up too much, you can pop the mixture into the refrigerator for a few minutes to chill before continuing.
Creating the Dough
After cutting in the butter, it’s time to add the buttermilk. Pour the cold buttermilk into the flour mixture and gently mix with a spatula or wooden spoon until just combined. The dough should be slightly sticky but manageable. Avoid overmixing; you want to mix until the dry ingredients are incorporated, but it’s okay if there are a few lumps.
Once mixed, turn the dough out onto a lightly floured surface. Dust your hands and the surface with a bit of extra flour to prevent sticking. Gently knead the dough about 3-4 times, just enough to bring it together. Be careful not to over-knead, as this can result in dense biscuits.
Next, pat the dough into a rectangle about 1-inch thick. This thickness is important as it ensures your biscuits will rise properly while baking. Use a floured rolling pin if necessary, but remember that the goal is to handle the dough as little as possible to maintain its light texture.
This marks the halfway point in your biscuit-making journey. As you continue through the recipe, you’re just a few steps away from enjoying the delightful fluffiness of homemade buttermilk biscuits that will surely impress anyone at your dining table. Stay tuned for the final steps that will guide you through cutting, baking, and serving these delicious biscuits!
The Art of Making Fluffy Buttermilk Biscuits
When it comes to baking biscuits, achieving that perfect fluffy texture requires attention to detail, especially in the mixing and handling of the dough. One of the most critical aspects of biscuit-making is the significance of not overmixing. Overmixing can lead to dense and tough biscuits rather than the light and flaky texture we all desire. This section will walk you through the crucial steps for creating perfectly fluffy buttermilk biscuits.
The Importance of Not Overmixing
Overmixing the biscuit dough can develop gluten, resulting in chewy, dense biscuits instead of the tender, fluffy delights that are the hallmark of a great biscuit. The key is to mix until just combined. You want to see some lumps and a slightly shaggy texture in the dough. This indicates that the ingredients are incorporated without overworking the flour.
Folding and Rolling Technique
When it comes to achieving those delightful layers in your biscuits, the folding and rolling technique is vital. After mixing your dough, turn it out onto a lightly floured surface. Gently pat the dough into a rectangle, about 1 inch thick. Here’s where the folding comes into play. Fold the dough over onto itself in thirds, like a letter. This technique helps to create the layers that will puff up beautifully in the oven.
Detailed Description of Folding the Dough for Layering
After your first fold, rotate the dough 90 degrees and gently roll it out again to about 1 inch thick. Repeat the folding process two more times. This method not only creates layers but also incorporates air into the dough, which is essential for that ideal rise. Remember: the more layers you create, the more flaky and tender your biscuits will be.
Importance of Thickness in Achieving the Right Biscuit Height
When rolling out your biscuits, consistency in thickness is key. Aim for a thickness of about 1 to 1.5 inches. If the dough is rolled too thin, your biscuits will bake up flat and won’t have much height. Conversely, if they’re too thick, they may not cook evenly. The ideal thickness allows for even cooking, ensuring that the insides are fluffy and the outsides are golden brown.
Cutting the Biscuits
Now it’s time to cut out your biscuits. Use a round biscuit cutter to create uniform shapes. It’s essential to apply a firm, even pressure when cutting the dough. Avoid twisting the cutter as you press down; this can seal the edges and prevent the biscuits from rising properly.
Tips for Using a Round Cutter to Minimize Dough Waste
To minimize waste, use a cutter that matches the size you want your biscuits to be. Place the cutter close together, and try to maximize each cut. Gather any scraps of dough, re-pat them gently into a rectangle, and cut out more biscuits. However, avoid overworking the dough with any leftover scraps, as this can lead to toughness.
Placement on Baking Sheet for Optimal Softness
For the best texture, place the cut biscuits on a baking sheet lined with parchment paper. You can arrange them close together, allowing the sides to touch slightly. This method helps them rise upwards rather than spreading outwards, contributing to a soft, tender texture.
Baking the Biscuits
Once your biscuits are cut and placed on the baking sheet, it’s time for the most crucial stage: baking.
Importance of Oven Temperature and Baking Time
Preheat your oven to 425°F (220°C). This high temperature is essential for achieving that beautiful rise and golden color. Bake the biscuits for about 12 to 15 minutes, but keep an eye on them as oven temperatures can vary.
Signs That Biscuits Are Done: Color and Texture Cues
Your biscuits are done when they are golden brown on top and have a slightly crisp exterior. A gentle tap on the top should produce a hollow sound, indicating they are fully baked. If the bottoms are browning too quickly, you can rotate the baking sheet or lower the temperature slightly.
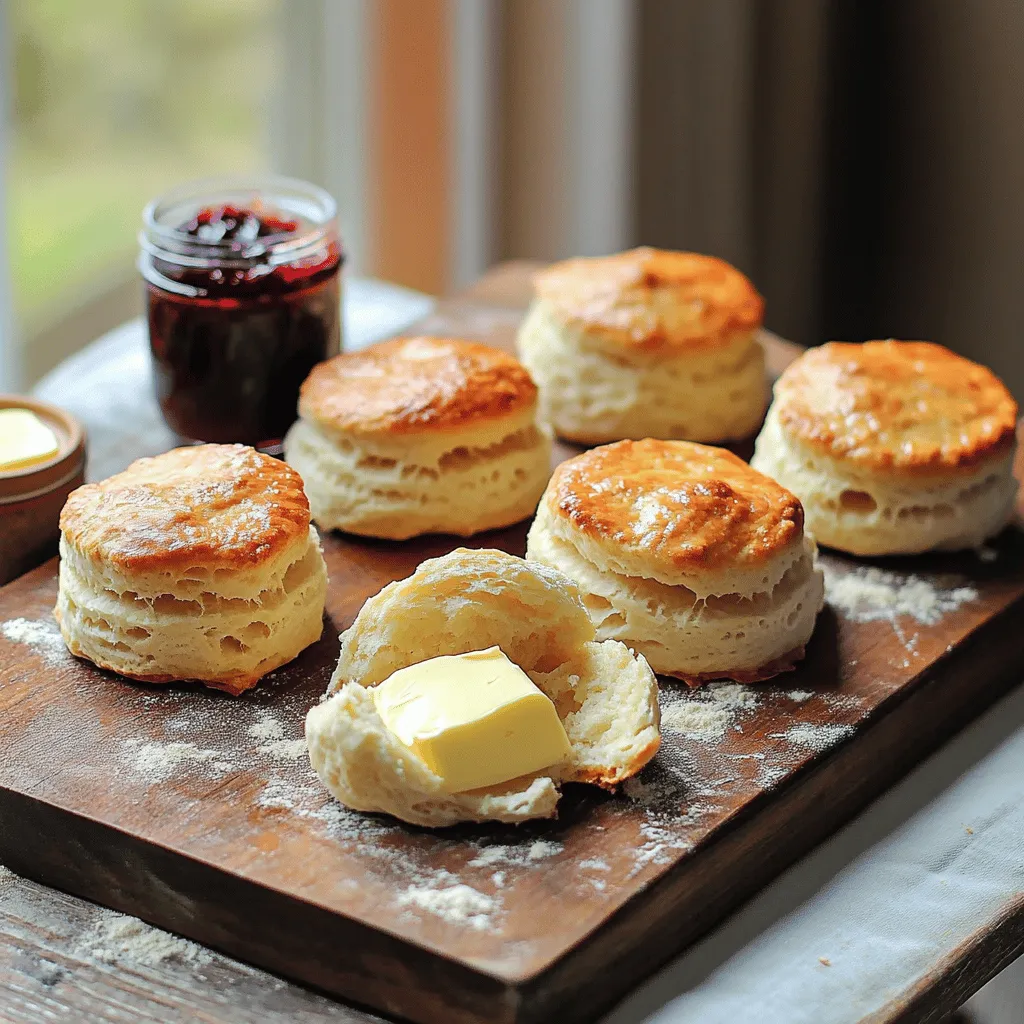
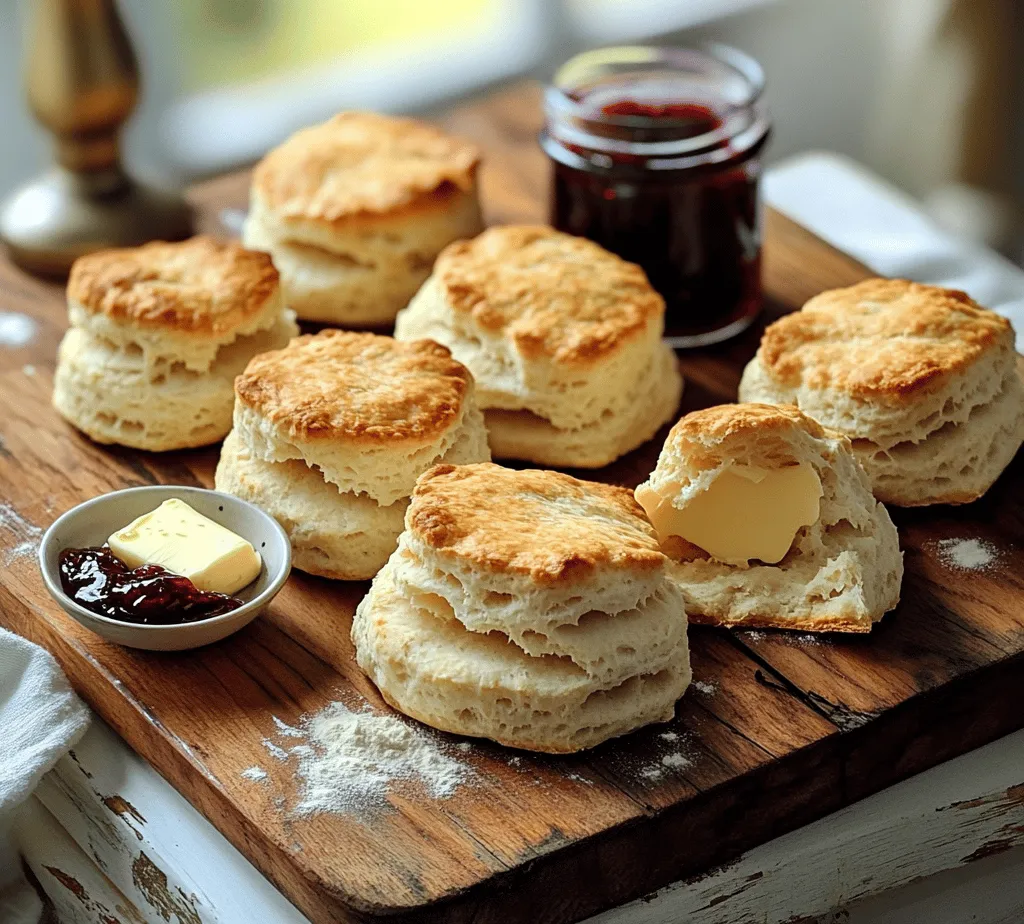
Cooling Process: Why It Matters for Texture and Flavor
Once out of the oven, allow your biscuits to cool on the baking sheet for a few minutes before transferring them to a wire rack. This cooling period helps to set the texture while also enhancing the flavor. The steam released during cooling creates a tender crumb, making them even more enjoyable.
Serving Suggestions for Fluffy Buttermilk Biscuits
Fluffy buttermilk biscuits are incredibly versatile and can complement a variety of dishes. Here are some classic and creative serving suggestions:
Classic Pairings: Butter, Jam, and Honey
For a traditional approach, serve your biscuits warm with a pat of butter, a dollop of your favorite jam, or a drizzle of honey. The combination of the warm biscuit with the sweet toppings creates a comforting and delightful experience.
Creative Serving Ideas: Biscuits in Breakfast Sandwiches, with Soups, or as a Side for Meals
Get creative by using your biscuits in breakfast sandwiches. Layer them with eggs, cheese, and your choice of protein for a hearty breakfast. Alternatively, serve them alongside hearty soups or stews to soak up the flavors. Their tender texture pairs beautifully with the rich flavors of a creamy soup or a savory broth.
Highlighting Versatility: Sweet Versus Savory Options
Fluffy buttermilk biscuits can also be adapted for sweet or savory dishes. Consider topping them with a mixture of fresh berries and whipped cream for a delightful dessert. Alternatively, for a savory twist, try adding herbs or cheese to the dough before baking for a unique flavor profile.
Common Mistakes to Avoid
Even the best recipes can lead to disappointing results if certain mistakes are made. Here are some common pitfalls to avoid when making buttermilk biscuits:
Overmixing the Dough: Consequences on Texture
As previously mentioned, overmixing can lead to tough biscuits. Always mix until just combined to ensure a tender final product.
Not Using Cold Ingredients: Effect on Fluffiness
Using cold butter and buttermilk is crucial for achieving fluffy biscuits. The cold fat creates steam during baking, which helps the biscuits rise. If your ingredients are at room temperature or warmer, your biscuits may not achieve the desired lift.
Incorrect Cutting Technique: How It Affects Rise and Shape
Twisting the cutter when cutting the biscuits can seal the edges, preventing them from rising properly. Always apply even pressure without twisting to ensure that the biscuits rise beautifully in the oven.
Conclusion
There is nothing quite like the joy of making homemade buttermilk biscuits. Their fluffy texture and warm, comforting flavor can elevate any meal and create lasting memories at the dining table. The versatility of biscuits allows for endless possibilities, from classic butter and jam pairings to innovative breakfast sandwiches and savory complements.
As you master this recipe, you’ll find that the process of creating light, fluffy biscuits can bring warmth and comfort to your home cooking. Enjoy the experience of baking and savoring your biscuits, knowing that each batch is a step toward perfecting your craft. So gather your ingredients, follow the steps, and indulge in the delightful experience of fresh, fluffy buttermilk biscuits straight from your oven.