French Dip Biscuits are a delightful fusion of two beloved comfort foods: the classic French Dip sandwich and flaky, buttery biscuits. This innovative recipe has gained immense popularity in kitchens across the country, not just for its rich, savory flavors, but also for its versatility. Whether you’re looking for a hearty meal to serve at a family gathering or a quick, satisfying snack, these biscuits are sure to impress. With tender roast beef, melted cheese, and a flavorful dipping broth, French Dip Biscuits elevate your dining experience with minimal effort.
The appeal of this recipe lies not only in its taste but also in its simplicity. The cozy, comforting nature of biscuits combined with the succulent flavors of a French Dip sandwich makes for a dish that feels both indulgent and homey. As you dive into the preparation of these biscuits, you’ll find that they can be customized to suit your personal taste preferences, whether you prefer a sharper cheese, a spicier broth, or additional herbs. Join us as we explore the step-by-step preparation process along with tips to ensure perfect results every time you make this comforting dish.
Understanding the French Dip Biscuit Concept
To truly appreciate the French Dip Biscuit, it’s essential to understand its origins. The traditional French Dip sandwich, which consists of thinly sliced roast beef served on a crusty French roll, is believed to have been created in Los Angeles in the early 1900s. The sandwich is typically served with a side of rich beef broth for dipping, allowing diners to savor the juicy flavors of the beef while enjoying the satisfying crunch of the bread.
The French Dip Biscuit takes this classic sandwich and reimagines it. Instead of using a roll, this recipe incorporates soft, flaky biscuits as the base. The transition from bread to biscuit not only adds a delightful texture but also enhances the overall flavor profile of the dish. While the traditional version is excellent in its own right, the biscuit version offers a unique twist that is equally comforting and delicious.
Comparing the two, the French Dip Biscuit is more than just a simple alteration; it transforms the dish into a delightful experience that can be enjoyed for breakfast, lunch, or dinner. The biscuits provide a buttery, melt-in-your-mouth quality that complements the tender roast beef, while the dipping broth remains a staple, allowing you to soak up every last bit of flavor.
Ingredients Breakdown
To create the perfect French Dip Biscuits, it’s crucial to understand the role of each ingredient involved in the recipe. Here’s a detailed breakdown of what you’ll need:
All-Purpose Flour
All-purpose flour is the backbone of the biscuit dough, providing the necessary structure and texture. It plays a significant role in achieving the desired fluffiness and lightness that make biscuits so appealing. Using the right amount of flour is essential; too much can lead to dense biscuits, while too little may cause them to collapse during baking.
Baking Powder and Baking Soda
These two leavening agents are vital for creating the biscuit’s rise. Baking powder contributes to the initial lift during baking, while baking soda, when combined with acidic ingredients like buttermilk, enhances the overall rise and texture. Together, they help achieve that desirable flaky quality in the biscuits.
Salt
Salt is often overlooked, but it is crucial for enhancing flavor. It balances the sweetness of the biscuits and brings out the richness of the other ingredients. Using the right amount of salt ensures that your biscuits have a well-rounded taste.
Unsalted Butter
The use of unsalted butter is essential for achieving the perfect biscuit texture. It contributes to the flakiness and richness of the biscuits. Chilling the butter before incorporating it into the dough helps create those distinct layers that make biscuits light and airy.
Buttermilk
Buttermilk is a key ingredient in this recipe, adding moisture and a slight tang that elevates the flavor of the biscuits. It also reacts with the baking soda to create a tender crumb. Using buttermilk instead of regular milk is a simple yet effective way to enhance the overall taste and texture of your biscuits.
Roast Beef
When it comes to the roast beef, choosing the right cut is crucial for maximum flavor. Cuts like chuck roast or eye of round provide the tenderness and flavor needed for a successful French Dip. It’s best to roast the beef until medium-rare, allowing it to retain its juiciness and flavor when sliced.
Beef Broth
The broth serves as the dipping sauce that brings the entire dish together. You can use homemade beef broth or store-bought options, but be sure to choose a high-quality broth for the best flavor. Different broths offer varying flavor profiles, so feel free to experiment with different types to find your preferred taste.
Cheese Options
When it comes to cheese, mozzarella and provolone are popular choices due to their meltability and mild flavors. However, you can also experiment with other varieties such as Swiss or cheddar to add a different twist to your French Dip Biscuits. The cheese not only enhances the flavor but also adds a creamy texture that complements the beef perfectly.
Worcestershire Sauce
This savory sauce adds depth of flavor and umami to the dish. It enhances the richness of the beef and broth, making every bite more satisfying. A few dashes in the dipping broth or mixed with the roast beef can elevate the overall taste profile.
Fresh Herbs
Fresh herbs can be used to garnish your French Dip Biscuits, adding a touch of color and freshness. Options like parsley, thyme, or chives not only enhance the presentation but also provide an aromatic finish to the dish.
Preparation of Biscuit Dough
Now that we’ve covered the essential ingredients, it’s time to dive into the preparation of the biscuit dough. Making biscuit dough is a straightforward process, but there are key techniques to ensure the best results. Here’s a step-by-step guide:
Step 1: Chill the Butter
Begin by cutting your unsalted butter into small cubes and placing it in the refrigerator for at least 30 minutes. Chilling the butter is crucial because it helps create a flaky texture in the biscuits. When the cold butter is mixed into the flour, it forms pockets that expand during baking, resulting in the light and airy biscuits we all love.
Step 2: Combine Dry Ingredients
In a large mixing bowl, whisk together the all-purpose flour, baking powder, baking soda, and salt. Ensure that the dry ingredients are well combined to achieve an even distribution of the leavening agents and salt throughout the dough.
Step 3: Cut in the Butter
Once the butter is chilled, it’s time to cut it into the flour mixture. Using a pastry cutter, fork, or your fingertips, work the cold butter into the flour until the mixture resembles coarse crumbs. Be careful not to overwork the dough; you want to see small pieces of butter throughout the mixture, as this will contribute to the biscuits’ flakiness.
Step 4: Add Buttermilk
Make a well in the center of the flour mixture and pour in the chilled buttermilk. Using a spatula or wooden spoon, gently mix the buttermilk into the dry ingredients until just combined. Be cautious not to overmix the dough, as this can lead to tough biscuits. The goal is to combine the ingredients until there are no dry spots, and the dough begins to come together.
Step 5: Turn Out the Dough
Flour a clean surface and turn out the dough onto it. Lightly knead the dough just a few times to bring it together into a cohesive ball. Overworking the dough will result in dense biscuits, so handle it gently.
Step 6: Roll and Cut
Using a rolling pin, roll the dough out to about 1-inch thickness. Use a biscuit cutter to cut out the biscuits, re-rolling the scraps as needed. Place the cut biscuits on a baking sheet lined with parchment paper, leaving some space between each biscuit to allow for rising.
Shaping and Baking the Biscuits
Once your biscuits are shaped, it’s time to focus on the baking process, which is crucial for achieving that golden-brown exterior and tender interior.
Step 1: Preheat the Oven
Preheat your oven to 425°F (220°C). A hot oven is key to ensuring your biscuits rise properly, so don’t skip this step.
Step 2: Bake the Biscuits
Place the baking sheet with the biscuits in the preheated oven and bake for approximately 12-15 minutes, or until they are golden brown on top. Keep a close eye on them, as baking times may vary depending on your oven.
Step 3: Serve Warm
Once baked, remove the biscuits from the oven and allow them to cool slightly before serving. They are best enjoyed warm, ideally while the cheese is still melted and the beef is juicy. You can serve the biscuits on their own or with a side of hot beef broth for dipping.
With these steps, you are well on your way to creating delicious French Dip Biscuits that are sure to become a favorite in your household. Stay tuned as we delve deeper into tips for perfecting this recipe and answer some common questions about making French Dip Biscuits.

Signs of Doneness and How to Avoid Overbaking
When baking French Dip Biscuits, recognizing the signs of doneness is crucial to achieving the perfect texture. The biscuits should be golden brown on top and firm to the touch. A toothpick inserted into the center should come out clean or with just a few crumbs clinging to it, indicating that they are fully baked. To avoid overbaking, keep a close eye on the biscuits during the final minutes of baking. If the tops begin to darken too quickly, you can loosely cover them with aluminum foil to prevent burning while allowing the insides to finish cooking.
Preparing the Roast Beef and Broth
To create the ultimate French Dip experience, the roast beef and broth must be prepared with care. Here’s a step-by-step process for heating the beef and broth:
1. Gather Your Ingredients: You’ll need sliced roast beef (preferably medium rare) and a quality beef broth. Homemade broth will yield the best flavor, but store-bought options can be convenient and effective.
2. Heat the Broth: In a medium saucepan over medium heat, pour in the beef broth and bring it to a gentle simmer. Avoid boiling, as this can lead to an overly salty flavor and loss of quality.
3. Warm the Beef: Once the broth is simmering, add the sliced roast beef to the pot. Allow it to soak in the broth for about 5-7 minutes. This process infuses the beef with flavor and ensures it is warm throughout, enhancing the overall taste of the dish.
4. Taste and Adjust: After heating, taste the broth. If desired, add a splash of soy sauce or Worcestershire sauce to deepen the flavor profile.
The importance of warming the beef in broth cannot be overstated; this step not only enhances the flavor but also ensures a juicy, tender bite when you assemble the biscuits. Opt for high-quality roast beef, ideally from the deli or butcher, for optimal tenderness and flavor.
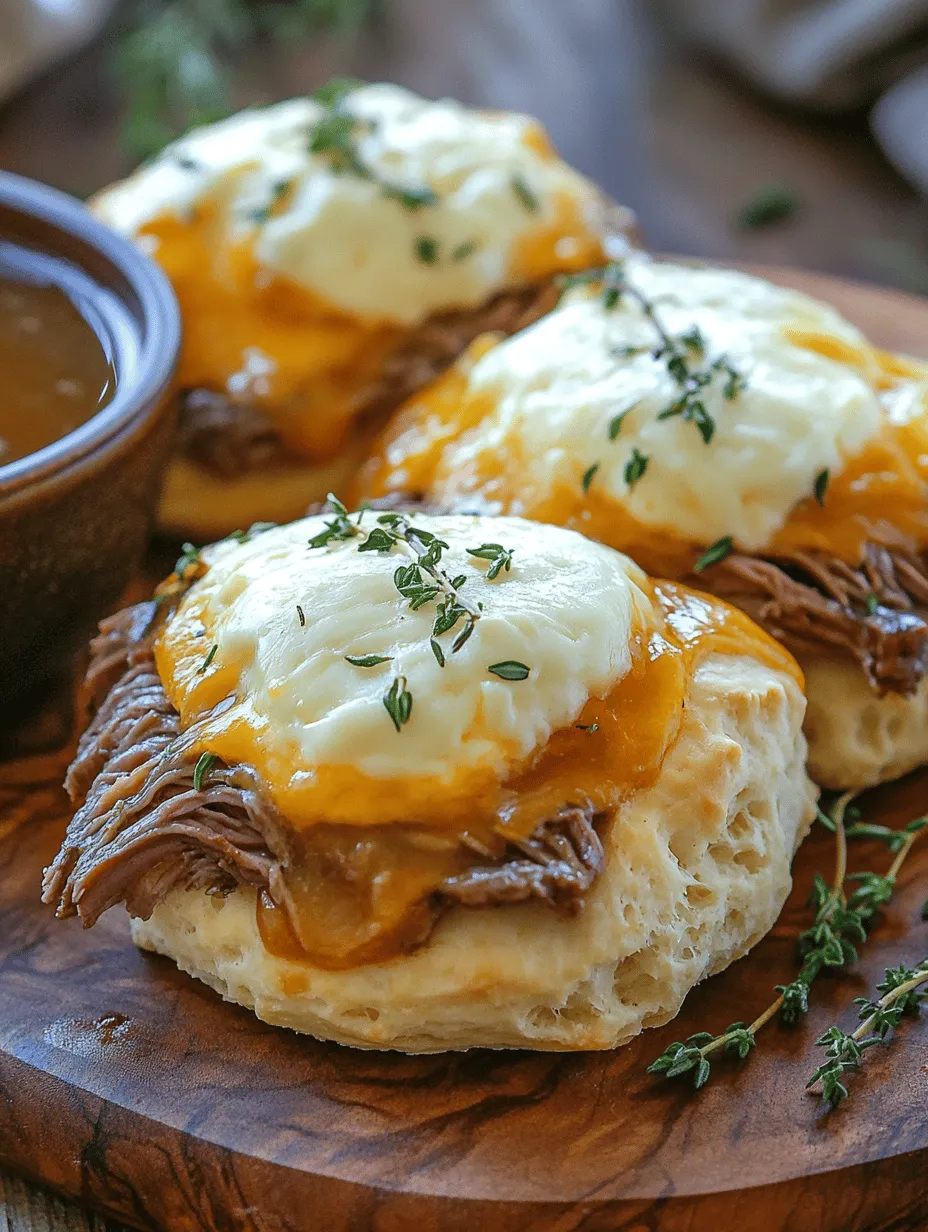
Assembling the French Dip Biscuits
Assembling your French Dip Biscuits requires attention to detail to ensure a delicious balance of flavors. Follow these instructions for the perfect assembly:
1. Prepare Your Biscuits: Once the biscuits are baked and slightly cooled, slice them in half horizontally.
2. Layering the Ingredients: Begin by placing a generous amount of warm roast beef on the bottom half of each biscuit. Layering is essential here; ensure that the beef is evenly distributed to avoid any dry bites.
3. Add Cheese: Top the beef with a slice of your favorite cheese. Provolone or Swiss cheese melts beautifully and pairs wonderfully with the beef.
4. Cap It Off: Place the top half of the biscuit on the cheese.
The key to achieving a satisfying bite is ensuring that the cheese is melting into the beef, creating a gooey, savory experience.
Finishing Touches
To achieve the ideal cheese melt, follow these tips:
1. Oven Settings: Preheat your oven to 350°F (175°C) after assembling the biscuits. Place the assembled biscuits on a baking sheet lined with parchment paper.
2. Timing for Melting Cheese: Bake the biscuits for about 5-10 minutes, or until the cheese is melted and bubbly. Keep an eye on them to prevent overbaking.
3. Optional Garnishes: For a touch of freshness, consider garnishing the melted cheese with chopped fresh herbs such as parsley or thyme. This not only adds visual appeal but also enhances the flavor profile of the dish.
Serving Suggestions
French Dip Biscuits can be served in a variety of creative ways. Here are some suggestions to elevate your meal:
1. Pairing with Sides: Serve your biscuits alongside crispy fries, sweet potato wedges, or a fresh garden salad. The contrast of textures and flavors will complement your dish beautifully.
2. Dipping Sauces: Provide small bowls of au jus (the beef broth) for dipping. You can also offer horseradish sauce or a zesty mustard for an extra kick.
3. Presentation Tips: For an appetizing look, arrange the biscuits on a large platter. You can garnish the platter with fresh herbs or colorful vegetables to create visual interest.
Nutritional Information
Understanding the nutritional content of your French Dip Biscuits can help you make informed choices. Here’s an overview of the nutritional content per serving:
– Calories: Approximately 350-400 calories per biscuit, depending on the ingredients.
– Protein: About 20-25 grams, primarily from the roast beef and cheese.
– Fats: Around 20 grams, largely from the cheese and butter in the biscuits.
– Carbohydrates: Close to 30 grams, mainly from the biscuits.
For those looking to adjust the recipe for dietary needs, consider using gluten-free flour alternatives for the biscuits. You can also opt for lean cuts of beef to reduce fat content or substitute with plant-based proteins for a vegetarian version.
Variations and Customizations
Experimenting with variations can make your French Dip Biscuits even more exciting. Here are some suggestions for ingredient substitutions and enhancements:
1. Gluten-Free Options: Use gluten-free flour blends to create biscuits that are safe for those with gluten sensitivities.
2. Vegetarian Alternatives: Substitute the roast beef with plant-based proteins, like marinated mushrooms or seitan, for a satisfying vegetarian option.
3. Flavor Variations:
– Spices: Add spices like garlic powder or smoked paprika to the biscuit dough for an extra flavor punch.
– Cheese: Experiment with different cheeses such as cheddar, gouda, or pepper jack for varied flavor profiles.
– Enhancements: Consider adding caramelized onions or sautéed mushrooms to the beef layer for additional depth of flavor.
Conclusion
Creating French Dip Biscuits is not only a straightforward process but also an enjoyable culinary experience that yields delicious results. The satisfaction of assembling the warm, flavorful ingredients into a biscuit is a joy in itself. These biscuits are perfect for cozy family dinners or gatherings with friends, allowing everyone to indulge in the comforting flavors of this classic dish.
I encourage you to experiment with the recipe, personalizing it to suit your taste preferences. Whether you stick to the traditional roast beef or venture into vegetarian alternatives, the possibilities are endless. Cooking is a beautiful way to express creativity and share comfort food with loved ones, so gather your ingredients, preheat your oven, and dive into making your own delightful French Dip Biscuits!