Heavenly Garlic Butter Bread Rolls: A Step-by-Step Recipe

WANT TO SAVE THIS RECIPE?

Introduction

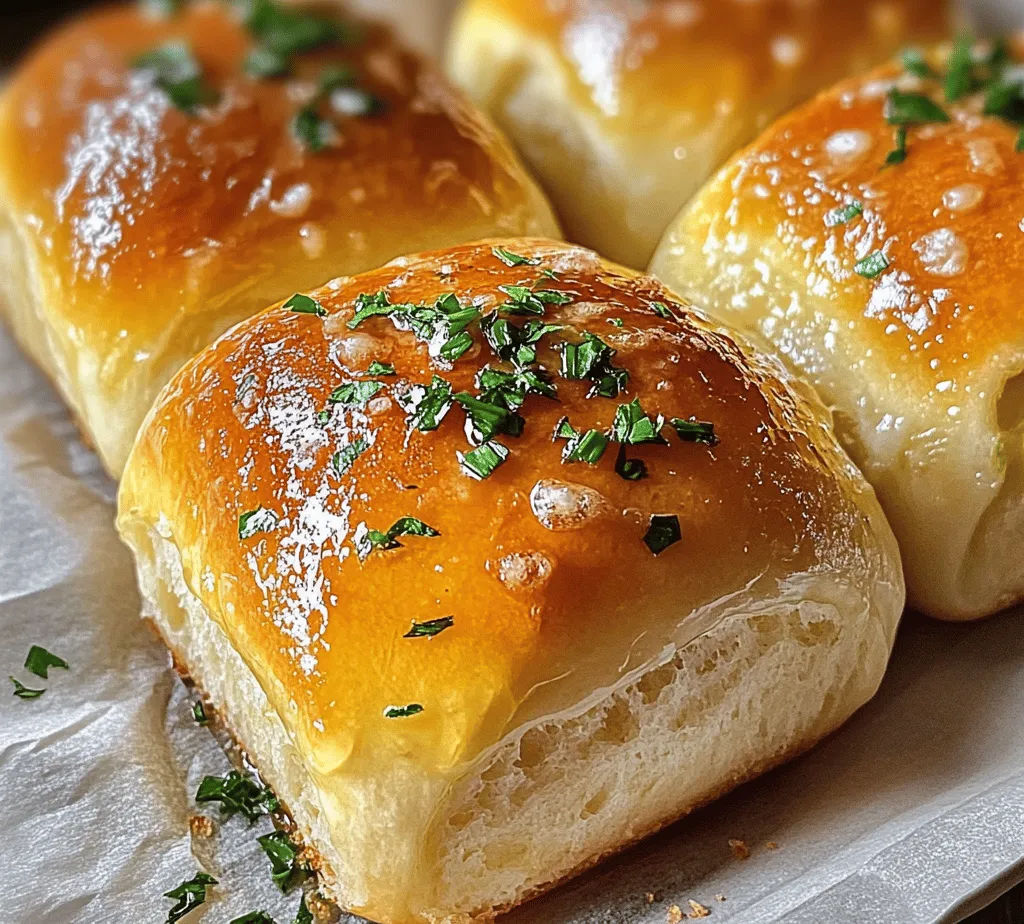
There’s something undeniably comforting about the aroma of freshly baked bread wafting through your home. Homemade bread rolls have a special place in many hearts and kitchens, offering warmth and familiarity with every bite. Among the myriad of bread roll recipes, Heavenly Garlic Butter Bread Rolls stand out as a delectable choice that elevates the humble bread roll into a flavor-packed delight. The infusion of garlic butter not only enhances the rolls’ taste but also makes them irresistible, appealing to both casual eaters and gourmet food lovers alike.

Imagine biting into a soft, fluffy roll, the buttery richness melting in your mouth, while the savory notes of garlic dance on your palate. These rolls are perfect as a side dish for hearty meals like soups, stews, or roasted meats, but they also shine as a standalone snack. Whether served warm out of the oven or at room temperature, they are guaranteed to impress guests at any gathering or simply elevate a quiet family dinner.

Understanding the Ingredients

Before diving into the preparation of these heavenly rolls, it’s essential to understand the core ingredients that contribute to their delightful flavor and texture. Each component plays a vital role, and the quality of these ingredients can make a significant difference in the final product.

Essential Ingredients

1. All-Purpose Flour: This is the main ingredient that provides structure to the bread rolls. All-purpose flour has a moderate protein content, which helps create a tender yet chewy texture. For best results, consider using unbleached flour, as it can enhance the flavor and color of your rolls.

2. Instant Yeast: The star of the show when it comes to bread-making. Instant yeast is a fast-acting yeast that allows for quicker rise times compared to active dry yeast. It can be mixed directly with dry ingredients, making it a convenient choice for home bakers.

3. Warm Milk: Milk adds richness and moisture to the dough. When warmed, it helps activate the yeast, creating a perfect environment for fermentation. The sugars present in the milk also contribute to a slightly sweeter flavor profile and a tender crumb.

4. Granulated Sugar: This ingredient serves two purposes: it adds a hint of sweetness and acts as food for the yeast, promoting its activity during the fermentation process.

5. Salt: An essential ingredient in any bread recipe, salt enhances the flavor of the rolls and helps regulate yeast activity. It also strengthens the gluten structure, contributing to the rolls’ overall texture.

6. Unsalted Butter: Melted butter enriches the dough, adding a wonderful buttery flavor and contributing to a soft texture. Using unsalted butter gives you control over the saltiness of the rolls.

7. Garlic: The aromatic and flavorful essence of garlic takes these bread rolls to another level. Whether you use fresh minced garlic or pre-prepared garlic butter, this ingredient infuses the rolls with a savory depth that is simply unforgettable.

8. Eggs: Adding eggs to the dough increases richness and helps bind the ingredients together. They also contribute to the rolls’ golden color and enhance their overall structure.

The Importance of Ingredient Quality

When it comes to baking, the quality of ingredients can significantly influence the outcome. Opting for high-quality flour, fresh yeast, and natural ingredients will yield a more flavorful and appealing final product. For instance, fresh garlic offers more robust flavor than pre-packaged alternatives, and using real butter will provide a richer taste than margarine. Investing in quality ingredients not only makes a difference in flavor but also enhances the overall experience of making and enjoying these rolls.

Step-by-Step Guide to Making Heavenly Garlic Butter Bread Rolls

Preparing the Dough

Now that we understand the importance of each ingredient, it’s time to begin the exciting process of making our heavenly garlic butter bread rolls. Let’s break it down into manageable steps.

Detailed Instructions for Combining Dry Ingredients

1. Measure the Flour: Start by measuring out the all-purpose flour. For best results, spoon the flour into the measuring cup and level it off with a knife. Avoid packing the flour, as this can lead to dense rolls.

2. Mix the Dry Ingredients: In a large mixing bowl, combine the flour, instant yeast, granulated sugar, and salt. Whisk the dry ingredients together until they are evenly distributed. This step ensures that the yeast and salt don’t come into direct contact, which could inhibit yeast growth.

Importance of Using Instant Yeast

Using instant yeast is one of the key tips for making these rolls. Unlike active dry yeast, which requires proofing in warm water, instant yeast can be mixed directly with the dry ingredients. This not only saves time but also simplifies the process. Instant yeast is also more potent, providing a quicker rise, which is perfect for those who want fresh bread rolls in a hurry.

Mixing Wet Ingredients

Next, we will focus on the wet ingredients that will bring our dough to life.

1. Warm the Milk: Gently warm the milk in a saucepan or microwave until it reaches about 110°F (43°C). This temperature is warm enough to activate the yeast without killing it.

2. Incorporate Melted Butter and Eggs: In a separate bowl, whisk together the warm milk, melted unsalted butter, and eggs until fully combined. The melted butter will contribute richness and flavor, while the eggs help bind the dough and create a tender texture.

Combining Wet and Dry Ingredients

Now it’s time to bring the dry and wet ingredients together to form the dough.

1. Mixing the Dough: Pour the wet mixture into the bowl with the dry ingredients. Using a wooden spoon or spatula, mix the ingredients until they come together to form a shaggy dough. You may need to adjust the flour or milk slightly depending on humidity and other factors.

2. Achieving the Right Dough Consistency: The dough should be slightly sticky but manageable. If it feels too wet, add a little more flour, one tablespoon at a time. Conversely, if it’s too dry, add a splash of milk until you reach the desired consistency.

Kneading Techniques

Kneading is a crucial step in developing the gluten structure of the dough, which gives the rolls their characteristic softness and chewiness.

1. Kneading by Hand: Turn the dough out onto a lightly floured surface. Using the heels of your hands, push the dough away from you, fold it back over itself, and rotate it a quarter turn. Repeat this process for about 8-10 minutes until the dough becomes smooth and elastic.

2. Using a Stand Mixer: If you prefer, you can knead the dough using a stand mixer fitted with a dough hook. Mix on low speed for about 5-7 minutes until the dough is smooth and elastic.

3. Testing the Dough: A good test for perfect dough is the “windowpane test.” Take a small piece of dough and stretch it between your fingers. If it stretches without tearing, creating a thin membrane that allows light to pass through, it’s ready for the next step.

First Rise

Once your dough is kneaded to perfection, it’s time for the first rise, which allows the yeast to work its magic.

1. Letting the Dough Rise: Place the dough in a large, greased bowl, turning it to coat the surface lightly with oil. Cover the bowl with a clean kitchen towel or plastic wrap to retain moisture.

2. Choosing the Right Environment: Allow the dough to rise in a warm, draft-free area for about 1 to 1.5 hours, or until it has doubled in size. A good tip is to place the bowl in a slightly warmed oven (turn the oven on for a minute and then turn it off) to create an ideal environment for rising.

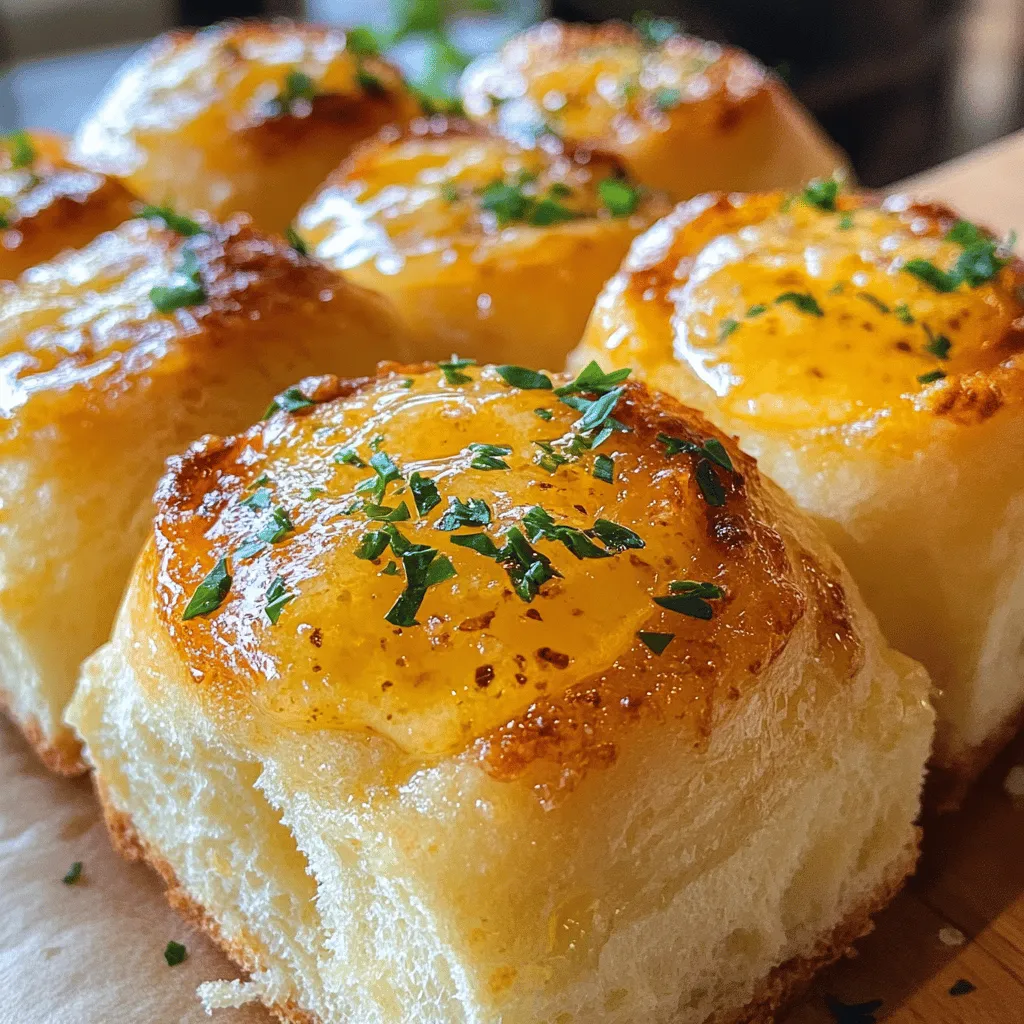
As the dough rises, the yeast will ferment, producing carbon dioxide gas that causes the dough to expand. This is a magical time when the aroma of garlic butter will start to fill your kitchen, teasing your taste buds for the delicious rolls to come.

Stay tuned for the next part of the article, where we will shape the rolls, prepare the garlic butter, and bake them to golden perfection!

There's something undeniably comforting about the aroma of freshly baked bread wafting through your home. Homemade bread rolls have a special place in many hearts and kitchens, offering warmth and familiarity with every bite. Among the myriad of bread roll recipes, <strong>Heavenly Garlic Butter Bread Rolls</strong> stand out as a delectable choice that elevates the humble bread roll into a flavor-packed delight. The infusion of garlic butter not only enhances the rolls’ taste but also makes them irresistible, appealing to both casual eaters and gourmet food lovers alike.” /></p>
</p>
<h3>The Science Behind Dough Rising</h3>
</p>
<p>Understanding the science behind dough rising is essential for achieving the perfect texture and flavor in your garlic butter bread rolls. At the heart of this process is yeast, a living organism that ferments sugars present in the dough, producing carbon dioxide gas. This gas gets trapped in the dough’s gluten structure, causing it to rise and expand.</p>
</p>
<p><strong>Temperature and Yeast Fermentation</strong>: Yeast is sensitive to temperature, and its activity varies significantly based on the environment. Ideally, yeast thrives in a warm environment, around 75°F to 80°F (24°C to 27°C). In this range, yeast ferments efficiently, leading to a quicker rise. If the temperature is too low, fermentation slows down, resulting in a dense bread. Conversely, if the dough becomes too hot (above 130°F or 54°C), the yeast can die, halting the rising process altogether. Therefore, it’s crucial to maintain the right temperature throughout the rising stages.</p>
</p>
<h3>Signs to Look for When the Dough Has Doubled in Size</h3>
</p>
<p>Knowing when your dough has risen appropriately is key to ensuring fluffy rolls. Here are a few signs to look for:</p>
</p>
<p>1. <strong>Visual Observation</strong>: The most apparent sign is the dough’s volume. When it has doubled in size, it should appear puffy and have a smooth surface, free of cracks.</p>
</p>
<p>2. <strong>Poke Test</strong>: Gently poke the dough with your finger. If the indentation remains and doesn’t spring back, it’s a good indication that the dough is ready for the next step.</p>
</p>
<p>3. <strong>Time</strong>: While rising times can vary based on environmental factors, a general rule of thumb is to allow the dough to rise for about 1 to 2 hours, or until it has doubled.</p>
</p>
<h3>Creating the Garlic Butter Mixture</h3>
</p>
<p>Now that your dough is ready, it’s time to prepare the heavenly garlic butter that gives these rolls their signature flavor.</p>
</p>
<p><strong>Ingredients for Garlic Butter</strong>:</p>
<p>– 1/2 cup unsalted butter, softened</p>
<p>– 4-5 cloves of fresh garlic, minced</p>
<p>– 2 tablespoons fresh parsley, chopped (or 1 tablespoon dried)</p>
<p>– 1 teaspoon garlic powder (optional)</p>
<p>– Salt, to taste</p>
</p>
<p><strong>Instructions</strong>:</p>
<p>1. <strong>Combine Ingredients</strong>: In a bowl, mix softened butter with minced garlic and parsley. Use a fork or a whisk to blend everything until smooth and well combined. If you prefer a stronger garlic flavor, feel free to add more minced garlic or a pinch of garlic powder.</p>
</p>
<p>2. <strong>Season</strong>: Add salt to taste, ensuring the mixture is well-flavored but not overpowering. Remember that the bread itself will also have some salt, so balance is key.</p>
</p>
<p>3. <strong>Rest</strong>: Let the garlic butter sit at room temperature while you prepare the rolls. This allows the flavors to meld beautifully.</p>
</p>
<h3>Shaping and Second Rise</h3>
</p>
<p>With your garlic butter ready, it’s time to shape your rolls.</p>
</p>
<p><strong>Step-by-Step Guidance</strong>:</p>
<p>1. <strong>Divide Dough</strong>: After the first rise, punch down the dough to release air bubbles. Turn it onto a floured surface and divide it into equal pieces, typically 12 to 16, depending on your desired roll size.</p>
</p>
<p>2. <strong>Shape the Rolls</strong>: To shape each piece, take a portion of dough and flatten it slightly. Then, fold the edges toward the center and pinch them to seal. Roll it gently between your hands to create a smooth ball.</p>
</p>
<p>3. <strong>Uniform Size</strong>: Ensure each roll is roughly the same size, which is crucial for even baking. Using a kitchen scale can help achieve consistent weights.</p>
</p>
<p>4. <strong>Second Rise</strong>: Place the shaped rolls on a greased baking tray or in a baking dish, spacing them slightly apart. Cover them with a clean kitchen towel or plastic wrap. Let them rise again for about 30-45 minutes until they’ve puffed up again. This second rise is vital for achieving a light, airy texture in the finished rolls.</p>
</p>
<h3>Baking the Rolls</h3>
</p>
<p>Now comes the exciting part: baking your garlic butter rolls to golden perfection.</p>
</p>
<p><strong>Preheating the Oven</strong>: Preheat your oven to 375°F (190°C). Preheating is essential for proper baking as it ensures that the rolls start cooking immediately when placed inside. This helps create a crispy crust while keeping the inside tender and fluffy.</p>
</p>
<p><strong>Applying Garlic Butter</strong>: Once the rolls have completed their second rise, generously brush the tops with your prepared garlic butter mixture. This step not only enhances the flavor but also contributes to a beautiful golden color.</p>
</p>
<p><strong>Baking Time</strong>: Bake the rolls in the preheated oven for 20-25 minutes or until they are golden brown on top. To check for doneness, tap the bottom of a roll; it should sound hollow. Alternatively, you can use an instant-read thermometer to check the internal temperature, which should be around 190°F (88°C).</p>
</p>
<h3>Serving Suggestions</h3>
</p>
<p>These garlic butter rolls are incredibly versatile and can enhance a variety of meals. Here are some ideas for pairing:</p>
</p>
<p>– <strong>Soups</strong>: Serve the rolls alongside a hearty soup, such as minestrone or tomato basil, perfect for dipping.</p>
<p>– <strong>Salads</strong>: Pair with a fresh garden salad for a delightful contrast of flavors and textures.</p>
<p>– <strong>Main Courses</strong>: They complement rich main dishes, such as roasted chicken or beef stew, providing a comforting addition to your meal.</p>
</p>
<p><strong>Serving Tips</strong>: These rolls are best enjoyed warm or at room temperature. Consider serving them with additional garlic butter for dipping or a flavorful sauce, such as marinara or a balsamic reduction.</p>
</p>
<h3>Nutritional Information</h3>
</p>
<p>While these garlic butter rolls are undeniably delicious, understanding their nutritional aspects can help when incorporating them into your meals.</p>
</p>
<p><strong>Overview</strong>: Each roll is approximately 150-200 calories, depending on the size and amount of garlic butter used. They are a source of carbohydrates and fats, providing energy for your body.</p>
</p>
<p><strong>Healthier Variations</strong>: To make these rolls a bit healthier, consider substituting half of the all-purpose flour with whole wheat flour. This modification increases fiber content while adding a nutty flavor to the rolls. You could also reduce the amount of butter used or substitute it with a healthier oil, such as olive oil.</p>
</p>
<h3>Conclusion</h3>
</p>
<p>Making homemade garlic butter bread rolls is a rewarding experience that brings a sense of comfort and satisfaction to any meal. The process—from kneading the dough to baking and savoring the aroma wafting through your kitchen—creates an enchanting cooking experience that can’t be replicated by store-bought options.</p>
</p>
<p>These rolls not only enhance your dining experience but also create lasting memories at the dinner table. The delightful combination of flavors, the warm, soft texture, and the inviting aroma make them a perfect addition to any meal. So, roll up your sleeves, gather your ingredients, and try this recipe for heavenly garlic butter rolls—you won’t be disappointed!</p>
</div>

There's something undeniably comforting about the aroma of freshly baked bread wafting through your home. Homemade bread rolls have a special place in many hearts and kitchens, offering warmth and familiarity with every bite. Among the myriad of bread roll recipes, Heavenly Garlic Butter Bread Rolls stand out as a delectable choice that elevates the humble bread roll into a flavor-packed delight. The infusion of garlic butter not only enhances the rolls’ taste but also makes them irresistible, appealing to both casual eaters and gourmet food lovers alike.

Garlic Butter Bread Rolls

Indulge in the delightful taste of homemade Heavenly Garlic Butter Bread Rolls! This step-by-step recipe guides you through creating irresistibly soft rolls infused with rich garlic butter. Perfect as a side for soups or as a tasty snack, these rolls are sure to impress at any gathering. With simple ingredients and easy-to-follow instructions, you'll have warm, fluffy rolls ready to enjoy in no time! #BreadRolls #GarlicButter #HomemadeBaking #ComfortFood #BakingRecipe #FoodieFun

Ingredients
  

4 cups all-purpose flour

2 tablespoons instant yeast

1 teaspoon sugar

1 teaspoon salt

1 cup warm milk (110°F/43°C)

1/4 cup unsalted butter, melted

2 large eggs

1/2 cup unsalted butter, softened (for garlic butter)

4-5 cloves garlic, minced

2 tablespoons fresh parsley, chopped

1 teaspoon garlic powder (optional)

1/2 teaspoon dried Italian herbs

Pinch of salt

Instructions
 

Prepare the Dough: In a large mixing bowl, combine the flour, instant yeast, sugar, and salt. Mix well.

    Mix Wet Ingredients: In a separate bowl, combine warm milk, melted butter, and eggs. Whisk together until well-blended.

      Combine: Slowly pour the wet mixture into the dry ingredients and mix until a dough starts to form.

        Knead: On a floured surface, knead the dough for about 8-10 minutes until smooth and elastic. Alternatively, use a stand mixer with a dough hook.

          First Rise: Place the dough in a greased bowl, cover with a kitchen towel, and let it rise in a warm place for about 1 hour or until doubled in size.

            Prepare Garlic Butter: In a bowl, mix softened butter, minced garlic, parsley, garlic powder, Italian herbs, and a pinch of salt. Set aside.

              Shape the Rolls: After the dough has risen, punch it down and divide it into 12 equal pieces. Shape each piece into a smooth roll and place them in a greased 9x13-inch baking dish.

                Second Rise: Cover the rolls with a towel and let them rise for another 30 minutes until puffy.

                  Preheat Oven: Preheat your oven to 350°F (175°C).

                    Apply Garlic Butter: Once the rolls are ready, brush the garlic butter mixture generously over the tops of the rolls.

                      Bake: Bake in the preheated oven for 20-25 minutes or until golden brown on top and cooked through.

                        Serve: Remove from oven and brush again with any leftover garlic butter. Let them cool slightly before serving warm.

                          Prep Time: 20 minutes | Total Time: 2 hours | Servings: 12 rolls

                            WANT TO SAVE THIS RECIPE?

                            Leave a Comment

                            Recipe Rating