Looking for a hearty and simple dish that warms you up inside? Try this Instant Pot White Chicken Chili! It’s quick to make and packed with flavor. In just a few easy steps, you’ll enjoy a creamy, zesty meal that everyone will love. Whether you're a beginner or a seasoned chef, you’ll find helpful tips, ingredient swaps, and answers to common questions. Let’s get cooking and make your new favorite chili!
Why I Love This Recipe
- Quick and Easy: This creamy white chicken chili can be made in just 40 minutes, making it perfect for busy weeknights.
- Comfort in a Bowl: The rich flavors and creamy texture make this chili incredibly comforting, perfect for chilly days.
- Customizable: You can easily adapt this recipe by adding your favorite vegetables or adjusting the spices to suit your taste.
- Healthy Ingredients: With lean chicken, beans, and plenty of veggies, this dish is both nutritious and satisfying.
Ingredients
List of Primary Ingredients
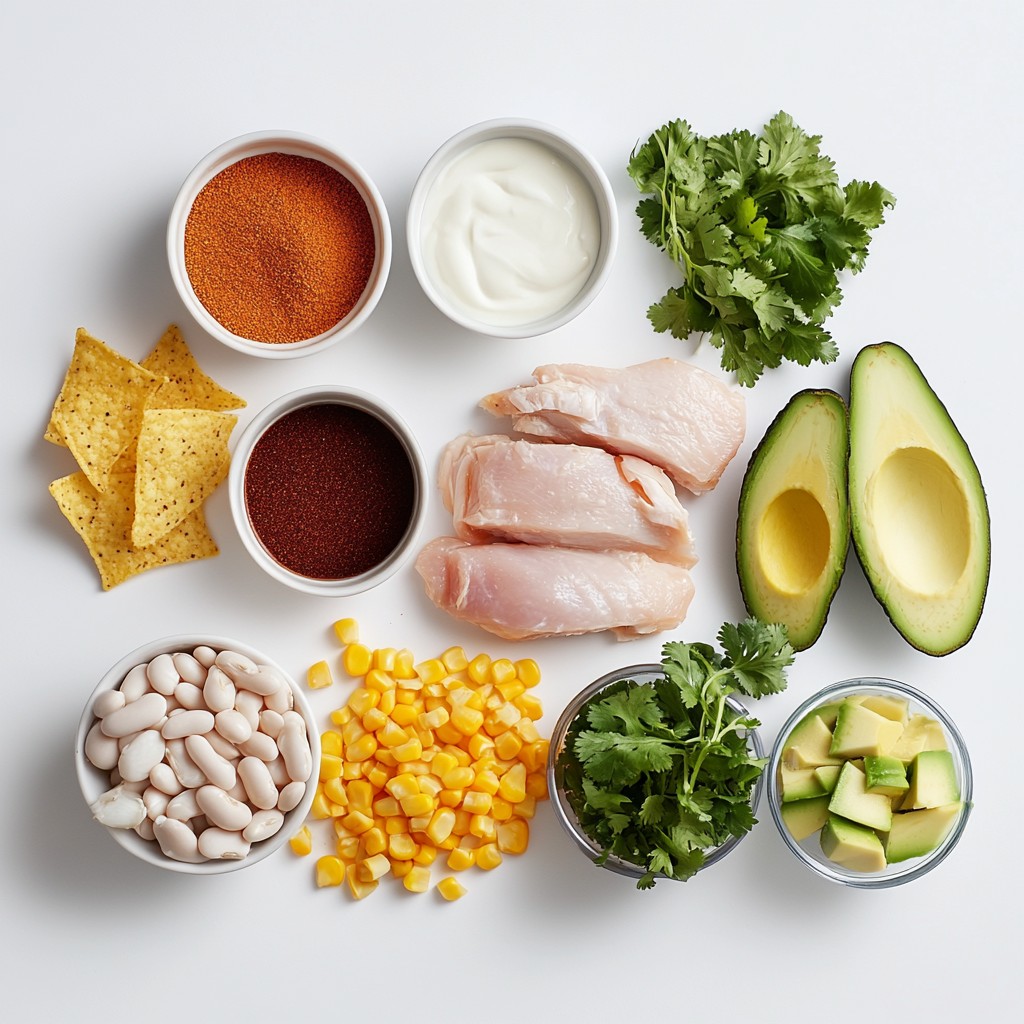
To make this tasty white chicken chili, gather these key ingredients:
- 1 lb boneless, skinless chicken breasts
- 1 medium onion, diced
- 3 cloves garlic, minced
- 1 can (15 oz) white beans (like cannellini or great northern), drained and rinsed
- 1 can (4 oz) diced green chilies
- 2 cups low-sodium chicken broth
- 1 teaspoon cumin
- 1 teaspoon chili powder
- ½ teaspoon smoked paprika
- 1 cup corn (frozen or canned)
- 1 cup heavy cream or coconut milk for a lighter version
- Salt and pepper, to taste
- Fresh cilantro, for garnish
Optional Toppings
You can add extra flavor and texture to your chili with these toppings:
- Shredded cheese
- Avocado slices
- Tortilla chips
Ingredient Substitutions
If you don’t have some ingredients, here are easy swaps:
- Use chicken thighs instead of chicken breasts for a richer flavor.
- Swap white beans for black beans or kidney beans if you prefer.
- If you want a spicy kick, add jalapeños or a dash of hot sauce.
- For a vegan option, use beans and coconut milk only.
- You can replace heavy cream with plain yogurt for a tangy taste.
Step-by-Step Instructions
Sauté Chicken and Aromatics
First, choose the Sauté function on your Instant Pot. Pour in a splash of olive oil. Once hot, toss in the diced onion. Cook for 2 to 3 minutes until the onion softens. Now, add the minced garlic and sauté for another minute. You want the garlic to smell great.
Add Ingredients and Pressure Cook
Next, add the chicken breasts to the pot. Then, mix in the white beans, diced green chilies, and chicken broth. Sprinkle in your cumin, chili powder, smoked paprika, corn, salt, and pepper. Stir everything well to combine. Close the Instant Pot lid and set the valve to Sealing. Choose the Manual or Pressure Cook option. Set the timer for 15 minutes.
Release Pressure and Shred Chicken
When the timer goes off, it’s time for a quick release. Carefully turn the valve to Venting. Let all the steam escape before opening the lid. Now, take out the chicken breasts and shred them with two forks. Return the shredded chicken back to the pot.
Add Cream and Serve
Finally, stir in the heavy cream or coconut milk. Mix until everything is combined. Taste and adjust with more salt and pepper if needed. Let the chili sit on the Keep Warm setting for about 5 minutes. This allows all the flavors to mix nicely.
Tips & Tricks
Perfecting Flavor and Texture
To make your chili pop, use fresh spices. Fresh spices give great flavor. I like to toast them in the pot for a minute. This brings out their warmth. If you want creaminess, the heavy cream works great. For a lighter dish, try coconut milk. Both options blend well and make it rich.
Cooking Time Adjustments
If your chicken breasts are thicker, add a few minutes to the cook time. For smaller pieces, reduce the time by a few minutes. Always check that the chicken is cooked through. You want it to reach 165°F. This keeps it safe and tasty.
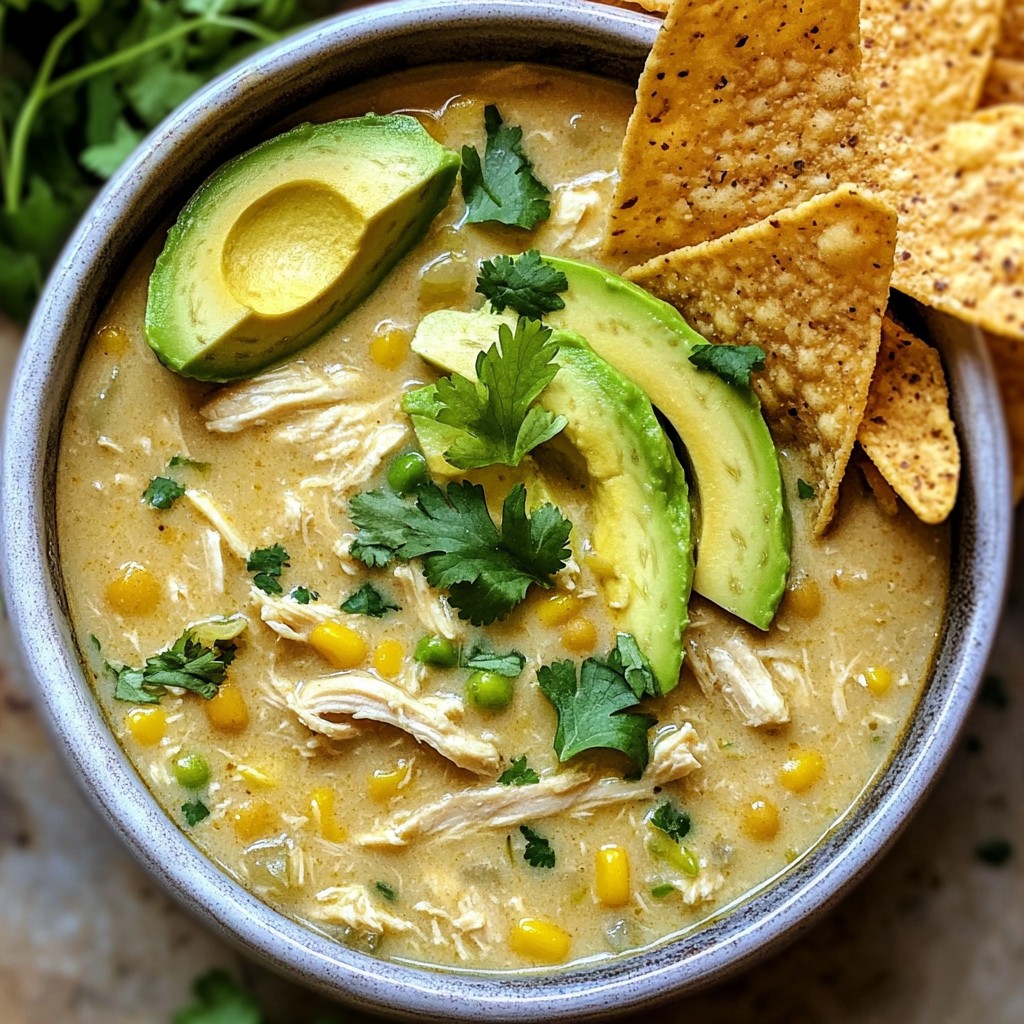
Serving Suggestions
Serve your chili in fun bowls. Top it with fresh cilantro for color. Add shredded cheese, avocado, or crunchy tortilla chips. Each topping adds a unique taste. You can also serve it with crusty bread, perfect for dipping. Enjoy this dish with family or friends for a cozy meal!
Pro Tips
- Use Fresh Ingredients: Fresh herbs and spices can elevate the flavors of your chili. Whenever possible, opt for fresh garlic and cilantro to enhance the dish.
- Customize the Heat: Adjust the spiciness of your chili by adding fresh jalapeños or a dash of hot sauce. This way, you can tailor it to your taste preferences.
- Thicken the Chili: If you prefer a thicker consistency, you can mash some of the white beans or add a cornstarch slurry during the cooking process.
- Leftovers Are Gold: This chili tastes even better the next day! Store leftovers in the fridge for a quick and delicious meal later in the week.
Variations
Dairy-Free Options
If you want a dairy-free chili, you can use coconut milk instead of heavy cream. It adds a nice flavor while keeping the dish creamy. Just swap the cream for one cup of coconut milk when you mix in the cream. This small change keeps the chili rich without the dairy.
Spicy Version
To kick up the heat, add a chopped jalapeño or some cayenne pepper. You can add these when you sauté the onions and garlic for more flavor. Adjust the amount based on your spice level. This simple tweak can make the chili much bolder and more exciting.
Adding Vegetables
Want to sneak in more veggies? Add bell peppers, zucchini, or spinach to the pot. Dice them small and toss them in with the other ingredients. They will cook down nicely and add great nutrition. You can also use frozen corn if you want a sweet crunch. This makes the dish heartier and more colorful.
Storage Info
How to Store Leftovers
After enjoying your white chicken chili, let it cool to room temperature. Then, pour it into an airtight container. Make sure to seal it well. Store it in the fridge for up to 4 days. If you want to keep it longer, freezing is a great option.
Reheating Instructions
To reheat, scoop out the amount you want. Place it in a saucepan over medium heat. Stir it often until it warms through. You can also use a microwave. Heat in short bursts, stirring in between. This helps it heat evenly and stay creamy.
Freezing Guidelines
For freezing, use a freezer-safe container. Leave some space at the top, as the chili can expand when frozen. It can last in the freezer for about 3 months. When you're ready to eat, thaw it in the fridge overnight. Then reheat as mentioned above. This way, you can enjoy your chili anytime!
FAQs
Can I make this recipe without an Instant Pot?
Yes, you can make this chili on the stove. Just use a large pot. Cook the onions and garlic first, then add the other ingredients. Simmer for about 30-40 minutes until the chicken is cooked. Shred the chicken and stir in cream as usual.
How can I thicken my chili?
To thicken your chili, you can use a few methods. Here are some options:
- Cornstarch Slurry: Mix cornstarch with cold water. Stir it into the chili and let it cook until thickened.
- Mash Beans: Take some beans from the chili and mash them with a fork. Stir them back in to thicken the mix.
- Add More Cream: Including extra cream will also add thickness and richness.
What can I serve with White Chicken Chili?
White chicken chili is great on its own but pairs well with:
- Rice or Quinoa: These grains soak up the flavors.
- Tortilla Chips: They add crunch and texture.
- Crusty Bread: A slice of bread is perfect for dipping.
- Fresh Salad: A light salad balances the meal.
How long does White Chicken Chili last in the fridge?
White chicken chili can last in the fridge for about 3-4 days. Store it in an airtight container. Make sure to let it cool down before sealing it.
Can I use frozen chicken breasts in the Instant Pot?
Yes, you can use frozen chicken breasts in the Instant Pot. Just add a couple of extra minutes to the cooking time. Keep the rest of the recipe the same. The chicken will still turn out tender and delicious!
We covered the key parts of making White Chicken Chili. We discussed essential ingredients, how to cook it step-by-step, and shared useful tips. You can also try different versions and know the best ways to store leftovers. My final thought is this: with simple adjustments, you can make this dish truly your own. Enjoy making it and have fun experimenting!