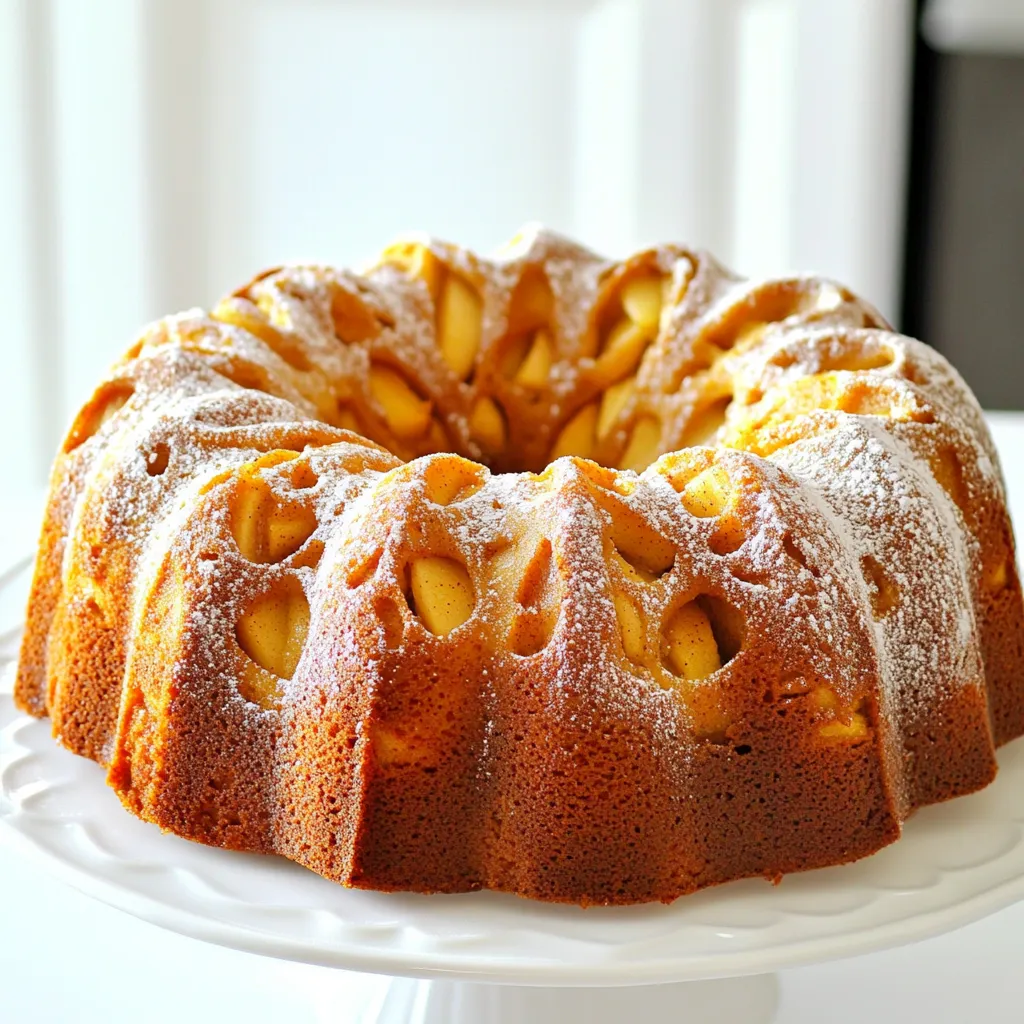
If you love the cozy flavors of fall, you’ll adore this Apple Cider Donut Cake! This easy recipe brings together sweet apple cider and warm spices for a treat that feels like a hug. Perfect for gatherings or just a sweet dessert at home, this cake is sure to please everyone. Ready to dive in? Let’s create a dessert that smells as good as it tastes!
Why I Love This Recipe
- Deliciously Flavorful: This cake captures the essence of fall with its warm spices and rich apple cider, making it a perfect treat for cozy gatherings.
- Easy to Make: The simple steps and common ingredients make this cake accessible for bakers of all levels, ensuring anyone can enjoy a homemade dessert.
- Moist and Tender: Thanks to the grated apples and buttermilk, this cake stays incredibly moist and has a delightful texture that everyone loves.
- Perfect for Sharing: With its generous serving size, this cake is ideal for sharing at potlucks, parties, or family gatherings, bringing smiles all around.
Ingredients
Essential Ingredients for Apple Cider Donut Cake
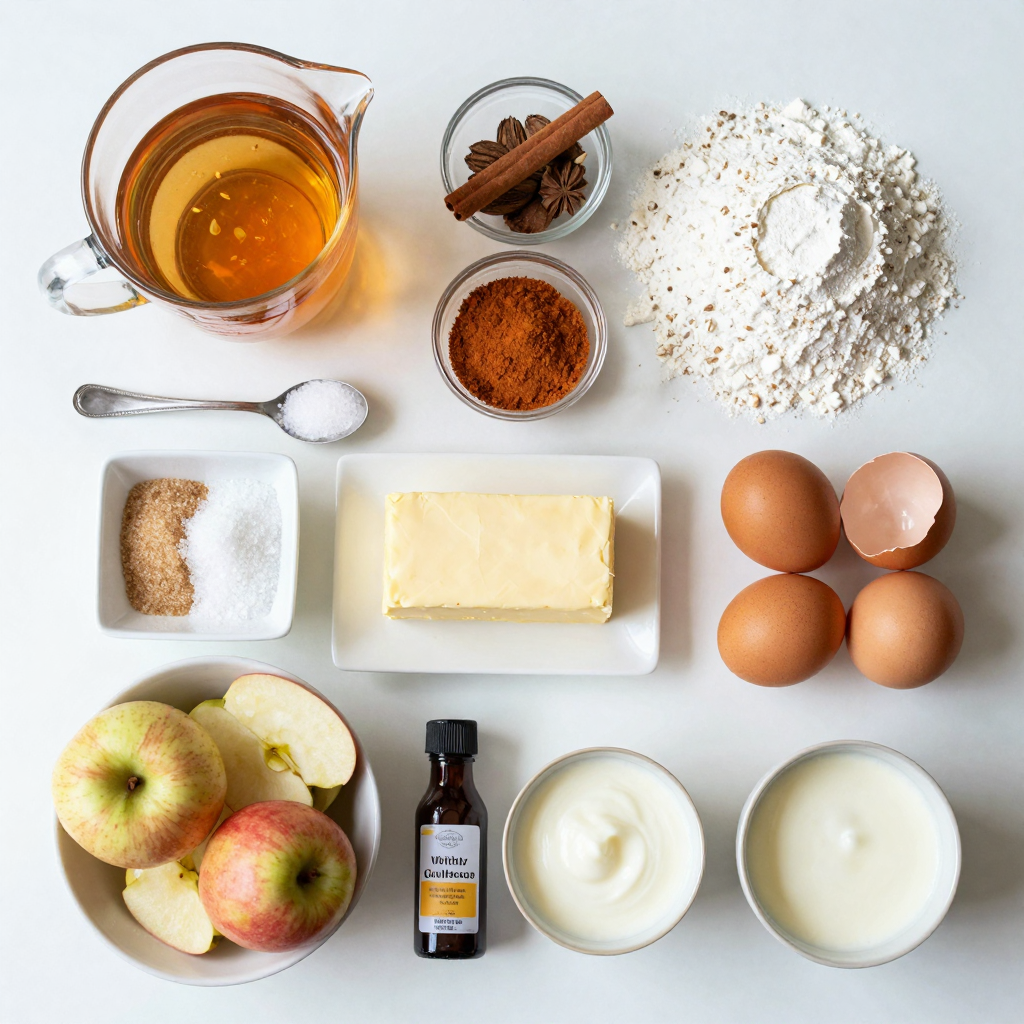
For a delicious Apple Cider Donut Cake, you need these key ingredients:
– 2 cups apple cider
– 1 cup all-purpose flour
– 1 cup whole wheat flour
– 1 teaspoon baking powder
– 1 teaspoon baking soda
– 1 teaspoon ground cinnamon
– ½ teaspoon ground nutmeg
– ½ teaspoon salt
– 1 cup brown sugar, packed
– ½ cup granulated sugar
– ½ cup unsalted butter, softened
– 3 large eggs
– 1 teaspoon vanilla extract
– 1 cup grated apples (about 2 small apples)
– ½ cup buttermilk
These ingredients create a rich flavor and tender texture. The apple cider gives the cake a warm, fruity taste.
Optional Ingredients for Added Flavor
You can enhance your cake with these optional ingredients:
– Powdered sugar for dusting
Dusting the cake with powdered sugar adds a sweet touch. It also makes the cake look fancy and inviting.
Tips on Choosing the Best Apples
Choosing the right apples is key to a great cake. Here are some tips:
– Select sweet apples: Varieties like Honeycrisp or Fuji work well.
– Check for firmness: Choose apples that feel firm and crisp.
– Look for fresh apples: Fresh apples have better flavor and texture.
Using the right apples makes a big difference. They add natural sweetness and moisture to your cake.
Step-by-Step Instructions
Step 1: Reducing the Apple Cider
Start by pouring 2 cups of apple cider into a saucepan. Place it on the stove over medium-high heat. Bring it to a boil, then lower the heat. Let it simmer. You want it to reduce to about 1 cup. This should take around 15 to 20 minutes. Once done, set it aside to cool.
Step 2: Preparing the Dry Ingredients
Grab a medium bowl. In it, whisk together the all-purpose flour, whole wheat flour, baking powder, baking soda, cinnamon, nutmeg, and salt. This mix will add flavor and help the cake rise. Set this bowl aside for now.
Step 3: Creaming the Butters and Sugars
In a large mixing bowl, place ½ cup of softened butter, 1 cup of packed brown sugar, and ½ cup of granulated sugar. Use a hand mixer or stand mixer to cream them together. Mix on medium speed until the mixture is light and fluffy. This should take about 3 to 5 minutes. This step is key for a soft cake.
Step 4: Incorporating Eggs and Vanilla
Next, add 3 large eggs to the butter-sugar mix one at a time. Mix well after each egg. Once all the eggs are in, stir in 1 teaspoon of vanilla extract. This will give your cake a nice flavor.
Step 5: Combining Wet Ingredients
Now it’s time to add the wet ingredients. Gradually stir in the reduced apple cider and ½ cup of buttermilk to the butter-sugar mixture. Mix until everything is just combined. Be careful not to overmix; this can make the cake tough.
Step 6: Baking and Cooling the Cake
Gradually add the dry ingredient mix to the wet mixture. Stir gently to combine. Then, fold in 1 cup of grated apples. Preheat your oven to 350°F (175°C). Grease a bundt pan with cooking spray or butter. Pour the batter into the pan evenly. Bake for 35 to 40 minutes. Check if it’s done by inserting a toothpick in the center. If it comes out clean, your cake is ready!
Let the cake cool in the pan for 10 minutes. Then, transfer it to a wire rack. If you like, dust it with powdered sugar before serving. Enjoy your delicious treat!
Pro Tips
- Reduce Cider Wisely: Make sure to reduce the apple cider to concentrate its flavor, which brings out that delicious apple taste in the cake.
- Use Fresh Apples: Opt for fresh, crisp apples for grating to ensure the best flavor and moisture in your cake.
- Check for Doneness: Always check your cake a few minutes before the recommended baking time to avoid overbaking, as ovens can vary.
- Dust with Powdered Sugar: For a lovely presentation, dust the cooled cake with powdered sugar right before serving for a beautiful touch.
Tips & Tricks
How to Achieve the Perfect Texture
To get a soft and fluffy cake, don’t overmix. When you add the dry ingredients, stir just until combined. This keeps the gluten from forming too much. Also, ensure your butter is soft but not melted. This helps trap air and creates a light texture. Finally, folding in the apples last adds moisture and flavor without making the batter heavy.
Using Fresh vs. Store-Bought Apple Cider
Fresh apple cider adds a bright flavor that store-bought cider may lack. If you can, use fresh cider. It often has more depth and sweetness. If you use store-bought, choose a brand with no added sugars or preservatives. Check the label for a pure apple cider. This choice helps keep your cake tasting natural and delicious.
Tips for Greasing Bundt Pans
Greasing your bundt pan is key to a clean release. Use unsalted butter or cooking spray. Make sure to coat all the nooks and crannies. A pastry brush helps to spread the grease evenly. You can also use flour after greasing. Sprinkle flour into the pan and shake to coat. This extra step ensures your cake slides out perfectly, keeping its shape intact.
Variations
Gluten-Free Apple Cider Donut Cake
You can make this cake gluten-free with some simple swaps. Use gluten-free all-purpose flour instead of regular flour. Check the blend for xanthan gum; it helps with texture. You can find many good brands in stores or online. This change won’t hurt the taste. It still has that warm apple flavor you love.
Vegan Alternatives for a Dairy-Free Version
To make this cake vegan, replace the eggs with flax eggs. Mix 1 tablespoon of flaxseed meal with 2.5 tablespoons of water for each egg. Let it sit for a few minutes until it thickens. For the butter, use coconut oil or vegan butter. Swap buttermilk for almond milk mixed with a splash of lemon juice. These changes keep the cake tasty and moist.
Flavor Twists: Adding Spices or Nuts
You can add spices or nuts for extra flavor. Try adding a pinch of allspice or cardamom for a new twist. If you like nuts, fold in chopped walnuts or pecans. These add crunch and depth. You can also mix in a bit of dried fruit like raisins. This makes the cake unique each time you bake it.
Storage Info
Best Practices for Storing Leftovers
To keep your apple cider donut cake fresh, store it in an airtight container. This helps prevent it from drying out. If you have leftover slices, wrap them tightly in plastic wrap before placing them in the container. Store the cake at room temperature for up to three days. If you live in a warm area, consider refrigerating it to maintain freshness.
How to Freeze Apple Cider Donut Cake
Freezing your cake is easy and great for later enjoyment. First, let the cake cool completely. Then, slice it into individual portions. Wrap each slice in plastic wrap. After that, place the wrapped slices in a freezer-safe bag. Make sure to remove as much air as possible. Your cake can last up to three months in the freezer. When you’re ready to eat, let it thaw in the fridge overnight.
Shelf Life and Reheating Tips
The apple cider donut cake lasts about three days at room temperature and up to a week in the fridge. To reheat, place a slice in the microwave for about 10-15 seconds. You can also warm it in a toaster oven for a few minutes. This will bring back that fresh-baked taste. If you want to enjoy it warm, sprinkle some powdered sugar on top after reheating.
FAQs
Can I use bottled apple cider for this recipe?
Yes, you can use bottled apple cider. Just make sure it’s not sweetened. Fresh cider gives a better flavor, but bottled works well too.
How can I make the cake more moist?
To make the cake moist, try adding an extra egg or using more buttermilk. You can also mix in more grated apples. Each adds moisture and keeps the cake soft.
What is the difference between baking powder and baking soda?
Baking soda is a base that needs acid to work. Baking powder has acid already mixed in. Both help the cake rise, but they do it differently.
Can I substitute the butter with oil?
Yes, you can use oil instead of butter. This change can make the cake more moist. Use a light oil like canola or vegetable for the best results.
How do I know when the cake is done baking?
You can check if the cake is done by inserting a toothpick in the center. If it comes out clean, the cake is ready. If it has batter on it, bake for a few more minutes.
We’ve covered how to make a delicious apple cider donut cake. You learned about key ingredients and why apples matter. I shared step-by-step instructions to help you bake perfectly. Tips for texture and storage ensure you enjoy every bite. Variations let you explore gluten-free and vegan options. Always remember to ask questions if you’re not sure. This cake brings warmth and joy to any gathering. Now, gather your ingredients and start baking!