Are you ready to spice up your dinner routine? These Lemon Garlic Tuna Cakes are a game-changer! Made with simple ingredients, they’re tasty, easy to prepare, and perfect for any night. In this post, I’ll guide you through each step, from mixing to cooking, plus share tips and variations. Let’s dive into this flavorful dish that you and your family will love!
Why I Love This Recipe
- Quick and Easy: This recipe can be whipped up in just 30 minutes, making it perfect for busy weeknights.
- Healthy Ingredients: Packed with protein from tuna and fiber from whole wheat breadcrumbs, these cakes are a nutritious choice.
- Customizable: Feel free to add your favorite herbs or spices to make these cakes uniquely yours!
- Deliciously Flavorful: The combination of lemon and garlic gives these tuna cakes a fresh and vibrant taste that’s hard to resist.
Ingredients
Main Ingredients for Lemon Garlic Tuna Cakes
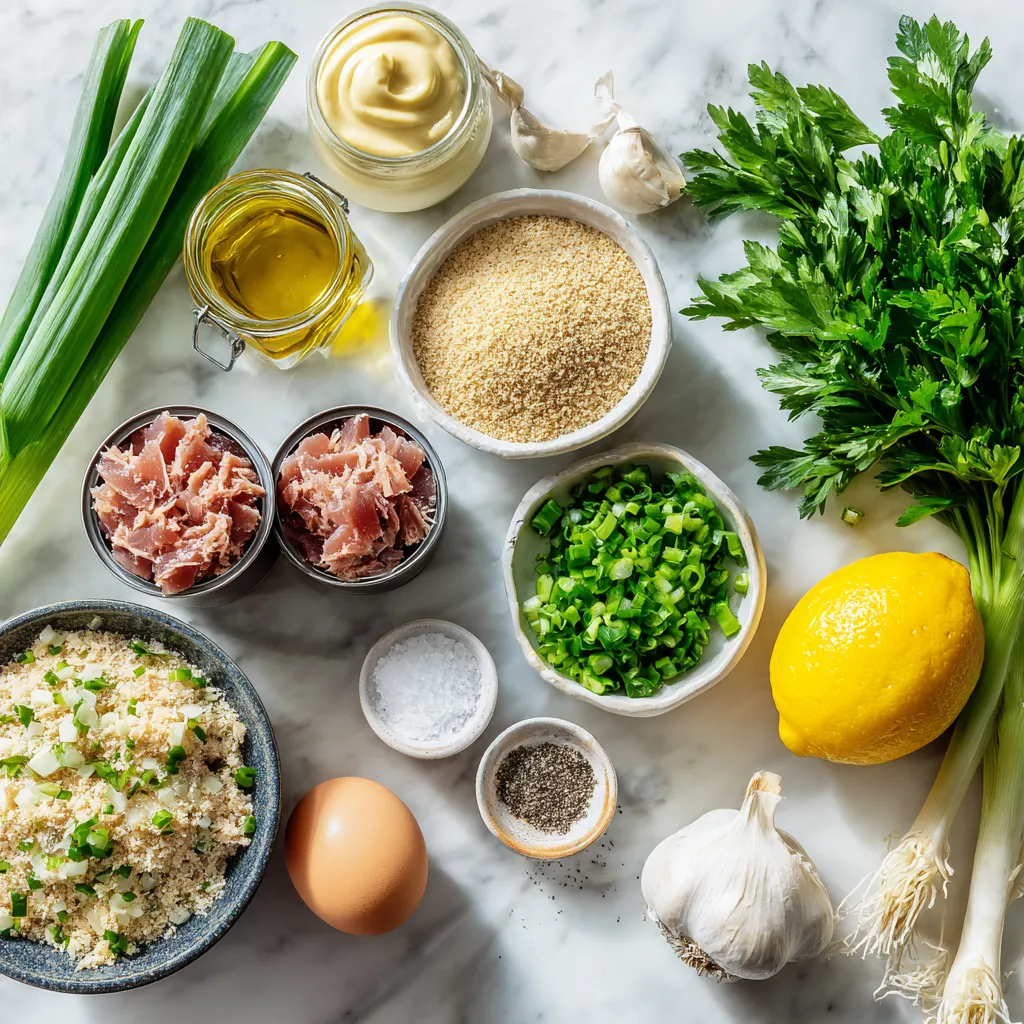
To make tasty lemon garlic tuna cakes, you need just a few key items:
– 2 cans (5 oz each) tuna, drained
– 1/2 cup breadcrumbs (preferably whole wheat)
– 1/4 cup finely chopped green onions
– 2 cloves garlic, minced
– 1 large egg
– 2 tablespoons mayonnaise
– 1 tablespoon Dijon mustard
– 1 tablespoon fresh lemon juice
– Zest from 1 lemon
– Salt and pepper to taste
– Olive oil for frying
– Fresh parsley for garnish (optional)
These ingredients bring out the fresh, bright flavors in the dish. Tuna gives you protein, while lemon adds zest.
Optional Ingredients for Customization
You can tweak this recipe to fit your taste. Here are some great options:
– Chopped bell peppers for crunch
– Celery for a fresh bite
– A pinch of cayenne for heat
– Grated cheese for creaminess
Feel free to mix and match. It’s fun to experiment!
Recommended Substitutes for Dietary Needs
If you have special dietary needs, you can make easy swaps:
– Use chickpeas instead of tuna for a plant-based option.
– Substitute gluten-free breadcrumbs for a gluten-free dish.
– Replace mayonnaise with Greek yogurt for less fat.
These substitutes keep the dish tasty while fitting your diet. Enjoy making lemon garlic tuna cakes your way!
Step-by-Step Instructions
Preparing the Tuna Mixture
First, grab a large mixing bowl. Open the two cans of tuna and drain them well. Add the drained tuna to the bowl. Next, add in half a cup of breadcrumbs for a nice texture. I prefer whole wheat breadcrumbs for added flavor. Then, chop up a quarter cup of green onions and toss them in. Don’t forget to mince two cloves of garlic. Add the garlic to the bowl too. Mix everything together until it is well combined.
Making the Egg Binding Mixture
Now, take another bowl and crack one large egg into it. Whisk the egg until it’s smooth. Next, add two tablespoons of mayonnaise for creaminess. Then, mix in one tablespoon of Dijon mustard for a hint of tang. Squeeze in one tablespoon of fresh lemon juice and add the zest from one lemon. This will add a bright flavor. Stir the mixture until it is smooth and all the ingredients are blended well.
Forming and Cooking the Tuna Cakes
Pour the egg mixture into the bowl with the tuna mixture. Stir until everything is fully combined. Season with salt and pepper to taste. Now, it’s time to form the cakes. Take a portion of the mixture and shape it into patties, about two to three inches wide and half an inch thick.
Heat a skillet over medium heat. Drizzle some olive oil to coat the bottom. Once the oil is hot, carefully place the tuna cakes in the skillet. Cook them for about four to five minutes on each side. You want them to be golden brown and crispy. When they’re done, remove them from the skillet and place them on a paper towel-lined plate to soak up extra oil. Enjoy your tasty lemon garlic tuna cakes!
Tips & Tricks
Best Practices for Cooking Tuna Cakes
To make the best tuna cakes, follow these tips:
– Use quality tuna. Canned tuna in water or oil works well.
– Drain the tuna well. This helps prevent soggy cakes.
– Mix gently. Over-mixing can make the cakes tough.
– Shape the patties evenly. This ensures they cook evenly.
– Preheat the skillet. A hot pan gives a nice golden color.
How to Avoid Common Mistakes
Here are some common mistakes to avoid:
– Don’t skip the breadcrumbs. They hold the cakes together.
– Be careful with salt. Canned tuna can be salty.
– Avoid overcrowding the pan. Cook in batches for the best crispiness.
– Let them cool slightly before serving. This helps them firm up.
Suggestions for Serving and Pairing
Lemon garlic tuna cakes are tasty on their own. Here are some ideas:
– Serve with a fresh salad. A light lemon vinaigrette pairs well.
– Try a dollop of tartar sauce. It adds a nice creamy touch.
– Pair with roasted veggies. They add color and nutrition.
– Garnish with fresh parsley. It makes the dish pop visually.
These tips will help you make perfect lemon garlic tuna cakes every time. Enjoy your cooking!
Pro Tips
- Use Quality Tuna: Opt for tuna packed in olive oil for a richer flavor and better texture.
- Chill the Mixture: Allow the tuna mixture to chill in the fridge for 30 minutes before forming patties to help them hold their shape.
- Test the Patties: Fry a small test patty first to check the seasoning and adjust as necessary before cooking the whole batch.
- Serve with Sauce: Pair the tuna cakes with a tangy dipping sauce, like tartar sauce or aioli, for an extra flavor boost.
Variations
Adding Extra Flavor with Herbs and Spices
You can boost the taste of lemon garlic tuna cakes by adding herbs and spices. Fresh dill or parsley adds a nice touch. You might also try adding a pinch of red pepper flakes for heat.
Consider using dried herbs, like oregano or thyme. These herbs are easy to find. You can mix them right into the tuna mixture. Experiment with your favorites to find the best blend.
Alternative Protein Sources for Different Diets
If you want to try something new, you can swap tuna for other proteins. Canned salmon works great and gives a different flavor. You could also use cooked chickpeas for a vegetarian option. Mash them well to keep the texture right.
For those who avoid fish, shredded chicken is a solid choice. It’s still easy to make and tastes good. The key is to keep the mixture moist and flavorful, no matter the protein you choose.
Creative Serving Ideas and Accompaniments
Serving tuna cakes can be just as fun as making them. Try placing the cakes on a bed of mixed greens for a fresh touch. You can also serve them with a side of tangy coleslaw for crunch.
For a tasty dip, mix yogurt with lemon juice and herbs. This adds a creamy element that pairs well. You could also serve the cakes with a side of roasted vegetables for a healthy meal.
Don’t forget to experiment with sauces, too. A drizzle of sriracha or a simple garlic aioli can take these cakes to the next level. Enjoy creating your own perfect plate!
Storage Info
How to Store Leftover Tuna Cakes
To keep your leftover tuna cakes fresh, place them in an airtight container. Make sure they cool down to room temperature first. This helps avoid moisture buildup. Store them in the fridge. They should last for about 3 days. If you want to eat them later, freezing is a great option.
Freezing Tuna Cakes for Later Use
To freeze tuna cakes, wrap each cake in plastic wrap. Then place them in a freezer-safe bag or container. This method prevents freezer burn. You can freeze them for up to 2 months. When you’re ready to eat, simply thaw them in the fridge overnight.
Reheating Tips for Optimal Flavor and Texture
For the best taste, reheat your tuna cakes in a skillet. Heat a little olive oil over medium heat. Cook the cakes for about 3-4 minutes on each side. This helps them stay crispy. You can also use an oven. Preheat it to 350°F and bake the cakes for about 10-15 minutes. Enjoy them warm, just like when they were fresh!
FAQs
Can I use fresh tuna instead of canned for this recipe?
Yes, you can use fresh tuna. Just cook the fresh tuna first. After cooking, shred it into small pieces. This will give your cakes a nice texture. The flavor will be fresh and bright. You might need to adjust the cooking time a little. Cook the cakes until they are golden brown.
How do I know when the tuna cakes are cooked through?
You will notice a nice golden color on both sides. The cakes should feel firm when you touch them. If they look crispy and brown, they are likely done. You can also use a food thermometer. The inside should reach 165°F (74°C) for safety.
What are some good side dishes to serve with lemon garlic tuna cakes?
Lemon garlic tuna cakes pair well with many sides. Here are a few tasty options:
– A fresh green salad with lemon dressing
– Steamed vegetables like broccoli or green beans
– Roasted potatoes or sweet potatoes
– A light pasta salad with herbs and olive oil
– Quinoa or rice with fresh herbs
These sides will add color and flavor to your meal. Enjoy your meal with a nice balance of tastes and textures!
Lemon garlic tuna cakes are easy to make and tasty. We discussed key ingredients, steps for making them, and tips for success. You learned how to store leftovers and even customize your cakes. These simple cakes offer many ways to enjoy tuna. Experiment with flavors and serving ideas to find your favorite. With these tools and facts, you can whip up a delicious meal that everyone will love. Dive into cooking and make your own tuna cakes tonigh