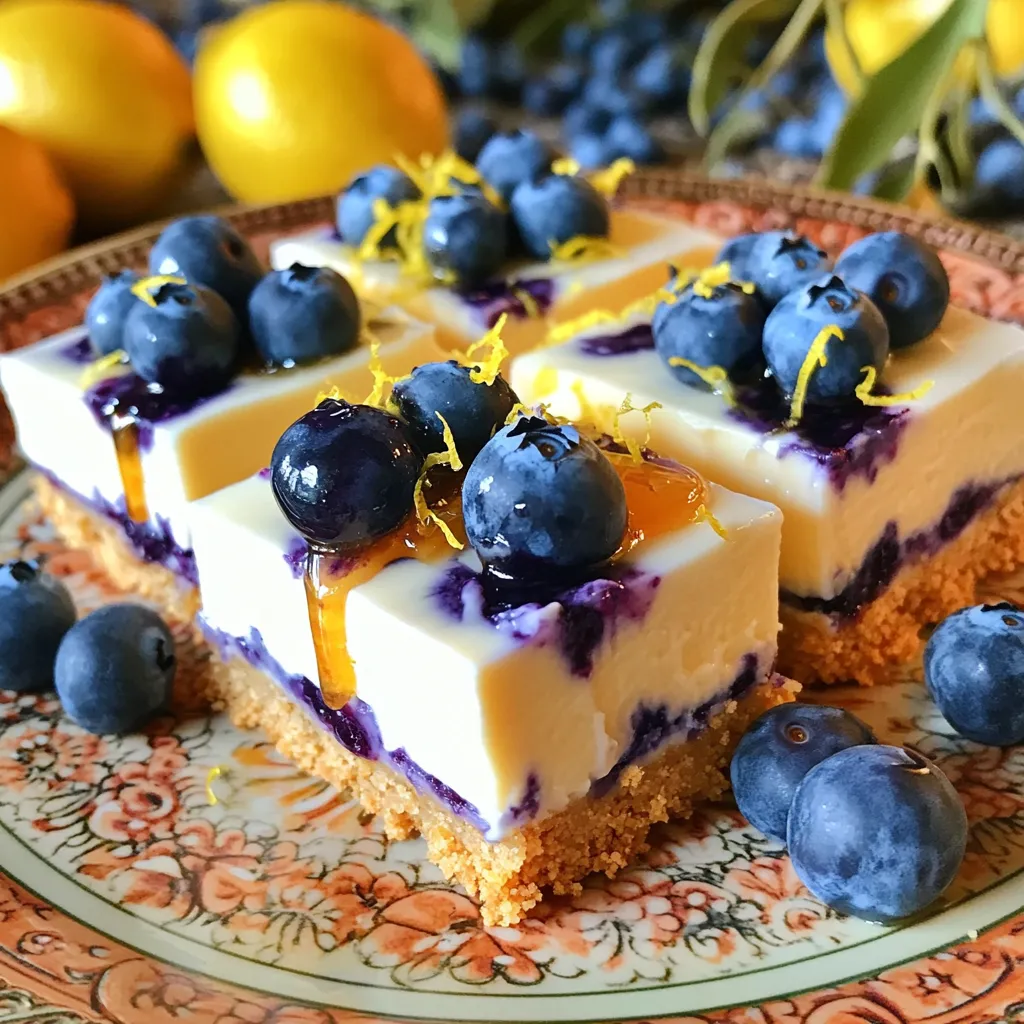
Get ready for a sweet treat with my No-Bake Blueberry Lemon Cheesecake Bars! This easy recipe combines fresh blueberries and zesty lemon for a refreshing dessert that’s perfect for any occasion. You’ll love the creamy texture and crunchy crust. Plus, there’s no oven needed! I will guide you step by step to make these delightful bars. Grab your ingredients, and let’s create something delicious together!
Why I Love This Recipe
- Quick and Easy: This no-bake dessert requires minimal time and effort, making it perfect for busy days.
- Refreshing Flavor: The combination of lemon and blueberries creates a bright, refreshing taste that’s perfect for warm weather.
- Beautiful Presentation: These bars look stunning and are sure to impress guests, making them ideal for gatherings.
- Customizable: You can easily modify the recipe with different fruits or toppings to suit your taste preferences.
Ingredients
Main Ingredients
– 1 ½ cups graham cracker crumbs
– ½ cup unsalted butter, melted
– 1 cup cream cheese, softened
– ½ cup powdered sugar
– 1 teaspoon vanilla extract
– 1 cup heavy cream, chilled
– Zest of 1 lemon
– ½ cup fresh lemon juice
– 1 cup fresh blueberries
These main ingredients create the heart of your cheesecake bars. The graham cracker crumbs form a tasty crust. The cream cheese gives the filling its rich texture. Fresh blueberries add a burst of flavor and color.
Optional Ingredients
– 2 tablespoons honey (for drizzling)
– Additional lemon zest for garnish
These optional ingredients add a sweet touch. Drizzling honey over the bars makes them shine. Extra lemon zest enhances the flavor and looks great.
Equipment Needed
– 9×9 inch square baking dish
– Mixing bowls
You need a square baking dish to hold your cheesecake bars. Mixing bowls help combine all your ingredients easily. Having these tools ready makes the process smooth.

Step-by-Step Instructions
Preparing the Crust
Start by mixing the graham cracker crumbs with melted butter in a bowl. Make sure you coat the crumbs well. This mixture creates a tasty base for our cheesecake. Next, press the crust mixture firmly into the bottom of a 9×9 inch baking dish. Use a flat tool like a measuring cup for even pressure. Once pressed down, chill the crust in the refrigerator for about 30 minutes. This helps the crust set and makes it easier to slice later.
Making the Cheesecake Filling
In a large mixing bowl, beat the softened cream cheese until it is smooth. This step is key for a creamy filling. Then, add the powdered sugar, vanilla extract, lemon zest, and lemon juice. Mix everything until it is well combined. The lemon juice gives a bright taste that pairs wonderfully with blueberries. Make sure there are no lumps in the mixture for the best texture.
Combining Elements
In another bowl, whip the chilled heavy cream until stiff peaks form. This will add air and lightness to your cheesecake. Once whipped, gently fold the whipped cream into the cream cheese mixture. Be careful not to deflate the whipped cream; it adds fluffiness to your bars. Stir until fully incorporated, creating a creamy filling. Pour this cheesecake filling over the chilled crust and spread it evenly. Finally, place fresh blueberries on top, pressing them slightly into the mixture. This adds color and bursts of flavor to each bite.
Pro Tips
- Use Fresh Ingredients: Fresh blueberries and lemons will enhance the flavor of your cheesecake bars, making them taste vibrant and delicious.
- Cool Your Crust: Ensure your crust is well-chilled before adding the cheesecake filling. This helps to maintain its structure and prevents it from becoming soggy.
- Whip Cream to Stiff Peaks: Whipping the heavy cream until stiff peaks form is crucial for a light and airy cheesecake filling. This will give your bars a delightful texture.
- Chill Overnight: For the best results, chill the cheesecake bars overnight. This allows the flavors to meld together and the texture to set perfectly.
Tips & Tricks
Perfecting the Texture
How to avoid deflating whipped cream?
When making the filling, whip the cream until you see stiff peaks. Use a gentle hand when folding the whipped cream into the cream cheese mixture. I like to use a rubber spatula. This helps keep the air inside the whipped cream.
Ensuring smooth cheesecake filling:
Start with softened cream cheese for the best results. Mix it until it’s creamy and free of lumps. Adding powdered sugar slowly helps blend everything well. Lastly, remember to scrape the bowl sides while mixing. This way, you get a smooth filling without lumps.
Chilling Recommendations
Optimal chilling time for firmness:
Chill the cheesecake bars for at least 4 hours. For best results, let them sit overnight. This extra time helps the bars set properly. A firm texture makes them easier to cut into nice squares.
Serving tips for best presentation:
Serve these bars on a decorative plate. Garnish with extra blueberries and a bit of lemon zest. This makes the dish look bright and inviting. A drizzle of honey adds shine and extra flavor, making it a treat for the eyes and the taste buds.
Flavor Enhancements
Suggestions for additional toppings:
You can add more fresh berries on top for a colorful touch. Consider using sliced strawberries or raspberries. A sprinkle of chopped nuts can also add a nice crunch.
Alternative sweeteners in the recipe:
If you prefer a different sweetener, try using maple syrup or agave nectar. These can replace honey for a unique twist. Adjust the amount to taste, keeping in mind that sweetness varies with each sweetener.
Variations
Fruit Alternatives
You can switch up the fruit in this recipe. Instead of blueberries, try using strawberries or raspberries. Both fruits add a sweet and tangy taste. They also look beautiful on top of the cheesecake. You can also add citrus flavors. Lime or orange can make the dessert pop. Just replace some lemon juice with lime or orange juice. This change brings a fresh twist and bright flavor.
Gluten-Free Options
If you need a gluten-free version, you can easily adapt this recipe. Use gluten-free graham crackers instead of regular ones. They work just as well for the crust. Make sure to check the other ingredients for gluten. For example, some cream cheeses may have additives. Always read the labels to be safe.
Dairy-Free Adaptations
For a dairy-free option, you can switch the cream cheese. Use vegan cream cheese to keep it creamy. There are also dairy-free whipped cream options. Look for coconut cream or almond-based whipped cream. These choices will keep the cheesecake light and fluffy without dairy. Enjoy the same great taste while sticking to your dietary needs.
Storage Info
Refrigeration Guidelines
To keep your no-bake blueberry lemon cheesecake bars fresh, store them in the fridge. Use an airtight container or cover with plastic wrap. This protects them from odors and moisture. They will last for about 5 days. If you want to enjoy them later, it’s best to store them properly.
Freezing Instructions
You can freeze these cheesecake bars too! First, cut them into squares. Then, wrap each piece tightly in plastic wrap. Place the wrapped bars in a freezer-safe bag or container. They can stay in the freezer for up to 2 months. When you want to eat them, take them out and let them thaw in the fridge. Freezing may change the texture slightly, but they will still taste great.
Serving After Storage
Before serving, check the bars after storage. If they seem a little soft, you can chill them for a bit. Drizzle some honey on top for added sweetness. Garnish with extra blueberries and lemon zest to make them look pretty. Serve them on a nice plate to impress your guests!
FAQs
Can I make these bars ahead of time?
Yes, you can. These bars do well when made in advance. I recommend making them a day ahead. This gives the flavors time to blend. Just keep them in the fridge until you are ready to serve. They will taste even better after chilling overnight.
What can I substitute for cream cheese?
If you need a substitute, try using Greek yogurt. It adds creaminess and a slight tang. Another option is mascarpone cheese, which is rich and smooth. For a dairy-free choice, look for vegan cream cheese. Each of these options brings a unique taste to your bars.
How do I make the crust firmer?
To make a firmer crust, add a bit more butter to the crumbs. Use a ratio of two tablespoons of butter for every cup of crumbs. Press the mixture down firmly into the baking dish. Chill it longer before adding the filling. This helps create a sturdy base that holds up well.
This blog post covers how to make delicious cheesecake bars with easy steps. We discussed key ingredients like graham crackers, cream cheese, and blueberries. Remember the tips for a great texture and chilling times. You can experiment with variations, including gluten-free or dairy-free options. Don’t forget about proper storage for leftovers! Enjoy your cheesecake bars, whether for a party or a simple dessert. With these tips, you’ll impress everyone with your tasty creation.