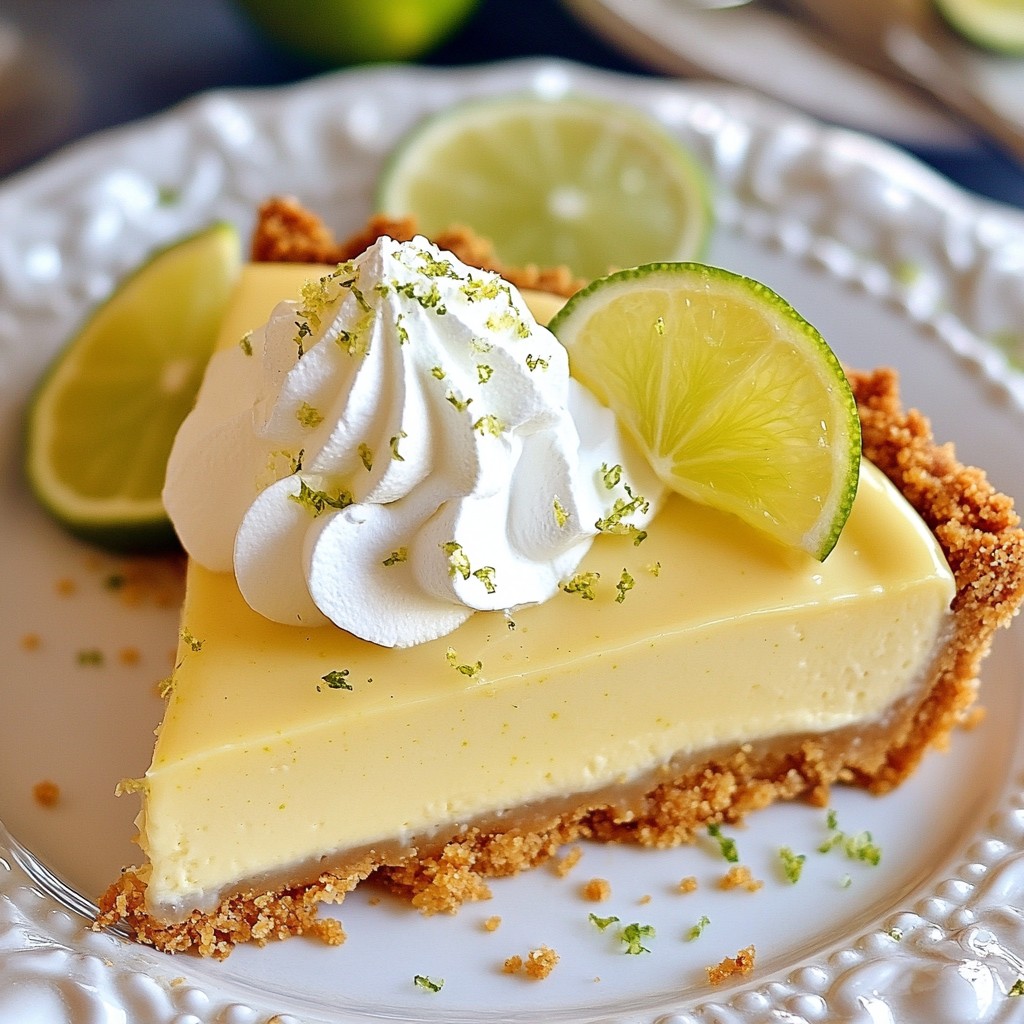
Craving a refreshingly sweet treat without the fuss? No Bake Key Lime Pie is your answer. This easy dessert combines the tartness of lime with a creamy filling, all set in a simple crust. You won’t need an oven for this delight! Whether you’re a baking pro or a newbie, I’ll guide you step-by-step to create the perfect pie. Let’s dive into making this cool, zesty dessert together!
Why I Love This Recipe
- Easy Preparation: This no-bake pie requires minimal cooking skills and can be prepared in just 20 minutes, making it perfect for any occasion.
- Refreshing Flavor: The combination of key lime juice and zest creates a bright and zesty flavor that is both tangy and sweet, ideal for warm weather.
- Light and Airy Texture: Incorporating whipped cream into the filling gives the pie a delightful lightness that melts in your mouth.
- Perfect for Sharing: This recipe serves 8-10 people, making it a great dessert to share at gatherings, parties, or family dinners.
Ingredients
Complete List of Ingredients
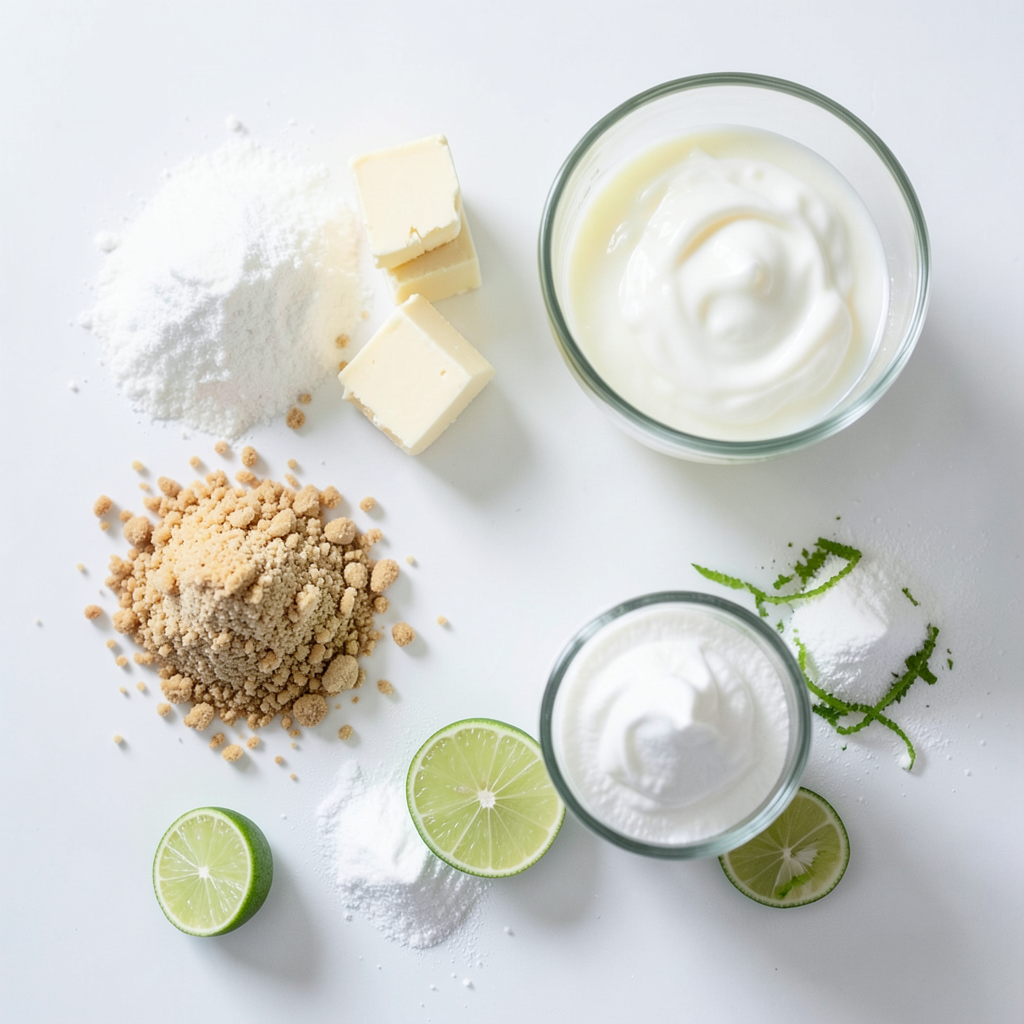
To make this refreshing no bake key lime pie, you need the following ingredients:
- 1 ½ cups graham cracker crumbs
- ⅓ cup granulated sugar
- ⅓ cup unsalted butter, melted
- 1 can (14 oz) sweetened condensed milk
- ½ cup freshly squeezed key lime juice (or regular lime juice)
- 1 teaspoon lime zest
- 1 cup heavy whipping cream
- 2 tablespoons powdered sugar
- Lime slices and zest for garnish
Ingredient Substitutions
You can swap some ingredients if needed. Here are a few ideas:
- Graham cracker crumbs: You can use crushed cookies like Oreos or vanilla wafers for a twist.
- Granulated sugar: You can try coconut sugar or a sugar substitute for less sweetness.
- Unsalted butter: Use coconut oil or a plant-based butter for a dairy-free option.
- Sweetened condensed milk: You can use a homemade version using milk and sugar if you prefer.
- Key lime juice: Regular lime juice works just as well if key limes are hard to find.
- Heavy whipping cream: A non-dairy whipped topping can replace it for a lighter version.
Equipment Needed
For this recipe, gather these kitchen tools:
- 9-inch pie dish
- Medium mixing bowl
- Large mixing bowl
- Electric mixer (or whisk)
- Spatula
- Plastic wrap for chilling
This simple list makes it easy for you to gather what you need. With these ingredients and tools, you’ll be ready to create a delicious no bake key lime pie!
Step-by-Step Instructions
Preparing the Crust
First, grab a medium bowl. Add 1 ½ cups of graham cracker crumbs. Mix in ⅓ cup of granulated sugar and ⅓ cup of melted butter. Stir until it looks like wet sand. Now, take a 9-inch pie dish. Press the crumb mixture into the bottom and up the sides. Make it even and compact. Chill the crust in the fridge while you work on the filling.
Making the Lime Filling
Next, find a large mixing bowl. Add one can of sweetened condensed milk. Pour in ½ cup of freshly squeezed key lime juice. Add 1 teaspoon of lime zest for extra flavor. Whisk them together until it is smooth and creamy. This lime filling will bring a zesty kick to your pie.
Whipping the Cream
In another bowl, pour in 1 cup of heavy whipping cream. Add 2 tablespoons of powdered sugar. Use an electric mixer on medium speed. Whip until soft peaks form. This will make the pie light and fluffy. Be careful not to over-whip.
Combining the Mixtures
Now, gently fold the whipped cream into the lime filling. Use a spatula for this. Fold carefully to keep the whipped cream airy. This step makes the filling light and delicious. Once mixed, it should look fluffy and bright.
Chilling the Pie
Pour the creamy lime filling into your chilled crust. Spread it evenly with a spatula. Cover the pie with plastic wrap. Place it in the fridge for at least 4 hours. For the best taste, chill it overnight. This helps the pie set properly.
Serving Suggestions
When ready to serve, slice the pie into pieces. Serve each slice chilled on a plate. For a fun touch, add a dollop of whipped cream on top. Garnish with a slice of lime and some zest. This adds color and extra flavor to each slice. Enjoy!
Tips & Tricks
How to Achieve the Perfect Texture
To get the best texture for your no bake key lime pie, focus on the whipped cream. Whip it until soft peaks form. This gives the pie a light and airy feel. Be gentle when folding the whipped cream into the lime filling. Use a spatula and fold slowly. This keeps the mixture fluffy. Don't skip chilling the pie; let it set for at least four hours, but overnight is best.
Common Mistakes to Avoid
One common mistake is over-mixing the whipped cream. This can lead to a dense filling. Another mistake is not chilling the crust. If the crust is warm, it won't hold the filling well. Make sure to press the crust firmly into the dish. Check that your key lime juice is fresh. Bottled juice can taste flat and dull.
Enhancing Flavor with Zest
Adding lime zest can take your pie to the next level. Just a teaspoon adds a bright punch of flavor. You can also garnish each slice with more zest. This adds a nice pop of color and taste. If you want more zest, use a microplane to finely grate the skin. Just remember, too much zest can make it bitter, so use it wisely.
Pro Tips
- Use Fresh Limes: For the best flavor, always use freshly squeezed key lime juice instead of bottled juice. Fresh limes provide a vibrant taste that enhances the overall pie experience.
- Chill Your Ingredients: Before starting, chill your mixing bowl and beaters in the freezer for about 10 minutes. This will help the whipped cream whip up faster and achieve a better texture.
- Don't Overmix: When folding the whipped cream into the lime filling, be gentle. Overmixing can deflate the whipped cream, resulting in a denser pie instead of the light and airy texture you want.
- Garnish Smartly: For a stunning presentation, use thin lime slices and a sprinkle of lime zest as garnish. This not only looks beautiful but also adds an extra burst of flavor.
Variations
Different Types of Crust (Graham Cracker, Oreo, etc.)
You can make this pie with many crust types. The classic graham cracker crust is easy and tasty. Just mix graham cracker crumbs, sugar, and melted butter. Press it into your pie dish. But you can also use an Oreo crust. Just crush Oreos and mix with melted butter. It adds a rich chocolate taste. You could even try a nut-based crust for a gluten-free option. Almonds or pecans work well. The choice is yours!
Flavor Variations (Mango, Strawberry, Coconut, etc.)
While key lime is the star, you can play with flavors. Try adding mango for a tropical twist. Just blend fresh mango into the filling. For a berry touch, mix in strawberries or raspberries. Coconut adds a nice creaminess too. You can use coconut cream instead of heavy cream for a coconut key lime pie. Each flavor gives a unique taste. Experiment and find what you love most!
Vegan or Dairy-Free Options
You can make this pie vegan and dairy-free. Use coconut milk or a cashew cream for the filling. Substitute the heavy cream with coconut cream. It whips up just like regular cream. For the sweetened condensed milk, use a vegan version available at stores. You can even make your own using coconut milk and sugar. This way, everyone can enjoy a slice of this refreshing dessert!
Storage Info
How to Properly Store Leftovers
To store your No Bake Key Lime Pie, cover it tightly with plastic wrap or foil. This keeps the pie fresh and safe from odors in your fridge. You can also use an airtight container to store the pie. Place it in the fridge for up to three days. If you want to enjoy it later, freezing is a great option.
Freezing Instructions
You can freeze your Key Lime Pie if you want to keep it longer. First, let the pie set completely in the fridge. Then, wrap it well in plastic wrap and foil. This prevents freezer burn. You can freeze the pie for up to three months. When you are ready to eat it, let it thaw in the fridge overnight. This keeps the texture nice.
Shelf Life of No Bake Key Lime Pie
The shelf life of No Bake Key Lime Pie depends on how you store it. In the fridge, it lasts for about three days. If you freeze it, the pie can last up to three months. Always check for any signs of spoilage before enjoying leftover slices. If it smells off or looks strange, it's best to toss it.
FAQs
How long does No Bake Key Lime Pie last?
No Bake Key Lime Pie lasts up to five days in the fridge. Store it in an airtight container to keep it fresh. If you notice any changes in smell or texture, it's best to toss it.
Can I use regular limes instead of key limes?
Yes, you can use regular limes instead of key limes. The pie will taste slightly different but still delicious. Regular limes are often easier to find and cheaper too.
Is it possible to make this pie ahead of time?
Absolutely! You can make this pie a day or two in advance. Just make sure to cover it well in the fridge. This will allow the flavors to meld and the pie to set perfectly.
What can I use instead of sweetened condensed milk?
If you want a substitute for sweetened condensed milk, try coconut cream. You can mix coconut cream with sugar to achieve a similar sweetness. You can also use a non-dairy version for a vegan option.
Can I make mini versions of the pies?
Yes, mini versions are a great idea! Use a muffin tin or small ramekins for individual servings. Just adjust the chilling time since they may set faster than a full-sized pie.
This blog post covered key ingredients and step-by-step instructions for a no-bake key lime pie. We also explored helpful tips for great texture and common mistakes. You learned about variations, storage, and answered frequently asked questions.
Now, you can confidently make this refreshing dessert. Enjoy using your creativity to try different flavors and crusts. With practice, you’ll whip up the perfect key lime pie every time. Happy baking!