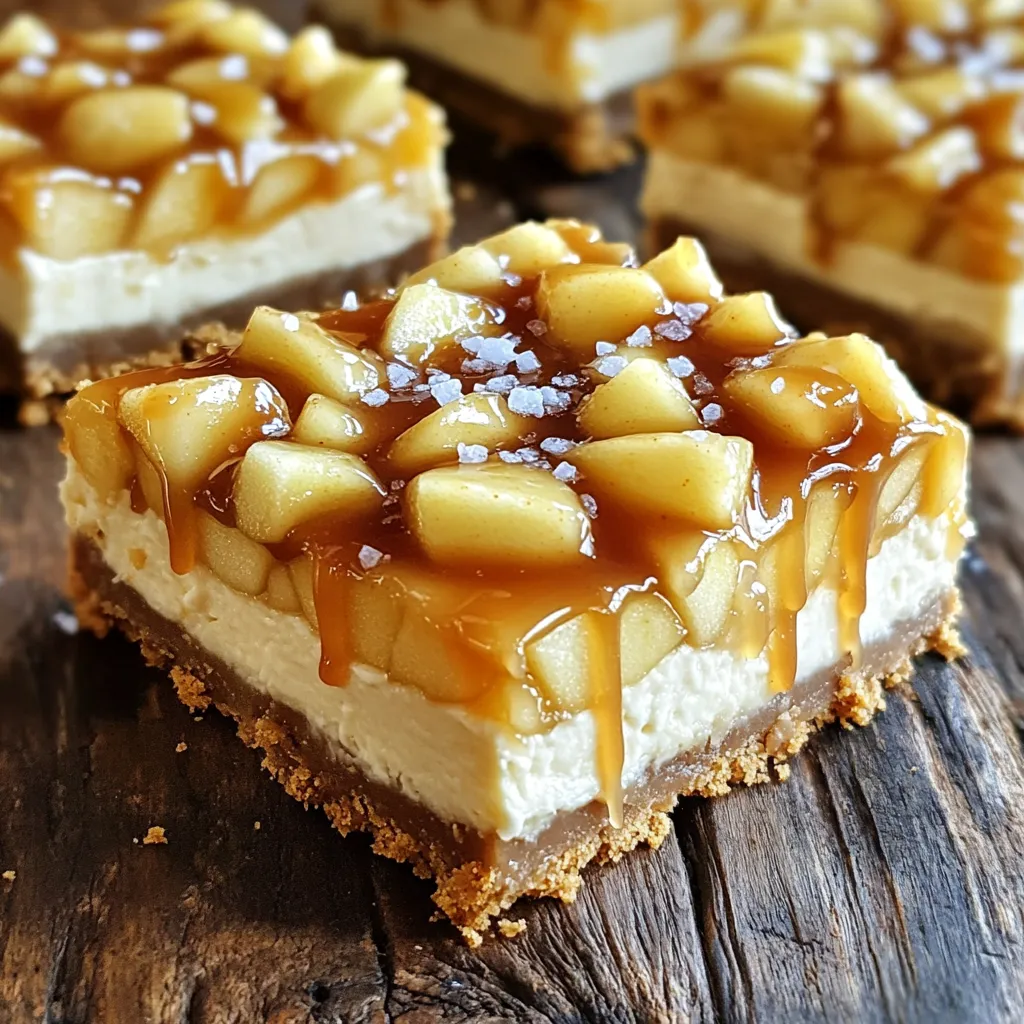
Are you ready for a delicious treat that combines sweet and salty flavors? Salted Caramel Apple Cheesecake Bars are the perfect dessert for any occasion. In this post, I will guide you through simple steps to create these mouthwatering bars. From gathering the right ingredients to baking tips, I’ve got you covered. Let’s dive into this easy recipe that will impress your friends and family!
Why I Love This Recipe
- Delicious Flavor Combination: The blend of creamy cheesecake, tart apples, and rich salted caramel creates a delightful taste that’s hard to resist.
- Perfect for Any Occasion: These cheesecake bars are suitable for holidays, family gatherings, or just a cozy night in.
- Easy to Make: With simple ingredients and straightforward steps, this recipe is accessible for bakers of all skill levels.
- Gorgeous Presentation: The marbled caramel and sprinkle of sea salt make these bars visually appealing and perfect for sharing.
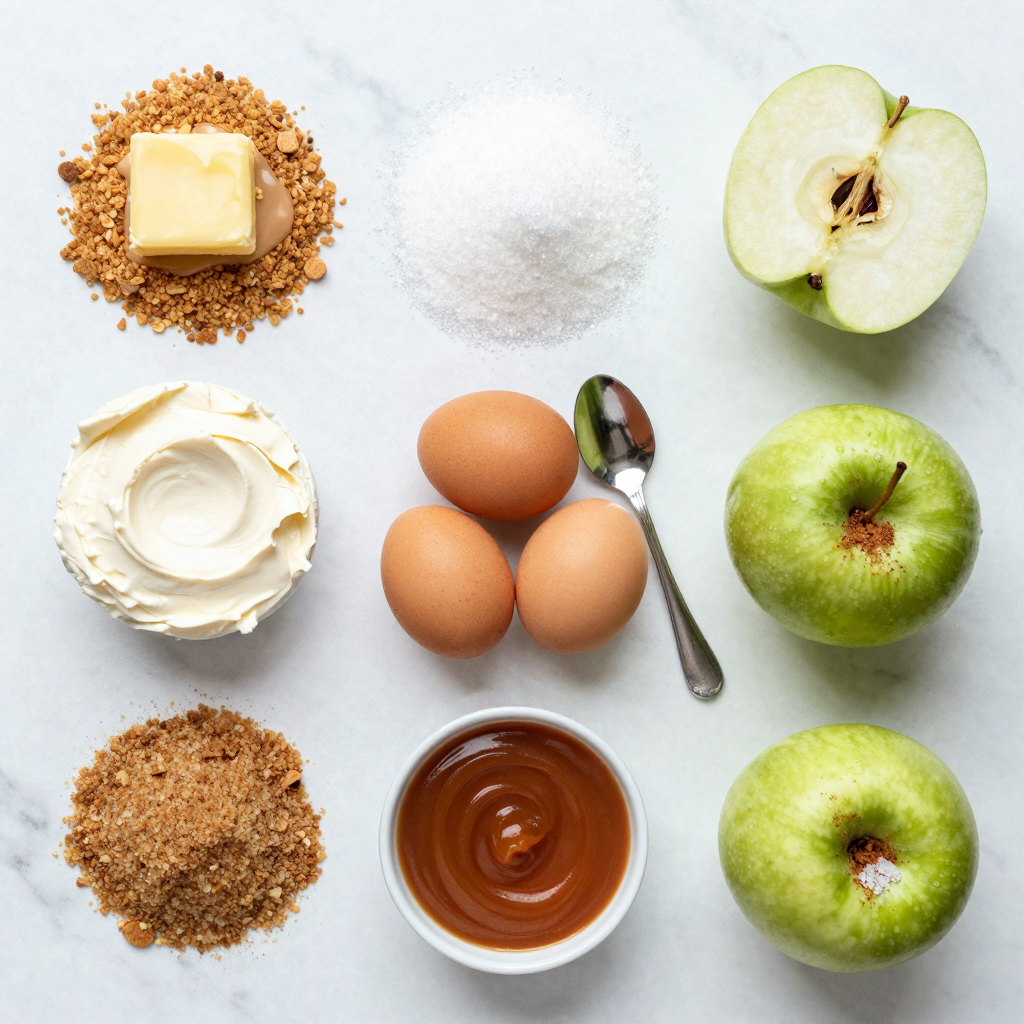
Ingredients
List of Ingredients
– 1 ½ cups graham cracker crumbs
– ½ cup unsalted butter, melted
– ¼ cup granulated sugar
– 2 (8 oz each) packages cream cheese, softened
– ¾ cup brown sugar, packed
– 2 large eggs
– 1 teaspoon vanilla extract
– 2 cups apples, peeled, cored, and diced (Granny Smith or Honeycrisp)
– ½ teaspoon ground cinnamon
– ½ cup salted caramel sauce (store-bought or homemade)
– Sea salt, for garnish
Ingredient Substitutions
You can swap graham cracker crumbs with crushed cookies. Use Oreo or digestive biscuits for a twist. If you need a dairy-free option, try vegan cream cheese. Maple syrup can replace brown sugar for a unique flavor. For apples, any tart variety works well. Try Fuji or Braeburn apples for a sweet touch.
Measuring Tips
Use dry measuring cups for solid ingredients like graham crumbs and sugar. Level off the top with a straight edge for accuracy. For sticky ingredients like melted butter, use a liquid measuring cup. Always pack brown sugar firmly in the cup. When measuring cream cheese, let it soften first for a smooth blend.
Step-by-Step Instructions
Preheat Your Oven
Set your oven to 325°F (163°C). This step warms up the oven for baking. It makes sure your cheesecake bars bake evenly. Line a 9×9 inch baking dish with parchment paper. Leave some paper hanging over the sides. This helps you lift the bars out later.
Preparing the Crust
In a mixing bowl, add 1 ½ cups of graham cracker crumbs, ½ cup of melted unsalted butter, and ¼ cup of granulated sugar. Mix these ingredients well. You want the crumbs to be coated nicely. Press the mixture firmly into the bottom of the baking dish. This forms a solid crust.
Making the Cheesecake Filling
In a separate bowl, beat together two packages of softened cream cheese and ¾ cup of brown sugar. Mix until it’s smooth and creamy. Add two large eggs one at a time. Make sure to blend well after each egg. Finally, stir in 1 teaspoon of vanilla extract until it is fully mixed.
Preparing the Apples
Take 2 cups of peeled, cored, and diced apples. Granny Smith or Honeycrisp apples work great. In another bowl, toss these apple pieces with ½ teaspoon of ground cinnamon. This adds a warm flavor. Then, gently fold the cinnamon apples into the cheesecake mixture. Make sure they are well distributed.
Layering the Cheesecake
Now, pour the apple cheesecake mixture over the cooled crust. Spread it out evenly. Drizzle ½ cup of salted caramel sauce on top. Use a knife to swirl the caramel into the cheesecake layer. This creates a fun marbled look.
Baking and Chilling the Bars
Place the dish in the oven and bake for 30-35 minutes. The edges should be set, but the center can have a slight jiggle. Once done, take it out and let it cool at room temperature for about 1 hour. After that, move the cheesecake bars to the fridge. Chill them for at least 4 hours, or overnight for the best results.
Pro Tips
- Use Fresh Apples: Opt for Granny Smith or Honeycrisp apples for a perfect balance of tartness and sweetness in your cheesecake bars.
- Cool Completely: Make sure to let the cheesecake bars cool completely at room temperature before chilling them in the refrigerator for the best texture.
- Enhance Caramel Flavor: If using store-bought caramel sauce, consider adding a pinch of sea salt to enhance the flavor and complement the sweetness.
- Perfect Slicing: For clean cuts, use a sharp knife and wipe it clean between cuts to prevent the bars from sticking together.
Tips & Tricks
How to Cut Perfect Bars
To cut perfect bars, first chill them well. Once they are firm, use a sharp knife. Wipe the knife with a damp cloth after each cut. This keeps the edges neat. You can also use a ruler to mark where to cut. This ensures even pieces.
Storing Leftovers
Store any leftover bars in an airtight container. Place parchment paper between layers to prevent sticking. They can last about a week in the fridge. If you want them to last longer, freeze them. Wrap each bar tightly in plastic wrap. Then place them in a freezer-safe bag. They can stay fresh for up to three months.
Baking Tips for a Creamy Texture
For a creamy texture, use softened cream cheese. Beat it until smooth to avoid lumps. Make sure your eggs are at room temperature. This helps them mix better. Don’t overbake the bars. The center should jiggle slightly when done. Let them cool before chilling. This helps set the cheesecake without cracking.
Variations
Alternate Fruit Options
You can change up the fruit in these bars. Try pears instead of apples. They add a nice sweetness. Berries also work well. Blueberries or raspberries give a tart flavor. You can mix fruits too. Combine apples and cranberries for a tasty twist.
Gluten-Free Options
If you need these bars to be gluten-free, swap the graham crackers. Use gluten-free crumbs instead. You can find them in many stores. Just check the label to be sure. For the filling, all other ingredients are naturally gluten-free.
Toppings and Garnishes
Toppings can really elevate your cheesecake bars. Drizzle more salted caramel on top for extra sweetness. Add chopped nuts for crunch. Walnuts or pecans work well here. You can also sprinkle extra sea salt for a bold flavor. A dollop of whipped cream adds a creamy touch.
Storage Info
How to Store Cheesecake Bars
To keep your cheesecake bars fresh, place them in an airtight container. You can store them in the fridge for up to five days. Make sure to keep them covered. This helps prevent them from drying out. If you have leftovers, always let them cool completely before storing. The cool bars will taste better later.
Freezing Instructions
If you want to save some for later, freezing works great! First, cut the cheesecake bars into squares. Wrap each piece in plastic wrap. Then, place the wrapped bars in a freezer-safe bag or container. They can stay in the freezer for up to three months. When you’re ready to enjoy them, just thaw them in the fridge overnight.
Best Practices for Reheating
Reheating cheesecake bars can be tricky. You want to warm them, not cook them more! The best way is to use the microwave. Heat a single bar for about 10 seconds. Check to see if it’s warm enough. If not, heat for another 5 seconds. You can also let them sit at room temperature for a bit. Enjoy your warm, tasty treat!
FAQs
Can I use a different type of apple?
Yes, you can use different apples. I like Granny Smith for its tartness. Honeycrisp adds sweetness. Other good options include Fuji or Braeburn. Choose apples based on your taste. Always peel and core the apples for the best texture.
How long do these bars last in the fridge?
These cheesecake bars last about five days in the fridge. Keep them in an airtight container. They taste best when fresh, but they still hold up well. The flavors can deepen over time, making them even more enjoyable.
Can I make these cheesecake bars ahead of time?
Yes, you can make these bars ahead of time. I recommend making them the day before you need them. This allows the flavors to meld beautifully. Just remember to chill them for at least four hours or overnight before serving.
This blog post covered all you need to make delicious cheesecake bars. We discussed key ingredients, how to measure them, and offered helpful substitutes. You learned step-by-step instructions for baking these treats and tips for cutting and storing them. Don’t forget the fun variations! You can easily switch fruits or try gluten-free options. Now, you’re ready to create a tasty dessert everyone will love. Enjoy sharing these bars with friends and family. Happy baking!