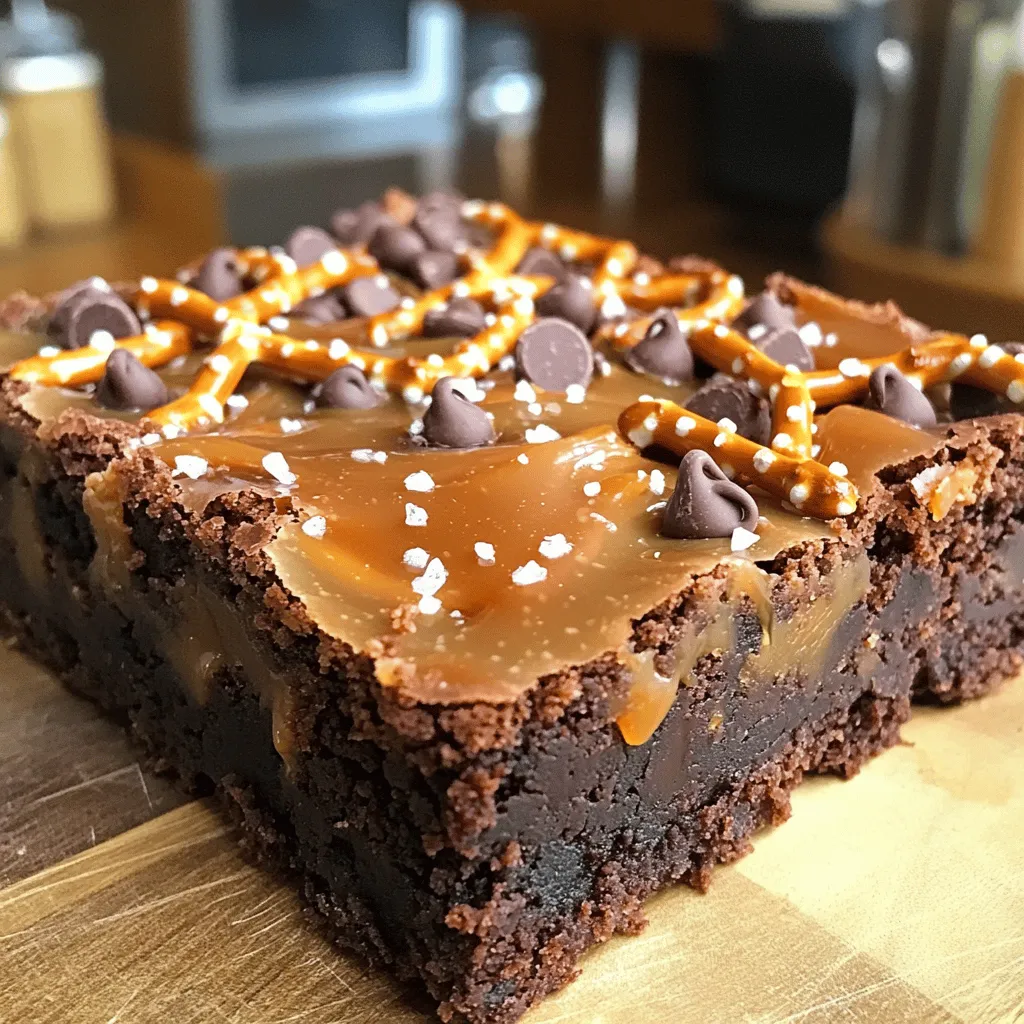
If you love sweet and salty treats, you’re in for a real delight! These Salted Caramel Pretzel Brownies combine rich chocolate with crunchy pretzels and gooey caramel. I’ll walk you through the easy steps to make the perfect batch. Whether you’re a baking beginner or a pro, you’ll impress everyone with this tasty dessert. Let’s dive into the fun of creating these decadent brownies that are sure to satisfy your cravings!
Why I Love This Recipe
- Decadent Flavor Combination: The rich chocolate brownie base paired with the sweet and salty caramel and crunchy pretzels creates an irresistible flavor profile that satisfies all cravings.
- Textural Delight: Each bite delivers a delightful contrast with the fudgy brownies, creamy caramel, and crispy pretzel bits, making these brownies a fun treat to enjoy.
- Easy to Make: This recipe comes together quickly with simple ingredients and straightforward steps, making it perfect for both novice and experienced bakers.
- Perfect for Sharing: With 24 servings, these brownies are ideal for gatherings, parties, or just a sweet treat to share with friends and family.
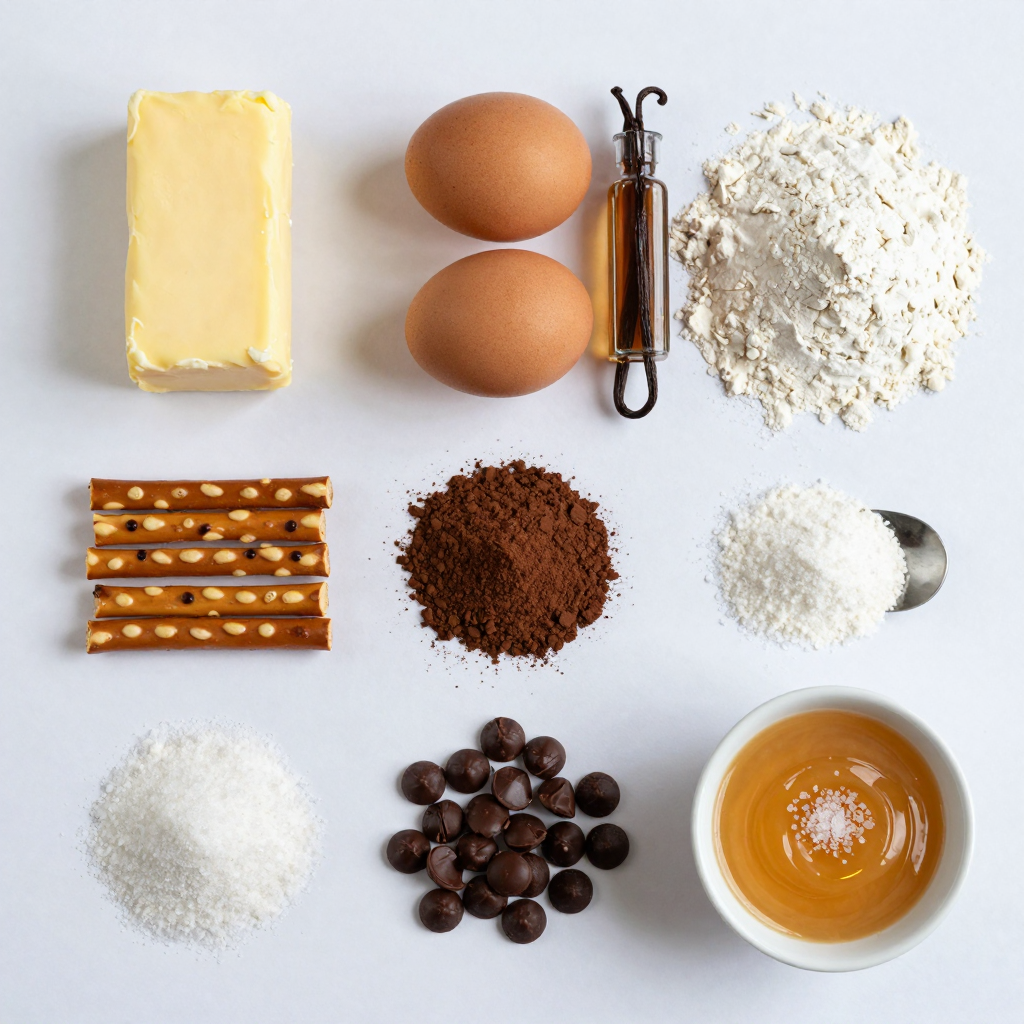
Ingredients
Main Ingredients List
– 1 cup unsalted butter (2 sticks)
– 2 cups granulated sugar
– 4 large eggs
– 1 teaspoon vanilla extract
– 1 cup all-purpose flour
– 1 cup unsweetened cocoa powder
– 1 teaspoon baking powder
– 1/2 teaspoon salt
– 1 cup chocolate chips
– 1 cup pretzel rods, crushed
– 1 cup caramel sauce (store-bought or homemade)
– Sea salt for topping
These ingredients create a rich, fudgy brownie. The butter adds moisture, while the sugar brings sweetness. Eggs help bind everything together. The flour and cocoa powder provide structure and chocolate flavor. Baking powder helps the brownies rise. Salt balances the sweetness and enhances flavors. Chocolate chips add extra chocolate goodness, and crushed pretzels give a delightful crunch.
Optional Toppings
– Chopped nuts (like pecans or walnuts)
– Whipped cream
– Extra caramel drizzle
Adding nuts gives a nice texture contrast. Whipped cream adds creaminess, while extra caramel makes it sweeter and richer. Choose toppings based on your taste!
Suggested Tools for Preparation
– Medium saucepan
– Large mixing bowl
– Whisk
– Spatula
– 9×13 inch baking pan
– Parchment paper (for easy removal)
– Measuring cups and spoons
These tools make the process smooth and easy. A whisk helps mix the batter well. A spatula ensures you get every bit of batter out. The pan size is key for baking evenly.
Step-by-Step Instructions
Prepping the Oven and Pan
Start by preheating your oven to 350°F (175°C). This step is key for even baking. While the oven warms up, prepare your 9×13 inch baking pan. You can either grease it with butter or line it with parchment paper. If you use parchment, leave some overhang. This helps you lift the brownies out later.
Making the Batter
Next, melt 1 cup of unsalted butter in a medium saucepan over low heat. Once melted, take it off the heat. Stir in 2 cups of granulated sugar until it blends well. Let this mixture cool for a minute. Then, add 4 large eggs one at a time, whisking after each. Don’t forget to mix in 1 teaspoon of vanilla extract.
In another bowl, sift together 1 cup of all-purpose flour, 1 cup of unsweetened cocoa powder, 1 teaspoon of baking powder, and 1/2 teaspoon of salt. Gradually add the wet mixture to the dry ingredients. Stir gently until just combined. Be careful not to overmix. Finally, fold in 1 cup of chocolate chips and 1 cup of crushed pretzel rods.
Baking and Cooling Process
Pour half of the brownie batter into your prepared pan. Smooth it out with a spatula. Drizzle half of the caramel sauce over this layer. Then, spoon the rest of the brownie batter on top. Use a knife to swirl in the remaining caramel for a fun marbled look.
Bake in your preheated oven for 25-30 minutes. Check for doneness by inserting a toothpick in the center. It should come out with a few moist crumbs. Once done, let the brownies cool in the pan for at least 15 minutes. After cooling, sprinkle a few flakes of sea salt on top for that sweet-and-salty kick.
Pro Tips
- Use Room Temperature Ingredients: Make sure your eggs are at room temperature for better mixing and a fluffier brownie texture.
- Don’t Overmix: Stir the batter just until combined to keep your brownies soft and fudgy. Overmixing can lead to a tough texture.
- Quality Caramel Sauce: Use a high-quality caramel sauce for the best flavor. Homemade caramel can elevate the taste significantly.
- Let Them Cool: Allow the brownies to cool completely before cutting. This helps them set and makes slicing easier.
Tips & Tricks
Perfecting Your Brownies
To make the best salted caramel pretzel brownies, focus on a few key steps. First, do not overmix the batter. This keeps your brownies soft and fudgy. Mix until just combined. Also, use room temperature eggs. They blend better and help with texture. For a richer taste, you can use high-quality cocoa powder. It makes a big difference in flavor. Lastly, let the brownies cool before cutting them. This helps them set and makes cutting easier.
Storage and Reheating Tips
Store your brownies in an airtight container. This keeps them fresh for up to five days. If you want to keep them longer, freeze them. Wrap each brownie in plastic wrap, then place them in a freezer bag. They can last for up to three months in the freezer. To reheat, warm them in the microwave for about 10-15 seconds. This makes them gooey and delightful.
Common Mistakes to Avoid
One common mistake is not greasing the pan properly. This can make removing the brownies tough. Always grease or line the pan with parchment paper. Another mistake is using old baking powder. Check the date; fresh baking powder ensures your brownies rise well. Lastly, avoid opening the oven door too early. This can cause your brownies to sink. Wait until the last few minutes to check for doneness.
Variations
Add-ins for Different Flavors
You can change up your salted caramel pretzel brownies with fun add-ins. Try adding nuts for a crunchy bite. Walnuts or pecans work well. You can also mix in different types of chocolate chips. Dark, white, or even mint chocolate chips can add a twist. For a fruity taste, add dried cherries or raspberries. This gives a nice balance to the sweet and salty.
Gluten-Free Options
Making these brownies gluten-free is easy. Substitute the all-purpose flour with a gluten-free flour blend. Make sure it has a good mix of starches and fibers. You can also use almond flour for a nutty flavor. Just keep an eye on the baking time. Gluten-free options may bake a bit faster, so check them early.
Vegan Adaptations
You can enjoy these brownies without animal products too. Replace the butter with coconut oil or a vegan butter. Use flax eggs instead of regular eggs for moisture. Mix one tablespoon of flaxseed meal with three tablespoons of water for each egg. This gives you a great binding effect. Use dairy-free chocolate chips and vegan caramel sauce. This way, everyone can taste this delicious treat!
Storage Info
Best Practices for Storing Brownies
Store your salted caramel pretzel brownies in an airtight container. This keeps them fresh and moist. You can layer them with parchment paper to prevent sticking. Keep the container at room temperature for up to three days. If you want to store them longer, the fridge is a good option. Just remember to seal them well to avoid drying out.
How to Freeze for Later Use
Freezing brownies is simple and a great way to save some for later. First, let the brownies cool completely after baking. Once cooled, cut them into squares. Wrap each piece in plastic wrap. Then, place the wrapped brownies in a freezer-safe bag or container. They can stay in the freezer for up to three months. When you want one, simply thaw it at room temperature or warm it in the microwave for a few seconds.
Shelf Life and Freshness Tips
Brownies taste best when eaten fresh, but they last well if stored properly. At room temperature, they stay good for about three days. In the fridge, they can last up to a week. Always check for any signs of spoilage, like a change in smell or texture. If you see any, it’s best to toss them. To enjoy the best flavor, try to eat them within the first few days.
FAQs
How do I know when brownies are done baking?
You can tell when brownies are done by checking the center. Insert a toothpick into the middle. If it comes out with a few moist crumbs, they are ready. If the toothpick has wet batter, bake them a bit longer. Brownies can also look set around the edges and slightly soft in the center.
Can I make these brownies ahead of time?
Yes, you can make these brownies ahead of time. They keep well for a few days at room temperature. Just store them in an airtight container. If you want to keep them longer, you can freeze them. Wrap the brownies tightly in plastic wrap, then place them in a freezer bag. They can last up to three months in the freezer.
What can I substitute for caramel sauce?
If you don’t have caramel sauce, there are some tasty substitutes. You can use chocolate sauce, peanut butter, or butterscotch sauce. You can also make your own caramel by cooking sugar and cream together. This can give you a fresh, homemade touch.
In this blog post, we covered everything about brownies. We listed main ingredients, optional toppings, and tools you’ll need. Next, we shared step-by-step instructions to bake them perfectly. I offered tips to avoid mistakes and shared handy storage advice. We also explored fun variations, including gluten-free and vegan options.
Remember, baking is about having fun. Don’t be afraid to try new flavors. Perfect your brownies, enjoy them fresh, and share them with others. Your journey to the best brownies starts now!