
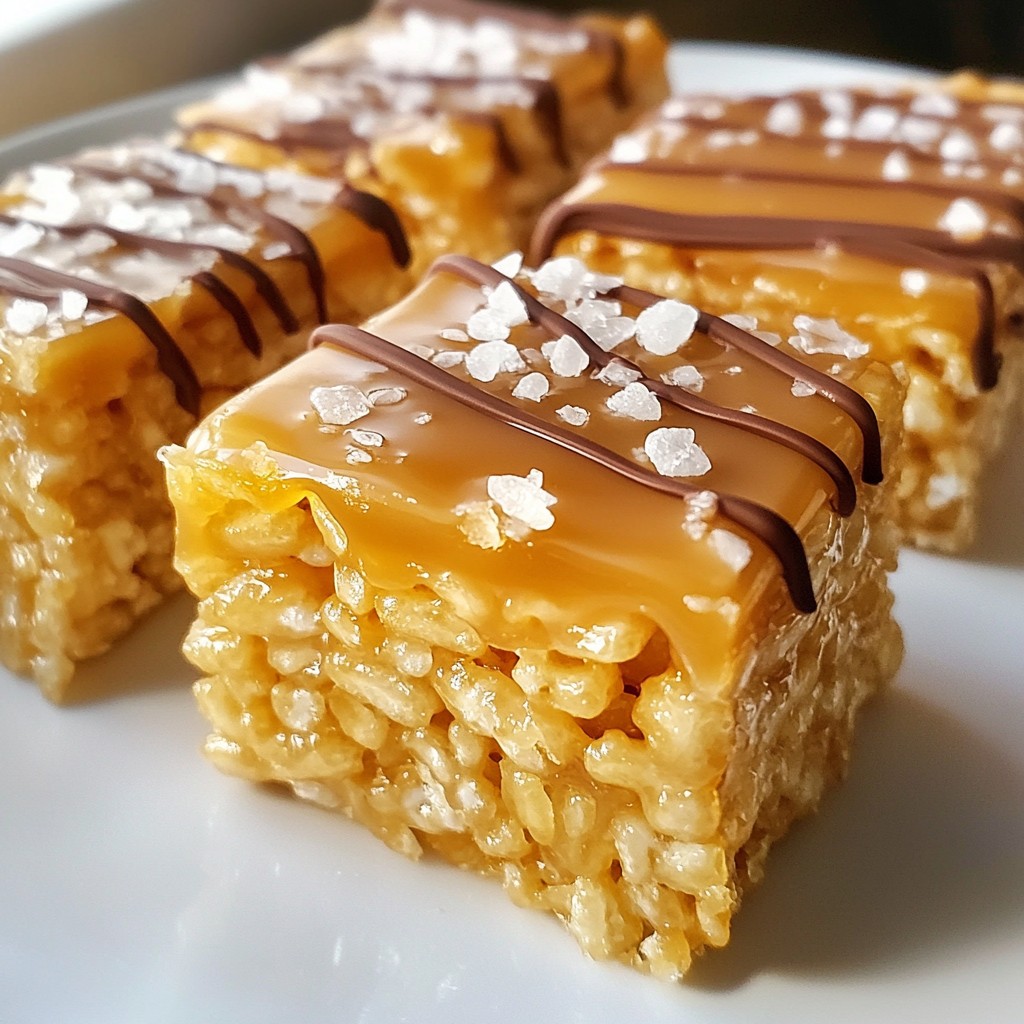
If you love a sweet and salty treat, you need to try salted caramel Rice Krispie treats! They’re easy to make and bursting with flavor. In this post, I’ll walk you through each step, from gathering the simple ingredients to putting your treats in the fridge. With tips, variations, and storage advice, these delightful bars will be a hit at your next gathering. Let’s dive in and create this irresistible snack!
Why I Love This Recipe
- Quick and Easy: This recipe comes together in just about 50 minutes, making it a perfect treat for last-minute gatherings or cravings.
- Decadent Flavor: The combination of gooey marshmallows and rich caramel creates a delightful indulgence that everyone loves.
- Customizable: Add chocolate drizzle or your favorite mix-ins to make these treats uniquely yours!
- Kid-Friendly: A great recipe to make with kids, as they can help with mixing and pressing the treats into the pan.
Ingredients
Essential Ingredients for Salted Caramel Rice Krispie Treats
To make Salted Caramel Rice Krispie Treats, you need a few key items:
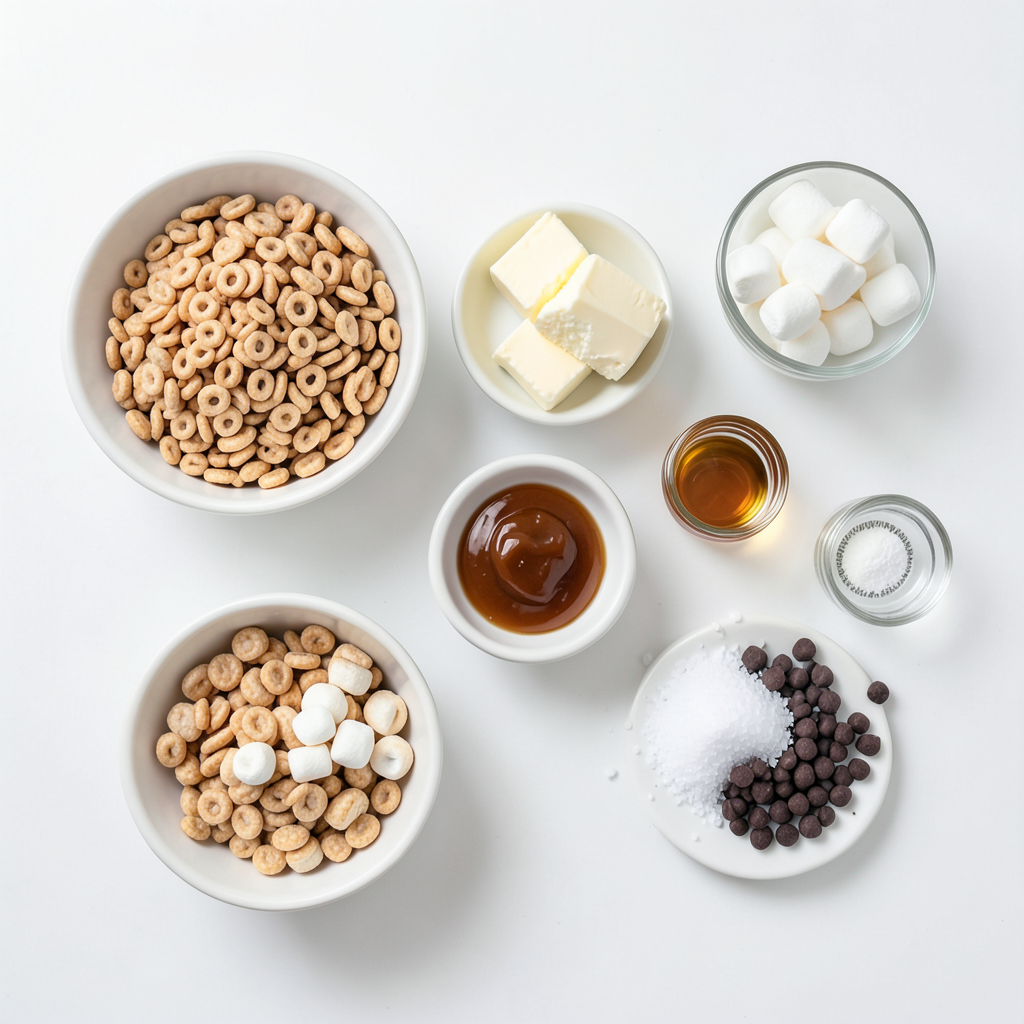
- 4 cups Rice Krispies cereal
- 3 tablespoons unsalted butter
- 10 oz marshmallows (mini or regular)
- 1/2 cup caramel sauce (store-bought or homemade)
- 1 teaspoon sea salt (plus more for sprinkling)
- 1/2 teaspoon vanilla extract
These ingredients combine to create a sweet and salty treat that everyone loves.
Optional Add-ins for Enhanced Flavor
If you want to make your treats even better, consider adding:
- 1/2 cup chocolate chips for drizzling
- Nuts like pecans or almonds for crunch
- Dried fruits like cranberries or raisins for sweetness
These add-ins can give your treats a unique twist and keep them exciting.
Equipment Needed for Preparation
To prepare these tasty treats, gather the following tools:
- A 9x13 inch baking dish
- Parchment paper for easy cleanup
- A large saucepan for melting
- A spatula for mixing and pressing
- Measuring cups and spoons
Having the right equipment makes the process smooth and fun!
Step-by-Step Instructions
Preparing the Baking Dish
Start by lining a 9x13 inch baking dish with parchment paper. Leave some paper hanging over the edges. This helps you lift out the treats later. Lightly grease the parchment with non-stick spray. This step keeps the treats from sticking.
Melting Butter and Marshmallows
In a large saucepan, melt 3 tablespoons of unsalted butter over medium heat. Stir gently as it melts. Once the butter is melted, add 10 ounces of marshmallows. Keep stirring until everything is smooth and melted. This should take about 2-3 minutes. Make sure there are no lumps.
Incorporating Caramel and Sea Salt
Remove the saucepan from the heat. Pour in 1/2 cup of caramel sauce, 1 teaspoon of sea salt, and 1/2 teaspoon of vanilla extract. Stir well until everything mixes together and looks glossy. The caramel gives the treats their tasty flavor. The sea salt enhances the sweetness.
Mixing in Rice Krispies
Gradually fold in 4 cups of Rice Krispies cereal. Use a spatula to mix until all the cereal is coated well with the marshmallow-caramel mixture. Make sure every piece gets some of that sticky goodness. This part is key to making the treats chewy and crunchy.
Setting and Cooling the Treats
Pour the mixture into your prepared baking dish. Use a spatula or damp hands to press it down evenly. While the mixture is still warm, sprinkle a little extra sea salt on top. This adds a nice touch. Let the treats cool for at least 30 minutes. This step is important for them to set properly. If you want, you can add a chocolate drizzle once they cool.
Tips & Tricks
Perfecting the Texture of Rice Krispie Treats
To get the best texture, use the right amount of marshmallows. I recommend 10 ounces for a soft, chewy treat. Melt them slowly with butter over medium heat. Stir until smooth. This helps create a glossy mixture. If it's too dry, your treats will crumble. If it’s too wet, they will be sticky. You want a nice balance for that perfect bite.
How to Avoid Sticky Hands When Pressing Mixture
Pressing the mixture can be tricky. To avoid sticky hands, dampen them with water or butter. This simple trick works wonders. You can also use a spatula to press down the mixture evenly. Make sure to press firmly, but not too hard. You want a compact layer without crushing it.
Using Different Types of Caramel Sauce
You can use store-bought caramel sauce for ease. Homemade caramel adds a special touch. If you want a deeper flavor, try different types. Sea salt caramel gives a nice contrast. You can even mix in butterscotch sauce for a twist. Experiment with flavors to find your favorite!
Pro Tips
- Use Fresh Ingredients: Always opt for fresh marshmallows and high-quality caramel sauce to enhance the flavor and texture of your treats.
- Don't Overheat the Mixture: Be careful not to overheat the butter and marshmallows, as this can lead to a hard texture. Stir until just melted and smooth.
- Press Firmly: When transferring the mixture to the pan, press down firmly to ensure the treats hold together well once set.
- Add Flavor Variations: Consider adding mix-ins like nuts or crispy rice cereal for added texture and flavor variations in your treats.
Variations
Adding Chocolate Chips to the Recipe
You can easily enhance your salted caramel Rice Krispie treats with chocolate chips. Just melt a half cup of chocolate chips after the treats cool. Drizzle the melted chocolate over the top for a sweet finish. This adds a rich flavor and a fun look. You can also mix in the chocolate chips before pressing the mixture into the pan for a more chocolatey treat.
Nutty or Fruity Additions for Extra Flavor
Consider adding nuts or dried fruit for a twist. Chopped nuts like pecans or almonds add crunch. You can also mix in dried fruits like cranberries or cherries for a tangy touch. Aim for about a half cup of your chosen mix-ins. Just fold these in with the Rice Krispies to keep the treats soft and chewy.
Seasonal Variations (e.g., Pumpkin Spice, Mint)
Seasonal flavors can make your treats special. For fall, add pumpkin spice to the caramel mix. Use about a teaspoon for a nice warmth. In winter, try peppermint extract for a fresh taste. Just a half teaspoon will do. These small changes can transform your treats and keep them exciting all year long.
Storage Info
Best Practices for Storing Treats
To keep your salted caramel rice Krispie treats fresh, store them in an airtight container. This helps prevent them from drying out. Place a piece of wax paper between layers if you stack them. This way, they won’t stick together. Avoid leaving them out in the open air. Exposure can make them hard and less tasty.
How to Freeze Salted Caramel Rice Krispie Treats
You can freeze these treats for later enjoyment. First, cut them into squares or rectangles. Then, wrap each piece tightly in plastic wrap. Put the wrapped treats in a freezer-safe bag or container. Label the bag with the date. They can last up to three months in the freezer. When you’re ready to eat, let them thaw at room temperature.
Shelf Life and Freshness Tips
Salted caramel rice Krispie treats are best enjoyed within one week. After that, they may lose their soft texture. To keep them fresh, store them in a cool, dry place. If you notice them getting hard, a quick microwave zap can help. Heat them in short bursts of about 10 seconds. This can restore some softness, making them delightful once more.
FAQs
Can I make these treats gluten-free?
Yes, you can! Rice Krispies have a gluten-free version. Look for "gluten-free" on the box. This ensures you enjoy the same great taste without gluten.
How can I achieve a richer caramel flavor?
To deepen the caramel flavor, use darker caramel sauce. You can also add a pinch of brown sugar when melting the butter and marshmallows. This will enhance the sweetness and add a nice depth.
What can I use instead of marshmallows?
If you want a marshmallow-free option, try using butterscotch chips or melted peanut butter. Both will add sweetness and a creamy texture. You could also blend cashew cream for a dairy-free alternative.
You now know how to make salted caramel Rice Krispie treats. We explored essential ingredients, equipment, and step-by-step instructions. I shared helpful tips for texture and how to avoid sticky hands. We also looked at fun variations and smart storage methods.
With these insights, you can create delicious treats to please anyone. Dive in, experiment, and enjoy the sweet rewards!