
There’s something undeniably nostalgic about s’mores—those delightful treats that evoke memories of summer nights spent around the campfire, the smell of toasted marshmallows wafting through the air, and the joy of melting chocolate sandwiched between graham crackers. But what if you could take this beloved treat and transform it into something even more delightful? Enter the S’mores Cookie Cups—a creative and scrumptious alternative that combines the best elements of s’mores with the comforting texture of freshly baked cookies. In this article, we will explore the magic behind these cookie cups, delve into the role of each ingredient, and guide you through the initial steps of preparing this sweet masterpiece.
The Appeal of S’mores Cookie Cups
S’mores Cookie Cups are not just a dessert; they are an experience. Imagine biting into a soft, chewy cookie that has been lovingly crafted to cradle a gooey center filled with melted chocolate and fluffy marshmallows. This delightful combination of flavors and textures creates a treat that is both familiar and exciting. Whether you’re hosting a gathering, looking for a fun baking project with the kids, or simply craving something sweet, these cookie cups are the perfect solution.
One of the many appealing aspects of S’mores Cookie Cups is their ease of preparation. Unlike traditional s’mores, which require an open flame and some assembly skills, these cookie cups can be made right in your oven, allowing you to enjoy the flavors of s’mores anytime—no campfire required. With straightforward steps and minimal equipment, this recipe promises a fun and rewarding baking experience that brings people together.
As we embark on this baking adventure, let’s take a closer look at the essential ingredients that make up these delicious S’mores Cookie Cups.
Understanding the Ingredients
Key Ingredients and Their Roles
Before diving into the preparation of S’mores Cookie Cups, it’s essential to understand the key ingredients that contribute to their deliciousness. Each component plays a vital role in creating the perfect cookie base, as well as achieving that iconic s’mores flavor.
– Butter: The foundation of any great cookie, softened butter is crucial for achieving a rich flavor and tender texture. It helps create a soft, chewy cookie cup that holds up against the gooey chocolate and marshmallow filling. Make sure to let your butter reach room temperature for optimal mixing.
– Sugars: This recipe calls for both granulated sugar and brown sugar. Granulated sugar contributes to the spread and crispiness of the cookies, while brown sugar adds moisture and a deeper flavor profile. The combination results in cookie cups that are not only sweet but also rich and satisfying.
– Eggs: Eggs are essential for binding the ingredients together and providing structure to the cookie dough. They help create a soft and chewy texture that contrasts beautifully with the filling.
– Flour: All-purpose flour is the backbone of the cookie dough, providing the necessary structure. It’s important to measure your flour correctly to avoid a dry or crumbly cookie.
– Baking Soda and Salt: Baking soda acts as a leavening agent, ensuring that your cookie cups rise adequately during baking. A pinch of salt enhances the overall flavor, balancing the sweetness of the sugars.
– Chocolate Chips and Graham Crackers: The heart of the s’mores experience lies in the chocolate chips and crushed graham crackers. The chocolate chips provide that signature melty chocolate goodness, while the graham crackers add a crunchy texture and unmistakable flavor associated with s’mores.
– Mini Marshmallows: No s’mores treat would be complete without marshmallows! Mini marshmallows melt beautifully in the oven and offer that sweet, gooey texture that makes s’mores so beloved.
Now that we’ve covered the key ingredients, let’s prepare our kitchen for the delightful task ahead.
Step-by-Step Preparation Guide
Prepping the Kitchen for Success
Before you start baking, it’s essential to set the stage for a successful cooking experience. Here are a few tips to ensure everything runs smoothly:
1. Preheat the Oven: Begin by preheating your oven to 350°F (175°C). This ensures that the cookie cups bake evenly and achieve that perfect golden-brown color.
2. Prepare the Muffin Tin: Grease a standard muffin tin with cooking spray or line it with cupcake liners. This step is crucial as it will prevent the cookie cups from sticking and make for easy removal once they are baked.
Crafting the Perfect Cookie Dough
With your kitchen prepped, it’s time to create the cookie dough. Follow these steps for a light and fluffy texture:
1. Creaming the Butter and Sugars: In a large mixing bowl, combine the softened butter, granulated sugar, and brown sugar. Using an electric mixer, beat the mixture on medium speed until it becomes light and fluffy, usually around 2-3 minutes. This step is important, as it introduces air into the dough, resulting in a tender cookie.
2. Adding the Eggs and Vanilla Extract: Next, add the eggs, one at a time, mixing well after each addition. This helps to fully incorporate them into the dough. Then, add in your vanilla extract, which enhances the overall flavor of the cookie cups.
Mixing Dry Ingredients with Precision
To achieve the perfect cookie cup, it’s important to mix your dry ingredients correctly:
1. Combine Flour, Baking Soda, and Salt: In a separate bowl, whisk together the flour, baking soda, and salt. This helps to evenly distribute the leavening agent and salt throughout the flour.
2. Incorporate Dry Ingredients: Gradually add the dry mixture to the wet ingredients, mixing on low speed until just combined. Be careful not to overmix, as this can lead to dense cookies. The goal is to have a soft, slightly sticky dough.
Incorporating Chocolate and Graham Crackers
The final touch to our cookie dough involves adding the chocolate chips and crushed graham crackers:
1. Fold in the Chocolate Chips: Gently stir in the chocolate chips, ensuring they are evenly distributed throughout the dough.
2. Add Crushed Graham Crackers: Finally, fold in the crushed graham crackers. This will add texture and flavor reminiscent of traditional s’mores.
Now that the cookie dough is ready, you’re well on your way to creating delightful S’mores Cookie Cups. Stay tuned for the next steps, where we will shape the dough, fill the cookie cups with delicious s’mores goodness, and bake them to perfection!
Techniques for Evenly Distributing Chocolate Chips and Crushed Graham Crackers in the Dough
Achieving the perfect S’mores Cookie Cups begins with a well-mixed dough. It’s essential to evenly distribute the chocolate chips and crushed graham crackers throughout the cookie dough to ensure that each bite delivers that signature S’mores flavor. Here are some techniques to help you accomplish this:
1. Mixing in Batches: After creaming the butter and sugars, add half of the flour mixture followed by the chocolate chips and crushed graham crackers. Mix until just combined, then add the remaining flour mixture. This method prevents overmixing while ensuring even distribution.
2. Folding Technique: Once you’ve combined the dough, use a spatula to fold in the chocolate chips and crushed graham crackers gently. Start from the bottom of the bowl and lift the dough over itself, being careful not to break the chips. This helps maintain the integrity of the chocolate while ensuring that the graham cracker crumbs are evenly spread.
3. Visual Check: After mixing, give your dough a visual inspection. If you notice clusters of chocolate chips or graham crackers, gently fold them in until they’re evenly dispersed. This step is crucial for that perfect balance in every cookie cup.
Filling the Muffin Tin
Now that your dough is ready, it’s time to fill your muffin tin. This step is critical for creating the ideal cookie cup shape:
1. Portioning the Dough: Using a cookie scoop or tablespoon, measure out about 2 tablespoons of dough for each cup. This amount will create a generous base and walls for your S’mores Cookie Cups.
2. Creating the Base and Walls: Place the dough into each muffin tin cavity. Press the dough down firmly to create a flat base and use your fingers or a small measuring cup to shape the sides, ensuring they rise about halfway up the cavity. Aim for uniformity in each cup for even baking.
3. Indentation for Marshmallows: After shaping the dough, use your thumb or the back of a small spoon to create a small indentation in the center of each cookie cup. This indentation will hold the mini marshmallows and help them achieve that gooey texture.
Baking Your S’mores Cookie Cups
Understanding Baking Time and Temperature
Preheat your oven to 350°F (175°C). Baking at the right temperature is paramount for achieving the perfect S’mores Cookie Cups:
– Baking Time: Typically, these cookie cups will take about 10-12 minutes to bake. Keep an eye on them, as ovens can vary. You want the edges to be lightly golden while the center remains soft.
– What to Look For: A good indicator of doneness is the slight puffing of the cookie cups. They should appear set around the edges but still slightly soft in the middle.
The Art of Adding Marshmallows
Timing is everything when it comes to adding the marshmallows for that perfect toasted effect:
1. When to Add: After the initial baking time of about 8-10 minutes, remove the muffin tin from the oven. The cookie cups should be slightly underbaked at this stage. Gently press 2-3 mini marshmallows into the center of each cookie cup.
2. Toasting the Marshmallows: Return the muffin tin to the oven for an additional 2-3 minutes, watching closely. The marshmallows should puff up and begin to turn golden brown. This quick baking infuses the marshmallows with that signature toasted flavor.
Cooling Process: Why It Matters
Once your S’mores Cookie Cups are out of the oven, it’s crucial to allow them to cool properly:
1. Importance of Cooling: Let the cookie cups cool in the pan for about 5-10 minutes before transferring them to a wire rack. This resting time allows the cookies to firm up, making them easier to remove from the tin without breaking.
2. Residual Heat Effects: The residual heat from the muffin tin will continue to cook the cookie cups slightly, helping to set the structure while ensuring they remain soft in the center. Avoid skipping this step, as it enhances the texture and overall experience of your dessert.
Serving Suggestions and Variations
Your S’mores Cookie Cups are not just delicious; they can also be presented beautifully:
Presentation Ideas
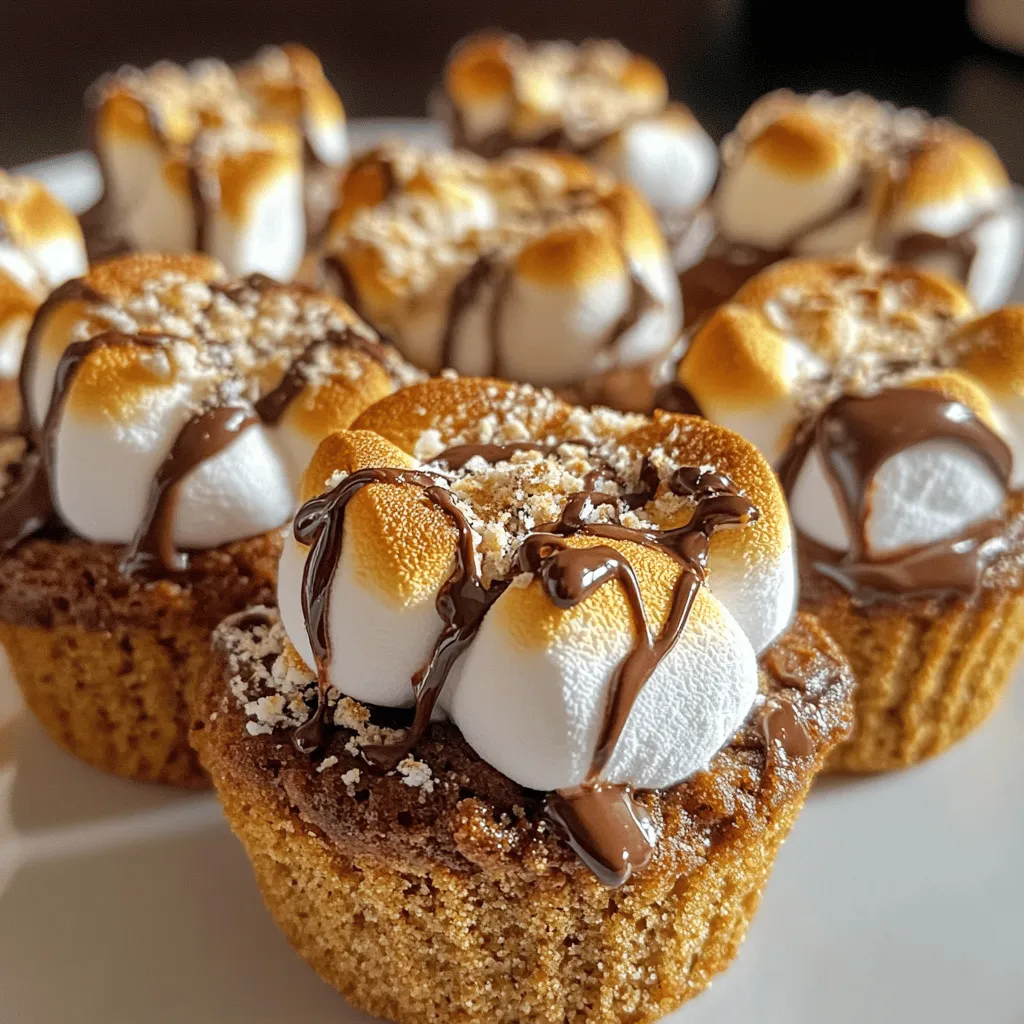
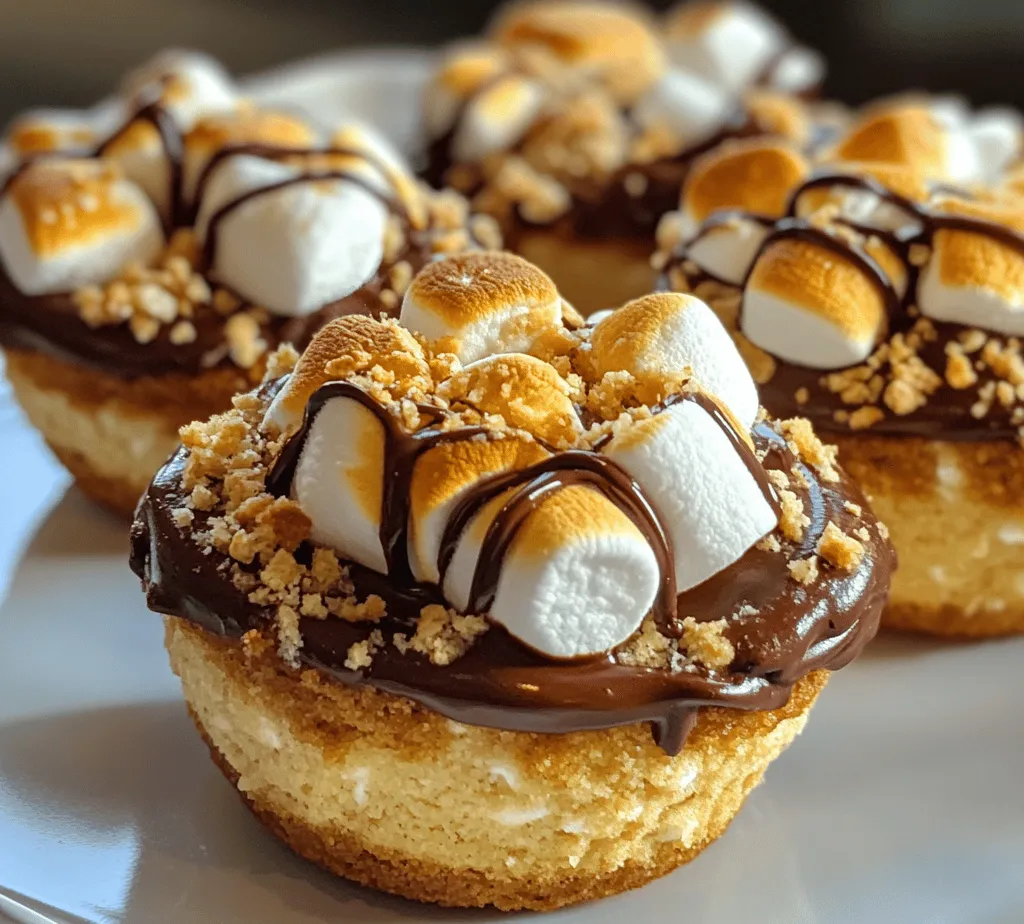
– Plating: Arrange the cookie cups on a rustic wooden board or a decorative platter. This presentation adds a touch of charm and makes them perfect for gatherings.
– Toppings: Drizzle melted chocolate over the top of each cookie cup to elevate their appearance and flavor. Use semi-sweet or dark chocolate for a rich contrast to the sweetness of the marshmallows.
Exploring Variations
1. Chocolate Choices: Experiment with different types of chocolate chips. Try dark chocolate, white chocolate, or even butterscotch chips for a unique twist.
2. Adding Caramel: For an indulgent variation, add a small dollop of caramel sauce to the center before placing the marshmallows. The combination of chocolate, marshmallow, and caramel is heavenly.
3. Flavor Infusions: Consider adding a hint of vanilla extract or a dash of cinnamon to the dough for a warm flavor profile. You can also mix in nuts for added texture.
Beverage Pairings
Enhance your dessert experience by pairing your S’mores Cookie Cups with beverages:
– Hot Chocolate: A classic pairing that complements the S’mores theme beautifully. Top with whipped cream for an indulgent treat.
– Coffee or Espresso: The rich flavor of coffee balances the sweetness of the cookie cups, making it an ideal choice for an afternoon treat.
– Milkshakes: A chocolate or vanilla milkshake can create a nostalgic dessert experience reminiscent of summer campfires.
Nutritional Information
Understanding the nutritional aspects of your S’mores Cookie Cups is important for mindful enjoyment:
1. Caloric Breakdown: Each cookie cup contains approximately 180-200 calories, depending on the size and specific ingredients used.
2. Serving Size: Consider serving one cookie cup per person, with the option for seconds for those who are extra hungry.
3. Dietary Modifications: For a lighter version, consider substituting some of the butter with applesauce or use a sugar substitute. Gluten-free flour can also be used for a gluten-free option, ensuring everyone can enjoy this treat.
Conclusion
S’mores Cookie Cups encapsulate the joy of baking and the nostalgic flavors of camping trips and summer nights. Their combination of gooey marshmallows, rich chocolate, and crunchy graham crackers makes them a delightful dessert that appeals to all ages.
The beauty of this recipe lies in its versatility—feel free to experiment with flavors and presentations to make it your own. Whether for a family gathering, a special occasion, or simply a cozy night in, these cookie cups are sure to bring smiles and satisfaction to all who enjoy them.
Baking is not just about following a recipe; it’s about creating memories and sharing delicious moments with loved ones. So gather your ingredients, invite a friend, and dive into the delicious world of S’mores Cookie Cups. You might just find that this recipe becomes a cherished part of your dessert repertoire.


