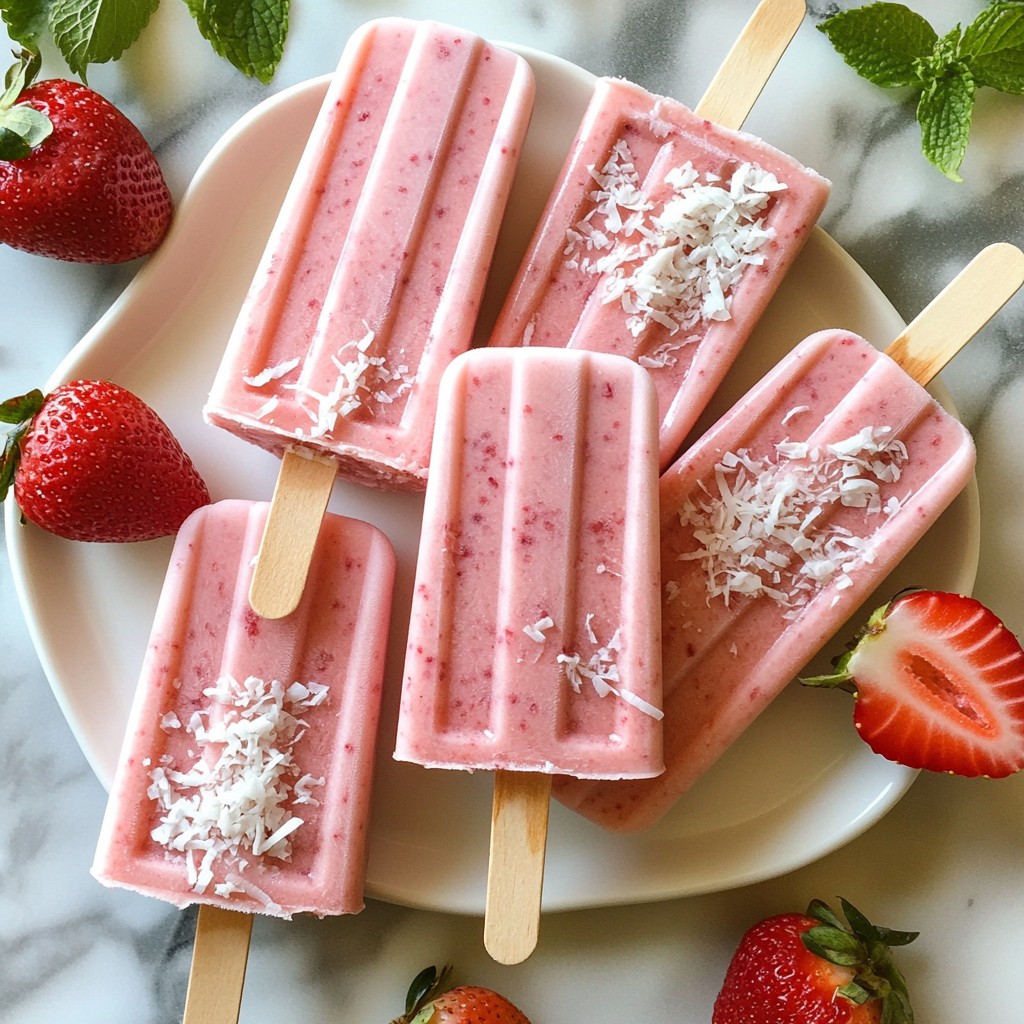
Craving a cool treat that’s both easy and delicious? You’ve found it! These Strawberry Coconut Popsicles are fun to make and perfect for hot days. Using just a few fresh ingredients, you can whip up a sweet delight everyone will love. I’ll share simple steps, tips, and flavors to make your popsicle game strong. Let’s dive in and make summer a little sweeter!
Why I Love This Recipe
- Fresh Flavors: The combination of ripe strawberries and creamy coconut milk creates a refreshing and vibrant taste that is perfect for hot days.
- Healthy Treat: With natural sweeteners and fresh fruit, these popsicles are a guilt-free dessert option that kids and adults will love.
- Easy to Make: This recipe requires minimal ingredients and simple steps, making it accessible for even novice cooks.
- Customizable: You can easily modify the sweetness or add other fruits to create your own unique flavor combinations.
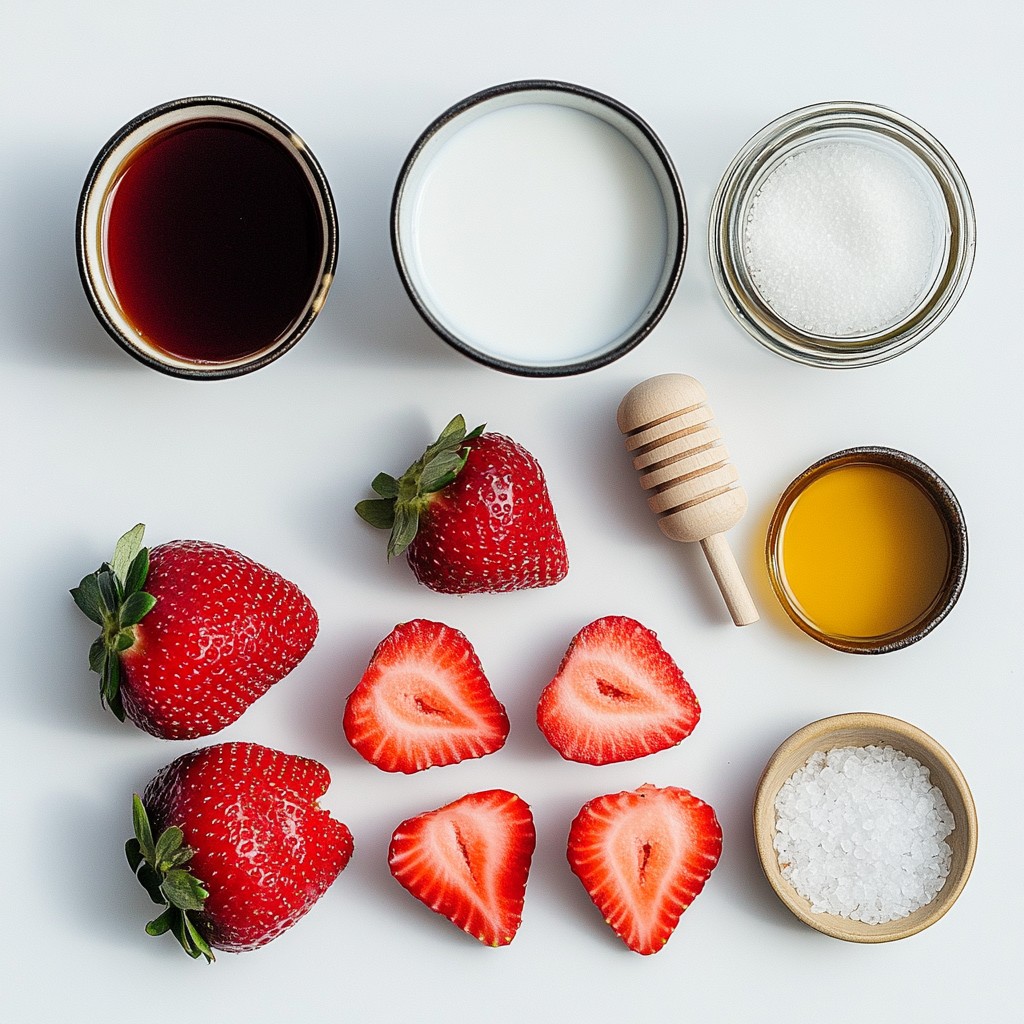
Ingredients
Fresh Strawberries
You need 2 cups of fresh strawberries. Make sure to hull and slice them. Fresh strawberries give the best flavor. They also add bright color to the popsicles.
Coconut Milk
Next, grab 1 cup of coconut milk. I recommend using full-fat coconut milk for creaminess. This makes your popsicles rich and smooth. The coconut flavor pairs perfectly with strawberries.
Sweeteners (Honey or Maple Syrup)
For sweetness, use 2 tablespoons of honey or maple syrup. You can adjust this amount based on your taste. Honey gives a nice floral note, while maple syrup adds a unique flavor.
Additional Flavorings (Vanilla Extract, Salt)
Don't forget 1 teaspoon of vanilla extract for extra depth. A pinch of salt enhances all the flavors. These small touches make a big difference in taste.
Step-by-Step Instructions
Blending the Ingredients
First, gather your ingredients. You need fresh strawberries, coconut milk, honey or maple syrup, vanilla extract, and a pinch of salt. In a blender, add the sliced strawberries and coconut milk. Then, pour in the honey or maple syrup for sweetness. Add the vanilla extract and salt. Blend until smooth, but keep some strawberry bits for texture. This adds a nice touch!
Filling the Popsicle Molds
Grab your popsicle molds. Pour half of the blended mixture into each mold. Fill them about halfway. This step helps to create layers. Next, freeze the molds for about 30 minutes. This allows the mixture to set a bit. It should be soft but not liquid.
Freezing Process
After 30 minutes, take the molds out of the freezer. Add a few whole strawberry slices into each mold. This makes your popsicles look pretty. Now, pour the rest of the mixture into the molds, covering the strawberries. Insert popsicle sticks into each mold. Freeze the popsicles for at least 4 to 6 hours. Make sure they are completely solid before you try to eat them!
Releasing the Popsicles
When you’re ready to enjoy your popsicles, it’s time to take them out of the molds. Run warm water over the outside of the molds for a few seconds. This helps to loosen them. Gently pull the popsicles out. They should come out easily! Enjoy this refreshing treat on a hot day!
Tips & Tricks
Achieving the Perfect Texture
To get the best texture in your strawberry coconut popsicles, blend just right. Start by mixing the strawberries and coconut milk well. Blend until smooth, but leave some small strawberry chunks. This gives your popsicles a nice, fruity bite. If you want extra creaminess, use full-fat coconut milk. It makes a richer treat!
Serving Suggestions
When it's time to serve, make it fun and colorful. Place the popsicles on a bright platter. Add fresh strawberries and a sprinkle of shredded coconut on top. This adds flair and makes them look tempting. Enjoy these popsicles on a sunny day for a sweet refreshment. You can even pair them with a scoop of sorbet for a cool dessert!
Healthier Variations (Dairy-Free, Sugar-Free)
You can easily make these popsicles healthier. For a dairy-free option, just use coconut milk as your base. If you want to cut sugar, try using ripe bananas or unsweetened applesauce instead of honey or maple syrup. These swaps keep the popsicles sweet and tasty without added sugar. You can enjoy a guilt-free treat that everyone will love!
Pro Tips
- Use Ripe Strawberries: For the best flavor, choose ripe strawberries that are sweet and fragrant. They will enhance the taste of your popsicles.
- Adjust Sweetness: Depending on the natural sweetness of your strawberries, you may want to adjust the amount of honey or maple syrup to suit your taste.
- Layering for Aesthetic: When adding whole strawberry slices, think about how they will be seen when the popsicles are unmolded. Layer them thoughtfully for a beautiful presentation.
- Experiment with Add-ins: Feel free to add other ingredients like shredded coconut or a splash of lime juice to customize your popsicles and add extra flavor.
Variations
Tropical Twist (Adding Pineapple)
You can add pineapple for a fun twist. Pineapple brings a juicy sweetness. Use about 1 cup of fresh pineapple chunks. Blend them with strawberries and coconut milk. This adds a tropical taste. You get a refreshing and bright popsicle that feels like summer.
Berry Medley (Using Mixed Berries)
Try mixed berries for more flavor. You can use blueberries, raspberries, or blackberries. Just swap out some strawberries for your berries of choice. Each berry adds its unique taste. This makes every bite exciting. Plus, the colors look great in the popsicles.
Creamy Options (Adding Yogurt)
Want a creamier popsicle? Add yogurt to your mix. Use about 1 cup of plain or flavored yogurt. This gives a rich texture and adds protein. Blend it well with the other ingredients. You’ll end up with a creamy treat that feels indulgent.
Storage Info
How to Store Homemade Popsicles
To store homemade popsicles, place them in the freezer. Use a container that seals well. This keeps them tasty and fresh. If you use popsicle molds, cover them tightly with plastic wrap. This helps prevent ice crystals. Always label the container with the date. This way, you know when you made them.
Best Containers for Freezing
I recommend using silicone molds or plastic containers with lids. Silicone molds let you pop out popsicles easily. Plastic containers work well too. Choose ones that are freezer-safe. Avoid glass containers, as they may break in the cold.
Shelf Life and Quality Tips
Homemade popsicles stay good for about two months. After that, they may lose flavor. For best quality, eat them within the first month. If you notice any ice crystals, it’s time to toss them. Enjoy them fresh for the best taste!
FAQs
Can I use frozen strawberries?
Yes, you can use frozen strawberries. They work well in this recipe. Just make sure to thaw them a bit. This helps the blender mix them smoothly. The flavor will be just as great!
How do I make these popsicles dairy-free?
To make these popsicles dairy-free, simply stick with coconut milk. This milk is creamy and rich. It adds a nice flavor without any dairy. You can also try almond milk or oat milk for a different taste.
What can I substitute for sweeteners?
If you want to skip sweeteners, use ripe bananas. They add natural sweetness. You could also try agave syrup or stevia. Adjust the amount to fit your taste. Each option gives a unique flavor.
How to make popsicles without molds?
You can make popsicles without fancy molds. Use paper cups instead. Fill them with the mixture and add sticks. You can also use ice cube trays. Just pop the cubes out when frozen and enjoy smaller bites!
You learned how to make tasty popsicles with simple ingredients like fresh strawberries and coconut milk. We explored steps to blend, fill, freeze, and release your cool treats. Tips helped you suit your tastes with healthier options and fun variations. Storing them right keeps them fresh longer.
Now you can enjoy a tasty snack that’s fun to make!