
Introduction
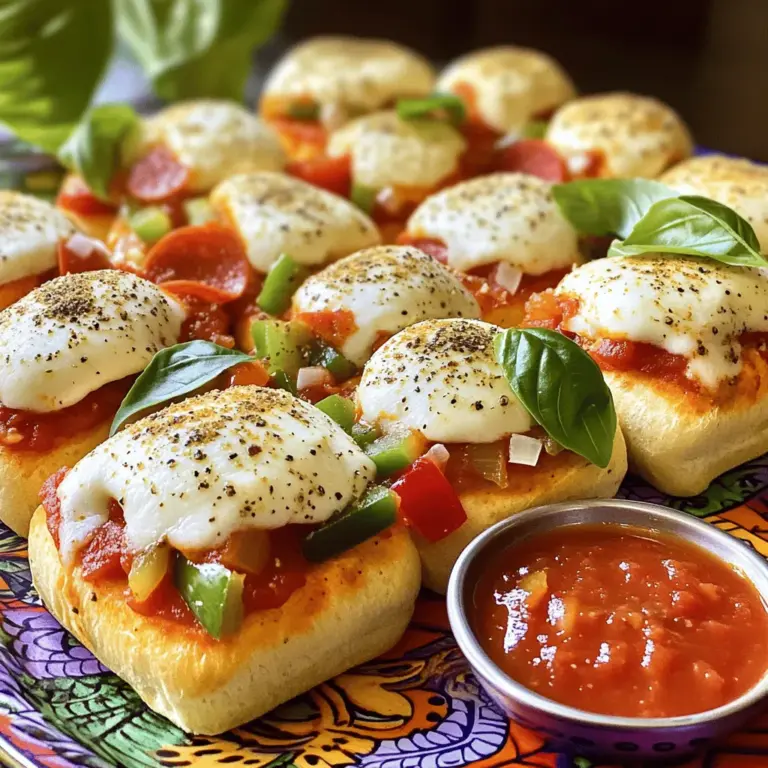
In recent years, sliders have taken the culinary scene by storm, becoming a go-to option for those seeking a versatile snack or meal. These bite-sized sandwiches are perfect for any occasion, whether you’re hosting a party, preparing a family dinner, or just craving a quick and satisfying bite. Among the myriad of slider recipes available, Mini Pizza Sliders stand out as a delightful fusion of two beloved comfort foods—pizza and sliders. This recipe marries the classic flavors of pizza with the fun, shareable nature of sliders, making it an ideal choice for gatherings or casual weeknight meals.
Mini Pizza Sliders are not only delicious but also incredibly easy to assemble. They offer a unique twist on traditional pizza, allowing you to serve up the flavors of your favorite pie in a compact, portable format. With gooey cheese, savory marinara, and your choice of toppings, these sliders are sure to please both kids and adults alike. Plus, they present an opportunity for creativity in the kitchen, as you can customize them to suit your taste preferences or dietary needs.
The Allure of Mini Pizza Sliders
Pizza is a dish that transcends cultures, with its origins tracing back to Italy and its widespread popularity now a global phenomenon. Whether topped with pepperoni, vegetables, or gourmet ingredients, pizza has a way of capturing hearts and taste buds everywhere. The combination of a crispy crust, rich tomato sauce, and bubbly cheese makes it a beloved staple in many households.
As the slider trend has gained momentum, home cooks and food enthusiasts have embraced the concept of miniaturizing their favorite dishes. Sliders are not only fun to eat, but they are also incredibly adaptable, allowing for a range of flavors and ingredients. From classic cheeseburgers to innovative dessert sliders, the possibilities are endless. Mini Pizza Sliders fit perfectly into this trend, offering a playful and interactive dining experience that encourages sharing and experimentation.
One of the significant advantages of making Mini Pizza Sliders at home is the ability to control the ingredients and flavors. While ordering pizza can certainly satisfy a craving, homemade sliders provide a fresher, more customizable option. You can choose high-quality ingredients, experiment with toppings, and even cater to specific dietary restrictions—all while avoiding the potential pitfalls of takeout, such as soggy crusts or overcooked toppings.
Ingredients Breakdown
Creating the perfect Mini Pizza Sliders starts with selecting the right ingredients. Each component plays a crucial role in achieving that quintessential pizza flavor we all love. Here’s a breakdown of the essential ingredients you’ll need:
Slider Buns
The foundation of any slider is the bun, and choosing the right type is key to achieving the ideal texture and flavor balance. For Mini Pizza Sliders, consider using soft dinner rolls or slider buns, which provide a pillowy base that complements the toppings without overpowering them. Brioche or Hawaiian rolls can add a touch of sweetness, while whole wheat or gluten-free options cater to different dietary preferences. Selecting buns that are sturdy enough to hold the fillings without falling apart is crucial for an enjoyable eating experience.
Marinara Sauce
No pizza would be complete without a rich, flavorful sauce. For Mini Pizza Sliders, marinara sauce is the star ingredient that ties everything together. You can opt for store-bought marinara for convenience or whip up a homemade version that lets you control the flavor profile. If you decide to make your own, consider adding fresh herbs like basil or oregano, along with garlic for an extra kick. The sauce should be spreadable but not too watery, as excess liquid can make the slider soggy.
Cheese
When it comes to cheese, mozzarella is the classic choice for any pizza-inspired dish. Its mild flavor and excellent melting qualities make it a perfect fit for Mini Pizza Sliders. For added depth of flavor, consider blending mozzarella with other cheeses, such as provolone or cheddar. If you’re looking to experiment, try using flavored cheeses or even dairy-free alternatives to accommodate dietary restrictions.
Pepperoni and Vegetables
The beauty of Mini Pizza Sliders lies in their versatility. While pepperoni is a beloved topping for many, the options are virtually endless. You can customize your sliders with a variety of toppings, including sautéed bell peppers, mushrooms, olives, or even pineapple for a sweet twist. For a vegetarian option, load up your sliders with fresh veggies, or try using plant-based pepperoni for a meat-free alternative.
Seasonings
To elevate the flavor of your Mini Pizza Sliders, don’t forget about seasonings. Garlic powder and Italian seasoning can make a significant impact on the overall taste, bringing the flavors of traditional pizza to life. Feel free to adjust the quantities to suit your palate, and consider sprinkling a little extra seasoning on top before baking for an aromatic finish.
Optional Ingredients or Substitutions
When crafting your Mini Pizza Sliders, it’s essential to consider dietary restrictions and personal preferences. For those who are gluten-sensitive, gluten-free slider buns are widely available and can be a great alternative. Additionally, you can utilize vegan cheese and plant-based toppings to create a delicious vegan version of this recipe. The adaptability of Mini Pizza Sliders makes them an excellent choice for a diverse group of diners, ensuring that everyone can enjoy this tasty treat.
Step-by-Step Instructions
Once you’ve gathered all your ingredients, it’s time to dive into the fun part—assembling and baking your Mini Pizza Sliders. Here’s a step-by-step guide to help you create these mouthwatering bites:
Step 1: Preheat Your Oven
Begin by preheating your oven to 350°F (175°C). This ensures that your sliders bake evenly and develop a delightful golden-brown crust.
Step 2: Prepare the Slider Buns
Slice the slider buns in half horizontally, keeping the tops and bottoms connected. This makes it easier to assemble the sliders and ensures that they stay together during baking. Place the bottom halves in a greased baking dish, ensuring they fit snugly.
Step 3: Spread the Marinara Sauce
Generously spread marinara sauce over the bottom halves of the slider buns. Be sure to cover them evenly for a consistent flavor throughout. Use as much or as little sauce as you prefer, keeping in mind that too much can lead to sogginess.
Step 4: Add Cheese
Sprinkle a layer of shredded mozzarella cheese over the marinara sauce. Make sure to cover the sauce thoroughly, as the cheese will melt and create a gooey, delicious top layer.
Step 5: Layer Your Toppings
Now it’s time to add your preferred toppings. If you’re using pepperoni, layer it evenly across the cheese. For those opting for vegetables, sauté them lightly beforehand to enhance their flavor and reduce moisture. Distribute your toppings evenly to ensure each slider is packed with flavor.
Step 6: Top with More Cheese
For an extra cheesy finish, add another layer of mozzarella cheese on top of your toppings. This will create a melty, irresistible crust that binds everything together.
Step 7: Cover with the Top Buns
Gently place the tops of your slider buns over the assembled sliders. You may want to brush them lightly with melted butter and sprinkle some garlic powder or Italian seasoning on top for added flavor.
Step 8: Bake
Carefully place the baking dish in the preheated oven and bake for approximately 15-20 minutes, or until the cheese is melted and the tops are golden brown. Keep an eye on them to prevent burning, as oven temperatures can vary.
Step 9: Serve and Enjoy
Once baked, remove the sliders from the oven and let them cool for a few minutes. Cut them apart and serve with additional marinara sauce on the side for dipping. Enjoy your delicious Mini Pizza Sliders with friends and family, and relish the smiles they bring!
With this detailed guide, you’re well on your way to creating a delicious and satisfying dish that showcases the best of both pizza and sliders. The combination of flavors, textures, and the fun of sharing makes Mini Pizza Sliders a crowd-pleaser for any occasion. Stay tuned for more tips and variations that will elevate your slider game to the next level!
Detailed Walkthrough of the Preparation Process for Mini Pizza Sliders
Mini Pizza Sliders are a delightful and versatile dish that can easily become a favorite in any household. Here is a step-by-step guide to preparing these delicious bites, ensuring they come out perfectly every time.
Prepping the Oven
Before diving into the preparation of the sliders, it’s crucial to preheat your oven. Preheating ensures that your sliders cook evenly, allowing them to develop a golden brown crust while keeping the insides moist and flavorful. Set your oven to 350°F (175°C) and give it at least 10-15 minutes to reach the desired temperature. This step is vital as it impacts the baking process significantly, giving you that perfect texture.
Preparing the Slider Buns
The next step involves preparing your slider buns. You can use store-bought slider buns or make your own for a more personalized touch. If you opt for store-bought buns, ensure they are fresh and soft.
1. Cutting the Buns: Using a serrated knife, carefully slice the entire pack of slider buns in half horizontally, keeping the bun halves attached. This technique helps maintain the structure of the sliders when layering the ingredients.
2. Laying Them Out: Place the bottom half of the slider buns in a baking dish, ensuring they fit snugly. This helps in retaining their shape during baking and makes for easier assembly.
Layering Ingredients
Achieving the perfect balance of flavors and textures in your Mini Pizza Sliders is all about the layering. Here’s how you can do it effectively:
1. Sauce Base: Start by spreading a generous layer of pizza sauce on the bottom buns. Use about 1/4 to 1/3 cup of sauce, depending on your taste preference. Make sure to spread it evenly to cover the surface.
2. Cheese Layer: Next, sprinkle a layer of shredded mozzarella cheese over the sauce. For added flavor, consider mixing in some shredded cheddar or provolone.
3. Toppings: Layer your choice of toppings, such as pepperoni, bell peppers, olives, or mushrooms. Be careful not to overload the sliders, as too many toppings can make them difficult to manage.
4. Final Cheese Layer: For that extra cheesy finish, add another sprinkle of mozzarella cheese on top of the toppings before placing the top buns.
5. Add the Top Buns: Finally, place the top halves of the slider buns over your layered ingredients, gently pressing down to ensure they stick together.
Baking Process
Once your sliders are assembled, it’s time to bake them. Place the baking dish in the preheated oven.
1. Covering with Foil: To start, cover the baking dish with aluminum foil. This helps trap steam, allowing the sliders to heat through without burning while keeping the buns soft. Bake for about 15 minutes.
2. Uncovering for Browning: After 15 minutes, remove the foil and continue baking for an additional 10 minutes. This step is crucial for achieving that golden-brown color and crispy top. Keep an eye on them to avoid over-browning.
Cooling and Serving
After baking, it’s important to let your Mini Pizza Sliders cool for a few minutes before slicing. This resting period allows the cheese to set slightly, making it easier to cut the sliders without them falling apart.
1. Cooling Time: Let the sliders cool for about 5-10 minutes after removing them from the oven. This also helps to prevent burning your fingers when handling them.
2. Slicing: Using a sharp knife, cut the sliders along the lines of the original buns. Depending on your preference, you can cut them into individual sliders or leave them as larger sections for sharing.
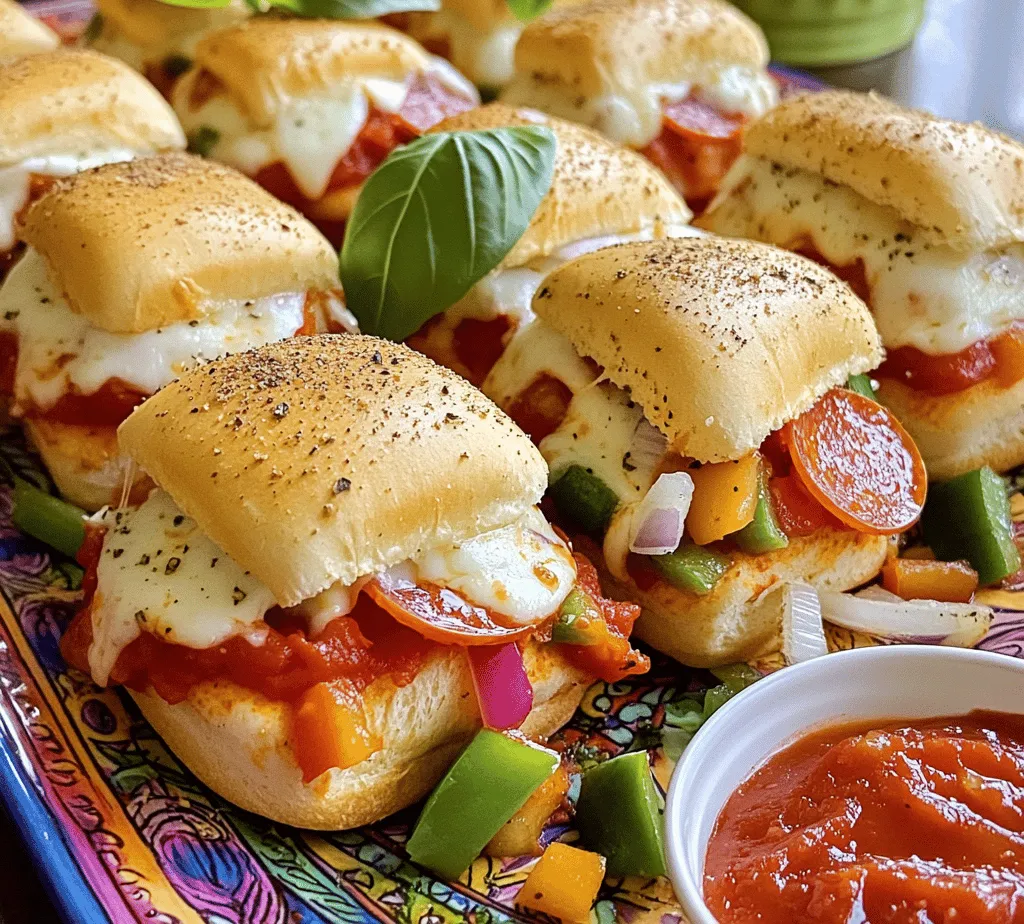
Presentation Ideas for Mini Pizza Sliders
A visually appealing presentation can elevate your Mini Pizza Sliders from a simple snack to a stunning centerpiece for any gathering. Here are some suggestions:
1. Serving Platters: Arrange the sliders on a large wooden board or a decorative platter. You can stack them vertically or line them up in rows. Consider using parchment paper underneath for a rustic touch.
2. Garnishing: Add a sprinkle of fresh herbs like basil or parsley over the top of the sliders to add color. You can also place toothpicks in each slider for easy serving and to keep them intact.
3. Pairing with Sides: Mini Pizza Sliders pair wonderfully with a variety of sides. Serve them alongside a fresh garden salad, crispy potato wedges, or a platter of fresh veggies and dips. For a more indulgent option, consider offering a selection of dipping sauces like marinara, ranch, or garlic aioli.
Nutritional Information
Understanding the nutritional value of your ingredients can help you make informed decisions about portion sizes and healthier alternatives. Here’s a brief overview of what to consider with Mini Pizza Sliders:
1. Ingredient Benefits:
– Slider Buns: Whole grain sliders provide additional fiber, while traditional white buns are softer but lower in nutrients.
– Cheese: Cheese is a good source of calcium and protein but can be high in saturated fat. Using part-skim mozzarella can reduce fat content.
– Toppings: Fresh vegetables like bell peppers and onions not only add flavor but also increase the nutrient density of your sliders.
2. Portion Control: Keep in mind that moderation is key. A typical serving might be 2-3 sliders, which provides a satisfying balance without overindulging.
3. Healthier Alternatives: For a healthier twist on this recipe, consider using whole-grain slider buns, reducing the amount of cheese, or adding more vegetables for extra nutrition. You can also use lean meats or plant-based protein options to cater to various dietary preferences.
Conclusion
Mini Pizza Sliders are a fun and easy recipe that can be enjoyed on any occasion, from game day gatherings to family dinners. They offer a fantastic way to bring your loved ones together over delicious food, and their customizable nature means you can tailor them to suit any palate.
Take the time to experiment with different toppings, sauces, and variations of the recipe. You might discover a new family favorite that becomes a cherished tradition in your home. Cooking is not just about the food; it’s about the memories you create while sharing it with those you care about. So gather your friends and family, roll up your sleeves, and enjoy the delightful experience of making and savoring Mini Pizza Sliders together.
