
No Bake Triple Chocolate Energy Bites Simple Treat
Looking for a quick, tasty snack that packs a chocolate punch? These No Bake Triple Chocolate Energy Bites are simple

Looking for a quick, tasty snack that packs a chocolate punch? These No Bake Triple Chocolate Energy Bites are simple

If you love bold flavors and easy meals, you’ll adore my Buffalo Chicken Stuffed Sweet Potatoes. This simple dish packs
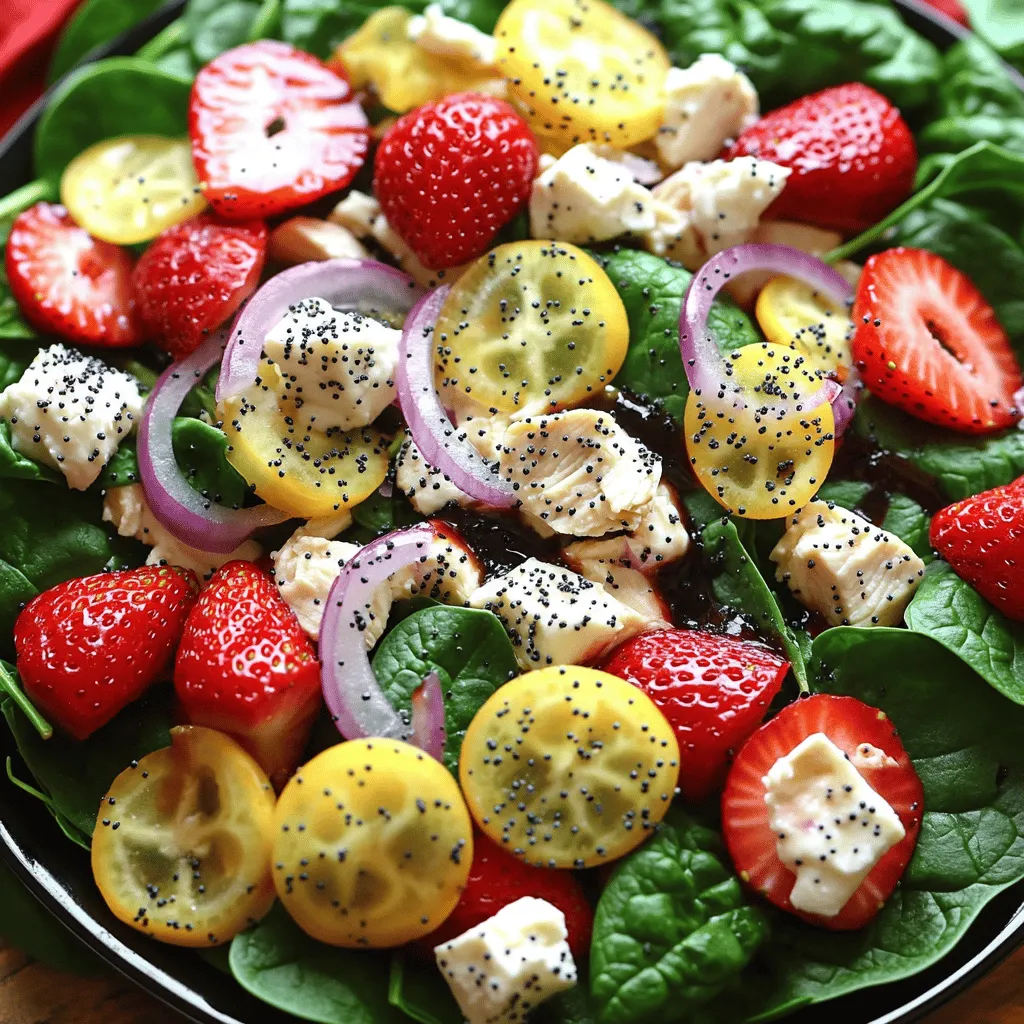
Craving something fresh and tasty? You’ll love my Strawberry Spinach Poppy Seed Salad with Chicken! This dish pairs sweet strawberries

If you love sweet and salty treats, you’re in for a real delight! These Salted Caramel Pretzel Brownies combine rich

Craving a sweet treat that’s quick and easy? You’re in the right place! Air Fryer Churro Bites are your answer.
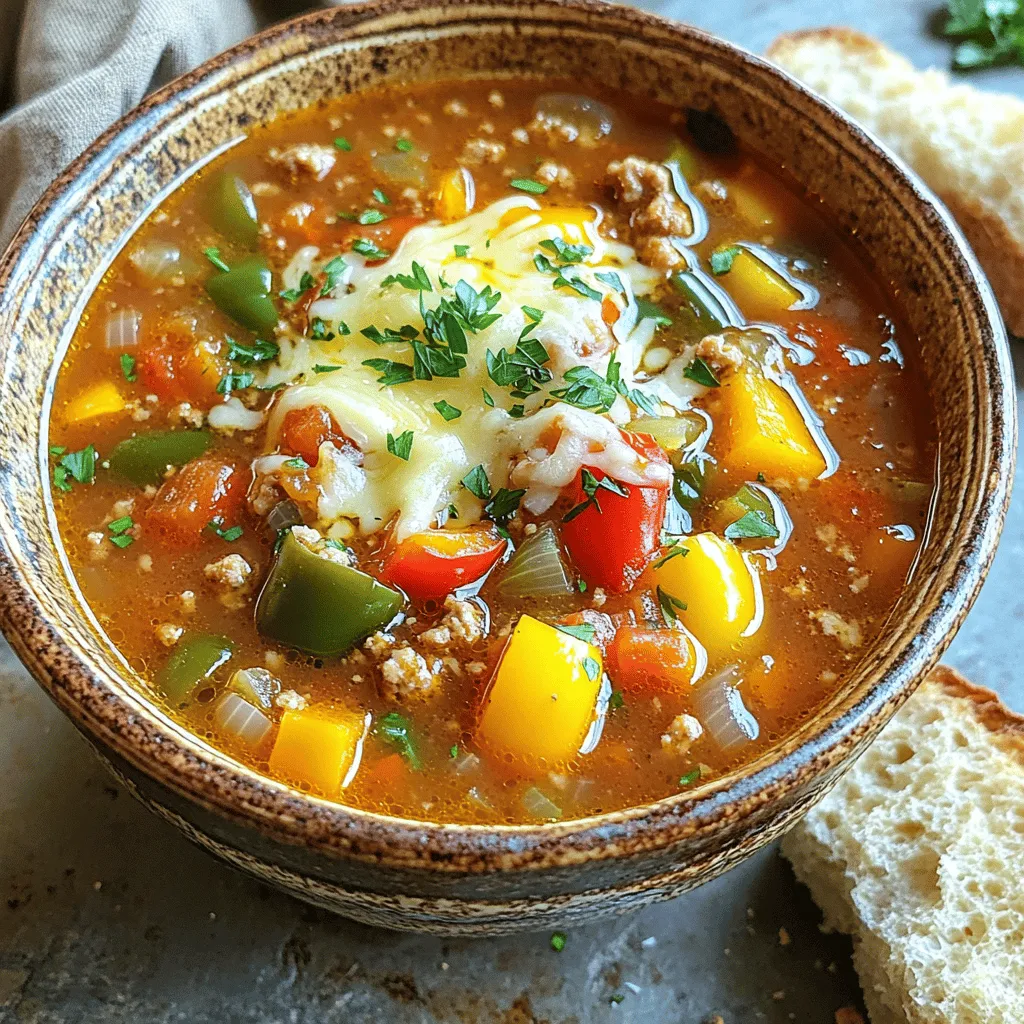
Looking for a cozy, flavorful dish that warms both your heart and your belly? My Slow Cooker Stuffed Pepper Soup

Craving a guilt-free treat that’s rich, moist, and full of flavor? Look no further than my Chocolate Chip Pumpkin Bread!

Looking for a simple yet flavorful meal? My Sheet Pan Greek Chicken and Potatoes Delight is your answer! This dish
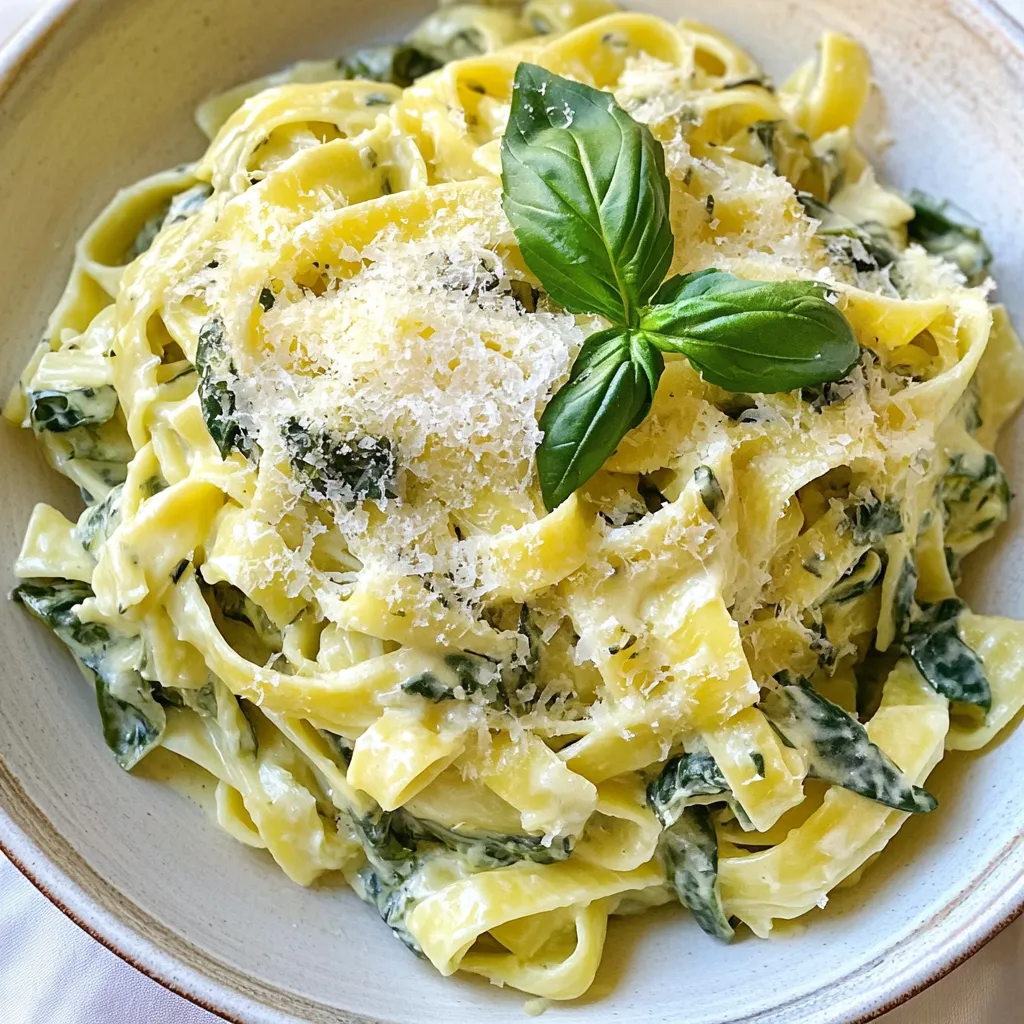
Are you ready to make a dish that’s both tasty and simple? Creamy Spinach Artichoke Pasta is here to satisfy

Want to treat yourself to a delicious breakfast? You’ve come to the right place! These Matcha Green Tea Pancakes are