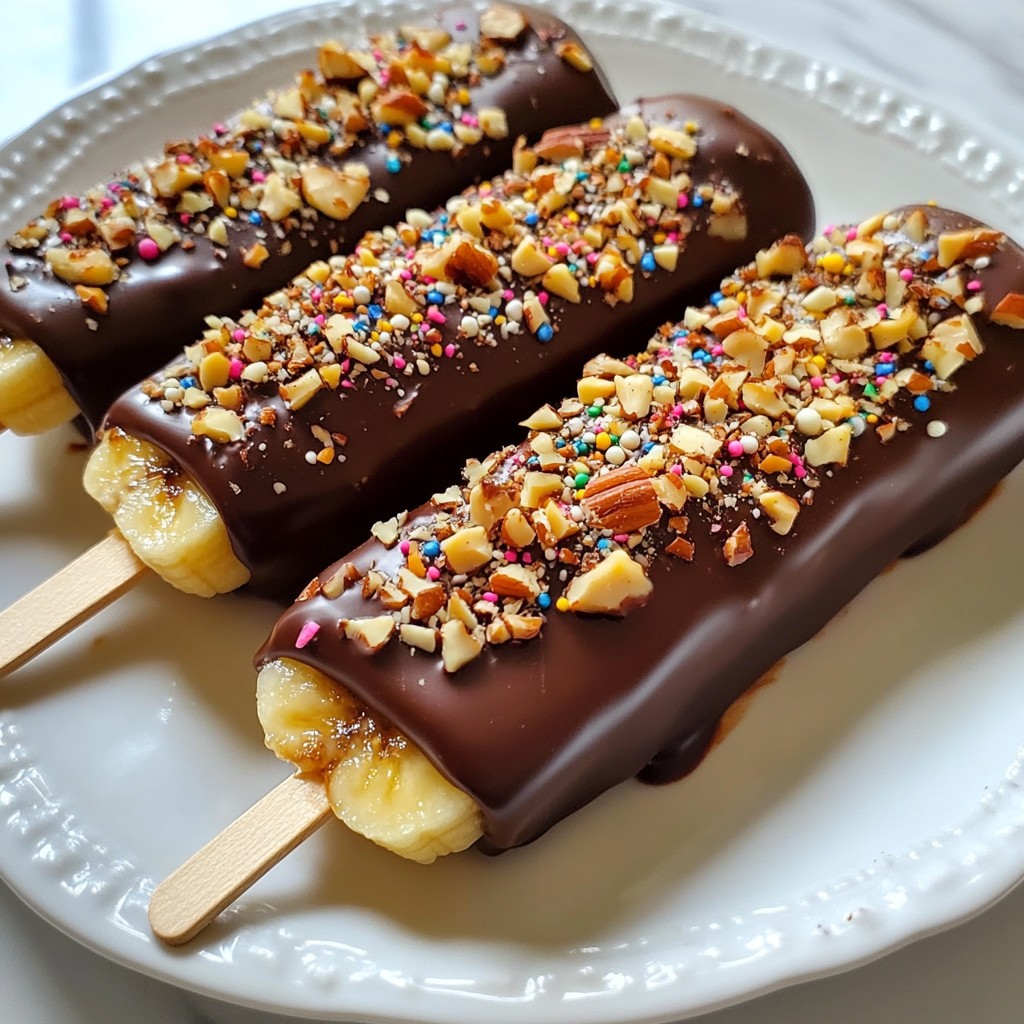
Are you ready for a sweet and simple treat? Chocolate covered banana pops are not only delicious but also super fun to make! With just a few ingredients and easy instructions, you'll have a tasty snack that meets the needs of all ages. In this guide, I will walk you through the steps to create your own chocolate-covered banana pops, plus share tips for customizing and storing them. Let’s get started!
Error: Connection error.
Ingredients
List of Required Ingredients
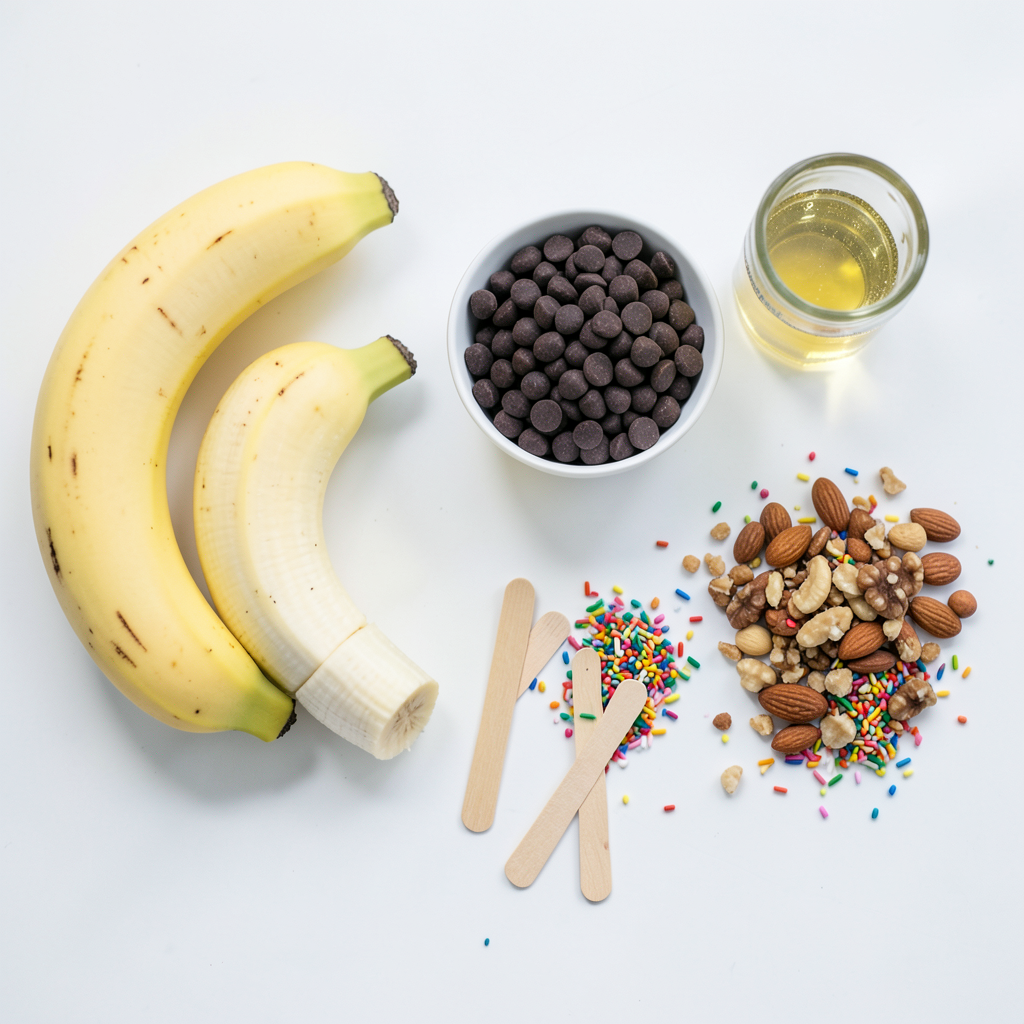
- Ripe Bananas
- Dark Chocolate Chips
- Coconut Oil
- Crushed Nuts
- Colorful Sprinkles (Optional)
- Wooden Popsicle Sticks
To make chocolate covered banana pops, you need a few simple items. Start with ripe bananas. They should have a few brown spots. This means they are sweet and soft.
Next, grab dark chocolate chips. I use one cup for this recipe. Dark chocolate adds a rich flavor. It pairs well with bananas.
You also need coconut oil. Just one tablespoon will help the chocolate melt smoothly. This oil gives a nice sheen to the chocolate.
Crushed nuts are next. You can choose almonds, walnuts, or peanuts. You will need a quarter cup. They add a crunchy texture to your pops.
Colorful sprinkles can add fun to your treats. They are optional but make the pops look festive. You will need a quarter cup if you want to use them.
Lastly, don’t forget wooden popsicle sticks. You will need four of them. These help with holding the banana pieces while you dip them in chocolate.
Gather all these ingredients. You are now ready to make a tasty treat!
Step-by-Step Instructions
Preparing the Bananas
How to Cut and Insert Popsicle Sticks First, peel the bananas. Then, cut each banana into three equal pieces. You will have six banana chunks. Take a wooden popsicle stick and insert it into the end of each chunk. Make sure the stick goes in deep enough to hold the banana securely.
Placement on Baking Sheet Next, line a baking sheet with parchment paper. This keeps the chocolate from sticking. Place each banana pop on the sheet with space between them. This way, they won’t touch each other.
Melting the Chocolate
Using the Microwave Safely To melt the chocolate, use a microwave-safe bowl. Add one cup of dark chocolate chips and one tablespoon of coconut oil. Heat the bowl in the microwave. Do this in 30-second intervals. Stir the chocolate after each interval. This helps it melt evenly.
Achieving a Smooth Consistency Keep heating and stirring until the chocolate is smooth. It should flow easily but not be too hot. If it gets too hot, it may burn. A smooth consistency is key for a good coat on your banana pops.
Coating the Banana Pops
Dipping Techniques Hold each banana pop by the stick. Dip it into the melted chocolate. Make sure to cover the banana completely. Let any extra chocolate drip back into the bowl. This keeps the coating even.
Rolling in Nuts or Sprinkles While the chocolate is still wet, quickly roll the banana pops in crushed nuts or colorful sprinkles. This adds fun and texture. You can use almonds, walnuts, or peanuts for nuts. If you like, sprinkle on some fun colors.
Freezing for Perfect Results
Recommended Freezing Time After coating, place the baking sheet in the freezer. Let the banana pops freeze for at least one hour. This will harden the chocolate and make it nice and crunchy.
Tips for Successful Hardening Make sure the pops are not touching each other in the freezer. If they stick, it can be hard to remove them later. After an hour, check to see if the chocolate has set. If it feels firm, they are ready to enjoy!
Tips & Tricks
Choosing the Best Bananas
When picking bananas, look for ripe ones. They should have a few brown spots. These spots mean the bananas are sweet and ready to eat. Overripe bananas work well, too. Just avoid green ones; they taste starchy and not sweet. You want your banana pops to be tasty!
Chocolate Melting Tips
To melt chocolate, do it slowly. If you heat it too fast, it might burn. Use a microwave-safe bowl and heat the chocolate chips with coconut oil. Start with 30 seconds, then stir. Repeat until it’s smooth.
You can also melt chocolate on the stove. Use a double boiler if you have one. Just fill a pot with water and bring it to a simmer. Place a heat-safe bowl on top and add the chocolate. Stir until melted, and keep an eye on it to prevent burning.
Customization Ideas
Make your banana pops unique! You can try different toppings. Roll them in crushed nuts like almonds or peanuts. You can also use colorful sprinkles for fun. For a twist, try shredded coconut or even crushed cookies. Mix and match to find your favorite flavors!
Error: Connection error.
Variations
Different Types of Chocolate
You can use different kinds of chocolate for your banana pops. The two main types are milk chocolate and dark chocolate.
- Milk chocolate is sweeter and creamier. It’s great for kids or anyone who likes a sweeter treat.
- Dark chocolate has a deeper flavor and is less sweet. It’s perfect if you enjoy a richer taste.
You can also try white chocolate! It adds a nice creamy taste and pairs well with bananas. Just melt it the same way as dark chocolate.
Alternative Toppings
Toppings make your banana pops even more fun. You can use different kinds of nuts. Here are some tasty options:
- Almonds add a nice crunch.
- Walnuts have a softer texture and rich flavor.
- Peanuts give a classic taste.
You can also get creative with dried fruits or coconut flakes. Dried cranberries or raisins add sweetness. Coconut flakes add a tropical twist. Just sprinkle them on before the chocolate hardens.
Healthy Alternatives
If you want a healthier version, you can try sugar-free chocolate. Many brands offer this option. It still gives you that chocolate taste without the sugar.
Another idea is to use yogurt instead of chocolate. You can dip the bananas in yogurt and freeze them. This gives a creamy, tangy flavor that is still delicious and a bit lighter.
Storage Info
Best Practices for Freezing
To keep your chocolate covered banana pops fresh, use an airtight container. This keeps out air and moisture. You can stack the pops in a single layer to save space. If you run out of room, add parchment paper between layers. The shelf life in the freezer is about two to three months. After that, the taste may fade.
Thawing Tips
To properly defrost your banana pops, take them out of the freezer. Place them in the fridge for about 30 minutes. This method allows them to thaw slowly and evenly. You can also leave them at room temperature for 10 to 15 minutes. Just avoid using heat, as this can make the chocolate melt.
Reusing Leftovers
If you have extra chocolate or toppings, don’t waste them! You can drizzle leftover chocolate on fruits or nuts. It makes a simple and fun snack. Use the remaining crushed nuts or sprinkles to top yogurt or oatmeal. Both ideas add flavor and crunch to your meals.
FAQs
Can I use frozen bananas?
Yes, you can use frozen bananas. Just make sure they are ripe before freezing. Frozen bananas work great for this treat. They add a creamy texture. However, they might be a bit soft when you melt the chocolate. To use them, let them thaw slightly at room temperature. Pat them dry with a paper towel before dipping in chocolate. This helps the chocolate stick better.
How long do chocolate-covered banana pops keep?
Chocolate-covered banana pops can stay fresh for about one month in the freezer. Store them in an airtight container. This keeps them from getting freezer burn and losing flavor. If you leave them out, they can become soft and messy. Always take them out of the freezer just before serving.
Can I make these ahead of time?
Yes, you can make these ahead of time. They are perfect for parties or snacks. Just follow the recipe steps, and freeze them. You can prepare them up to a month in advance. Keep them stored in an airtight container. This way, they will stay fresh and tasty when you are ready to enjoy them.
Making chocolate-covered banana pops at home is fun and easy. With just a few simple ingredients and steps, you can create a delicious treat. You learned about preparing the bananas, melting chocolate, and customizing toppings. Remember to store your pops right for the best taste later. Feel free to experiment with flavors and toppings. These pops are perfect for a snack or dessert. Enjoy making them just the way you like!