
Introduction
There’s something undeniably irresistible about the combination of chocolate and peanut butter. Whether it’s the creamy texture of peanut butter or the rich, decadent taste of chocolate, this duo has enchanted taste buds for generations. Today, we’re diving into a delightful recipe that celebrates this classic pairing: Chocolate Peanut Butter Cookie Cups. These mini desserts are not only delicious but also offer a perfect balance of flavors and textures that make them a hit for any occasion.
Chocolate Peanut Butter Cookie Cups are the ultimate treat for sweet lovers. They are convenient, portable, and, most importantly, incredibly satisfying. Whether you’re hosting a party, attending a gathering, or simply indulging in a sweet craving at home, these cookie cups are sure to impress. Their bite-sized nature makes them easy to enjoy, and their rich flavor profile will keep your guests coming back for more.
The Allure of Chocolate and Peanut Butter
The combination of chocolate and peanut butter is a classic favorite for a reason. The sweetness of chocolate pairs harmoniously with the nutty, slightly salty flavor of peanut butter, creating a taste sensation that is hard to resist. This pairing has been a staple in desserts, from cookies and cakes to candies and ice creams, and continues to delight people of all ages.
From a nutritional perspective, peanut butter brings some benefits to the table. It’s a good source of protein, healthy fats, and essential vitamins and minerals, including vitamin E and magnesium. While chocolate is often viewed as a guilty pleasure, dark chocolate, in particular, is rich in antioxidants and can offer health benefits when consumed in moderation. This means that indulging in Chocolate Peanut Butter Cookie Cups can provide a little bit of joy while also delivering some nutritional value.
Culturally, the chocolate-peanut butter combination has made its mark in various forms around the globe. From classic peanut butter cups to brownies swirled with chocolate, this duo has secured its place in dessert history. It’s no wonder that cookie cups, which encapsulate this delightful pairing in a convenient form, have become increasingly popular. They’re a testament to the versatility and appeal of these two ingredients, making them a beloved treat in many households.
Ingredients Breakdown
Before we dive into the recipe, let’s take a closer look at the ingredients that make these Chocolate Peanut Butter Cookie Cups special. Understanding each component will not only enhance your baking experience but also elevate the flavor of your final product.
Key Ingredients
1. All-Purpose Flour: This is the foundation of your cookie cups, providing the necessary structure. It balances the rich flavors and helps achieve a soft, chewy texture.
2. Baking Soda: A crucial leavening agent, baking soda helps the cookie cups rise and become fluffy. It reacts with the acidic components in other ingredients, creating carbon dioxide bubbles that expand in the oven.
3. Unsweetened Cocoa Powder: For those chocolate lovers, cocoa powder adds a deep, rich chocolate flavor that is essential for this recipe. It contributes to the overall taste while keeping sugar levels balanced.
4. Salt: A pinch of salt enhances the flavor of the cookies and helps to bring out the sweetness of the chocolate and the nuttiness of the peanut butter.
5. Butter: Unsalted butter provides richness and moisture to the cookie dough. It also helps to create a tender texture that melts in your mouth.
6. Granulated Sugar: This sweetener is essential for flavor and contributes to the cookie’s texture. The sugar caramelizes during baking, adding a delightful crunch.
7. Brown Sugar: Brown sugar adds moisture and a slight chewiness to the cookie cups. It also brings a hint of molasses flavor that complements the chocolate and peanut butter.
8. Creamy Peanut Butter: The star of the show! Creamy peanut butter provides that luscious texture and nutty flavor that pairs perfectly with chocolate.
9. Egg: The egg binds the ingredients together, adds moisture, and contributes to the cookie’s overall structure.
10. Vanilla Extract: A splash of vanilla enhances the flavor profile, adding depth and complexity to the cookies.
11. Chocolate Chips: Semi-sweet or dark chocolate chips can be folded into the batter, adding decadent pockets of chocolate throughout each cookie cup.
Optional Ingredients
– Extra Peanut Butter: For those who can’t get enough peanut butter flavor, consider adding a dollop of creamy peanut butter in the center of each cookie cup after baking. This adds an extra layer of richness.
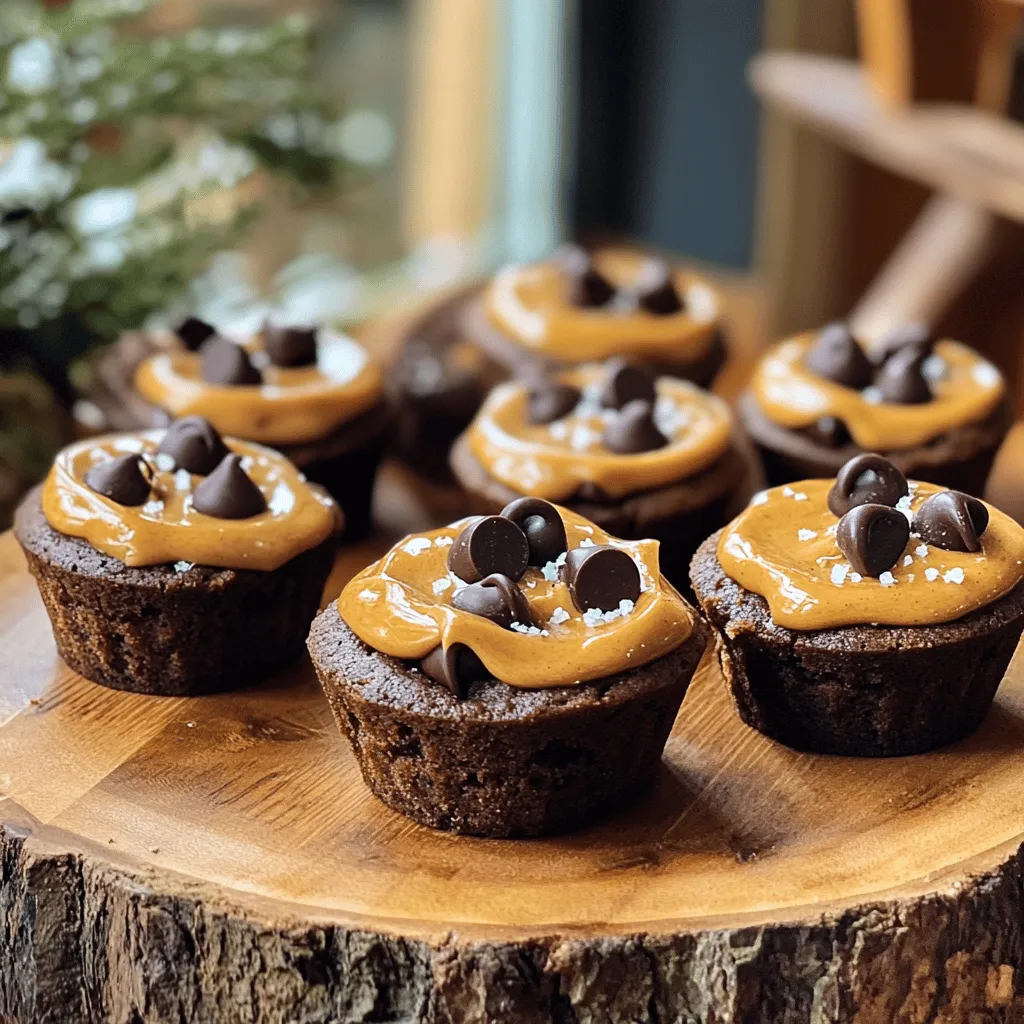
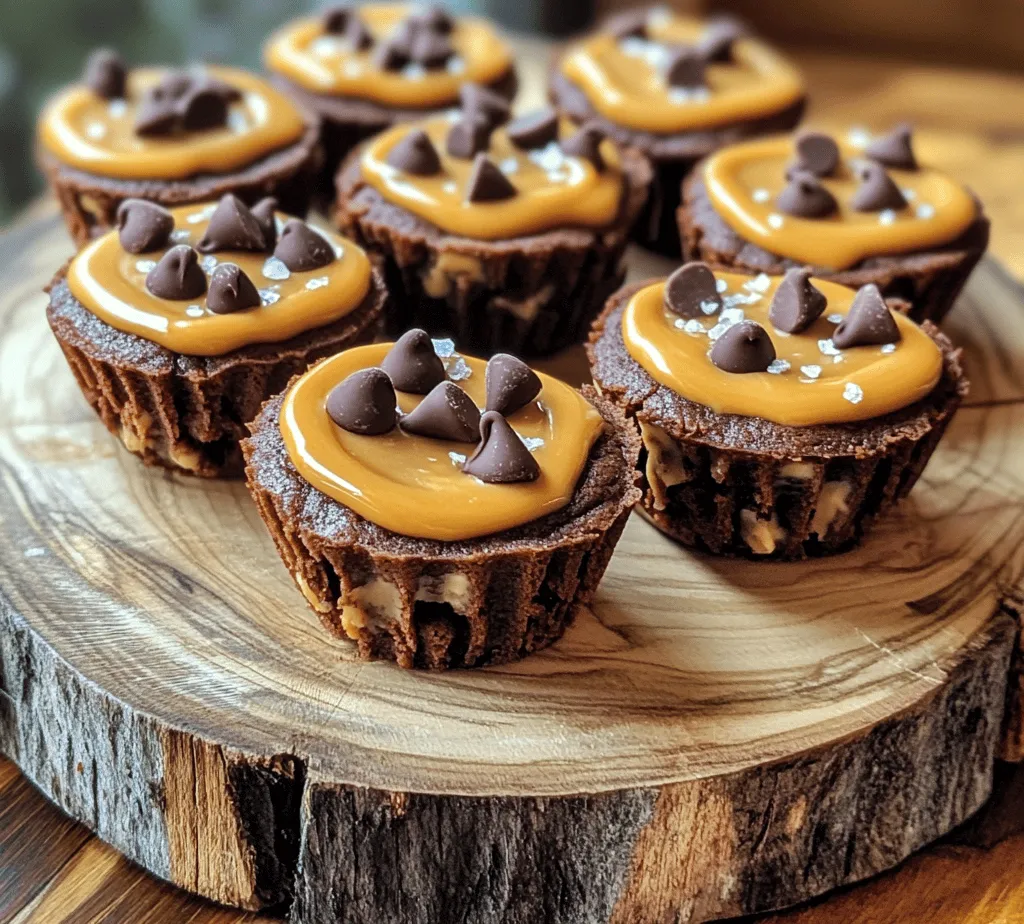
– Sea Salt: A sprinkle of flaky sea salt on top of each cookie cup before serving enhances the sweet and salty combination, providing a gourmet touch that elevates the dessert.
When selecting your ingredients, opt for high-quality products. Look for natural peanut butter without added sugars or hydrogenated oils, and choose chocolate chips made from real chocolate to ensure the best flavor. These small choices can significantly impact the taste and texture of your cookie cups.
Step-by-Step Instructions
Now that we have a clear understanding of the ingredients, let’s move on to the step-by-step instructions for making Chocolate Peanut Butter Cookie Cups. Follow these guidelines closely for the best results.
Preheat the Oven
Begin by preheating your oven to 350°F (175°C). Preheating is a crucial step in baking, as it ensures that your cookies will bake evenly and thoroughly. An oven that is too cool can lead to cookies that spread too much or do not rise properly, while an overly hot oven can burn the edges before the centers are fully cooked.
Prepare the Baking Pan
Next, prepare your baking pan. You can use a standard muffin tin for this recipe, which will help shape the cookie cups perfectly. To prevent sticking, grease the muffin tin with non-stick cooking spray or line each cup with paper liners. If you prefer a more rustic look, greasing the pan will allow the cookie cups to develop a nice crust while still being easy to remove.
Mixing Wet Ingredients
In a large mixing bowl, cream together the softened butter, granulated sugar, and brown sugar until the mixture is light and fluffy. This process incorporates air into the batter, which will help to create a light texture in your cookie cups. You can use a hand mixer or a stand mixer fitted with the paddle attachment for this step.
Once the sugars and butter are well combined, add in the creamy peanut butter. Mix until the peanut butter is fully incorporated and the mixture is smooth. Scraping down the sides of the bowl with a spatula will ensure that all ingredients are evenly mixed.
Incorporating Egg and Vanilla
Next, add the egg and vanilla extract to the mixture. The egg plays a vital role in binding the ingredients together and providing structure, while the vanilla extract adds a delightful flavor. Beat the mixture until the egg is fully integrated, resulting in a smooth and creamy batter.
By following these initial steps, you set the stage for the creation of your Chocolate Peanut Butter Cookie Cups. As we proceed with the remaining instructions, anticipate the delightful aroma and indulgent flavor that awaits you. Stay tuned for the next part, where we will delve deeper into the recipe and perfecting these sweet treats.
Combining Dry Ingredients
Properly combining the dry ingredients is essential for ensuring that the flavors and textures of your Chocolate Peanut Butter Cookie Cups are evenly distributed. In a large mixing bowl, sift together the flour, cocoa powder, baking soda, and a pinch of salt. Sifting these dry ingredients not only breaks up any clumps but also aerates the mixture, which can lead to a lighter and more tender cookie. Once sifted, use a whisk to thoroughly combine them; this step is crucial to prevent pockets of baking soda or cocoa from forming in your cookie dough, which could result in uneven flavors.
Filling the Muffin Tin
When it comes to portioning the dough into the muffin tin, consistency is key. Using a cookie scoop or a tablespoon, fill each muffin cup about two-thirds full with the cookie dough. This amount will allow the cookie cups to rise properly without overflowing. To ensure even baking, it’s important to evenly distribute the dough among all the muffin cups. If you’re making a large batch, consider working in batches to keep everything organized. Additionally, lightly greasing the muffin tin can help the cookie cups release easily after baking.
Creating a Well
Creating a well in the center of each cookie cup is a crucial step for accommodating the chocolate filling. Once your dough is portioned into the muffin tin, you’ll want to use your thumb or the back of a small spoon to gently press down in the center of each mound of dough, forming a small indentation. This well not only holds the chocolate filling but also ensures that it doesn’t overflow during the baking process. If the well is too shallow, the filling may spill over the edges, leading to a mess and loss of that signature cookie cup shape.
Baking Process
The baking process is vital for achieving the perfect texture of your cookie cups. Preheat your oven to 350°F (175°C) and bake the cookie cups for about 10-12 minutes. Keep an eye on them during the last few minutes of baking. The edges should look firm while the center may appear slightly underbaked. This is normal, as the cookie cups will continue to cook slightly after being removed from the oven. To check for doneness, you can lightly press the center with your finger; it should spring back, indicating that they are ready to be taken out.
Adding Chocolate Chips
To achieve the optimal melting and flavor infusion of chocolate, you’ll want to add the chocolate chips immediately after removing the cookie cups from the oven. The residual heat will melt the chocolate chips perfectly, creating a gooey center that complements the peanut butter. Simply sprinkle a generous amount of chocolate chips into the well of each cookie cup and let them sit for about 2-3 minutes. After that, use a toothpick or the back of a spoon to gently swirl the melted chocolate, creating a delightful marbled effect.
Cooling Instructions
Cooling your cookie cups properly is essential for achieving the best texture. After adding the chocolate chips, let the cookie cups cool in the muffin tin for about 5-10 minutes. This allows them to set slightly without becoming overly firm. Once they are cool enough to handle, carefully remove them from the muffin tin and transfer them to a wire rack. Allow them to cool completely before serving; this step helps the cookie cups firm up and makes them easier to bite into without crumbling.
Serving Suggestions
Enhancing the presentation of your Chocolate Peanut Butter Cookie Cups can take them to the next level. Consider drizzling melted peanut butter over the tops for a visually appealing touch and an extra layer of flavor. A light sprinkle of flaky sea salt can also enhance the sweetness of the chocolate and the richness of the peanut butter, providing a delightful contrast.
When it comes to beverages, pairing these cookie cups with a glass of cold milk is a classic choice that never disappoints. For adults, a rich cup of coffee or a mocha can elevate the experience, complementing the chocolate and peanut butter flavors beautifully. If you’re serving these treats at a gathering, consider creating a dessert platter alongside fresh fruit or other baked goods to offer a variety of flavors.
These cookie cups are perfect for various occasions, from casual family gatherings to festive holiday parties. They can be a hit at potlucks or bake sales, where their unique shape and delicious flavor make them stand out. Their individual servings also make them easy to share with friends and family.
Storage and Shelf Life
To maintain the freshness of your Chocolate Peanut Butter Cookie Cups, it’s important to store them properly. Place the cooled cookie cups in an airtight container at room temperature. They can last for about 3-5 days this way, retaining their chewy texture and flavor. If you need to keep them for a longer period, consider refrigerating them, where they can remain fresh for up to a week.
For longer storage, you may want to freeze the cookie cups. To do this, place them in a single layer on a baking sheet and freeze until solid. Once frozen, transfer them to a zip-top freezer bag or an airtight container, separating layers with parchment paper. They can be stored in the freezer for up to three months. When you’re ready to enjoy them, simply thaw them at room temperature or heat them in the microwave for a few seconds for that fresh-baked taste.
Conclusion
Making Chocolate Peanut Butter Cookie Cups is not only a delightful experience but also a rewarding one. Their combination of rich chocolate and creamy peanut butter makes for a treat that is sure to impress anyone. This recipe offers a fun and creative way to indulge your sweet tooth while also providing a satisfying baking experience.
We encourage you to try out this recipe and share your creations with loved ones. There’s something truly special about the joy of baking and the satisfaction that comes from indulging in homemade treats. Whether enjoyed at a party, as a casual snack, or as a sweet end to a meal, these cookie cups are bound to become a favorite in your home. So gather your ingredients, roll up your sleeves, and get ready to create a batch of these delicious cookie cups that everyone will love!


