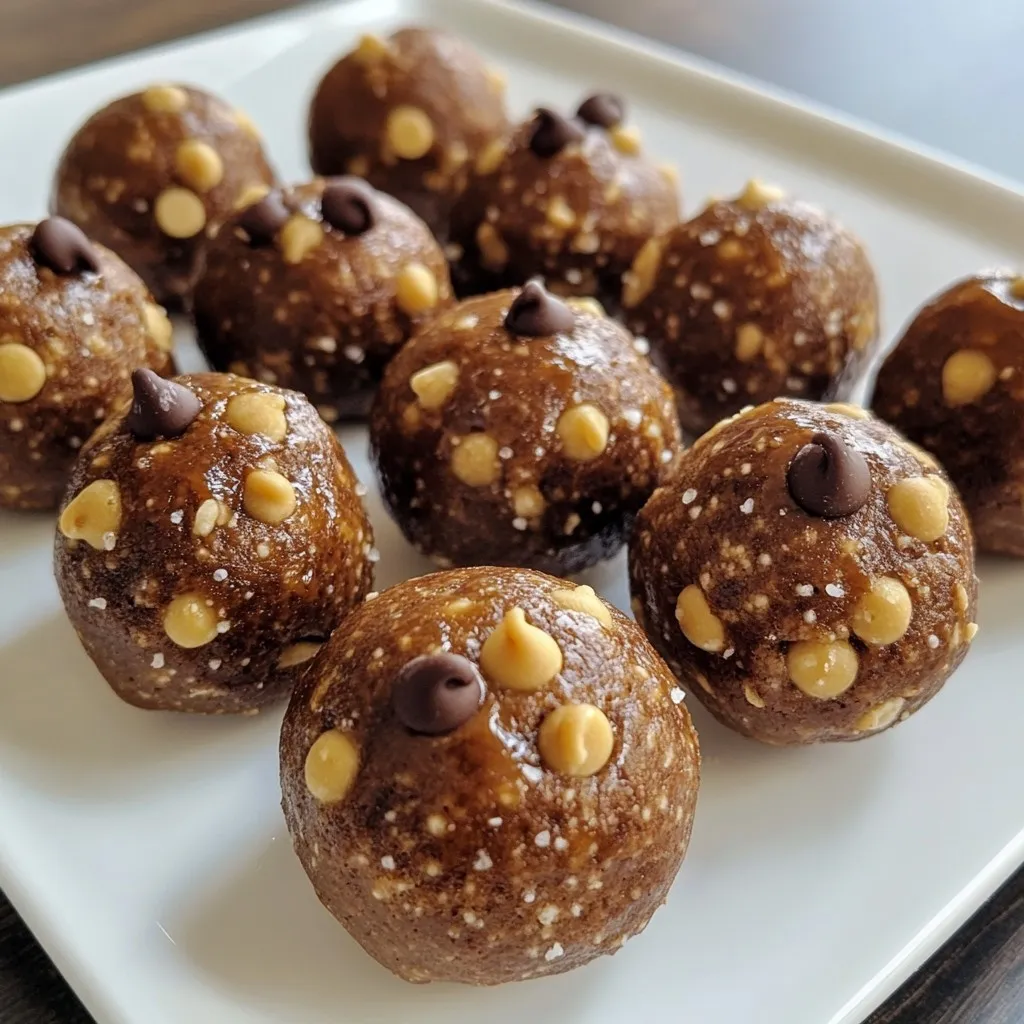
Looking for a quick and tasty snack? Try my Chocolate Peanut Butter Protein Balls! They are packed with flavor and good-for-you ingredients. Made with oats, peanut butter, and chocolate protein powder, these bites are perfect for a post-workout treat or a midday pick-me-up. Easy to make and fun to customize, you can enjoy them while staying on track with your health goals. Let’s dive into the recipe!
Why I Love This Recipe
- Quick and Easy: This recipe takes just 10 minutes of prep time, making it perfect for a busy lifestyle.
- Nutritious Ingredients: Packed with rolled oats, protein powder, and healthy fats from peanut butter, these balls are a guilt-free treat.
- Customizable: You can easily swap out the peanut butter for almond butter or use different sweeteners to suit your taste.
- Deliciously Satisfying: With mini chocolate chips and a rich chocolate flavor, these protein balls satisfy your sweet tooth without the added sugar.
Ingredients
To make chocolate peanut butter protein balls, you need just a few simple ingredients. These ingredients blend well together for a tasty and healthy snack. Here is the list:
– 1 cup rolled oats
– 1/2 cup natural peanut butter (or almond butter)
– 1/4 cup honey or maple syrup
– 1/4 cup chocolate protein powder
– 1/4 cup mini chocolate chips
– 1 teaspoon vanilla extract
– A pinch of sea salt
Each ingredient plays a key role. The rolled oats give texture and fiber. Peanut butter adds creaminess and protein. Honey or maple syrup sweetens the mix naturally. Chocolate protein powder boosts the protein content. Mini chocolate chips add a sweet surprise. Vanilla extract enhances all the flavors. Sea salt balances the sweetness.
When you gather these ingredients, make sure they are fresh. Freshness helps with taste and nutrition. You can find many of these items in your pantry. If you want to switch things up, almond butter is a great alternative to peanut butter. This small change can give you a different flavor.
Now that you know what you need, you’re ready to start mixing!

Step-by-Step Instructions
Preparation Overview
Making chocolate peanut butter protein balls is simple and quick. You can prepare these tasty bites in just ten minutes. Gather your ingredients before you begin. This will make the process easier and more fun. You will need rolled oats, peanut butter, honey, chocolate protein powder, mini chocolate chips, vanilla, and sea salt.
Mixing the Ingredients
Start by mixing the rolled oats and chocolate protein powder in a large bowl. Stir these together well. This helps spread the chocolate flavor throughout. Next, add the peanut butter and honey. You can also use maple syrup if you prefer. Pour in the vanilla and a pinch of sea salt. Mix everything together using a spatula or your hands. You want a sticky dough that holds together. If it feels dry, add a small splash of water. This will help the mixture bind.
Forming the Protein Balls
Once your mixture is ready, it’s time to shape the balls. Scoop out about a tablespoon of dough. Roll it into a ball using your hands. Repeat until you use all the dough. You should end up with around 12 to 15 protein balls.
– Refrigeration and Firming
Place the protein balls on a baking sheet lined with parchment paper. This keeps them from sticking. Now, refrigerate them for at least 30 minutes. This helps them firm up and makes them easier to eat. After chilling, your chocolate peanut butter protein balls are ready to enjoy!
Tips & Tricks
Customizing Your Protein Balls
Alternative Sweeteners
You can use honey or maple syrup for sweetness. If you want less sugar, try stevia or monk fruit sweetener. These options keep your protein balls tasty but lower in calories. Always adjust the amount, so they stay sticky.
Adding Superfoods
Make your protein balls even better by adding superfoods. Chia seeds, flaxseeds, or hemp seeds boost nutrition. They add fiber and healthy fats. You can also mix in some dried fruit, like cranberries or raisins, for a chewy texture.
Perfecting Texture and Flavor
Adjusting Wet Ingredients
The mixture should be sticky but not runny. If it’s too dry, add a splash of water or a bit more nut butter. If it’s too wet, add more oats or protein powder to balance it out. The right texture helps the balls hold together.
Choosing the Right Protein Powder
Not all protein powders are the same. Try whey for a creamy taste or plant-based for a lighter texture. Some powders have added flavor, so check the label. This choice affects the taste of your protein balls. Experiment to find your favorite!
Pro Tips
- Chill for Best Texture: Refrigerating the protein balls for at least 30 minutes not only helps them firm up but also enhances their flavor and texture.
- Experiment with Nut Butters: Feel free to swap out peanut butter for almond butter or sunflower seed butter for a nut-free version.
- Add More Flavor: Consider adding spices like cinnamon or a scoop of your favorite protein powder to customize the taste further.
- Storage Tips: Keep the protein balls in an airtight container in the fridge for up to a week, or freeze them for longer storage.
Variations
Flavor Variations
You can change the flavor of your protein balls easily. Two fun ideas are Nutty Chocolate Chip and Cookie Dough Style.
– Nutty Chocolate Chip: Add 1/4 cup of chopped nuts, like almonds or walnuts, to the mix. This gives a nice crunch and more protein. You can swap the mini chocolate chips for dark chocolate pieces for a richer taste.
– Cookie Dough Style: To make these taste like cookie dough, use brown sugar instead of honey. You can also add in 1/4 cup of mini chocolate chips and a teaspoon of cinnamon. This twist gives a sweet, nostalgic flavor we all love.
Dietary Modifications
You can adapt these protein balls for different diets. This makes them great for everyone. Here are some easy swaps:
– Vegan-Friendly Options: Use maple syrup instead of honey to keep it vegan. Pick almond butter or a nut-free spread for the base. You can also try a plant-based protein powder to keep it fully vegan.
– Gluten-Free Alternatives: Make sure to check your oats. Use certified gluten-free rolled oats to keep these protein balls safe for gluten-free diets. All the other ingredients are naturally gluten-free, so you’re good to go!
These variations let you enjoy your snacks in different ways while keeping them healthy and tasty!
Storage Info
Best Practices for Storing
Refrigerator Storage
Keep your chocolate peanut butter protein balls in the fridge. Use an airtight container. This helps them stay fresh. They will keep well for up to one week. I like to separate layers with parchment paper. This stops them from sticking together.
Freezer Storage
For longer storage, freeze the protein balls. Place them in a freezer-safe bag or container. They can last up to three months in the freezer. To eat, just take a few out and let them thaw. They are great to have on hand for quick snacks.
Shelf Life of Protein Balls
How Long They Last
These protein balls last about one week in the fridge. In the freezer, they last up to three months. If you notice a change in smell or texture, it is best to toss them.
Signs of Spoilage
Watch for any signs of spoilage. If they smell off or look dry, it’s time to throw them away. Mold is another sign that they are no longer good. Always trust your senses when checking food freshness.
FAQs
What is the protein content per serving?
Each protein ball has about 5 grams of protein. This comes mostly from the chocolate protein powder and peanut butter. You can enjoy these as a quick snack or post-workout treat.
Can I make these protein balls nut-free?
Yes, you can make nut-free protein balls. Just swap the peanut butter for sun butter or soy nut butter. These options work well and keep the snack tasty for everyone.
How do I get the mixture to bind together?
If your mixture feels dry, add a splash of water or more honey. This helps it stick better. Mixing well is key. Use your hands if needed. The dough should feel sticky but still hold its shape.
Can I use different types of protein powder?
Absolutely! You can use whey, soy, or pea protein powder. Each type will change the taste and texture a bit. Just know that flavors can vary. Choose one that fits your diet and taste preference for the best results.
You learned about making tasty and healthy protein balls using simple ingredients. We discussed step-by-step instructions for mixing, forming, and firming them. I also shared tips for customizing flavors and perfecting texture. We looked at variations for diet needs and how to store your protein balls for freshness.
Try these easy snacks for your next workout. They are fun to make and delicious to eat. Enjoy your healthy treat