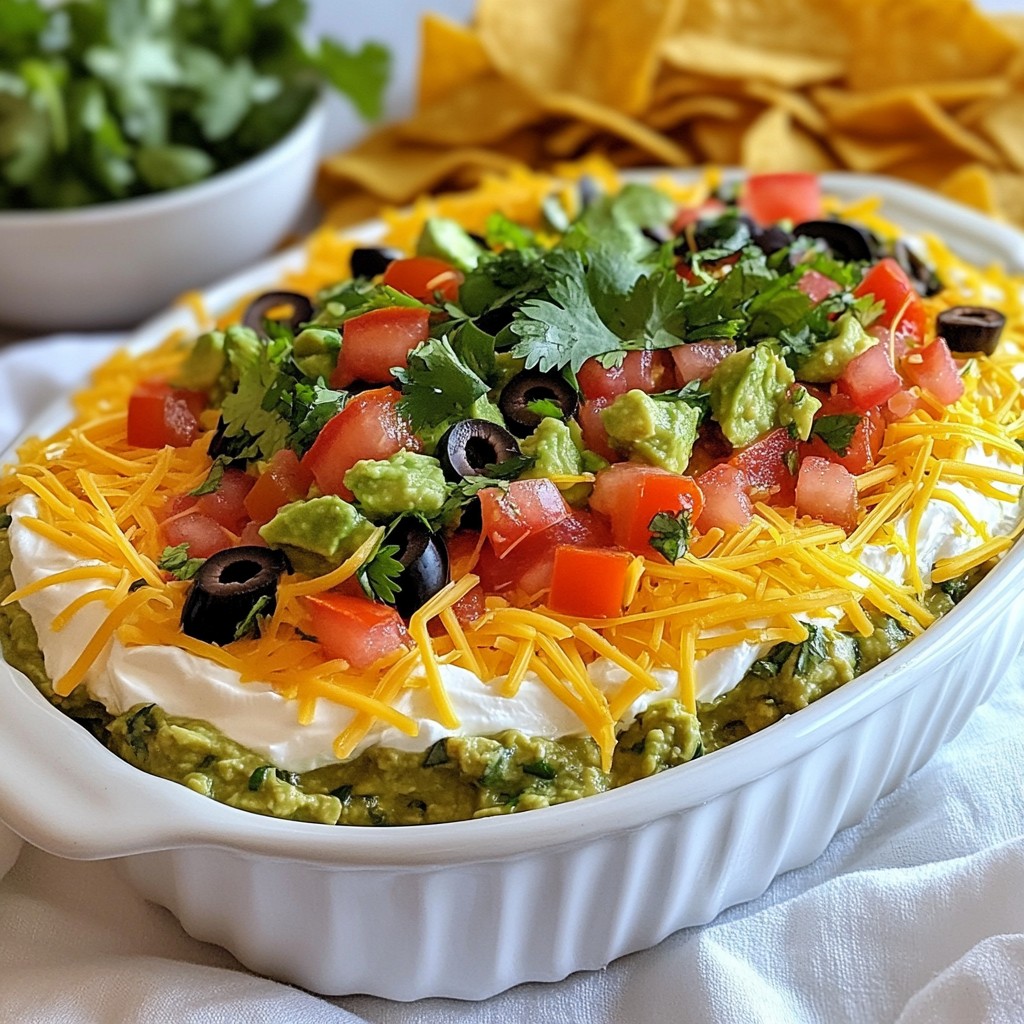
Get ready to impress your guests with a Loaded Fiesta 7 Layer Dip that’s bursting with flavor! This fun and easy appetizer is perfect for any party, game day, or casual gathering. I’ll guide you through every step, from choosing the right ingredients to layering like a pro. With helpful tips and tasty variations, you’ll create a dip everyone will rave about. Let’s dive into this delicious delight!
Why I Love This Recipe
- Flavor Explosion: This dip is a delightful combination of flavors that satisfies every craving, from savory to spicy.
- Easy to Prepare: With just 15 minutes of prep time, this recipe is perfect for last-minute gatherings or parties.
- Versatile Ingredients: You can customize this dip with your favorite toppings or adjust the spice level to suit your taste.
- Crowd-Pleaser: Whether it's a game day or a family get-together, this loaded fiesta dip is always a hit!
Ingredients
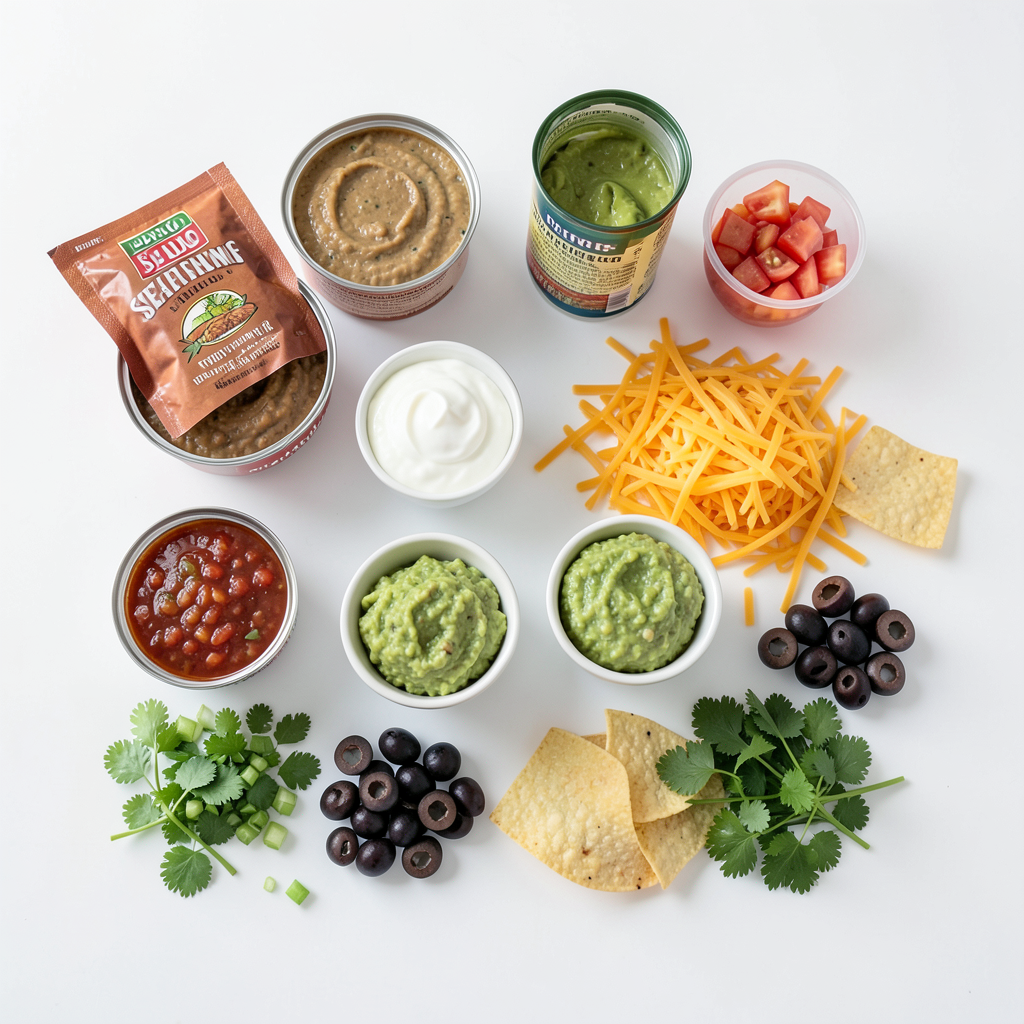
Complete List of Ingredients
- 1 can (15 oz) refried beans
- 1 packet taco seasoning
- 1 cup sour cream
- 1 cup Greek yogurt
- 1 cup guacamole (store-bought or homemade)
- 1 cup salsa (choose your spice level)
- 1 cup shredded cheddar cheese
- 1 cup diced tomatoes (seeds removed)
- 1/2 cup sliced black olives
- 1/2 cup chopped green onions
- Fresh cilantro for garnish (optional)
- Tortilla chips for serving
Key Ingredients Breakdown
The refried beans serve as a hearty base. They add protein and a creamy texture. Taco seasoning gives the beans a zesty kick. It brings out a bold flavor that everyone loves.
Sour cream and Greek yogurt make a rich, tangy layer. This mix adds creaminess and balances the dish. Guacamole brings a fresh taste. You can make it yourself or buy it for ease.
Salsa adds color and flavor. You can choose mild or spicy salsa based on your taste. Cheddar cheese brings a sharp, savory taste. It melts nicely and adds richness.
Diced tomatoes add freshness and a juicy bite. Black olives give a nice salty crunch. Green onions add a pop of color and a mild onion flavor. Fresh cilantro can brighten the whole dip if you like.
Suggestions for Fresh vs. Store-Bought Options
For the guacamole, I suggest making it fresh if you have time. It tastes better and lets you control the flavor. If you are short on time, store-bought works well too.
For salsa, always choose a brand you trust. You want one with good ingredients. If you enjoy cooking, try making your own salsa. It can be a fun way to add your twist.
Using fresh tomatoes is best for flavor and texture. But, canned tomatoes can work if fresh ones are not available. For the cheese, I prefer shredding my own. Pre-shredded cheese often has fillers that can affect melting.
With these ingredients, you can create a dip that’s rich, colorful, and tasty!
Step-by-Step Instructions
Preparation Steps
First, gather your ingredients. You will need refried beans, taco seasoning, sour cream, Greek yogurt, guacamole, salsa, cheese, tomatoes, olives, and green onions. Start by mixing the refried beans and taco seasoning in a bowl. Make sure they blend well. Once mixed, spread this mixture evenly in a 9x13-inch dish. This will be the first layer of your dip.
Next, mix the sour cream and Greek yogurt together in a small bowl. Stir until it is smooth. Carefully spread this creamy mix on top of the beans. This layer adds a nice rich taste.
Now, take your guacamole and gently spread it over the sour cream layer. Be sure it covers the layer evenly so every bite has flavor. After that, pour your salsa over the guacamole. Use a spoon to spread it out evenly.
Layering Technique
Now it's time for the cheese! Sprinkle the shredded cheddar cheese over the salsa. This adds great flavor and texture. Next, evenly distribute the diced tomatoes on top of the cheese. This adds freshness and a pop of color.
After the tomatoes, add the sliced black olives. They provide a nice contrast to the other layers. Finish your dip by adding chopped green onions on top. If you like, add some fresh cilantro for a burst of flavor.
Tips for Even Distribution
To ensure even layers, try to use a spatula or the back of a spoon. This helps spread each layer smoothly. Take your time when layering; it makes a big difference in how it looks and tastes.
Also, refrigerate the dip for at least 30 minutes before serving. Chilling allows all the flavors to blend well. Serve it with tortilla chips on the side for the best experience. Enjoy your Loaded Fiesta 7 Layer Dip at your next gathering!
Tips & Tricks
How to Avoid Common Mistakes
To make the best Loaded Fiesta 7 Layer Dip, avoid these mistakes:
- Overmixing the beans: Mix just until combined. Too much mixing can make them runny.
- Skipping the chill time: Let the dip sit in the fridge. This helps the flavors blend well.
- Not removing tomato seeds: Seeds can make the dip watery. Always remove them for a better texture.
Flavor Enhancements
Want to boost the flavor? Here are some tips:
- Add lime juice: A splash of lime juice brightens the dip. It adds a fresh taste.
- Use fresh herbs: Fresh cilantro or parsley can add a nice touch. They give extra flavor.
- Mix in spices: Try adding chili powder or cumin for a kick. Just a pinch can change the game.
Suggested Serving Recommendations
Serve your dip with these ideas:
- Tortilla chips: Classic and crunchy. They pair perfectly with the dip.
- Veggie sticks: Carrots, celery, or bell peppers add a fresh crunch. They are great for dipping too.
- Mini tacos: Serve the dip alongside mini tacos. This creates a fun, interactive meal.
These tips will help you create a dip that your guests will love!
Pro Tips
- Layer Wisely: When layering, spread each component evenly to ensure every bite is a delightful mix of flavors.
- Choose Your Heat: Select salsa with a spice level that suits your preference, or mix mild and spicy for a balance.
- Chill Time: Allowing the dip to chill for at least 30 minutes enhances the flavors, making it even tastier!
- Garnish for Freshness: Fresh cilantro and green onions not only add color but also a burst of freshness to your dip.
Variations
Customization Options
You can make Loaded Fiesta 7 Layer Dip your own. For a vegetarian version, skip the taco seasoning with meat. Use a plant-based taco seasoning instead. This keeps it tasty and meat-free. If you need gluten-free options, check the seasoning packet. Ensure it does not contain gluten. You can also swap the refried beans for black beans. This adds a great twist while keeping the dip creamy.
Additional Topping Ideas
Get creative with toppings! You might add jalapeños for a spicy kick. Fresh corn adds sweetness and crunch. Try diced avocados for extra creaminess. You can also include fresh herbs like parsley for a pop of color. If you like it cheesy, sprinkle more cheese on top. The more layers, the better!
Alternative Dips for Parties
If you want to switch things up, consider other dips. Spinach artichoke dip is creamy and hot. Hummus is a great choice for a healthy snack. You might also enjoy buffalo chicken dip for a spicy bite. Each dip can bring a new flavor to your party. Just make sure to have plenty of chips on hand!
Storage Info
Best Practices for Storing Leftovers
After enjoying your Loaded Fiesta 7 Layer Dip, store any leftovers in a sealed container. This helps keep the dip fresh. Layered dips can lose their texture, so cover each layer with plastic wrap. Place the lid tightly on the container. This will prevent air from getting in, which can dry out the dip. Always refrigerate leftovers promptly within two hours of serving.
Freezing Options for Long-term Storage
You can freeze this dip, but some layers might not hold well. If you plan to freeze it, only freeze the bean layer. You can mix refried beans and taco seasoning, then place them in a freezer-safe container. When ready to use, defrost in the fridge overnight. Once thawed, add fresh toppings like guacamole and salsa before serving.
Shelf Life and Food Safety Tips
When stored correctly, your Loaded Fiesta 7 Layer Dip lasts about 3 to 5 days in the fridge. Always check for signs of spoilage. If it smells sour or has an off color, it’s best to toss it. Never leave the dip out for more than two hours during a party. Bacteria grow quickly at room temperature, which can lead to foodborne illness. Keep your guests safe by following these tips.
FAQs
How can I make my Loaded Fiesta 7 Layer Dip spicier?
To add heat, try using hotter salsa. You can also mix in diced jalapeños. If you love spice, sprinkle cayenne pepper on top. Another option is to use spicy taco seasoning instead of regular. This will give your dip a kick that many will love!
Can I prepare this dip in advance?
Yes, you can make this dip ahead of time! Just layer it in your dish, cover it, and chill it in the fridge. It stays fresh for a day, so you can save time on party day. Just remember to add fresh toppings right before serving.
What is a good alternative for the refried beans?
If you want a change, use black beans or pinto beans. Mash them lightly for a smoother texture. You can also use hummus for a twist on flavor. Each of these options will still give you a tasty base for your dip.
How long can I leave the dip out at a party?
Keep the dip out for about two hours. After that, bacteria can grow. If the room is hot, it’s best to serve it for less time. To keep it cool, place the dish on ice or swap it out with a fresh batch.
What chips pair best with this dip?
Tortilla chips are a classic choice! They add crunch and hold the dip well. You can also try pita chips for a different texture. For a fun twist, use veggie chips for a healthier option. Each will complement the flavors beautifully!
This blog post covered the key ingredients and preparation steps for a delicious Loaded Fiesta 7 Layer Dip. You learned about using fresh or store-bought options and the best layering techniques. We explored tips to avoid common mistakes and flavor enhancements. You can even customize it for different diets. Finally, I provided storage tips and answered your FAQs.
With these insights, you can make a great dip that everyone will enjoy. Dive in and share it at your next gathering!